Club100 || Exploring Adobe Illustrator || Enroute to Graphic Designing! || Day # 2 || 10% to Steemit-Pak!! || Free lectures For Steemians!
Hello and Greetings Everyone. This is your very own Haidermehdi, Country Representative of Pakistan and Admin Steemit Pakistan.
As stated earlier, I have been trying to explore adobe illustrator and things went well in the first post as many people showed interest. Thus I am now looking forward to bringing it to shape by teaching more :p I have never ever taught anyone so perhaps I feel that I am a bad teacher. But let's see how we go in this course :p

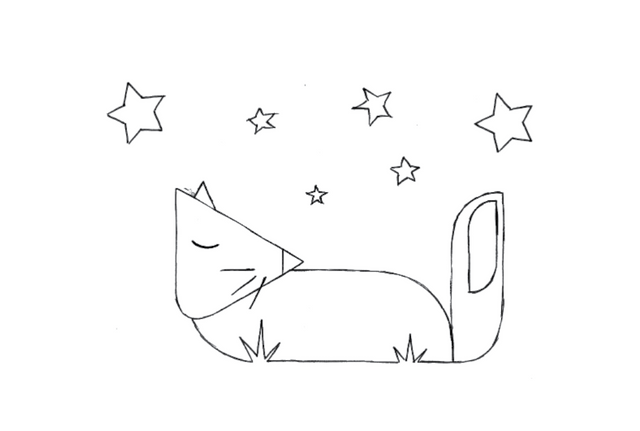
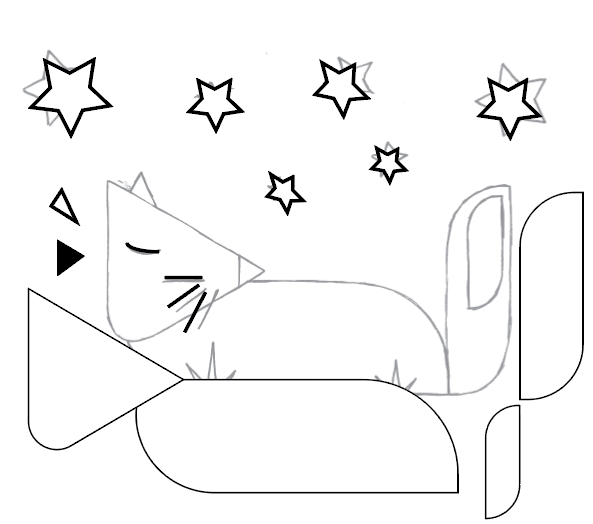
In this post, we will be learning how to make a sleeping fox using these simple shapes. I will provide a template and using the template, we will be creating a sleeping fox.
All of this will be done using simple shapes such as rectangles, rounded rectangles, triangles, a simple selection tool, and Direct Selection Tool. We would also be looking at methods of copying the whole thing using simple keys.
Placing the Template on the Artbox:
- The Only Step: Go to File, select Place, and then select the image that you have downloaded from the Link above.
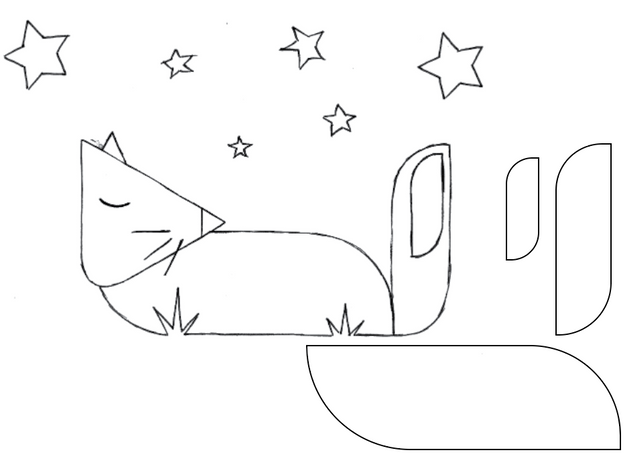
Using the rectangle Tool to cover the belly part of the sleeping fox and the Tail.
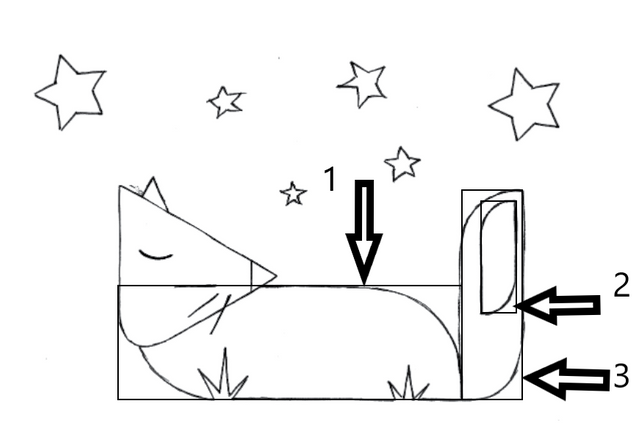
Now we first select the first rectangle using the Selection Tool and then select the Direct Selection Tool to alter the edges. When we select the Direct Selection Tool, all the corners of the square then start showing a dot. First, we will click on the bottom left corner's dot and then hold the mouse left button and bring it towards the center of the rectangle. We will see around a change in the shape of the rectangle from that corner. This is how we will do it on the top right corner as well. Also, the same pattern applies to the tail and its inner part.
Below is how It would look after we make the above changes.
Now we will select all these shapes and put them on a side of the art box. It's easy as you move one object from one place to another. Take the cursor to the shape and when it shows path then drag it to the side.
This shows how easy it is to use just simple shapes and make exciting objects.
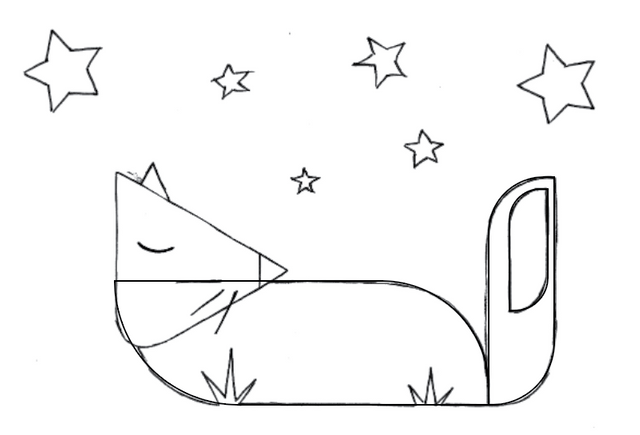
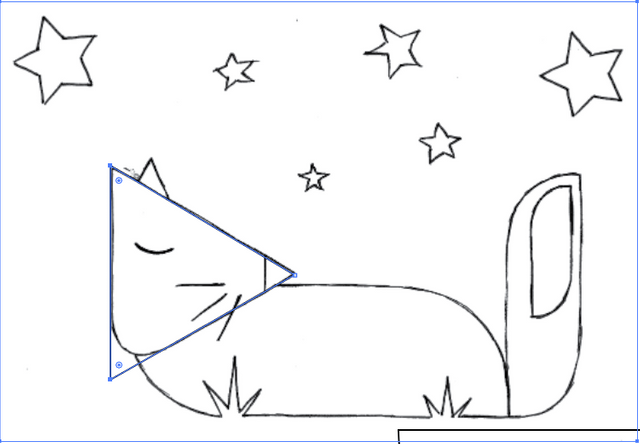
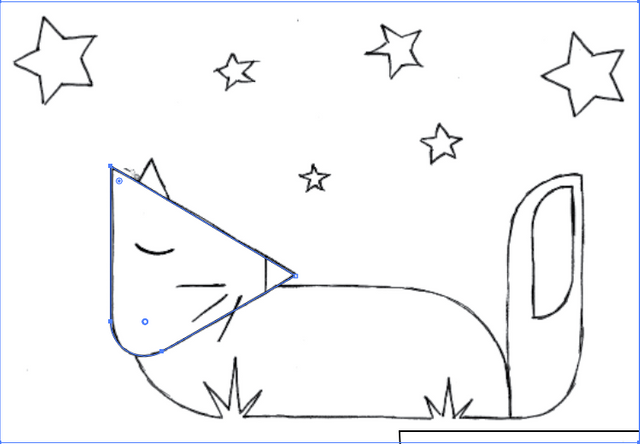
Now let's make a triangle and see how we can draw the face of the Sleeping Fox. We choose the Polygon type from the tools and then draw a triangle by inserting 3 in the pop-up box. Then we place the triangle on the face and using the direct selection tool, we will change the shape of the triangle from the bottom where it would be required. We will draw two little triangles on the nose and the ear of the fox. This one is simple, no direct selection tool is required. To replicate the ear, use the edges of the triangle to fit it on the ear.
Now we are done with all the big parts of this image, Let's learn something new. Select the Line tool from the toolbar on the left side and bring the cursor towards the mustache of the fox underneath the eye :p Hold the mouse left key on one end and drag it to the other end. This way we will be able to draw the mustaches easily. Before drawing the mustache, make sure to increase the pt(Size) from the control bar.
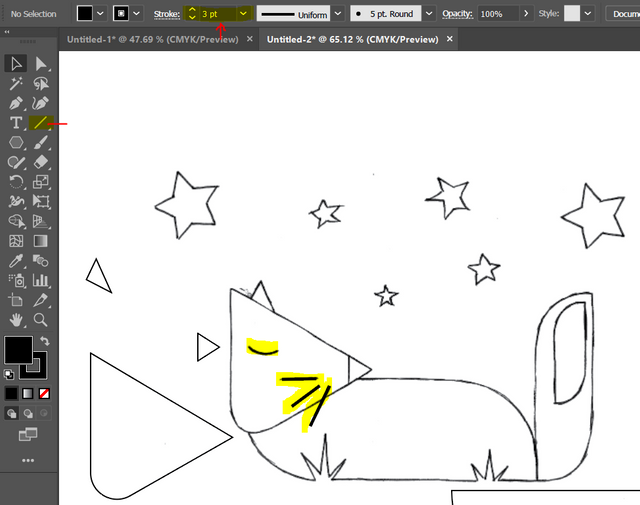
We will use the star tool from the shape tools and draw stars. We can zoom in to make stars as they are in the template but it would be okay if we draw simple stars using the tool and not focus much upon the shape of stars given in the template. We can always alter the shape and size of the star using the direct selection and selection tool respectively.
Here now, all the things are done, thus we will first pick a background. For setting a background, we will first draw a large square over the whole art box or the image, wherever you feel it's good. Then we right-click on the box, go to arrange, and select Send to back. What this does is, send the rectangle to the background of the art box.
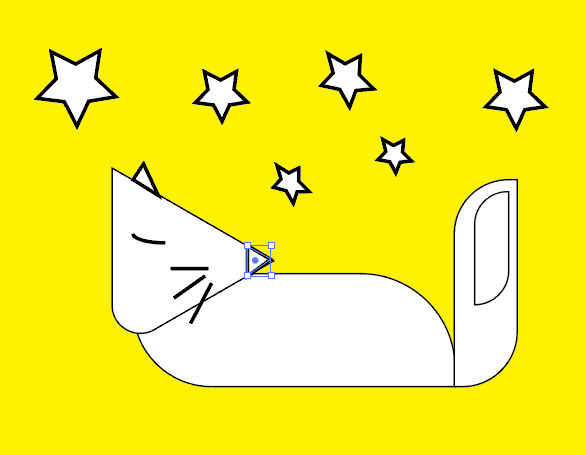
Now, we can choose colors of our choice for the tail, body, face, and everything else. This is all just fun playing around with the colors.
I hope you all enjoyed the lecture and hope that I have not gone very fast with the post lol :p This is all i am doing nowadays so let's move together :p
I have made a video of almost 10+ minutes that will help you in understanding all these steps. If you wanna see how it is happening, I am attaching the video below :)
I am ending the day # 2 post here. Good Luck everyone with your work. We will work over a template in the next day of exploration. Till then goodbye and take care. If you are interested in this one and have followed me, I would love to see your homework on doing this task :p Any problems, feel free to ask and we will solve them together :)
Yours, Haidermehdi.
Country Representative Pakistan.
Steem On!
Ma sha Allah
Nice lecture
Account operated by @aniqamashkoor