Crypto Academy Week 5 Homework Post for @yohan2on | Understanding Decentralized Finance (DeFi) Part 2 [MetaMask]
Hey Guys..!!
Meet again with me Wahyu Nahrul
To start week 5 of steemit crypto academy, I will start with the homework given by one of our professors @yohan2on, which this homework is a continuation of the discussion that was discussed in the previous week.
The homework for this week is explaining how to create a DeFi wallet and outlining how to use it. There are 4 wallet options given by professors to discuss, namely: MetaMask, MyEther wallet, Coinbase wallet, Argent wallet. What I choose to discuss is the MetaMask wallet.
What Is MetaMask?
![]()
This add-on with the fox logo is a bridge that connects its users to the DeFi network via a browser that is always used by many people.
MetaMask is a wallet or safe-deposit box that is used to store crypto-assets for its users who have tokens based on the Ethereum Blockchain or what we often hear as ERC-20 so that users can easily monitor these tokens.
As I explained earlier, MetaMask is an add-on that is installed in the browser application that we use for browsing on the internet. Everyone can now install the MetaMask add-on on Chrome, Firefox, Edge, and Brave browsers.
How To Install MetaMask On Browser?
The first thing you have to do is enter the official MetaMask website, which is here: https://metamask.io/index.html
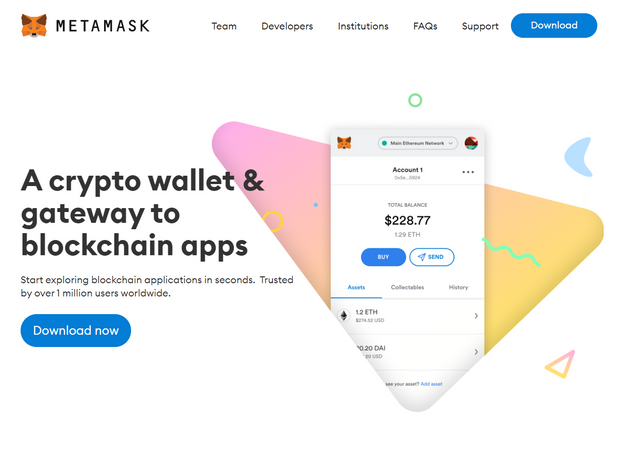
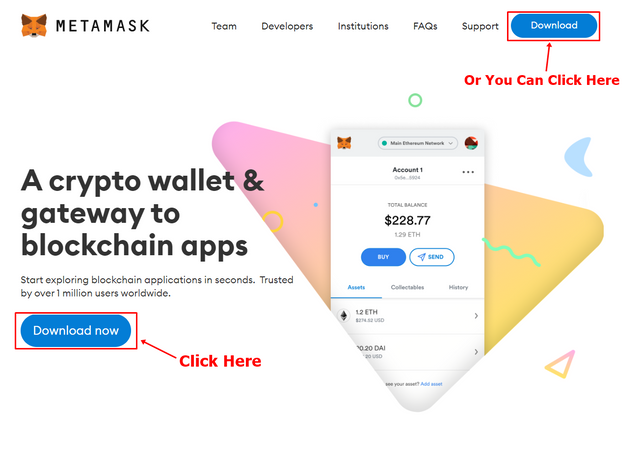
Then, all you have to do is click the blue "Download Now" button in the middle of the page, or you can click the blue "Download" button in the upper right corner.
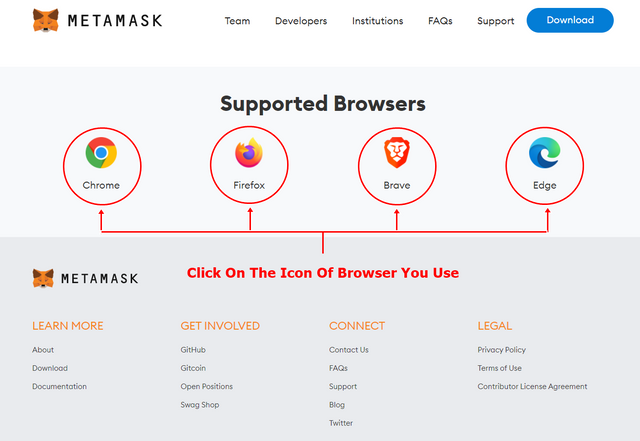
After that, you scroll down until you see an image of browsers that support the MetaMask add-on and you just have to click on the browser icon that you are using.
Because I use the chrome browser then I click the Chrome browser icon.
You will be taken to the web store page where you will download and install the MetaMask add-on to your browser.
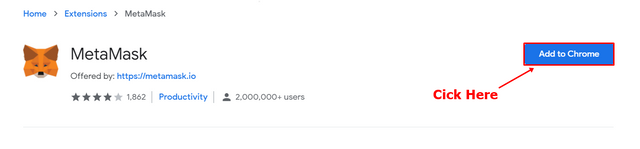
Then a pop-up will appear asking you permission to download and install the MetaMask add-on to your browser.
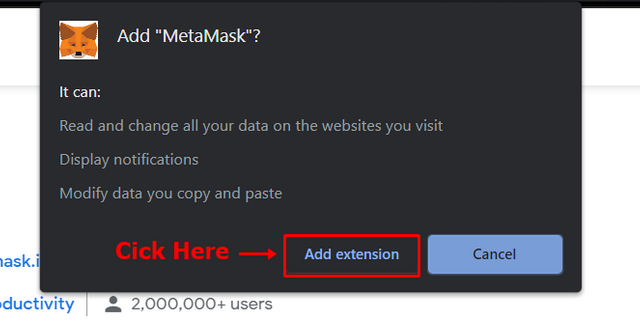
Congratulations, the MetaMask extension has been installed on your browser. However, this is not finished yet, because the next step is we will create a wallet so we can use it as a place to store our tokens later.
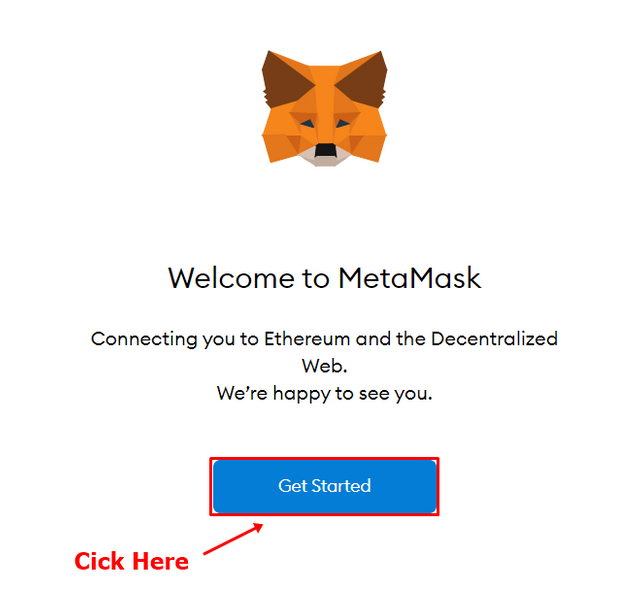
After the installation is complete, you will be taken to a page that will help you create a wallet, all you have to do is click the blue "Get Started" button.
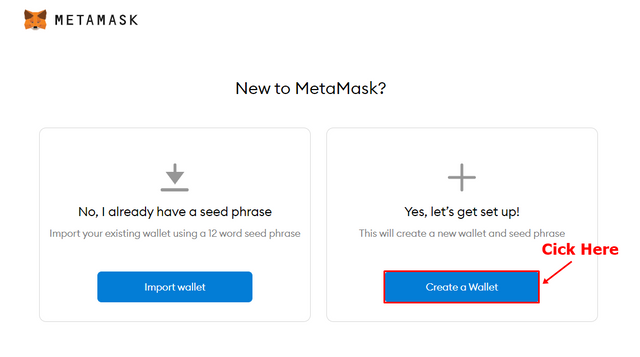
You will be given 2 options, "import wallet" or "create wallet". Because we don't have a wallet yet, then we will choose the create wallet option.
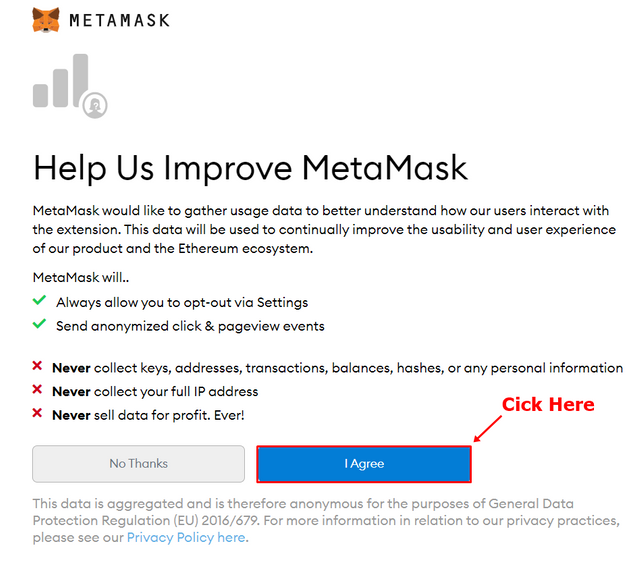
After that you will be asked for permission for several things to create a wallet, you just need to press the "I Agree" option to continue.
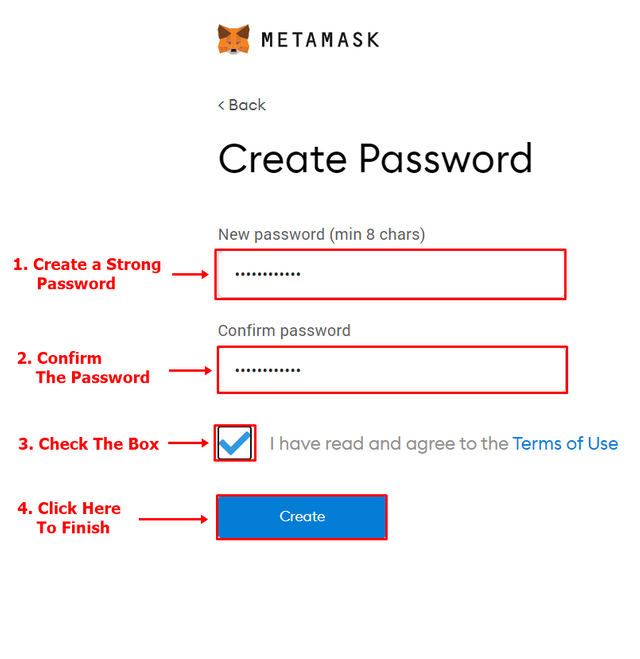
Make a strong password so that the security of your wallet is more secure, and you just have to check the box below which indicates that you have read and agreed to the terms and conditions. Then all you have to do is click the "Create" button to create your wallet.
After that, you will be given a Secret Backup Phrase which is used to backup your data if something happens that you don't want.
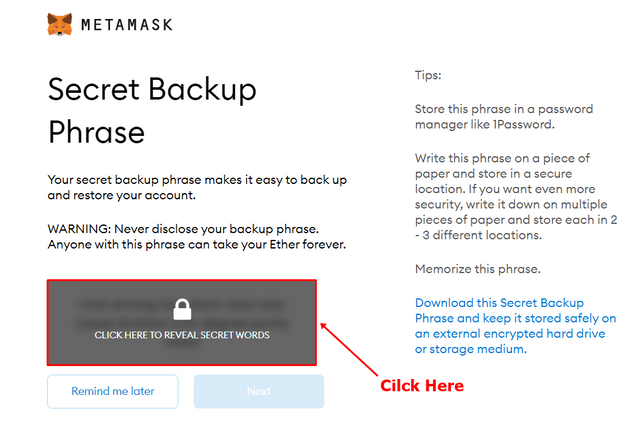
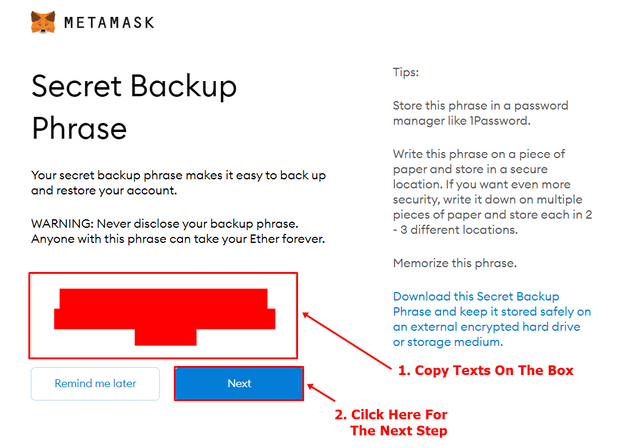
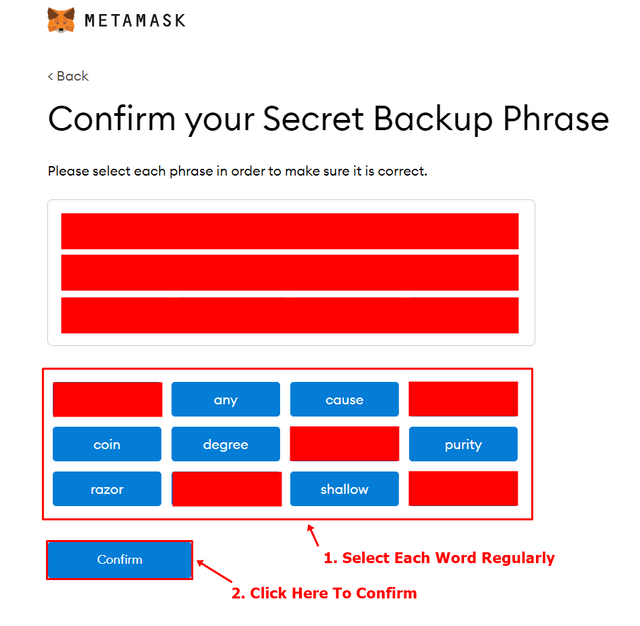
Then you will be given a few words that you will use as your Secret Backup Phrase. After that, you click next and you will be asked for confirmation from your Secret Backup Phrase earlier by sorting those few words correctly. My advice is that when you are given a backup of the code, you should first save it in a notepad which you can access at any time.
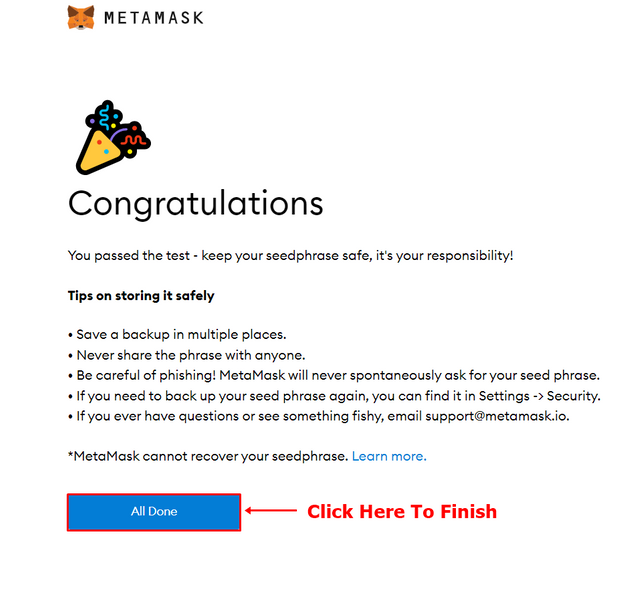
Congratulations !! your wallet was successfully created .. !!!
You just have to click "All Done" to exit from that page.
How To Use MetaMask?
There are several things you can do with this MetaMask wallet, the main thing is 3 things:
- Buy or Deposit
- Send
- Swap
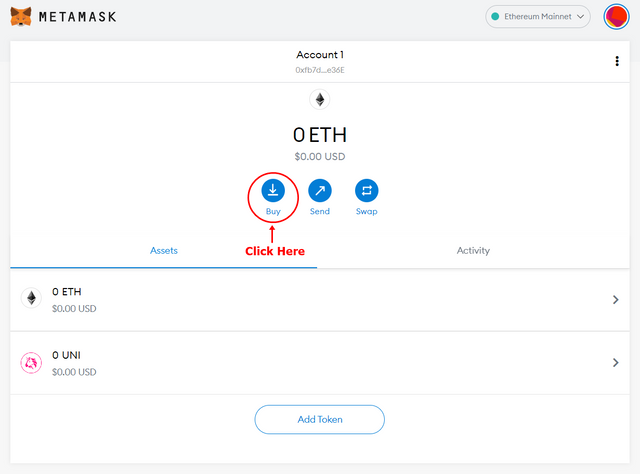
1. Buy or Deposit
In MetaMask we can make purchases and deposits for Ether coins. To make this transaction, you just have to press the "Buy" option on your wallet account.
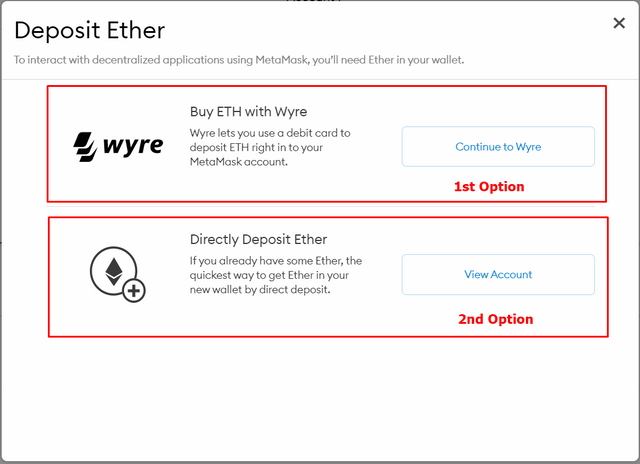
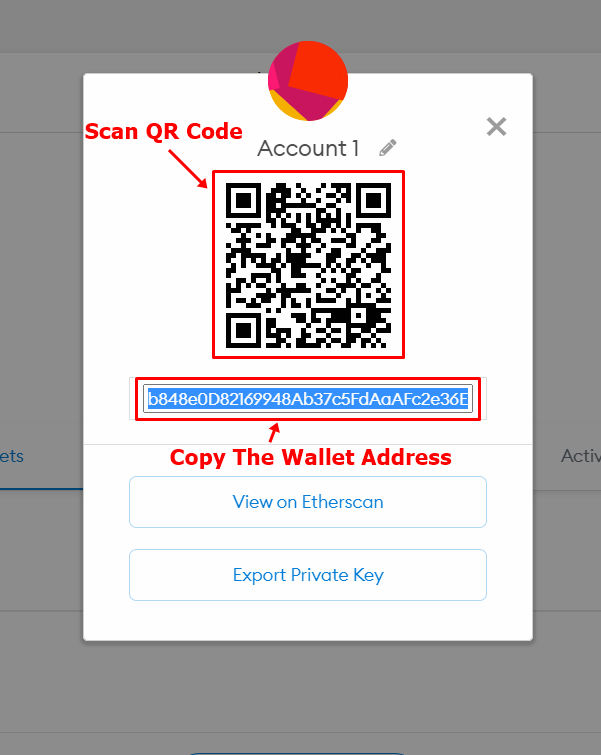
You will be given 2 options to enter ETH into your wallet, namely by buying Ether (ETH) with Wyre which will use your debit card to purchase ETH coins. Or if you already have ETH coins, you just have to send them to your wallet by making a deposit using the address provided or you can scan the existing QR code.
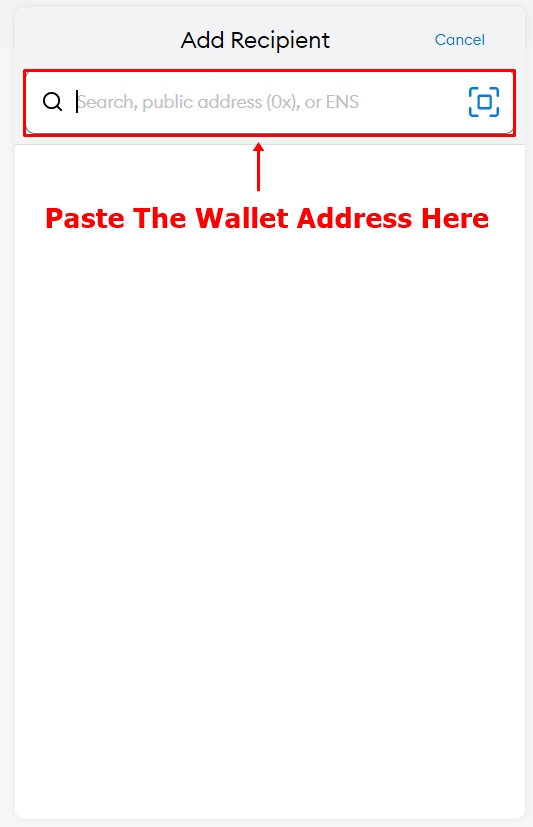
2. Send
You can also send your ETH to an exchange if you want to sell your ETH assets.
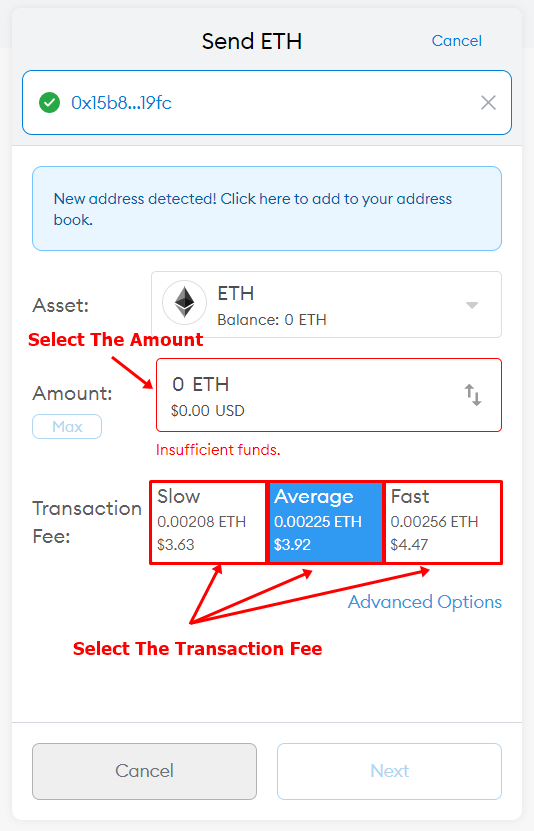
You just have to choose the "Send" option, then you can copy the wallet address of the exchange that you want to send and put it in the search field.
Then you just need to enter how much ETH you want to send and you can choose how fast the shipping transaction will run. There are 3 options: Slow, Average, and Fast. The faster the delivery process, The fee transaction will be expensive.

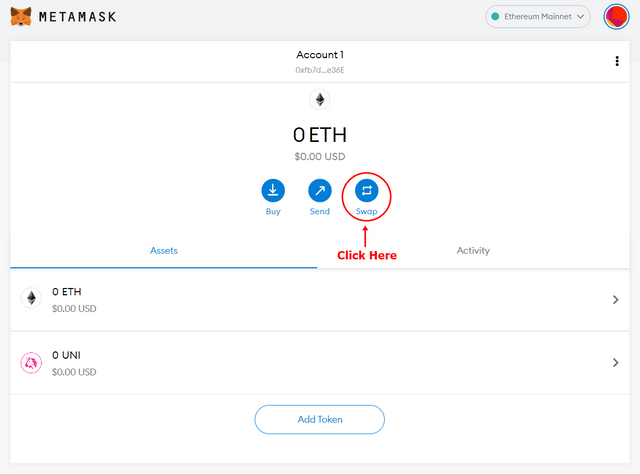
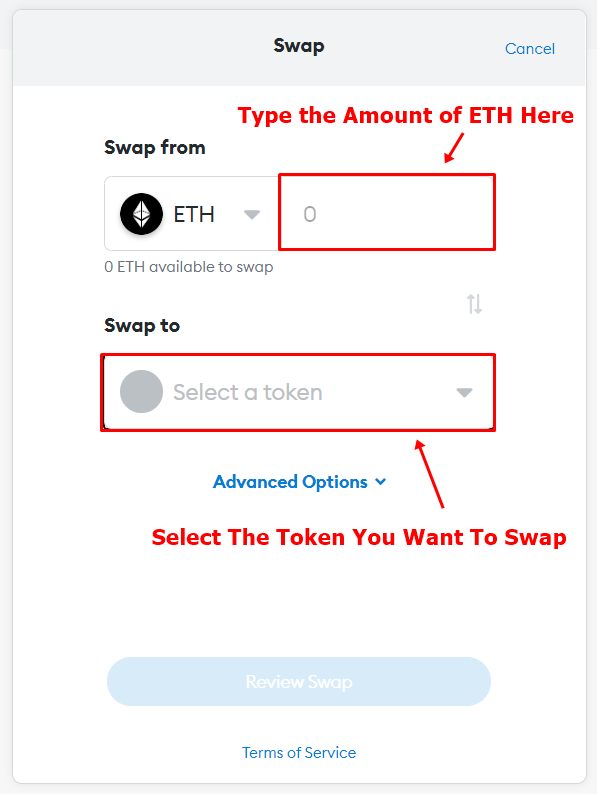
3. Swap
You can also exchange your ETH coins for ERC-20 tokens in MetaMask. Even some of the tokens that we discussed in the article about DeFi are here, such as Maker, Compound, Uniswap, Synthetix, which can be exchanged here. 👍
Last Word
That's my explanation of how to install and use some of the features of MetaMask, all of the explanations above are the result of my research on MetaMask by reading various articles from browsing the internet and also articles from some of our friends who also participated in this 5th week.
I cannot go into more detail, because I am afraid that the number of words in my article will exceed the limit given by our professor.
If you want to know more in detail about this MetaMask, I suggest you read the article from our friend @kouba01 you can read it here, he discusses in more detail about MetaMask and is very interesting to read.
I apologize if there are still many mistakes that you can get when reading my explanation earlier, I would be very grateful if you told me in the comments column below.
Thank you for reading my blog, hope it will be useful for all of you. 😁
CC:
Hi @wahyunahrul
Thanks for attending the 5th Crypto course and for your effort in doing the given homework task.
Feedback
This is very good work. You indeed took time to explore the various features in Meta Mask including sending, receiving, and swapping tokens and shared about each one of them with well edited screenshots.
Homework task
8
Thank you so much professor..!!
Shared on Twitter
@wahyunahrul, Thanks for your suggestion to read my post. Also you did a great work. Have a nice day!!
You are welcome bro!!
You really deserve it, keep making good articles for this community.
And thank you for visiting and reading my article :)