[ How to list your own Token on a Public Exchange ]-Steemit Crypto Academy | S5W4 | Homework Post for @reddileep

Introduction
In the previous class we were able to differentiate between crypto coin and crypto token with respect to how easy or hard they are to create. Having created our crypto tokens, it is very important we list the coins in exchanges to basically get them out there. Taking everything into consideration, professor @reddileep has properly explained an important concept yet again. Now, I will do my part and complete the task given.
1- Define your idea of listing a Crypto token in a public Crypto Exchange and what its significance is.
Crypto Tokens can be created with so much ease that a lot of the come up everyday. With many of these out there, it is important to get our tokens listed on exchanges so they get exposure and start to function. Before listing we have to decide on the type of exchange we would want to work with. Centralized Exchanges like Binance have some tedious and time consuming processes for listing their tokens because of the centralized state. A lot of paperwork and costs go into the process and in the end there is no guarantee that the token would be listed. This is because centralized exchanges try as much as possible to list projects based on quality before providing liquidity to that project.
Decentralized Exchanges, however, offer a less tedious process. Anybody can list their tokens on a decentralized exchange without having to go through any paperwork. All we have to do is find an exchange that supports the blockchain network (Ethereum, BSC, etc.) that the token is built on and follow the processes. On a decentralized exchange, our token is our responsibility. This means that we have to settle the gas fees and provide liquidity to the token for it to be tradeable.
Significance of Listing our tokens on a public exchange
1.) Exposure: Listing our project helps to get it out to the public to let them know that the project exists and possibly peak interest in it.
2.) The Token becomes Tradeable: Exchanges exist for the purpose of trading crypto coins and tokens. Listing our token on an exchange makes it available for trading but it can only be tradeable when we provide liquidity to it.
2- Demonstrate how to prepare everything needed to list your newly created Crypto Token in a public exchange such as selecting an exchange and adding a few BNB coins to your MetaMask wallet to accomplish the gas fee. (If you already have some amount of BNB in your wallet, you don’t need to deposit again.)
To list tokens on a public exchange we need to prepare by accomplishing the following:
- Create the Tokens and prepare the Contract Address.
- Deposit coins to pay for Gas
- Select a suitable exchange.
Now I will take these one after the other.
Creating the Tokens and preparing the Contract Address
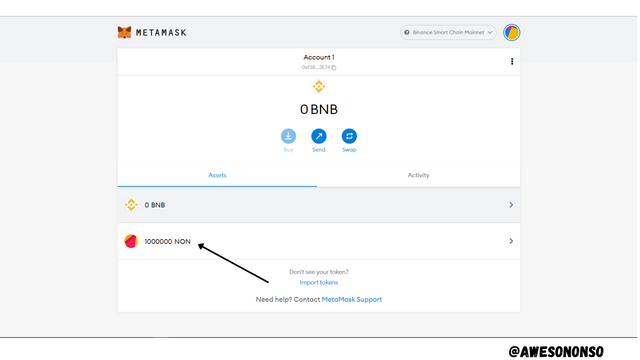
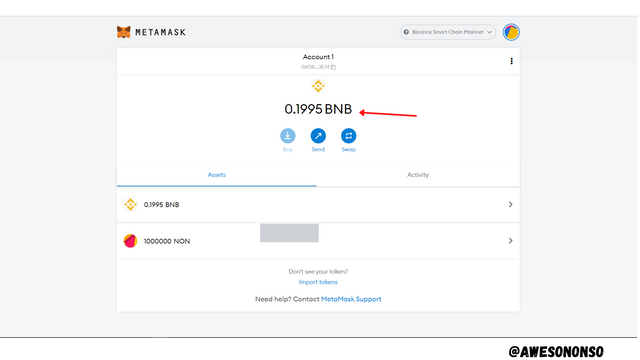
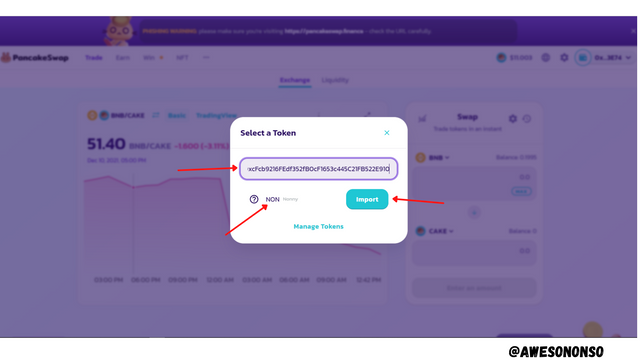
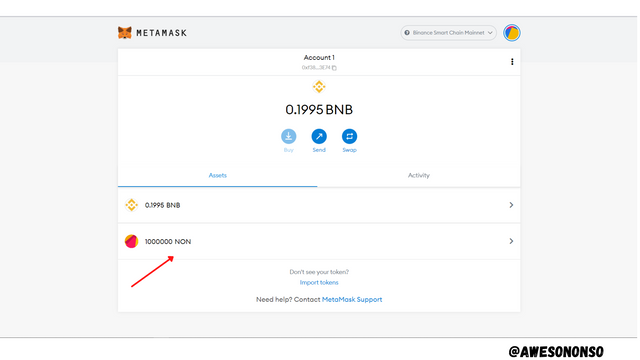
I have already created the Token in he previous task on How To Create Our Crypto Token. I named the token Nonny and stated the contract address which is: 0xcFcb9216FEdf352fB0cF1653c445C21FB522E910.
The symbol of my token is NON and the supply is 1,000,000 as shown below:
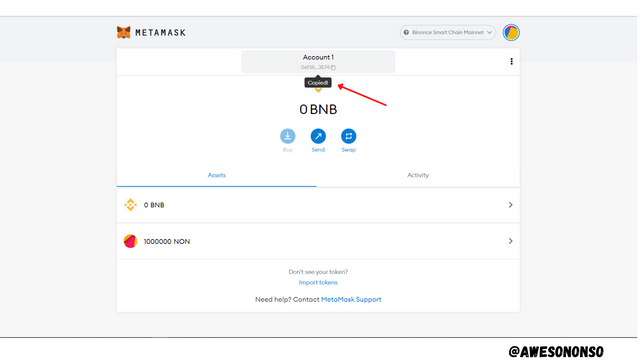
To deposit coins to pay for Gas follow the steps below:
Step 1: Copy the MetaMask BNB address.
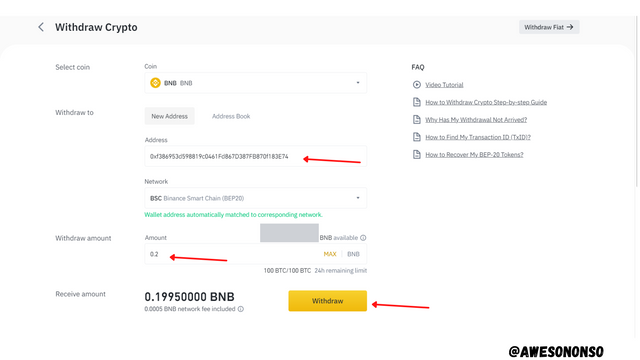
Step 2: I performed the transfer from Binance app.
Step 3: The coins are successfully deposited on MetaMask.
Selecting a suitable Exchange
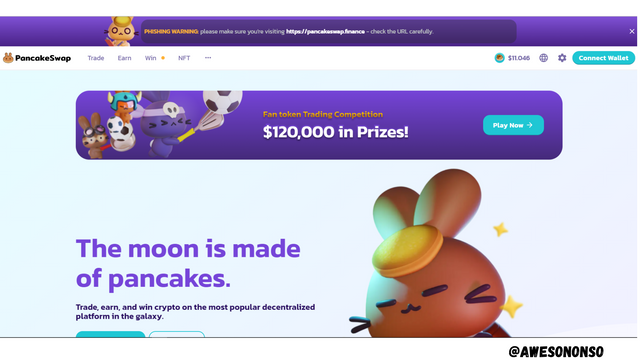
To select a suitable public exchange, we need to consider the network and exchanges that supports it. With that in mind, I will be using PancakeSwap Exchange.
3- Demonstrate all the steps of listing your own Crypto Token in a Public Crypto Exchange. (Screenshots required)
To List a crypto token on a public exchange follow the steps below:
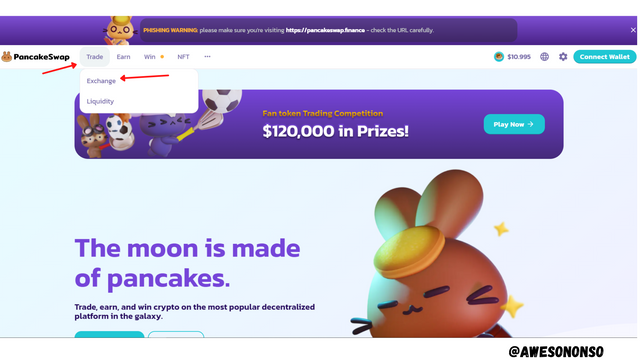
Step 1: Go to the PancakeSwap Site. Click on the Trade tab and click Exchange.
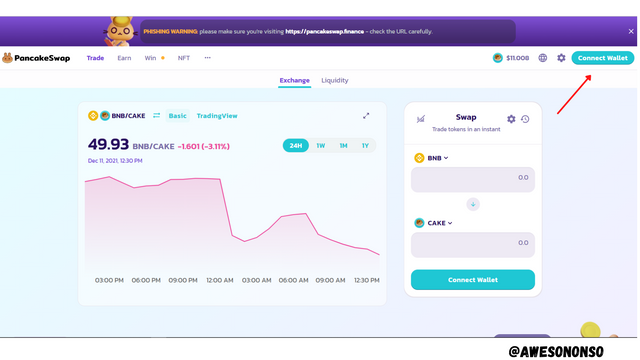
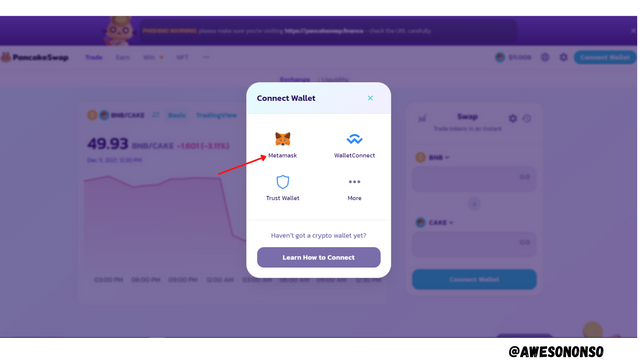
Step 2: Click on Connect wallet.
Step 3: Select a wallet which in my case is MetaMask.
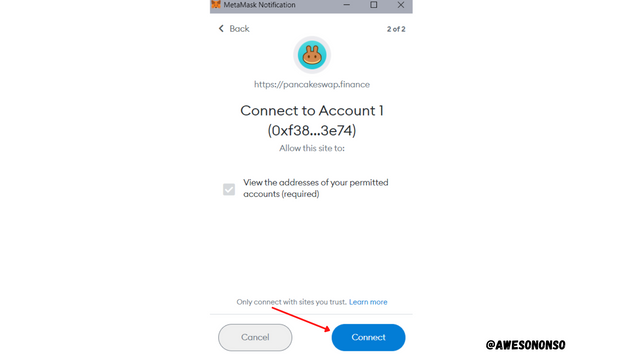
Step 4: A notification from MetaMask pops up. Click Next.

Step 5: Click Connect.
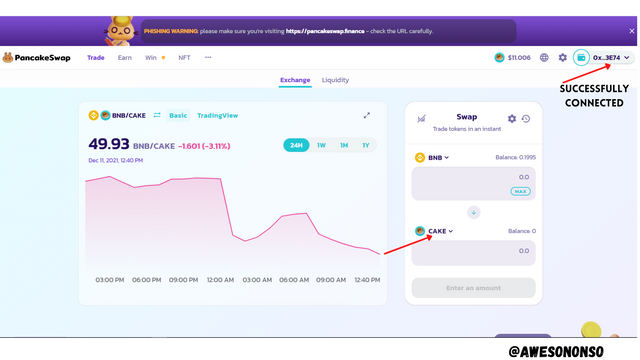
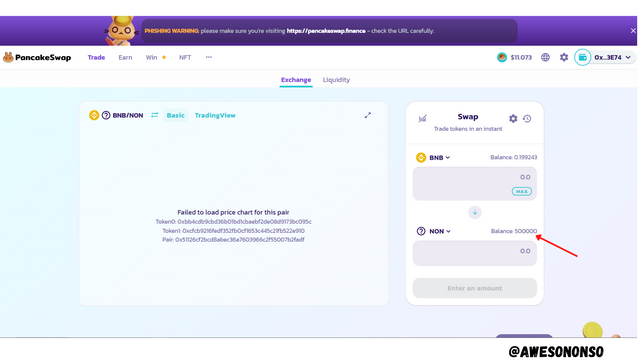
Step 6: The Wallet is successfully connected. Now choose to select a token under the Swap Window.
Step 7: Paste the Contract Address in the search bar. After the token comes up, click Import.
Step 8: On the next window, check the I understand box and click Import.
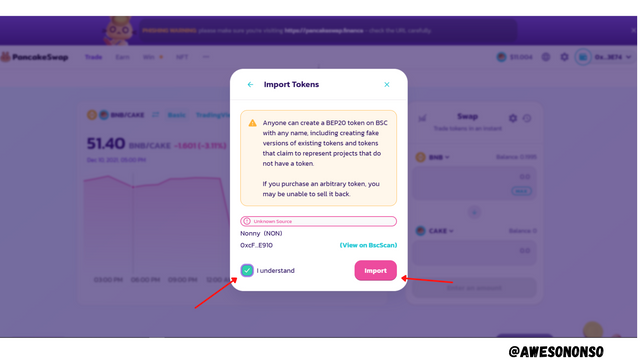
And that's it! The Token is successfully imported.

4- Demonstrate all the steps to bring half of your newly created Crypto Token into a Public Exchange (In addition to simply stating the steps, you should provide a clear explanation about each step)
After importing a token contract address to an exchange, we have to bring some of the tokens into the exchange so they can be available to traders. Once listed on the exchange, these tokens cannot be retrieved.
To Bring half of our tokens to the Public Exchange follow the steps below:
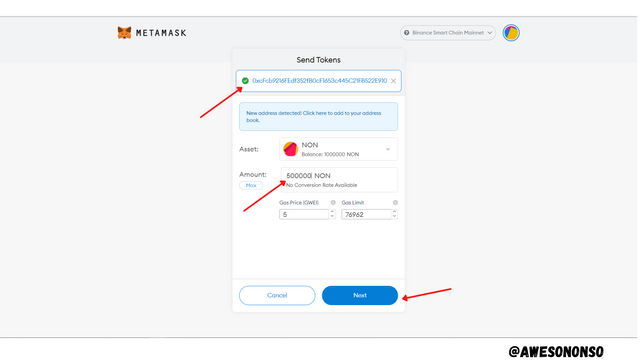
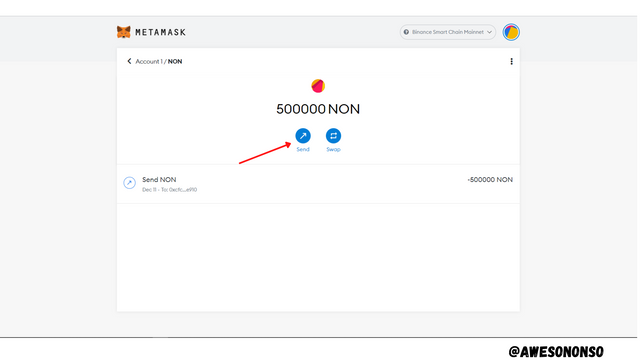
Step 1: On MetaMask, select the token and click Send.

Step 2: Now we have to paste the contract address in the search bar. This is because we have already listed the contract address on the exchange and so we have to send tokens to it. The contract address is 0xcFcb9216FEdf352fB0cF1653c445C21FB522E910. We paste this and then input the amount. The total supply is 1,000,000 NON and so half would be 500,000 NON. After all this, we click Next.
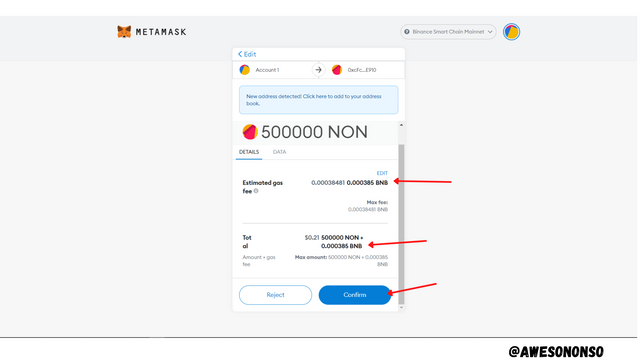
Step 3: The estimated gas fee is 0.000385 BNB. This is the estimated amount I would pay to list these tokens which is quite affordable. Now, click on Confirm.
After a few moments, the transaction is complete. The transaction ID is 0x021bf675532e18adb0a6e75a641f2bbe2d2109b0422d0e978f39a5bd0ec54668 which I copied as shown below:
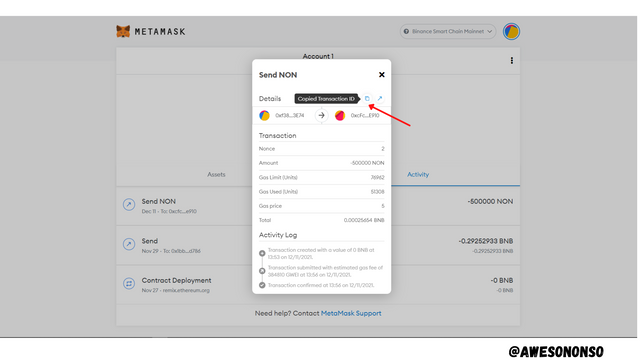
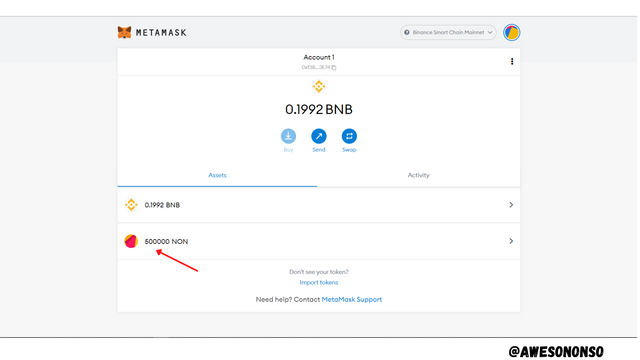
From the images below, my balance has been halved. The rest of it is now on the exchange.
5- Withdraw some of your own crypto Tokens into any other wallet such as Trust Wallet and MetaMask wallet. (Confirm the transaction through the relevant Block Explorer)
For this part, we need to select a wallet and create a public key, transfer some tokens to the new public key on the wallet and then Confirm the transaction on the block explorer. Let's take these one after the other:
To add the Contract Address to a wallet follow the steps below:
Step 1: On Trust Wallet for iOS, I clicked on the corresponding setup icon.
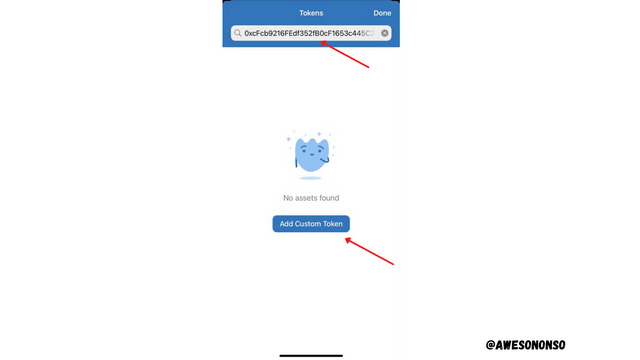
Step 2: Paste the Contract Address in the search bar and click Add Custom Token.
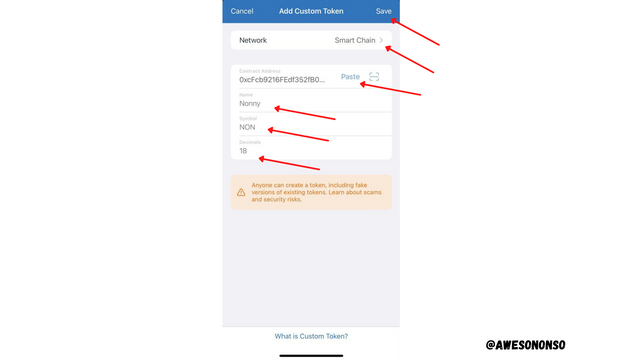
Step 3: Select the Network (which is Smart Chain in this case) and then paste the Contract Address. The token details come up. Click Save finally.
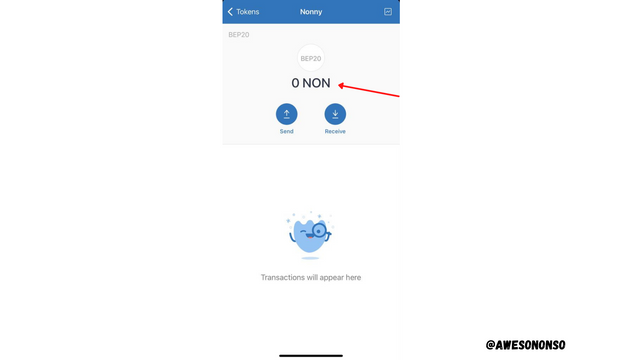
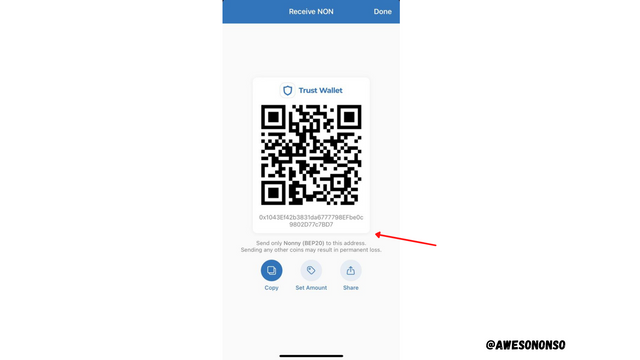
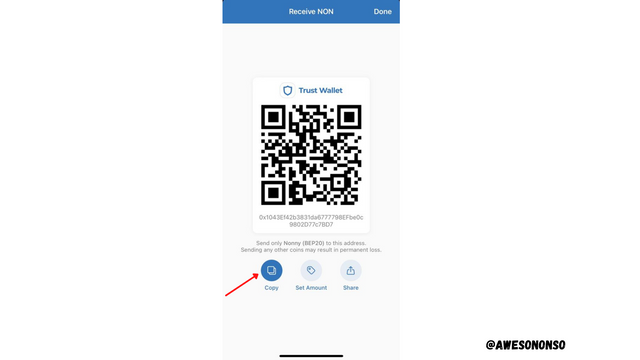
The public key (address) for the token is created. The public key is 0x1043Ef42b3831da6777798EFbe0c9802D77c7BD7.
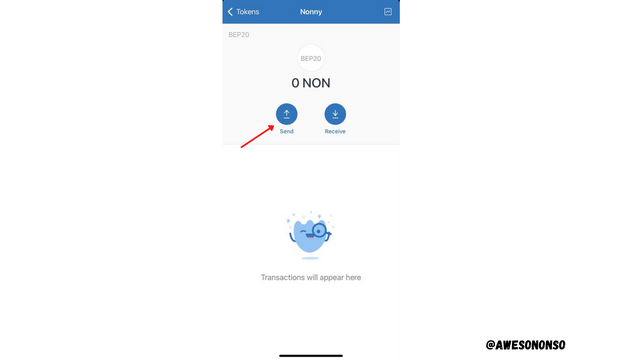
To withdraw some tokens to another wallet follow the steps below:
Step 1: On Trust wallet, click on Receive and copy the new public key.
Step 2: On MetaMask, after selecting the token, click on Send
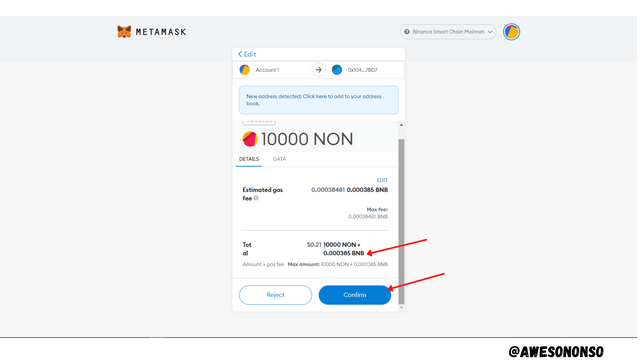
Step 3: Paste the new public key on the search bar, input and amount and click Next. I chose to transfer 10,000 NON.
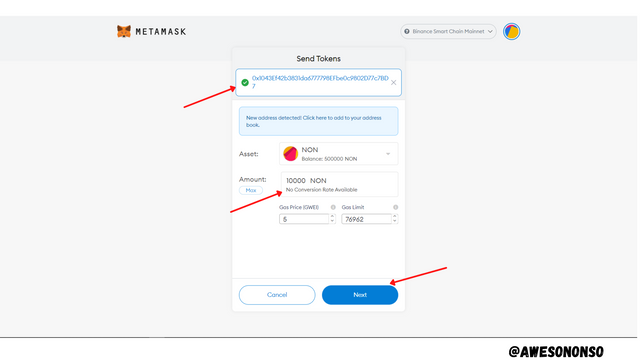
Step 4: The Gas fee is 0.000385 BNB. Click Confirm.
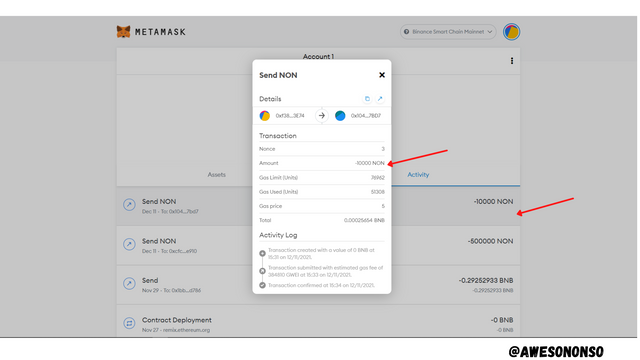
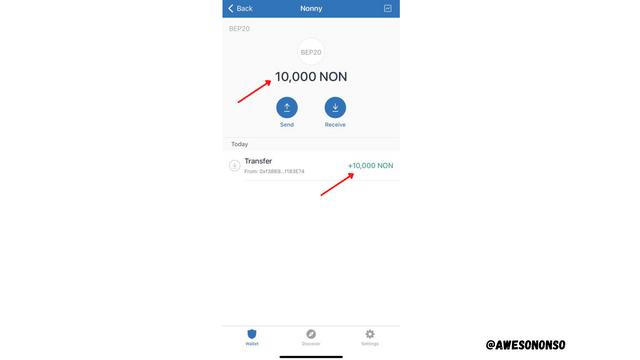
The tokens are successfully transferred to the Trust Wallet.
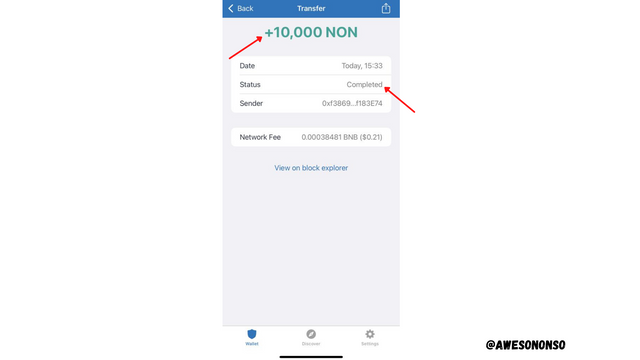
To Confirm the transaction on a Block Explorer, follow the steps below:
Method A: Directly from Trust Wallet, on the transaction details, click View on block explorer.
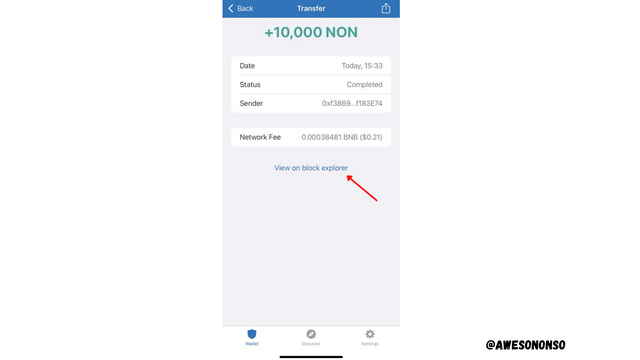
We are redirected to the transaction on the BSC block explorer.
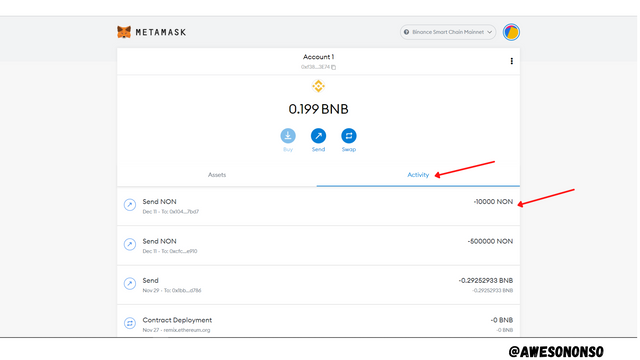
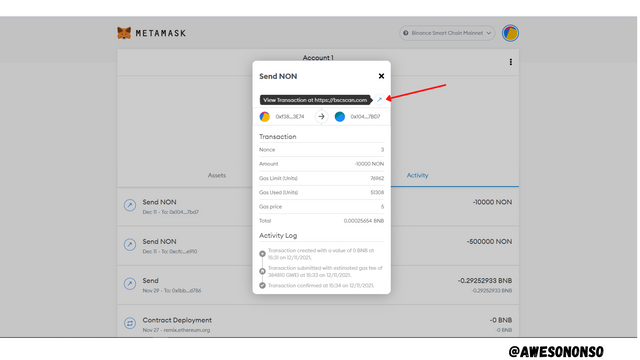
Method B Step 1: On MetaMask, click the Activity and select the transaction to view it.
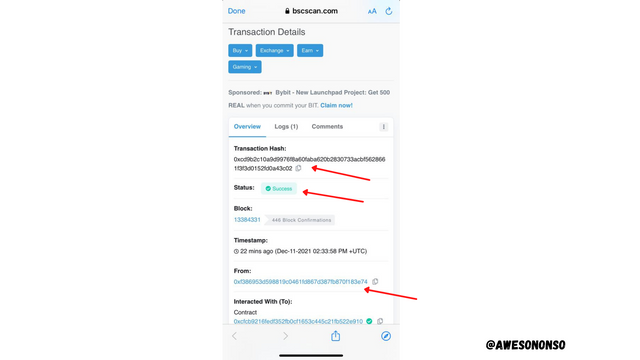
Method B Step 2: Click on the icon that says View Transaction at https://bscscan.com.
We are then redirected to the Block explorer where we can view the transaction details.
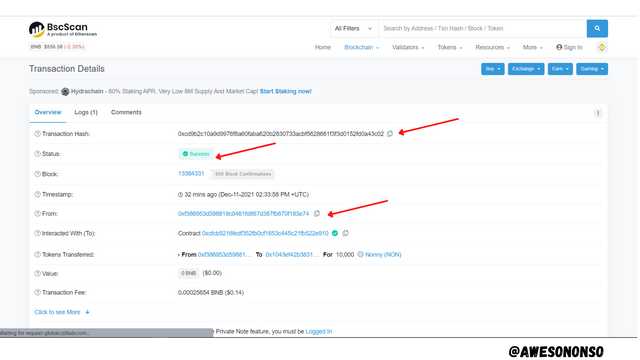
The hash of the transaction is 0xcd9b2c10a9d9976f8a60faba620b2830733acbf5628661f3f3d0152fd0a43c02.
Conclusion
Last time I was able to create the token "Nonny" and today I have been able to list it. Honestly, it has been quite an experience. The ease of the process is really encouraging but just like I said last time, it would take a lot of work before the token is work anything.