How to Create Your Own Crypto Token - Crypto Academy / S5W2 - Homework Post for @reddileep

Introduction
Digital currencies have become the normal and for a while now. There are about 14,000 cryptocurrencies as of the time of writing this. The huge number of cryptocurrencies makes one wonder how easy it is to create these digital currencies.
Professor @reddileep has been able to properly delve into the matter in the lesson. Now, I will attempt the questions in the task given.
1- Introduce how to create your own Cryptocurrency by differentiating between token and coin.
Creating cryptocurrencies can be easy or difficult depending on the category I want to create. If I want to create a coin, it would take some time and a lot of expertise. However, if I want to create a token it would not take so much time and so much expertise.
Let me explain...
A coin is a cryptocurrency that is built on its own blockchain network. That is, it is the native currency of the blockchain it is built on. So, if I want to create a coin, I would have to build a new blockchain network from scratch. This process will take time and cost a lot to purchase the necessary equipment, undergo some training in coding and employ a competent team.
An example is Ether which is built on the Ethereum blockchain and so is the native currency of that blockchain.
Other examples are TRX on Tron, BTC on Bitcoin blockchain, BNB on the Binance Chain and so on.
A Token, on the other hand, is a cryptocurrency that does not have a blockchain of its own. This type of cryptocurrency is built on a pre-existing blockchain and is said to be hosted on that blockchain. So, if I want to create a token, I do not need to spend much time and money like I would have for a coin. Instead I would just select a blockchain network and host my token.
An example is Tether (USDT) that is hosted on the Ethereum blockchain but is not the native currency of that blockchain.
Other examples are BTT on Tron, ChainLink on Ethereum and so on.
No matter what type of cryptocurrency we wish to develop, the following, among others, need to be taken into consideration:
a.) The type of cryptocurrency (Coin or Token): This is the first step. The type of cryptocurrency will define the costs and expertise required.
b.) Costs involved
c.) Use case: This is the question of "What problem does my crypto solve?"
d.) Token Economics: This is basically how the crypto would function. Things like supply, inflation, distribution, etc. are taken into consideration.
2- Demonstrate how to prepare everything needed to create a crypto token, such as making a wallet and adding a few coins to it to pay the gas fee. (Here you should deposit at least 15$ worth of BNB coins from your exchange wallet to the newly created wallet)
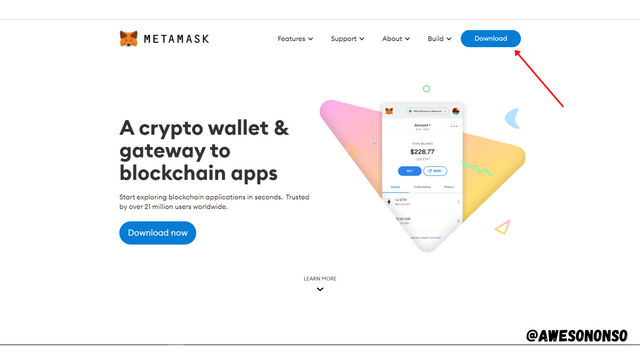
For this part, I will demonstrate with MetaMask on the Binance Smart Chain as was used in the lesson. All the processes In will explain below will encompass adding MetaMask to Chrome, adding the Binance Smart Chain Network and Depositing BNB to the wallet.
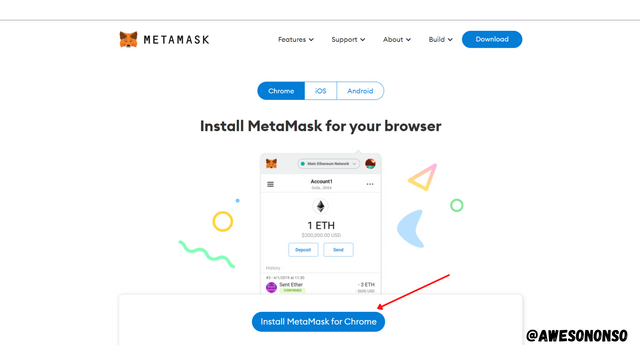
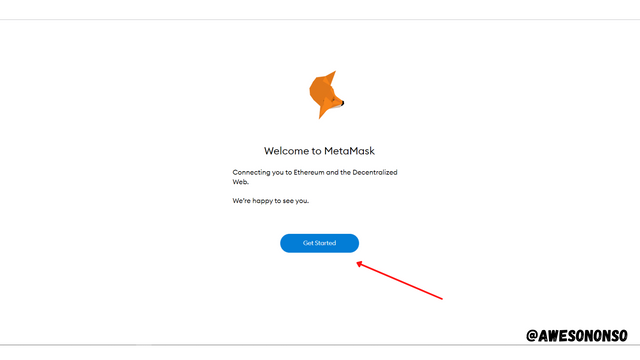
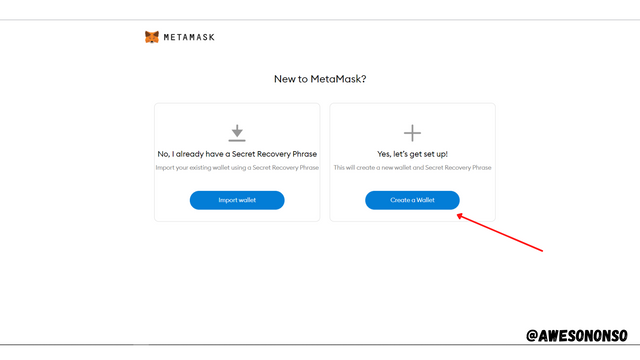
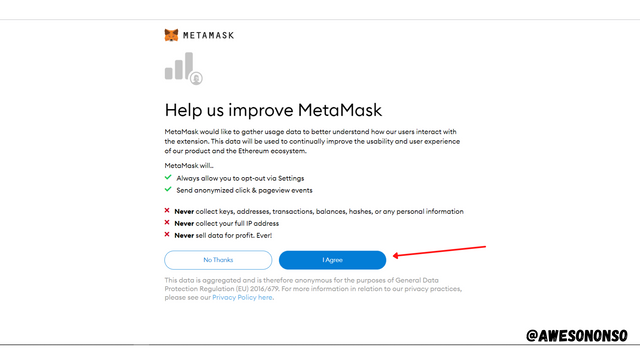
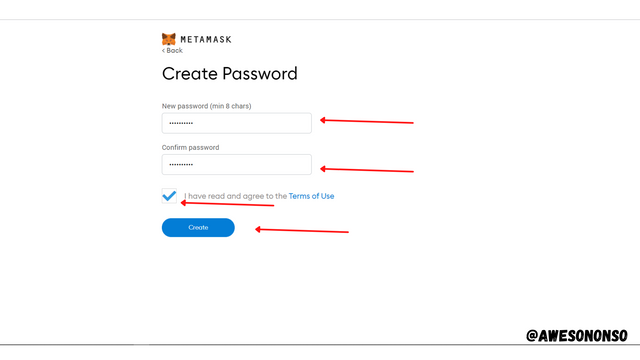
To Add MetaMask and Create a Wallet, follow the steps below
Step 1: Go to the MetaMask site and click Download.
Step 2: Select Install MetaMask for Chrome.
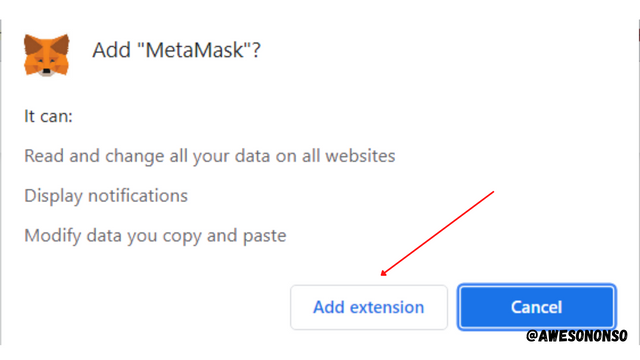
Step 3: Click Add to Chrome

Step 4: Click Add Extension
Step 5: The Extension is added. Click on Get Started
Step 6: For me, I selected Create a Wallet and agreed to the terms.
Step 7: Create a password, tick the box and click Create.
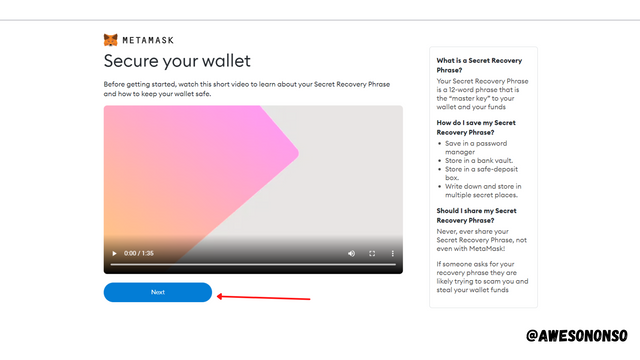
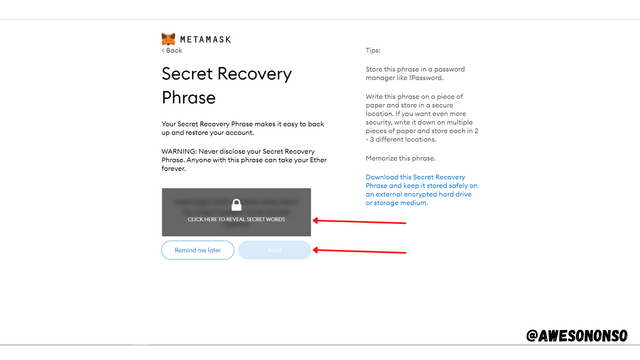
Step 8: Click Next on the following page. Reveal the seed phrase and click Next.
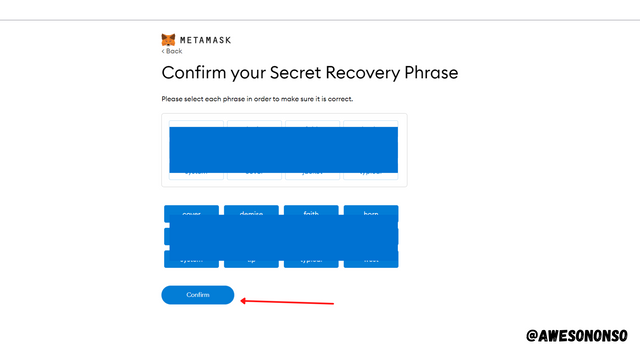
Step 9: Confirm the recovery phrase and click All Done
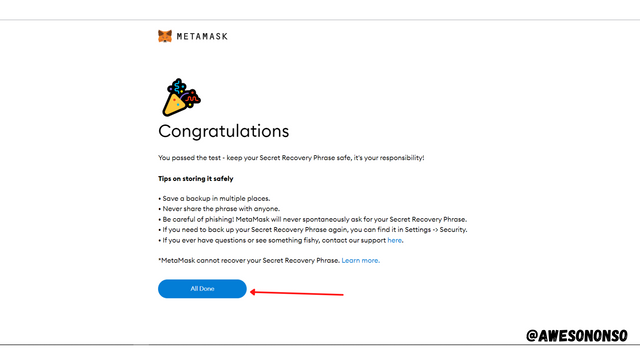
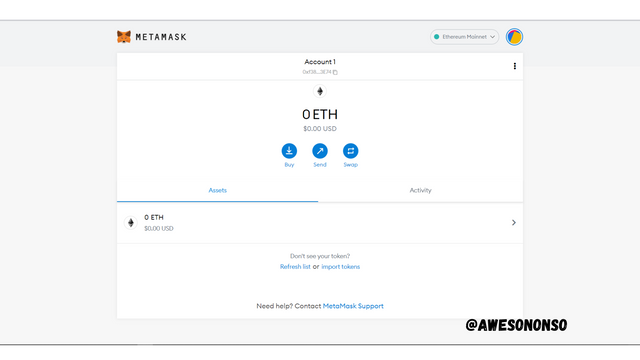
And that's it! The wallet has been created.
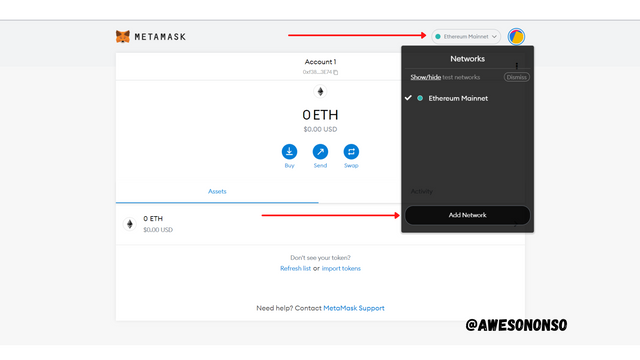
To add the Binance Smart Chain Network follow the steps below:
Step 1: Select the network menu at the top right and then click Add Network.
Step 2: Fill in al the fields and click Save.
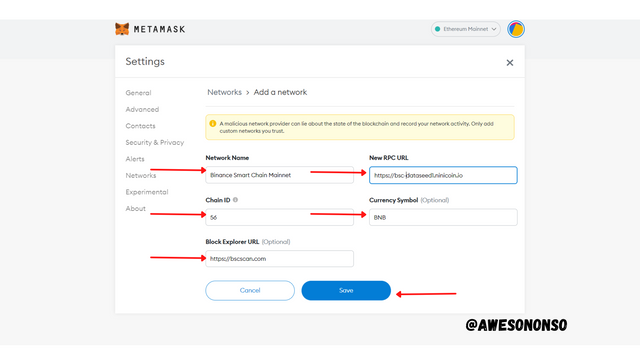
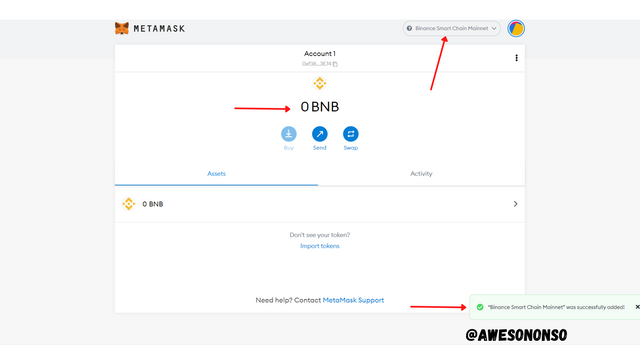
The network is successfully added.
To deposit coins for Gas fees, follow the steps below:
Step 1: Copy the MetaMask BNB address.
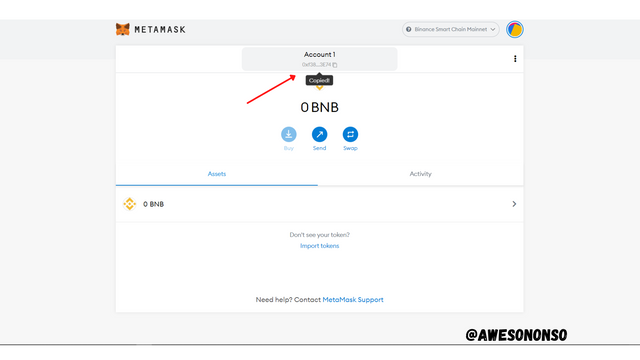
Step 2: I went over to binance to perform the withdrawal from there.
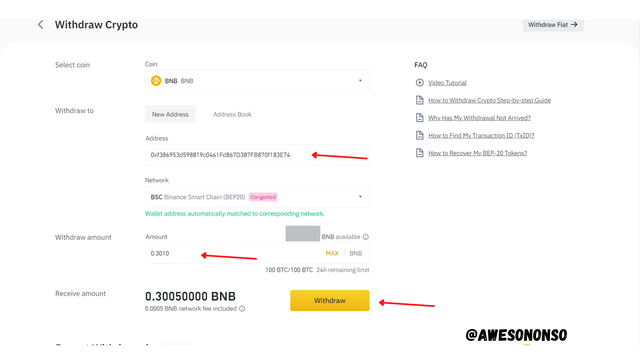
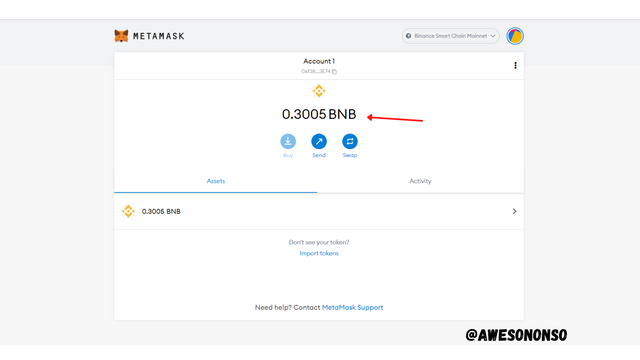
The BNB is successfully deposited to the MetaMask wallet.
3- Explain the Remix IDE and download the source code by showing each step. (Screenshots required)
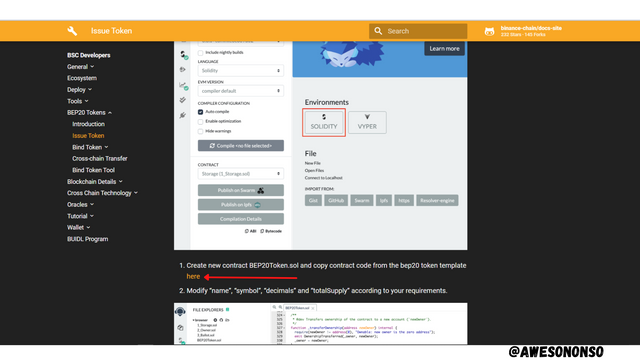
Remix IDE is and interactive application used for learning about and creating Smart Contracts. If this is true, then this application can be used to write and deploy smart contracts on Smart contract blockchains like Ethereum, Binance Smart Chain, NEO and so on.
With respect to our study, and in simpler terms, Remix IDE can be used to customize the Javascript code for a token. All we have to do is download the source code and modify it. This can be done on the Web or on a desktop.
To download the source code follow the steps below:
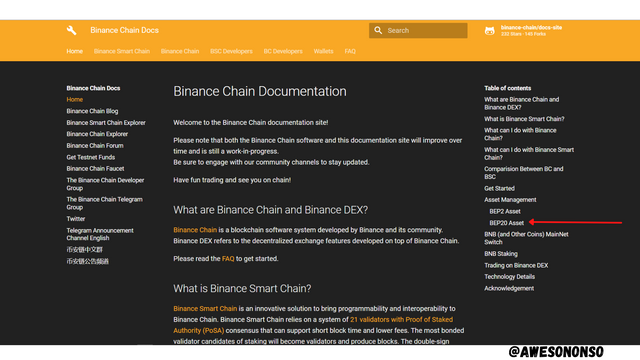
Step 1: Since we are dealing with Binance Smart Chain, go to https://docs.binance.org/ and click on BEP20 Asset.
Step 2: Click on Issue BEP20.
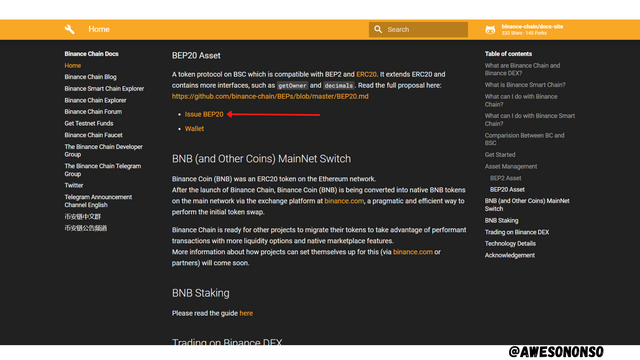
Step 3: Scroll down and click here.
And that's it! The Source code is downloaded.
4- Customize the source code according to your imagined future project. (In addition to simply stating the steps, you should provide a clear explanation about each customized code)
To customize the the source code follow the steps below:
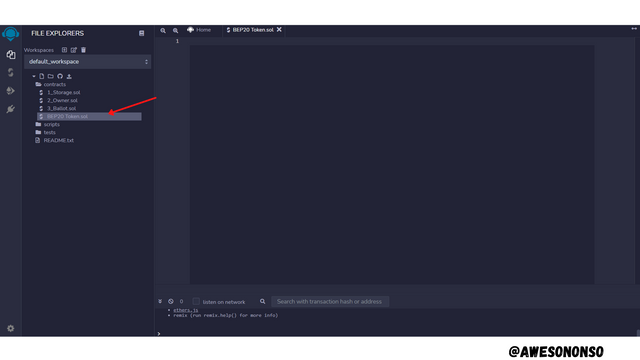
Step 1: Go to Remix IDE, right-click contracts and click on New File.
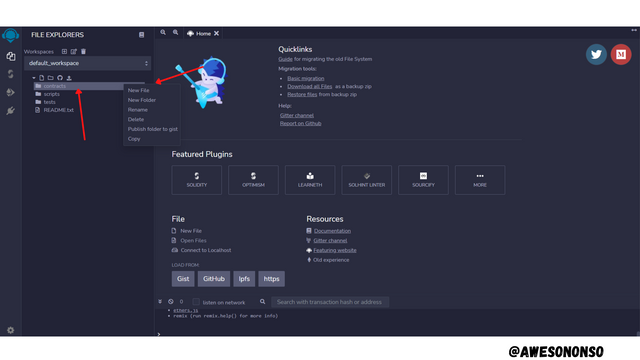
Step 2: Name the file as BEP20 Token.sol for Binance Smart Chain.
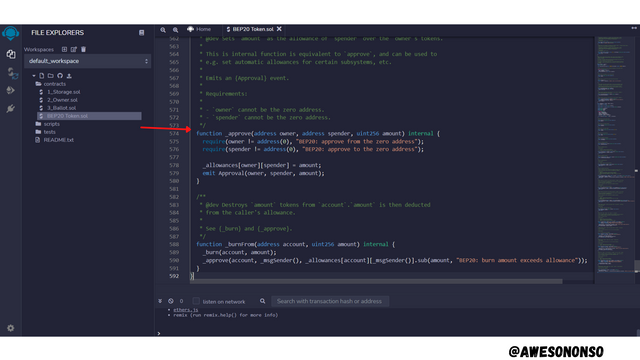
Step 3: Copy and Paste the downloaded source code into the new file.
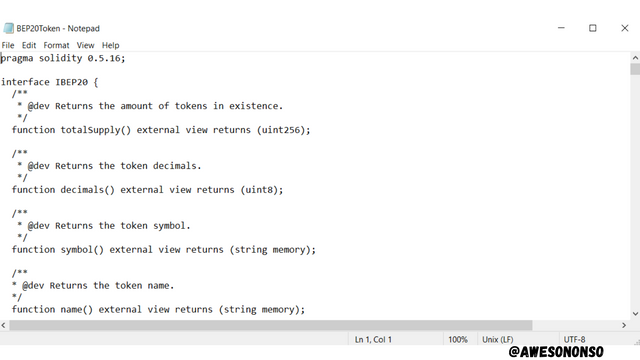
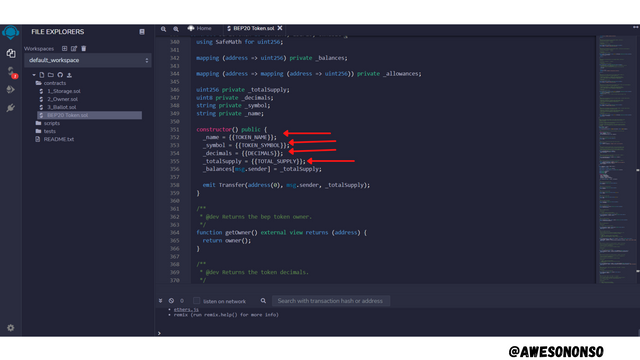
Step 4: Customize the code as you like. Parts that I will customize include;
name: As it sounds, this is just the name of the token I wish to create. I will name mine Nonny.
symbol: This is how the token will be represented on the blockchain. Just like Binance Coin is called BNB, mine will be NON.
decimals: Cryptocurrencies are divisible up to certain points. This property is defined by the decimal function. Satoshi is the smallest unit of Bitcoin which is one-seventh of one BTC or seven decimal places. Mine will be up to 18 decimal places.
totalSupply: This is the amount of tokens that will be created. Mine will be 1000000 * 10 ** 18.
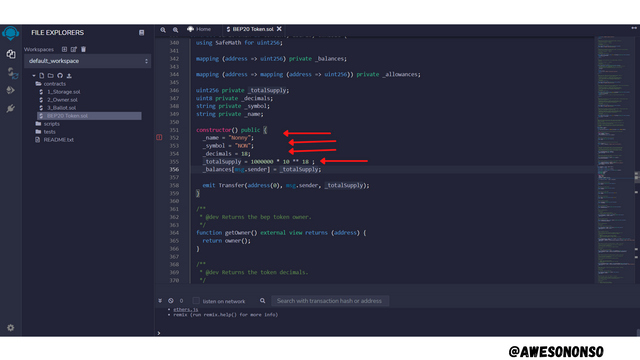
Below I have customized the code as follows;
- name = {{Nonny}};
- symbol = {{NON}};
- decimals = {{18}};
- total Supply = {{1000000 * 10 ** 18}};
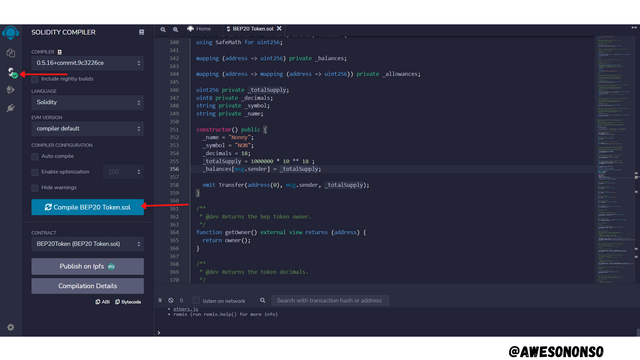
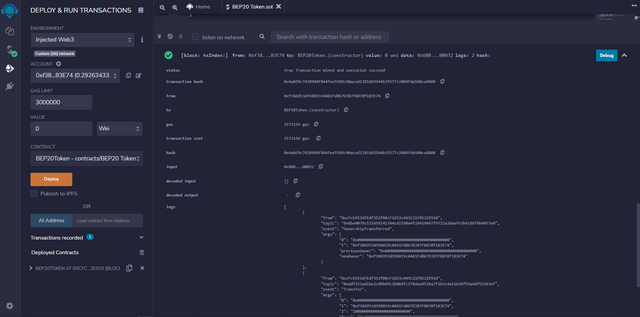
Step 5: Now I am done customizing the code, click on the solidity compiler icon on the left and then click compile BEP20 Token.sol.
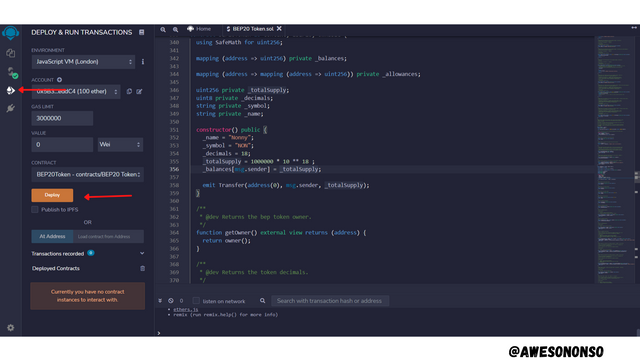
Step 6: Select Deploy and Run Transactions at the left and click Deploy.
Step 7: Scroll down and confirm the details by clicking on the different tabs.
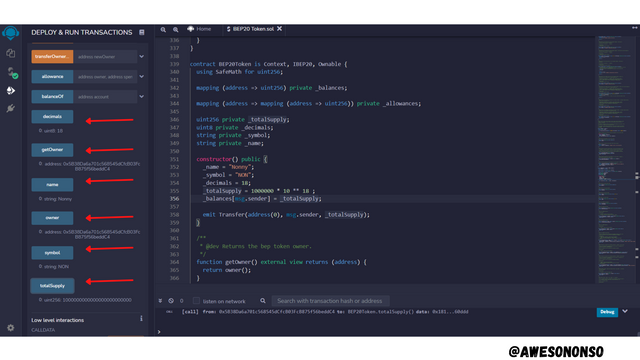
I noticed that the address is in the BSC format.
5- Demonstrate all the steps to add your created crypto token into your any wallet such as Trust Wallet and MetaMask wallet. (Screenshots required)
To Add the token to MetaMask follow the steps below;
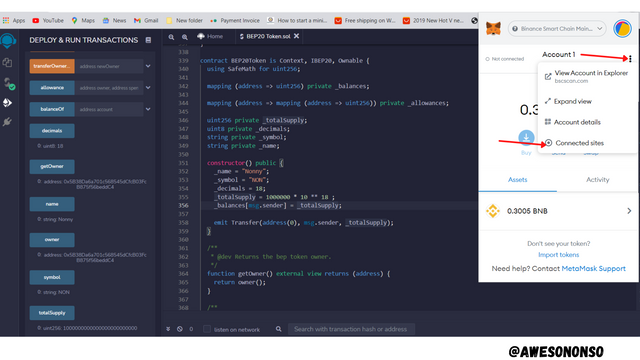
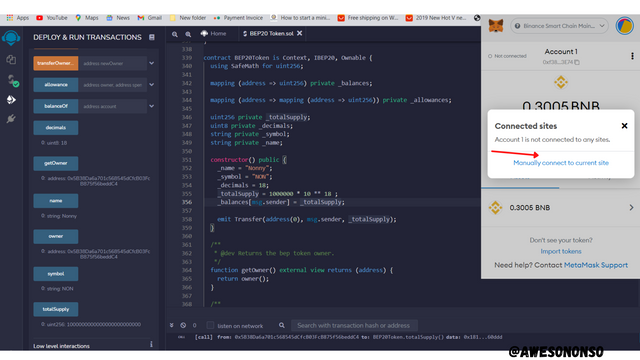
Step 1: Launch MetaMask on the Remix IDE page. Click on the corresponding options icon and click Connected sites.
Step 2: Click Manually connect to current site.
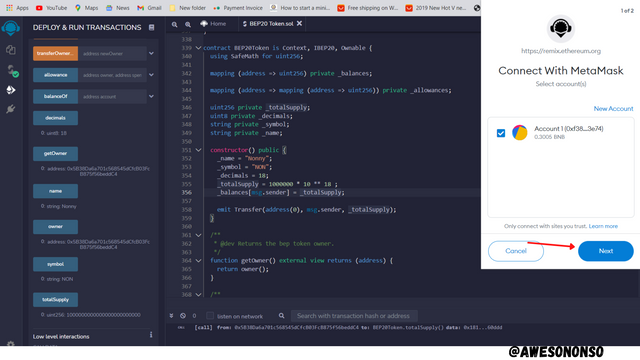
Step 3: Click Next on the following window.
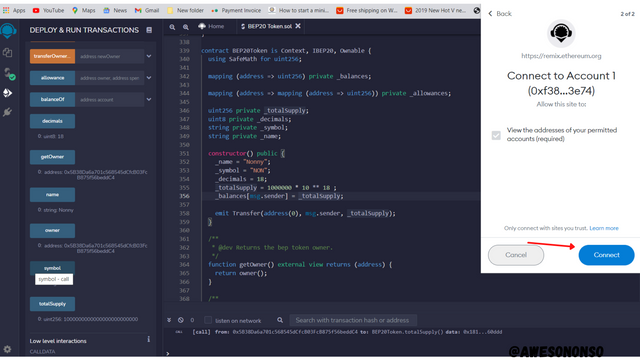
Step 4: Click Connect on the following window.
Step 5: The Wallet is connected. Now click on the tab under Environment.
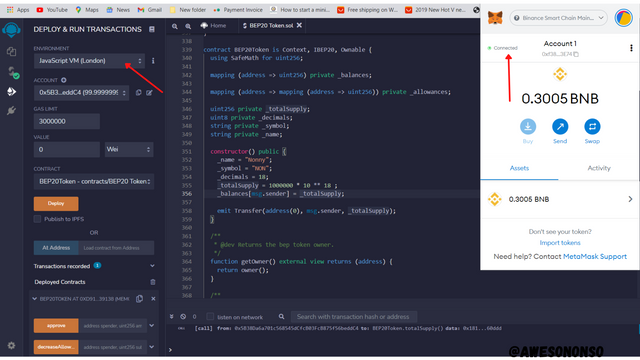
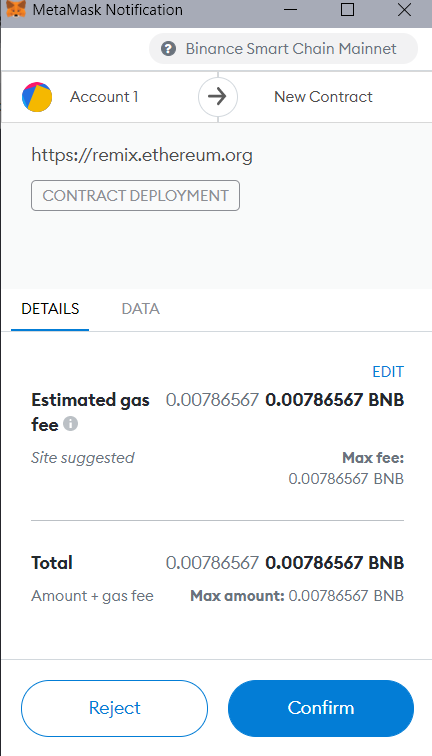
Step 6: Selected Injected Web3 and click Deploy.

Step 7: A notification comes up from MetaMask. Click Confirm.
Step 8: From the transaction details, we can see the contract address required.
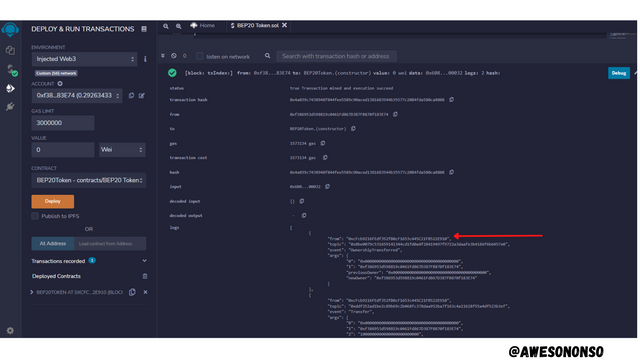
The address here is 0xcFcb9216FEdf352fB0cF1653c445C21FB522E910
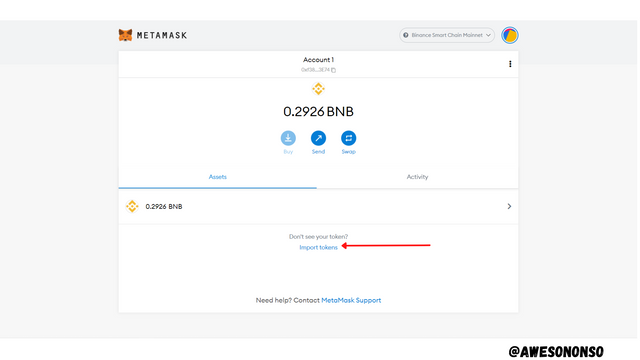
Step 9: Launch MetaMask and click Import tokens.
Step 10: Paste the Contract Address and click Add Custom Token.
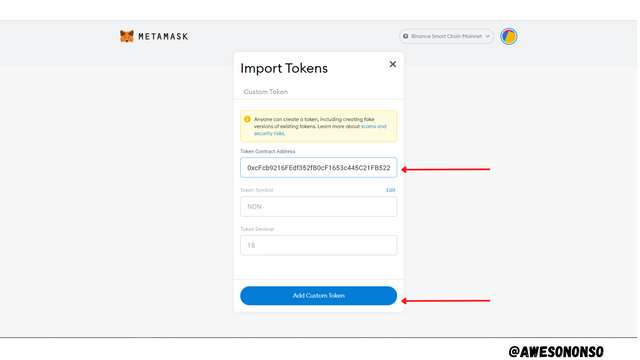
Step 11: Click Import Tokens.
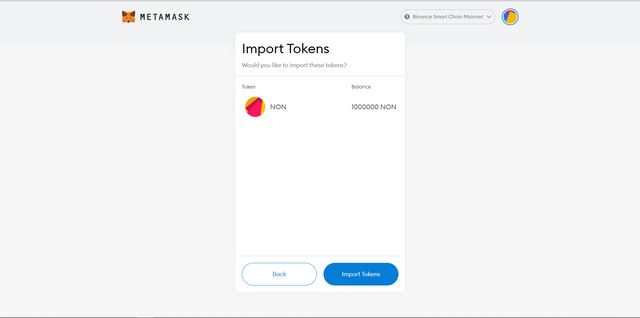
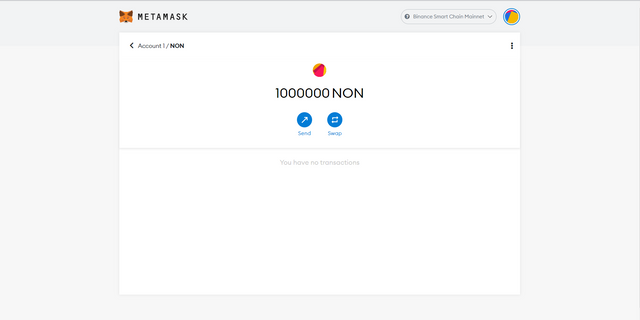
I have successfully been able to import 1,000,000 Nonny tokens.
6- Verify transactions and other details through the relevant Block Explorer. (Screenshots required)
To verify the transactions and other details, follow the steps below:
Step 1: Go to the Remix IDE page and copy the transaction hash from the details.
Step 2: Go to Bscscan and paste the transaction hash in the search bar. Click search.
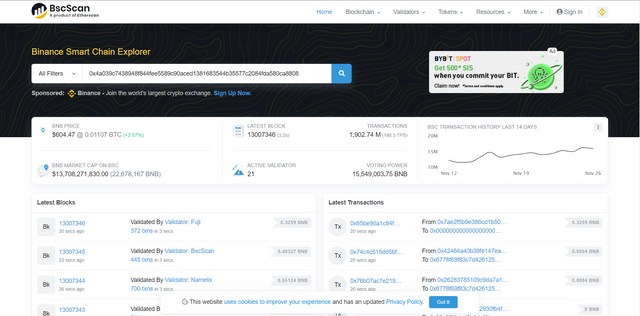
On the following window we can see the details of the successful transaction.
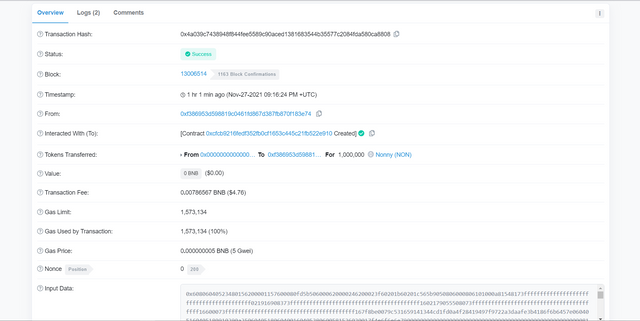
Block: 13006514
Transaction Fee: 0.00786567 BNB
Conclusion
From my experience in this lesson, I have to admit that making a token is not so straightforward. It took sometime but it definitely is easier than building a blockchain from scratch. The coin "Nonny" exists but now it would take some planning to make it worth something.