Zero to Witness: Part 7: Starting and syncing Steem
Today, at last, we'll adjust the wing mirrors, get a comfy driving position, and take the Steem node for its first spin round the block(chain).
Make some utility scripts
First let's make a little shell script to make it really easy to start our Steem node without having to type a long complex command.
A Linux shell script is a lot like a Windows batch file, if you're familiar with those. It's just a sequence of commands (or in our case one long one), that we can invoke by typing the name of the script.
Start nano, and have it create a new file in your home directory, with:
nano startsteem.sh
In the nano editor, paste the following:
docker run -itd \
    --name witness \
    -p 2001:2001 \
    -v /steemdata:/steem \
    ety001/steem-mira:0.23.1 \
    steemd --data-dir=/steem
Do Ctrl-O then Enter to save, then Ctrl-X to exit nano.
This script instructs Docker to start up our Steem container. Although it's split over several lines, that's all one command; the \ at the end of each line signifies that the next line is part of the same command.
A note about some of the parameters in the command above. The --name witness argument gives the running container a name, "witness", so that once it's running we can easily tell Docker which container we're talking about if we ask Docker to stop it again.
As mentioned last time, Steem uses port 2001 to talk to peers. The -p 2001:2001 maps the server's port 2001 to the container's port 2001, so that any incoming connections to the server's port 2001 get forwarded into the container for our Steem node to handle.
-v /steemdata:/steem maps the /steemdata directory on the server to the virtual directory /steem on the container, and steemd --data-dir=/steem tells the Steem node where in the container to find its data directory, containing the config file and the blockchain.
You will probably notice that we're proceeding without actually downloading or installing the Steem container! That's deliberate. Docker containers are by default hosted on the Docker Hub hosting service.
The line ety001/steem-mira:0.23.1 tells Docker which Docker Hub account (ety001), container (steem-mira), and version (0.23.1) should be used. If this container isn't already present on the server, it will be automatically downloaded by Docker the first time we try and start it. Neat!
At the moment, our new shell script is just a text file. We need to make it so that we can run it, by changing its permissions to make it executable. Do that with the following command:
chmod +x ./startsteem.sh
Let's make a couple more utility scripts. The next will let us check the logs from Steem. Create steemlogs.sh:
nano steemlogs.sh
And paste:
docker logs -f --tail 100 witness
Save and exit (Ctrl-O then Enter, Ctrl-X).
The last script we'll make is just a handy way to manually stop the server, in case we need to make any adjustments.
Create it with:
nano stopsteem.sh
Then paste:
docker network disconnect bridge witness
docker stop -t 600 witness
docker rm witness
Again, save and exit. Now we'll make both scripts executable:
chmod +x stopsteem.sh steemlogs.sh
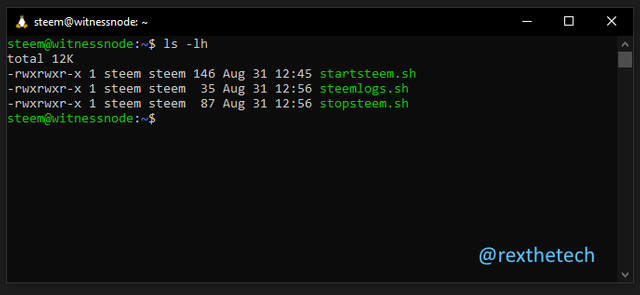
If we now do ls -lh to list the files in our home directory, here's what we should see:
The green filenames indicate that the files are executable.
Start Steem for the first time
Take a deep breath, because we're finally ready to actually fire up our Steem node and make sure it can connect to its peers and get its missing blocks.
Do:
./startsteem.sh
As promised, Docker realises that we don't have @ety001's image yet, and downloads it automatically:
After a couple of minutes, we're returned to the command line -- that was a bit of an anticlimax!
But don't worry -- Docker has started Steem, and it's running in the background.
Let's use the log viewer script we made to keep an eye on it as it connects to some peers and syncs its blockchain:
./steemlogs.sh
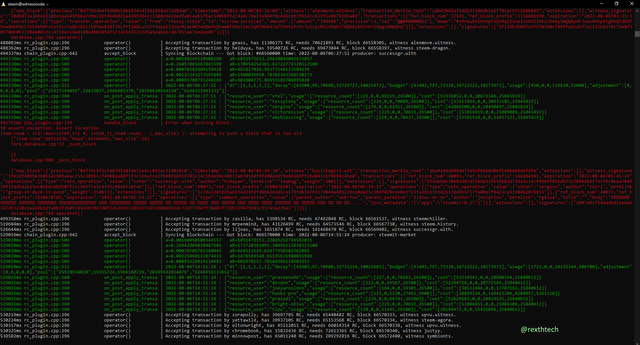
At first you may be alarmed to see these "Attempting to push a block that's too old" errors:
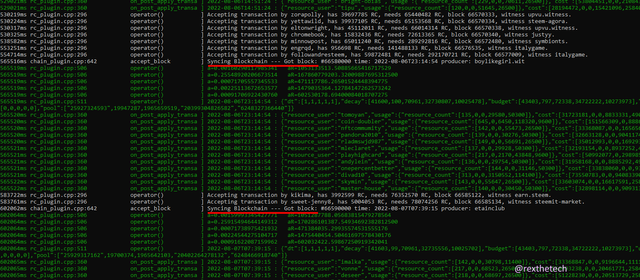
That's nothing to worry about. Nodes figure out how to get synced up by passing each other blocks. In our case, because our blockchain is a couple of weeks out of date, we're trying to push old blocks. These errors will shortly go away, and you'll notice "Syncing blockchain" messages:
These are output every 10,000 blocks -- so you can see that our node is happily consuming blocks from its peers, and getting caught up rapidly.
Checking your favourite Steem block explorer will show you the current blockchain height (67,273,015 blocks at time of writing) so you can see how far the Node has left to go.
For this first run, it's important to let it get completely up to date, otherwise it will want to restart the process from the same block it's starting from this time.
Within a couple of hours, it will have completely caught up, at which point the blocks will be shown coming in individually at roughly 3-second intervals:
At any time, it's safe to exit the log viewer with Ctrl-C.
Make Steem start automatically
Once Docker has been started, it will keep running in the background. Unlike most things we've run so far, it doesn't need to be wrapped in a Screen session to keep going. As such, you can log into the server whenever you like and check the Steem logs to see what's going on.
However, let's make it so that Steem starts automatically when the server reboots. That way, we'll never need to manually start the node unless we've manually stopped it for some reason.
There are umpteen ways to make something start automatically in Linux; we're going for one of the simplest, using cron.
Cron is a task scheduler which is installed by default on Ubuntu (and every other flavour Linux under the sun). Typically, it's used to control actions that we might want to happen every hour or every day. However, we can also schedule tasks to be run when the server boots.
To edit your crontab (table of cron schedules), do:
crontab -e
The first time you do this, it'll ask which editor you want to use. Nano is the default, so you can just hit Enter.
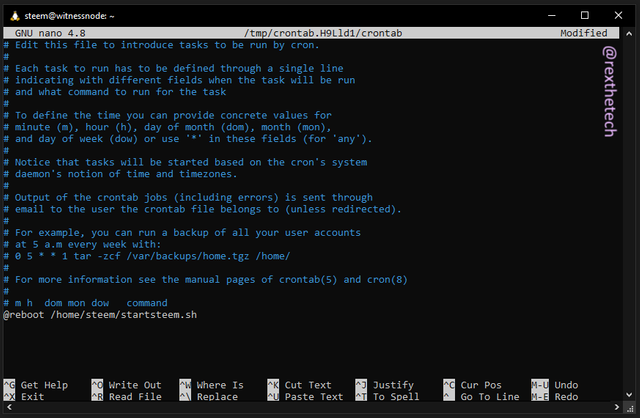
You'll see a file open which is full of comment lines (starting with #). At the end of the file, add:
@reboot /home/steem/startsteem.sh
So that it looks like this.
As usual, Ctrl-O then Enter to save, then Ctrl-X to exit nano.
Finally, we have to make Docker itself start on boot as well:
sudo systemctl enable docker
If you'd like to test that Steem starts automatically at boot time, reboot the server with:
sudo reboot
Of course, you'll need to wait a few minutes for the server to reboot before logging back in.
Woah, we have a Seed Node!
This was a landmark episode so huge thanks for sticking with me, and well done if you're successfully replicating the process yourself.
I left out the actual Witness config for today since this article's already on the huge side, so we'll pick that up next time!
In the meantime, we now have a fully functioning Seed Node, which is a worthy goal in its own right.
Series Index
Part 1: We need a big computer!
Part 2: Connecting to the server
Part 3: Securing the server (see also Passwords: A Rant)
Part 4: Enabling certificate authentication
Part 5: Downloading the blockchain
Part 6: Unpacking the blockchain and configuring Steem


Great series, I found it very interesting.
One question, is there a reason why you remove the container in stopsteem.sh and create it again using startsteem.sh? For example, if the wintess is to be stopped for maintenance, wouldn't
docker stop witnessand thendocker start witnessbe easier?Thanks! The main reason to do a full teardown in the stop script is in case we change any of the port forwarding etc config for the docker run command.
In that case I don't believe just docker "stop" and "start" are enough to get the new config loaded, so instead of having 2 levels of stop / start ("warm" / "cold") we just simplify and keep a single pair of scripts that always tear down the container.
The time difference between a simple stop and a full teardown is negligible too.
#lucky10
Oh, what a lovely surprise, thank you!
Good day, Please what do luck10 means, I have seen to and O1 use it recently
A way to reward meaningful interaction on the platform to encourage good quality comments, @starrchris.
This is a nice idea, I think I will also join you in this project 🌝, because it's for the growth of
steem Blockchain.
thankss for the reply now I know better.