My Mackbook Pro bricked so I built a more powerful Hackintosh Mac Mini and saved around $500!
Hackintosh: CustoMac Mini
Hi! I'm Magnus. I decided to build a CustoMac Mini Hackintosh this first week of August and document it for steemit!
This is my first try at building a hackintosh computer, and I felt confident of success with the recommended hardware and installation procedures from tonymacx86.com.

I also had the safety net of a very computer savvy friend(to be known as hunterx11) during the build and installation process, which came in handy for troubleshooting some post-installation problems like getting the computer to recognize 32GB of RAM. We used a motherboard specific guide for El Capitan at tonymacx86.com
Depending on which Apple Mac Mini we compare it to, I believe I saved around $500! It’s difficult to put an exact figure but it’s in the $400-$600 range. Although my case is much bigger than the beautifully compact Mac Mini, I have twice as much RAM and an equivalent CPU at a much lower cost!
My requirements for my CustoMac Mini build were that I have 32GB of RAM and 500GB SSD. This allows me to have much faster performance for video editing and color grading programs like Davinci Resolve, Lightroom and other Adobe CC applications. I am a filmmaker and this build will hopefully serve me well for many years!
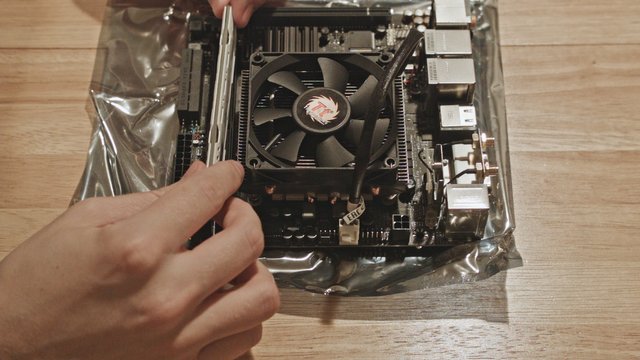
Attach the CPU
We forgot to put the plastic washers between the mobo and CPU fan screws, so we had to pull the CPU fan off and redo on the thermal paste... Luckily my friend had some high quality thermal paste lying around!
Install 32GB(16GBx2) RAM
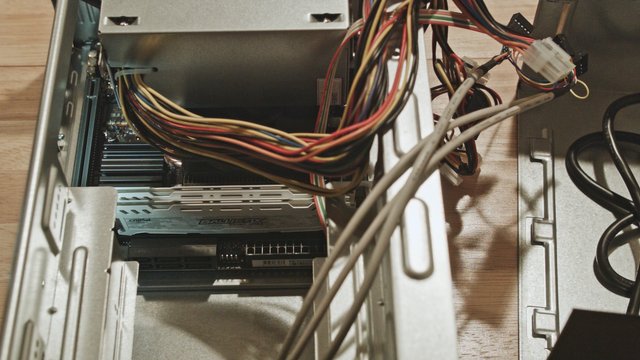
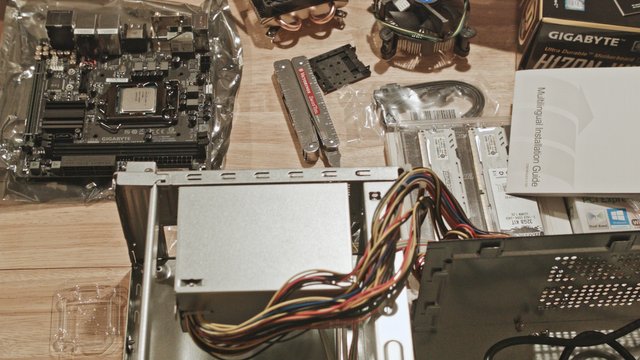
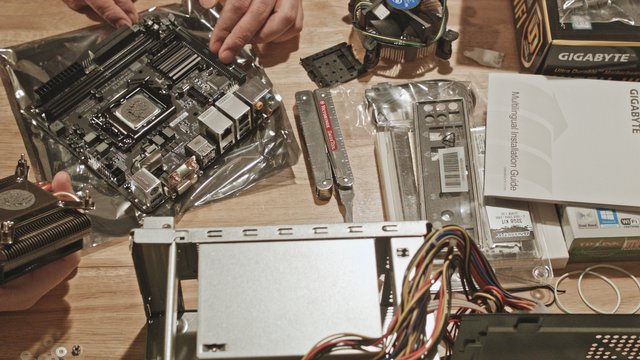
Motherboard and SSD install, and connect all wires
CustoMac Mini Build Specs

- Case: MI-008 Tower Black P4 Chassis with 250W Itx Psu+sata Power Supply ($55)
- Mobo: Gigabyte LGA1151 Intel H170 Mini-ITX DDR4 Motherboard GA-170N-WIFI ($118)
- CPU: Intel Boxed Core I5-6500 FC-LGA14C 3.20 Ghz 6 M Processor Cache 4 LGA 1151 ($205)
- CPU fan: Thermaltake Slim X3 Low Profile CPU Fan for Intel LGA775/LGA1156 ($21)
- RAM: Ballistix Sport LT 32GB Kit (16GBx2) DDR4 2400 ($128)
- SSD: Samsung 850 EVO - 500GB - 2.5-Inch SATA III Internal SSD ($161)
- Wireless Card: TP-LINK N900 2.4GHz Wireless Dual Band PCI Express Adapter ($39)
Total Cost on Amazon: $727 +$42Tax = ~$770 (as of August 2016)
Things I already had:
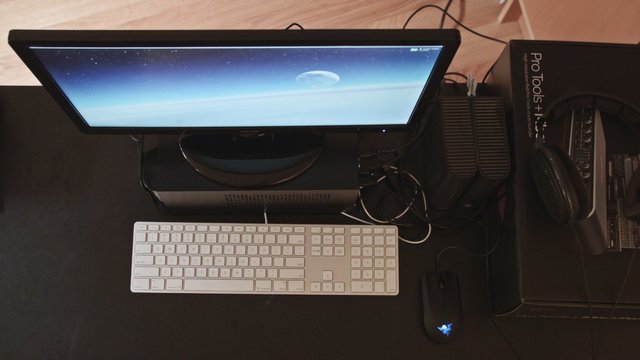
- Keyboard: Apple Aluminum Wired Keyboard (~$65)
- Mouse: Abyssus Razer Mouse (~$65)
- Monitor: 20” Acer S200HL (~$130)
You might ask, “Why even bother with Mac OS? Why not just build a more powerful Windows machine?” and that is a very good point.
I mainly choose to use Mac OS for compatibility with collaborators in the creative fields who use Macs. Oh, and it’s also fun to build a hackintosh, it feels like I’m getting a Mac machine at a non-monopolized price, because I am! Thanks to all those who have paved the way before me, and made relatively easy step-by-step build guides!
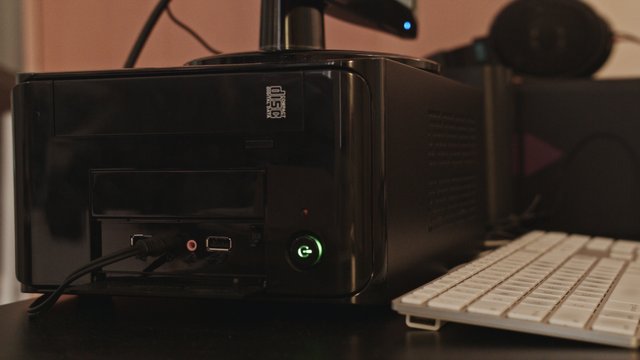
Final desk setup
I think in the years to come, my future hackintosh build will rival the Mac Pro “trashcan”, but for now this little beast will suffice.

- @allmt on steemit
Definitely on my bucket list to do something like this :) For anyone who'd like more info on installing MacOSX on the hardware, the guides here will help, for sure: http://www.tonymacx86.com/forums/el-capitan-desktop-support.180/
yeah, each configuration has various potential installation issues. thanks
A few years' back I installed OS X on two non-apple computers. One was a Compaq notebook which I specifically bought for it's OS X compatibility, the other a custom built PC. Both worked fine, but had a few quirks I had to get used to, like no sound, or wifi issues, and one of them was bricked by an update. After a while I went the (slower) emulation route and forgot about my hackintosh projects.
Your post is making me think of getting another try. Got any tips on the software side of things? How did you manage it to recognize the 32 gigs of ram? Cheers, mate!
Glad I can inspire! I mainly went by the guides on tonymacx86.com, it goes into detail about what BIOS settings to change before installing the OS, and doing post installation with unibeast and multibeast to get everything working. As for getting it to recognize the 32GB of RAM, my friend helped me out there. We messed up the post installation the first time so we re-installed the OS and followed the exact instructions for our motherboard, I believe that solved the RAM issue, but my friend did a work-around by manually editing some files.
it's really amazing to build a Mac with this price
Good stuff!
Awesome project , thanks for reusing before recycling :D !
not sure if I reused, or recycled, but I sure save money!
OMG! my first @dantheman upvote!!!! Super Excited! Thank You @dantheman This plus an @ned upvote would be the Ultimate!!!
Hi! This post has a Flesch-Kincaid grade level of 11.5 and reading ease of 65%. This puts the writing level on par with Michael Crichton and Mitt Romney.