Gas Engine: Preventative Maintenance with an Oil Level and Air Filter Check
At least once a year I like to check the oil level and the air filter condition on my lawn tractor. Whether it's a boat, car, generator, lawnmower, or other small engine, with a little preventative maintenance the engine will last longer, run smoother, and more efficiently.

Depending on the engine, the amount of use, and the conditions that it has to operate under, it may be a good idea to check the oil level and air filter more often than once per year. I mostly use my lawn tractor for towing the wagon and other items around the property, and was able to do most of the lawn mowing while towing. I've only filled up the gas tank twice this year - not what I would consider heavy use.
Lawn Tractor and other Engine Basics
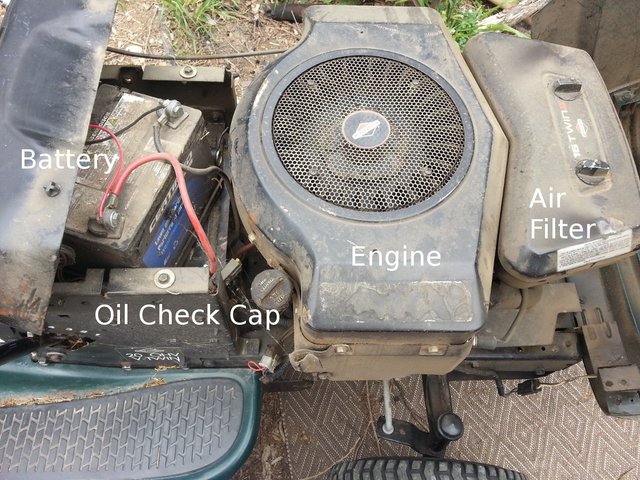
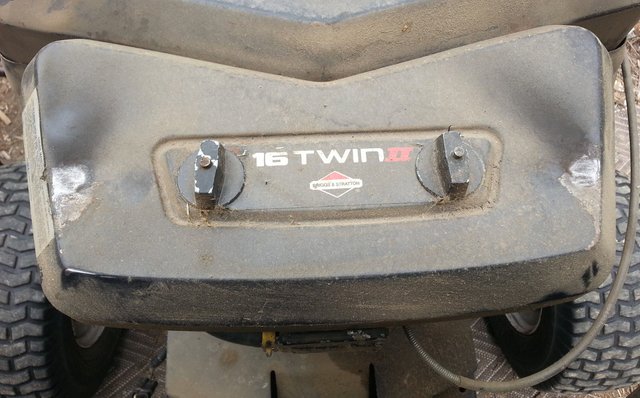
After opening the hood of the lawn tractor, you can see the engine for maintenance labeled on the picture below.
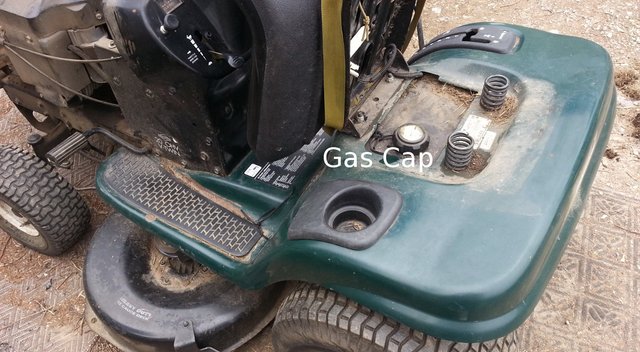
The fuel cap access for riding lawnmowers might not be as obvious - for mine, after tilting the seat forward, you can see the location of the fuel cap in the picture below.
Oil Level Check
Low or no oil will ruin an engine quickly. The engine is the most expensive part of the lawnmower. If your engine is new to you, be sure to check the oil level of the engine. Bring it to the correct oil level with the proper oil. Check the oil level after each use for the first few times using the engine to be sure there are no oil leaks.
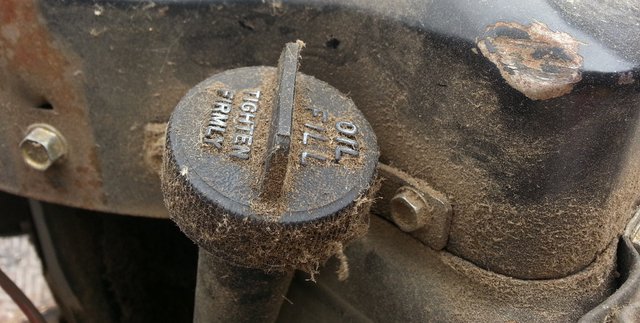
You can see the oil cap for level checking and oil adding in the picture above.
1 - Unscrew oil check/fill cap and pull out dipstick
After unscrewing you can see the cap has a long metal stick attached to it called the dipstick - for dipping into the engine oil to check the level. In the picture below you can see the oil is all the way up the dipstick. This is from the oil churning in the engine the last time the engine was on.
2 - Wipe the oil off the dipstick with a rag or towel and slide back in
You can see the clean dipstick in the picture below - before sliding it all the way back into the engine - where it came from.
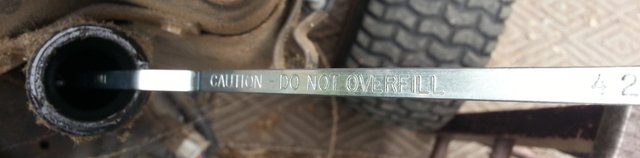
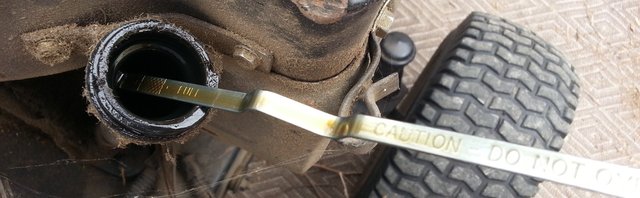
3 - Pull the dipstick out of the engine once more to check the level
In the picture below you can see the oil level on the dipstick.

4 - Add oil if necessary then screw the dipstick and oil check/fill cap back into place
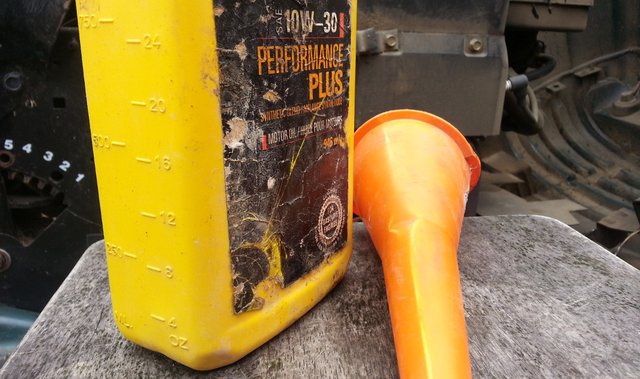
I was happy to see that the oil level looks perfect on the dipstick. The oil level should be within the grid lines of the dipstick. If it falls below the grid then more oil needs to be added. This dipstick advises to add 8oz of oil be added if below the grid lines. It also cautions not to over fill. In the picture below you can see the funnel that I was going to use to add oil to the dipstick hole under the oil check cap on the engine. You can also see the measurement guide on the side of the oil container. Be sure to use the correct oil for your engine when adding oil.
Air Filter Check
Gasoline engines need an clean airflow for the engine to run properly. Without an air filter, dust, grass, and other debris can damage the engine. If the air filter gets too clogged or dirty, it will limit the air supply and choke the engine and cause it to not run smoothly - or not at all. It is important to check the air filter to clean it if you can, or replace the air filter with a new one of necessary.
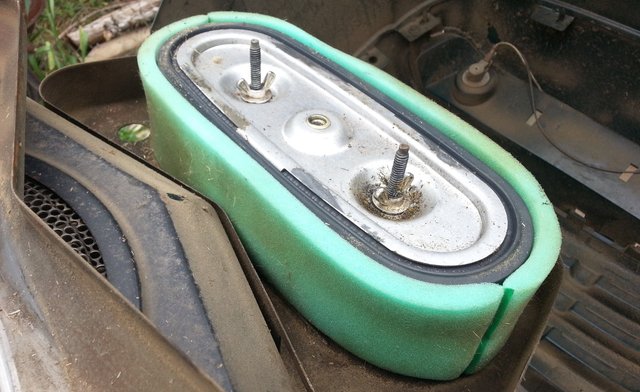
1 - Unscrew the air filter cover nuts and remove filter cover
|

|
In the picture above - on the right - you can see the light green foam pre-filter.
2 - Remove the pre-filter if there is one and remove debris if possible.
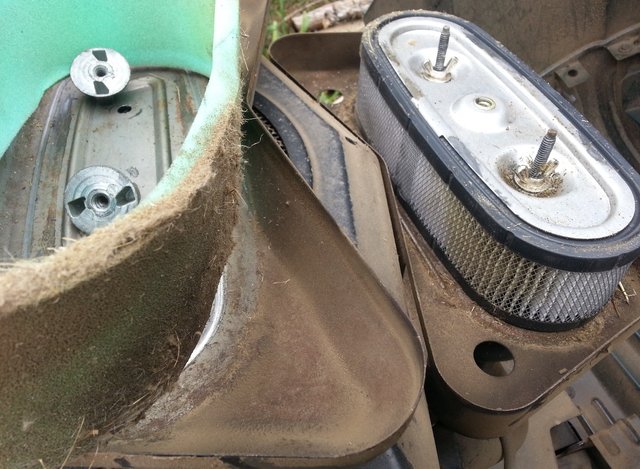
After removing the pre-filter, you can see the mostly white washboard style filter. The primary air filter looks very clean and won't need to be replaced. You can see the wingnuts holding the primary air filter in place. These would be unscrewed to remove, and clean or replace the filter.
3 - Clean or replace clogged with debris air filters
4 - Put the primary filter back into place after cleaning or replacing it, then tighten down the wingnuts on the primary filter if the filter was removed
5 - Slide the foam pre-filter back over the primary filter after cleaning or replacing
In the picture below you can see the pre-filter has been slid back into place after cleaning the grass and debris off of it.
6 - After putting the air filter cover back on, tighten down the nuts to hold it in place
With a little preventative maintenance, engines will last much longer, and save time and money on expensive repairs.
Previous posts that may interest you:
Nice clean, easy to follow post. Briggs and Stratton engines will run a long time with a little maintenance. My push mower is 18 years old :)
They don't build most consumer small engines like they use to. I didn't even want to look in the stores when it was time to buy a lawn tractor, I wanted the reliable older model :)
Great post! I just followed you and upvoted you! Follow me back @relsserd.
Yeah nice one JD.
People who neglect this type of action will always regret it in the end...
Do you do anything different or more regularly for the heat of summer or for the moisture of winter? Extremes can be just as damaging too.
Thanks - I dont drive the tractor after the snow is on the ground. I have a snowblower for the driveway in the winter. The engine is a little slower to start when it gets cooler, but the choke easily remedies that :) The 12 volt lead acid battery keeps full, so it handled the past winter without needing a charge in the spring.
Oh my! My husband will thank you for this one. Thanks very informative
Good sound advice and easy to understand with the pictures. Nice job Jack.
Great post, I just shared a series of posts about my maintenance work on my car not un-similiar to what you did for your tractor.
These are such simple tasks that most people can check and perform themselves that can ensure the longevity of a gas engine, yet many neglect it until things start to grind and fluids start to leak.
Congratulations! This post has been chosen as one of the daily Whistle Stops for The STEEM Engine!
You can see your post's place along the track here: The Daily Whistle Stops, Issue 207 (7/26/18)
The STEEM Engine is an initiative dedicated to promoting meaningful engagement across Steemit. Find out more about us and join us today.