My backyard garden, converting an empty yard to a productive yard for the family.
How I build my wicking garden beds.
First I cut all the timber needed. I used ACQ Arsenic Free H4 treated pine timber that has a 'Cherrypine' colour.
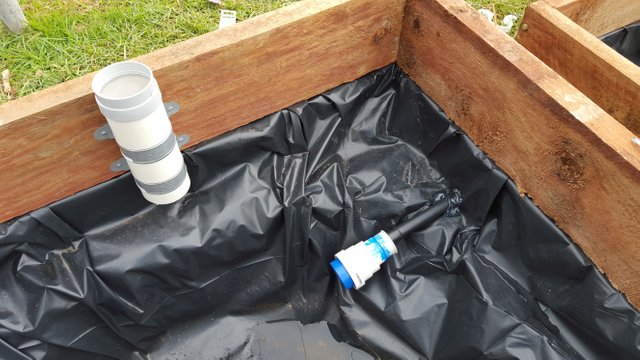
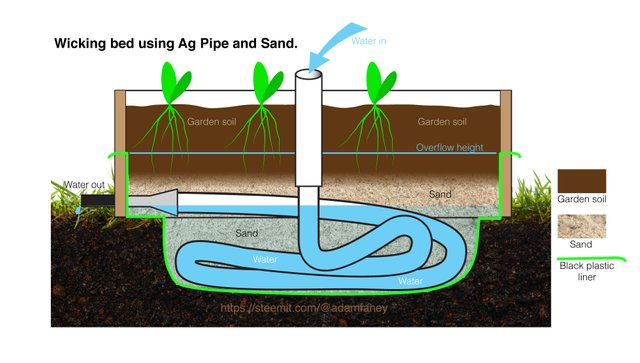
I placed the black plastic liner at the bottom of the hole and attached the water IN and OUT pipes that attaches to the Ag pipe. The black plastic liner doesn't go all the way to the top. The reason for this is so if the garden beds were ever to be flooded from heavy rain some of the garden soil will stay less water logged and hopefully not damage the plant roots.
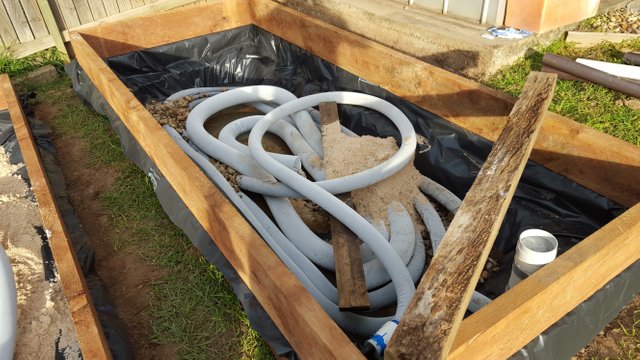
I used alot of Ag Pipe that has a cloth sock over the pipe. Its was easy to use and stayed in place once some sand was placed over it.
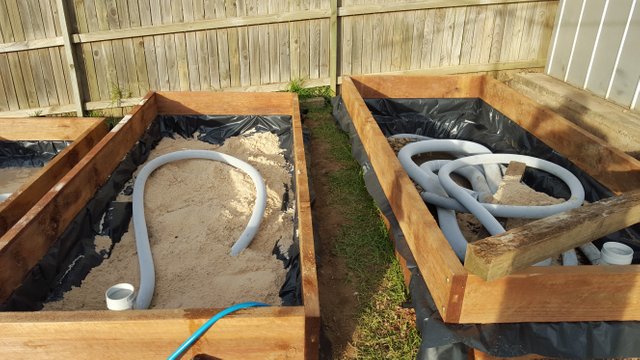
The reason I used Ag Pipe and sand to create the wicking part was the Pipe with a sock cover is a closed system so no dirt can get in except for the end outside the garden bed. The sand would wick the water up to the garden soil better than if I was using gravel or stones and the sand has more contact with the areas of water at the bottom.
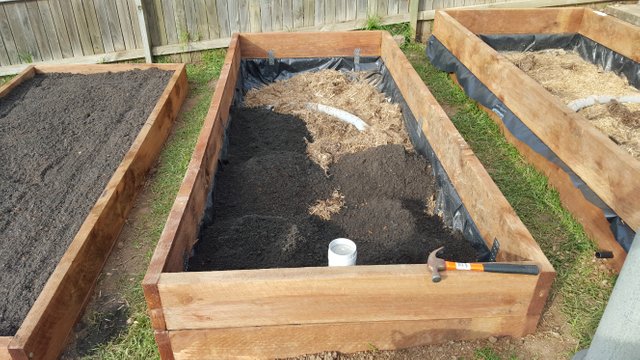
I put a thin layer of sugar cane mulch between the sand at the bottom and the garden soil at the top of the garden bed. I read is helps stopping the sand and Garden soil from mixing.
Once the beds were filled to the top with garden soil I created a border on the ground around the garden bed area and placed wet news paper than wood chips. I did this to stop any grass from growing up against the sides of the garden beds.
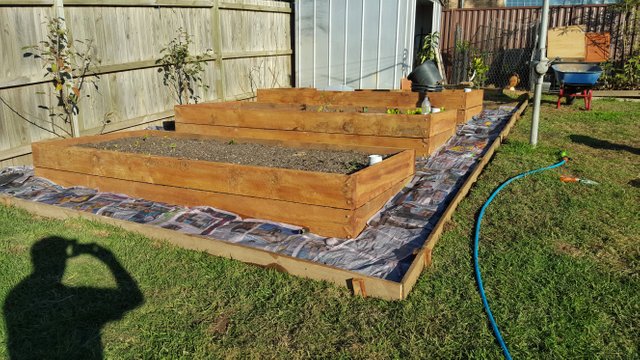
That's basically how I made them, if you have any question about them I'd be happy to answer them. Later on I set up shade cloth but I'll show that in later posts.
My next project after this was to work on a retaining wall and to level the backyard. I'll post soon on this project.
Wicking veggie garden beds and composting area.
Growing veggies in Australia's climate can be a challenge sometimes with the summer heat and poor soil. One of the first things I wanted to build was a compost bin at the top of the hill that allowed the nutrients to flow down the hill when it rained. The other must have item were wicking garden beds for my vegetables to help them during the hot days of summer.
In the next couple of posts I'll show how I made them with photos.
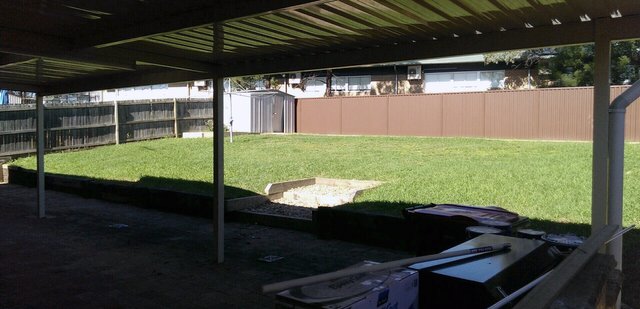
Before I started.
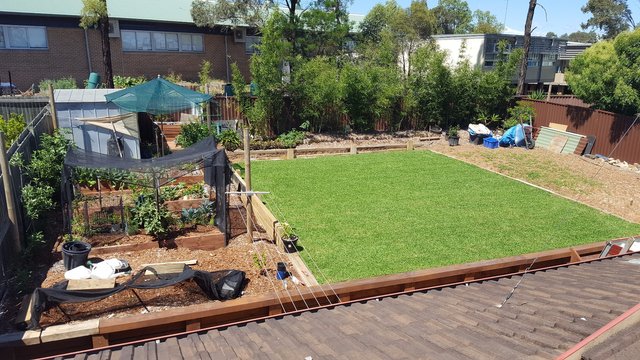
One of the best features of this property was the backyard that had full sun during the day all year and it was almost a blank canvas. This photo below was taken mid winter.
Hello and welcome to my backyard located in Sydney Australia.
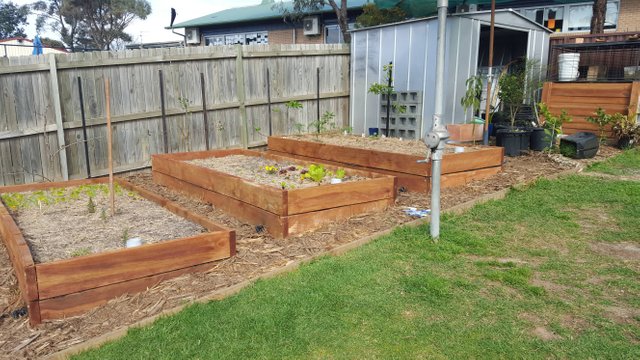
Over time I'll be uploading photos and talking about how I have established my backyard.A thriving veggie patch, a play area for my kids and a relaxing seating area for entertaining.
Over time, I will keep adding more updates and future projects.
Congratulations @adamfahey! You have completed some achievement on Steemit and have been rewarded with new badge(s) :
Click on any badge to view your own Board of Honnor on SteemitBoard.
For more information about SteemitBoard, click here
If you no longer want to receive notifications, reply to this comment with the word
STOPBy upvoting this notification, you can help all Steemit users. Learn how here!
Hey there, we have a pretty strong Team Australia community going here on steemit to support each other. If you'd like to be part of it, then please check out this link: https://steemit.com/teamaustralia/@choogirl/team-australia-new-recruits-update-02-07-17
Hi Choogirl, thanks I'll have a look. I'm still working Steemit out!
I know, it takes a while. Hopefully there's enough info in my link. Check out @sirknight as well - he started the whole thing.