ENS Domain Names, Complete Step-by-Step Instructions (Pictures!)

How to set up a custom wallet for your Ethereum.
This is not a quick process. The bidding and reveal phase will take at least five days although you will probably only spend about 30 minutes and $4.00 running through all of the steps. So settle in and lets get to it!
Assumptions
This walk through assumes you are using chrome, have the meta mask extension installed and setup. If not, start here: https://metamask.io/
You're meta mask account will also need at least $4.00 in ETH available.
Warnings
To win a eth name, you must bid for it and there is the chance someone will out bid you. My example below was performed with a name a I did not mind losing the bid for. I bid the minimum running the risk that someone would out bid me.
There are also some groups looking for domains that may be valuable in the future and placing large bids on them. For example there is a group bidding 0.358 in ETH on domains that appear to be last names. They are then turning around and offering them for resale.
- Reddit post about the problem
- Scan of all the bids the group has made: etherscan
Finally, I am not very knowledgeable of how Ethereum works or even how the ENS works but I have won and set up two names. It took me a long time to figure this out so I figured I would record the steps to help out anyone else who wanted a custom wallet as well.
Process
Day One
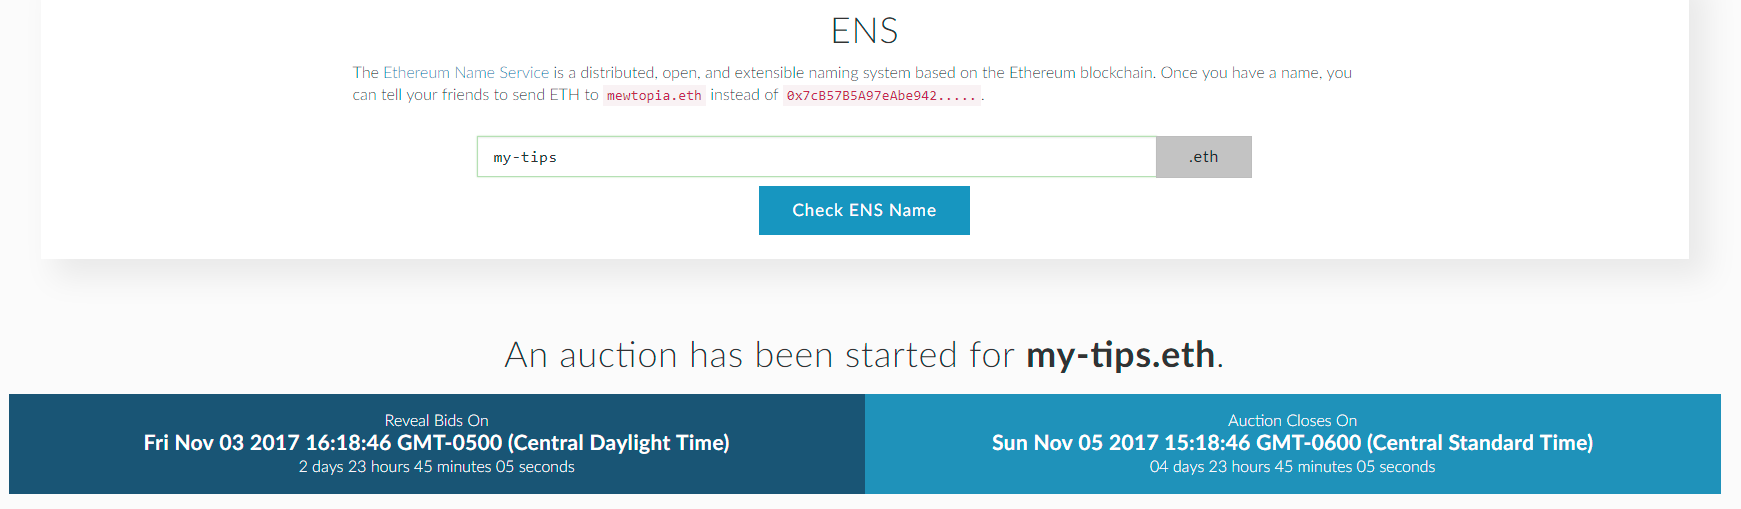
- Go to myetherwallet
- Find an ens name that is available
- Currently the name must be at least seven characters long. Smaller names will be available once the permanent registrar is released.
- This ENS system is still being developed. The final version of this system is expected to be out in two years and the rules governing names will probably change. Keep an eye on ENS Domains to ensure your wallet is compliant.
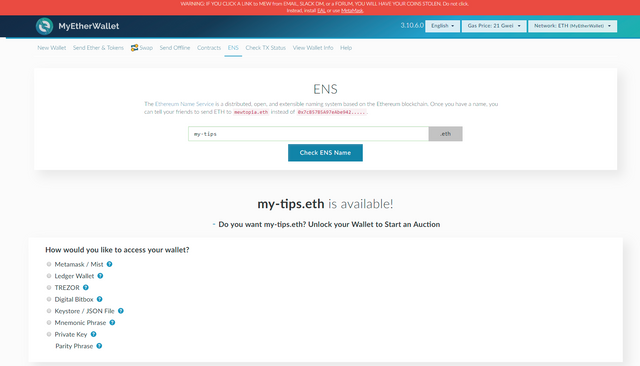
- Connect via Metamask
- The account you have activated in Metamask is the account that is bidding and will own the name.
- Make sure the account has enough ETH to cover the bid and transaction fees.

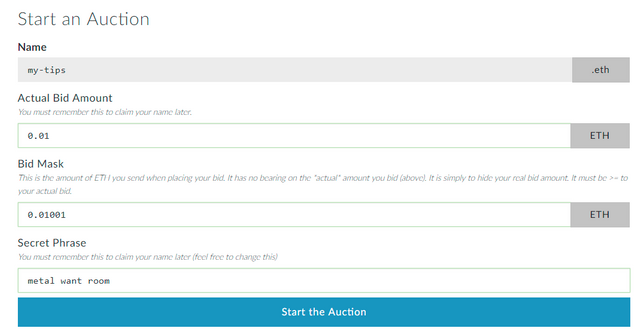
- Set bit and mask amount
- The bid amount must be greater than or equal to 0.01 ETH
- The mask amount must be greater than the bid amount. I made my masked bid as small as possible to avoid paying more than the minimum. This puts me at a greater risk of someone else bidding over me for my name.
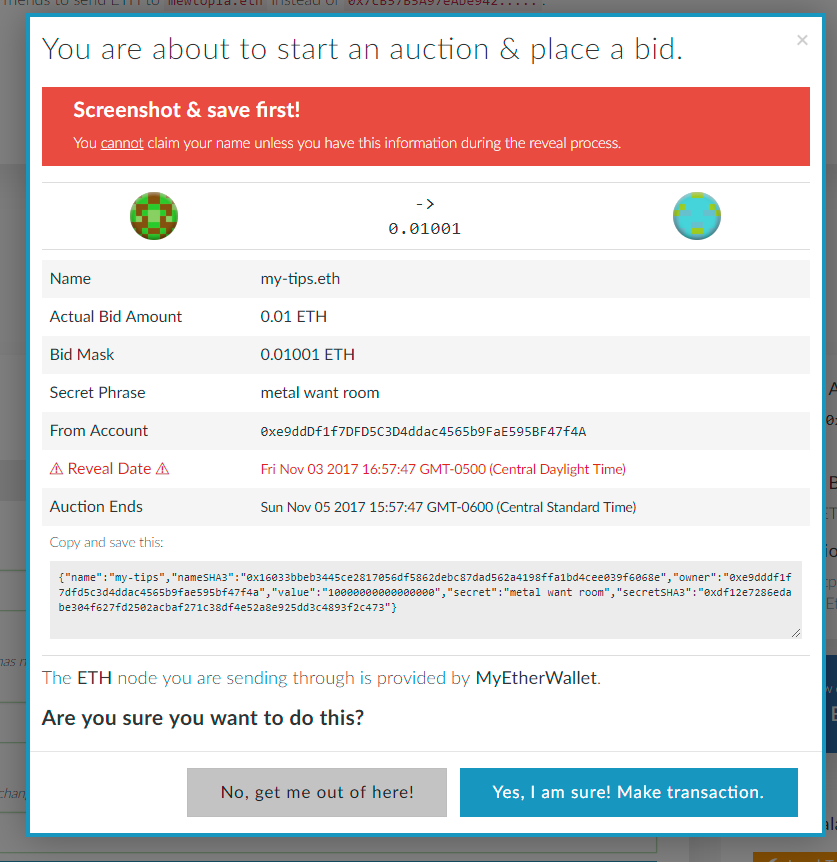
- Myetherwallet has generated the secret phrase for you. Save this information!
- Verify account, SCREEN SHOT OR SAVE INFO! You need the secret phrase and the bid amount saved.
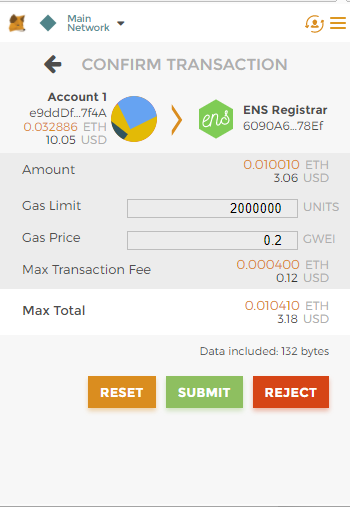
- Metamask notification, could be hidden
- The next step could show up as a pop up on your screen or it could be hidden under the chrome extension.
- Selecting the metamask chrome extension at the top right should allow you to confirm the transaction.
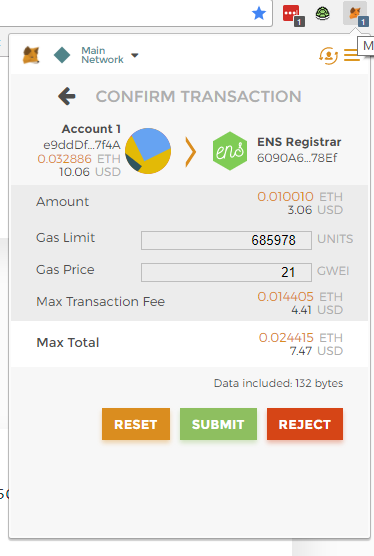
- Modify gas, ~ $0.10
- The default transaction fee is ~$4. Since I was trying to get this name as cheaply as possible I modified the gas a few times until I found a transaction fee that completed. I discovered that a transaction fee less than $0.06 had a good chance of failing while a transaction fee of $0.09 always completed. This transaction took at most 10 minutes. If there is an ICO occurring at the same time you are trying to bid, the times could vary drastically.
- The transaction fee is a function of the Gas Limit and the Gas Price
- The total I am paying is the masked bid plus the transaction fee

- Wait for confirmation, ensure completed
- In the metamask window, the transaction can be seen processing when it has three dots to the left of it.
- Once it is complete a symbol will replace the three dots.
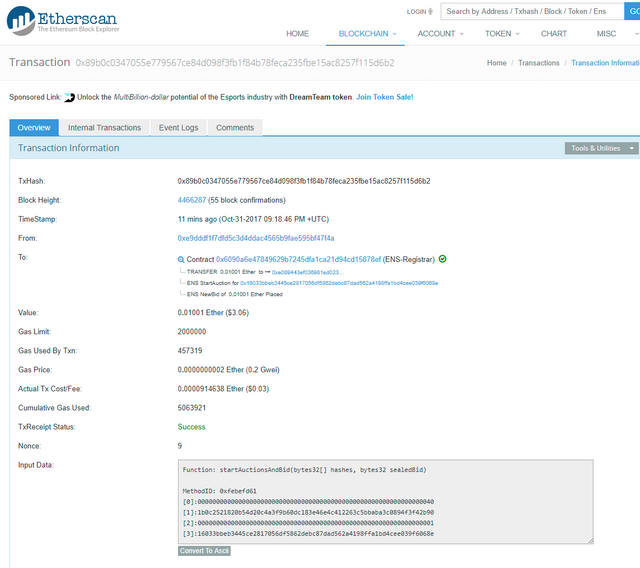
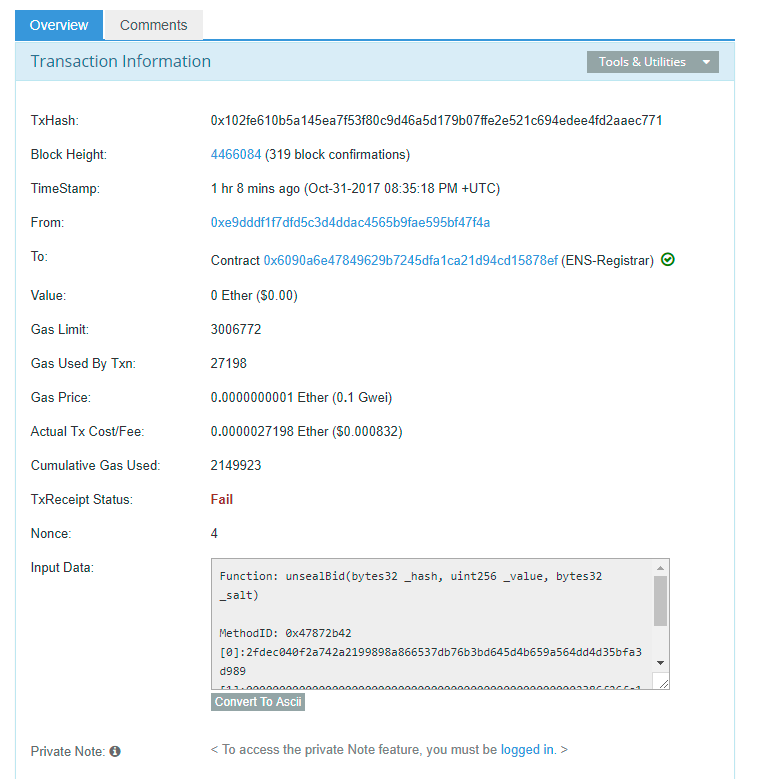
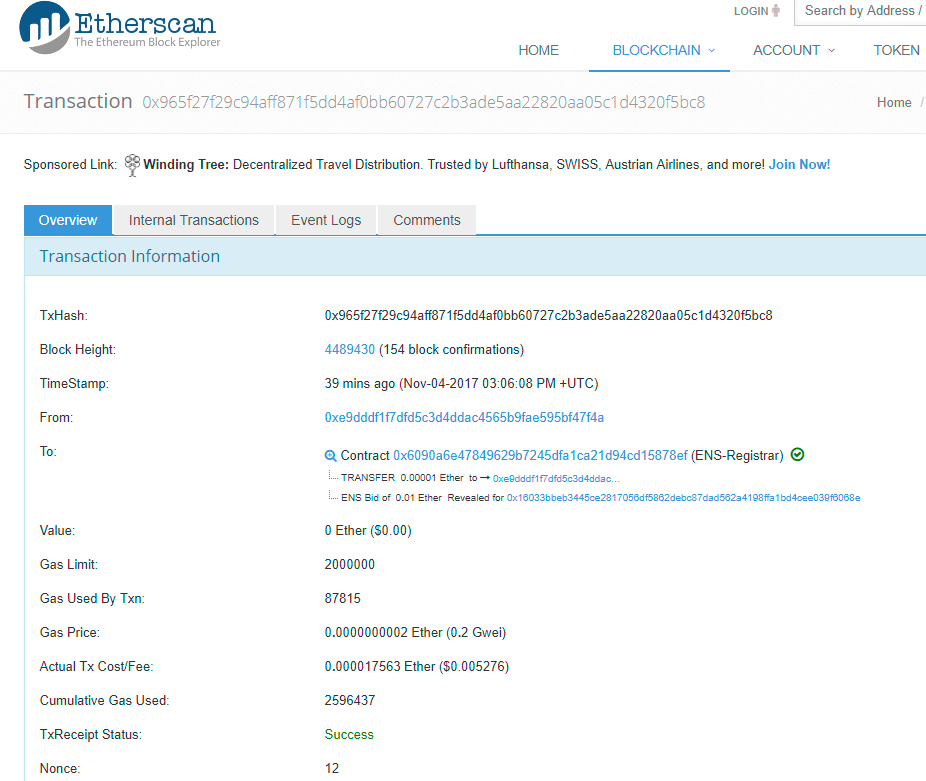
- CONFIRM THAT THE TRANSACTION WAS SUCESSFUL! Select the icon to be taken to an summary of the transaction. The To line should have a GREEN CHECK MARK and the TxReceit Status should say SUCCESS.
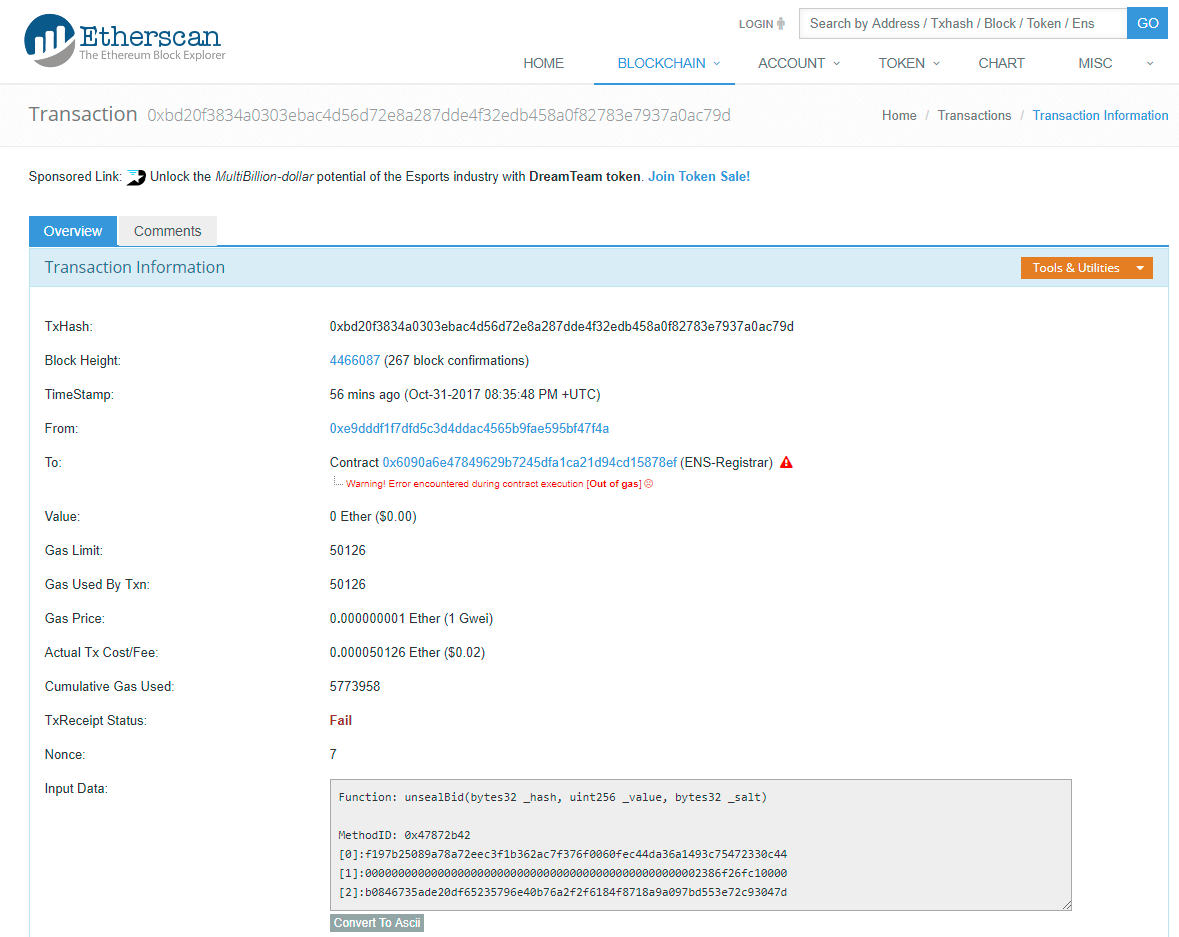
- Example of a failure, Out of GAS. This means you need to increase your transaction fee.
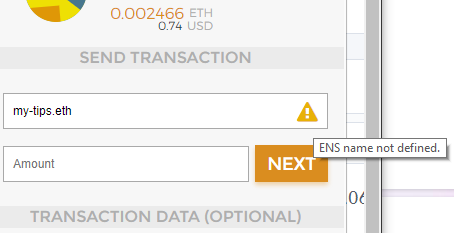
- Example of a failure, Wrong Data. In this case the transaction succeeded, but some information was entered incorrectly. This should not happen at this stage, but could happen when we try to resolve our address.

- In the metamask window, the transaction can be seen processing when it has three dots to the left of it.
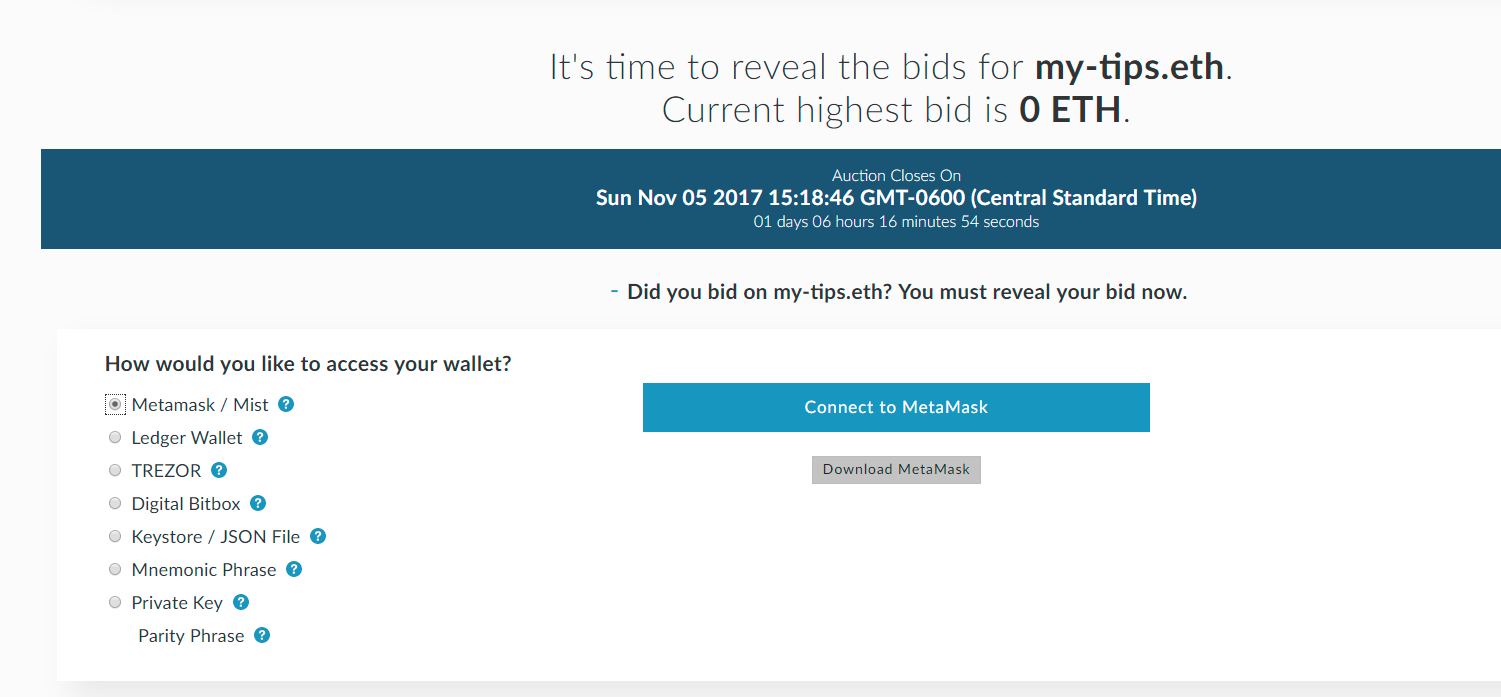
- Check time and set a timer
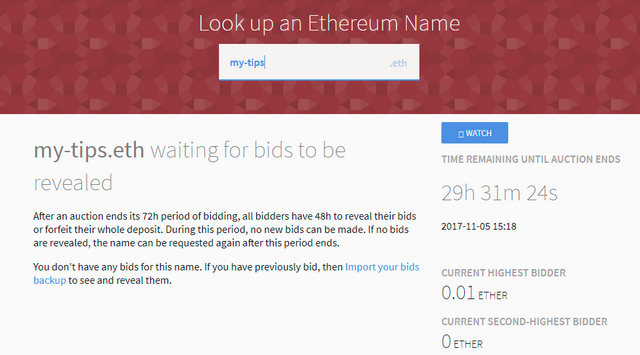
- Go back to myetherwallet and enter your ens name.
- If successful you should see this screen with a date and time at which the reveal phase will begin.
- Set an alarm and bookmark this page. You have completed the first step.


Day Two
- Go back to myetherwallet
- Make sure you are connected to Metamask and the account that bid on the name.
- Enter your ENS name
- Connect to Metamask and start the reveal process
- Reveal your bid
- Enter the ENS name, Actual bid amount, and Secret Phrase
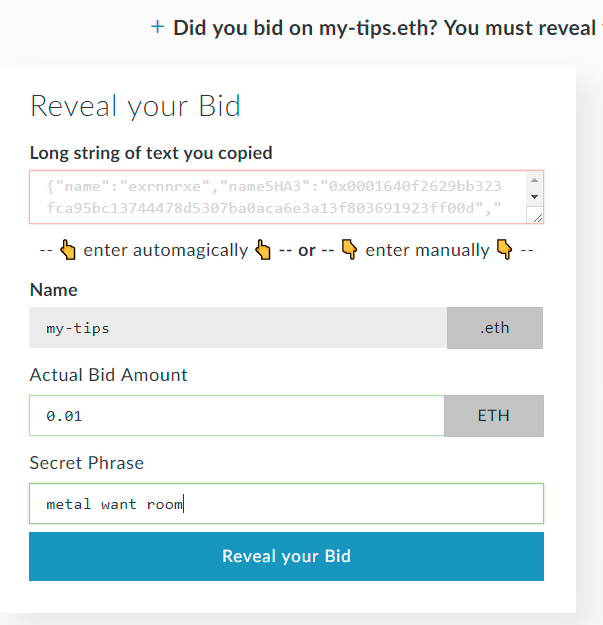
- Enter the ENS name, Actual bid amount, and Secret Phrase
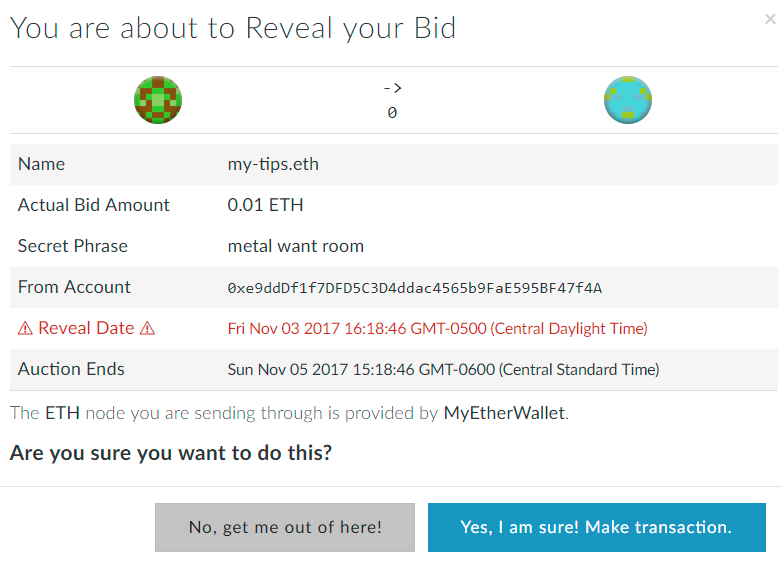
- Confirm you entered the correct reveal information
- Gassing and Confirm Transaction
- Repeat steps 6 - 8 from Day One.
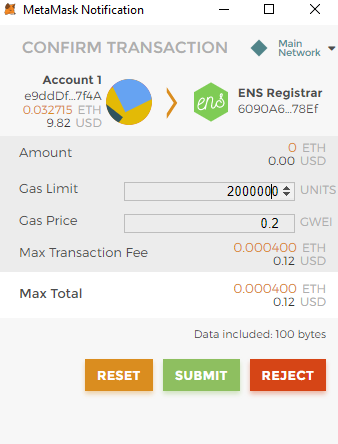
- Repeat steps 6 - 8 from Day One.
- Ensure complete
- Check the transaction
- Check the transaction
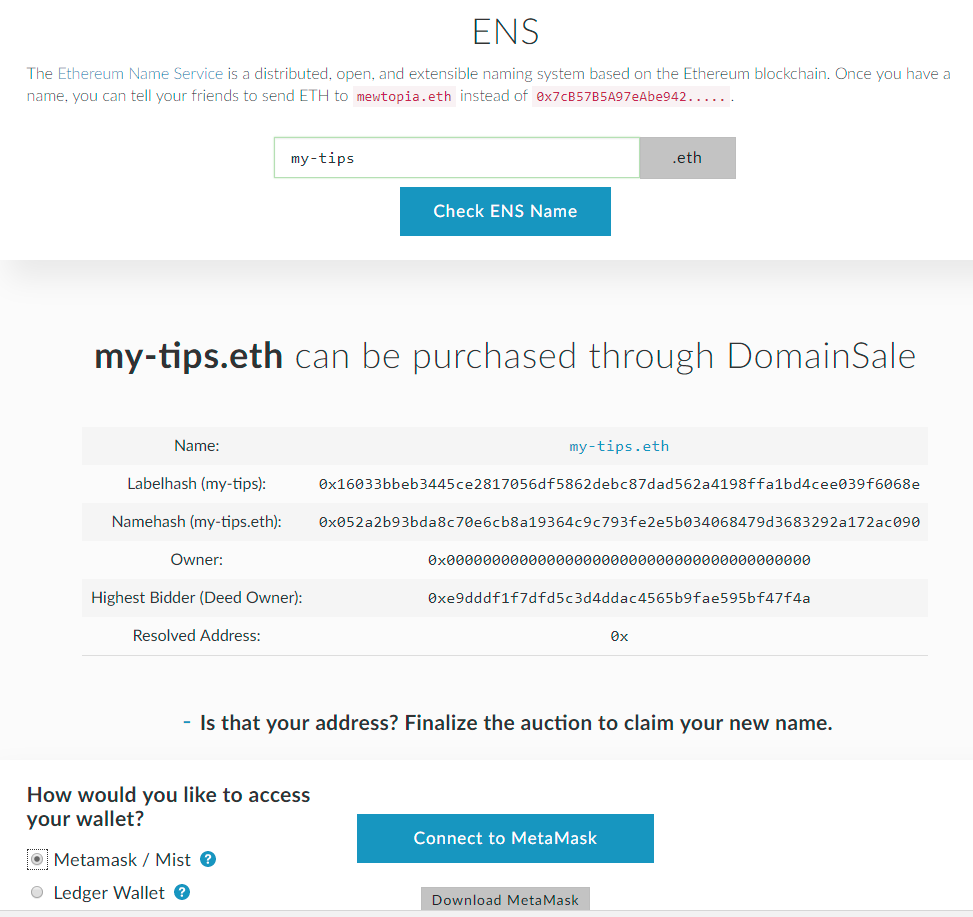
- Double check on registrar.ens.domains
- You can double check the reveal was successful by checking your name on the ENS Registrar. You should see your bid on the right. You will also find out here if you are the highest bidder.
- You can double check the reveal was successful by checking your name on the ENS Registrar. You should see your bid on the right. You will also find out here if you are the highest bidder.
- Check time and set a timer
- The reveal phase is 48 hours. Bookmark this page if you haven't and set your alarm. You have completed the second step.


Day Three
- Go back to myetherwallet
- Make sure you are connected to Metamask and the account that bid on the name.
- Enter the ENS name
- Claim address
- Follow instructions to claim address
- Repeat gassing steps 6 - 8 from Day One.
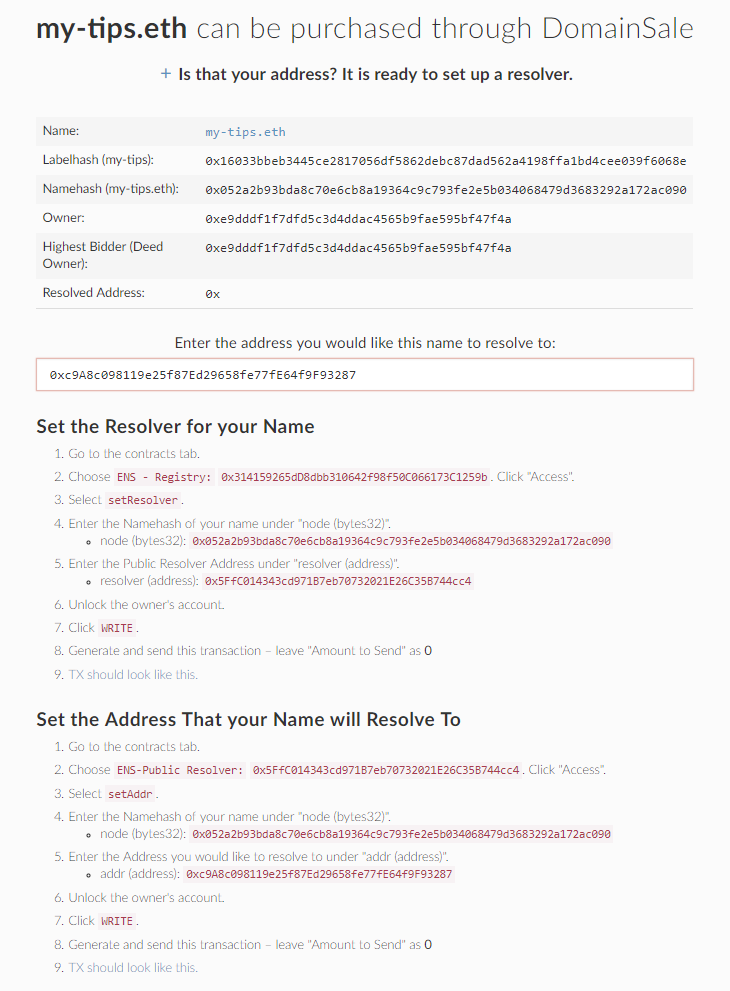
- Set up Resolver.
- I had to go refresh myetherwallet
- Enter your ENS Name and connect to Metamask
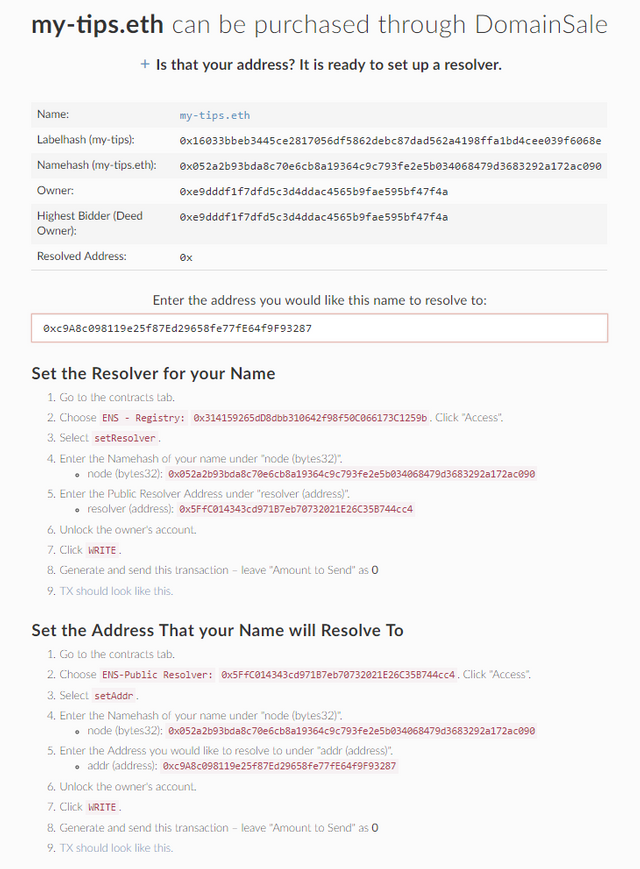
- Enter the address you would like the name to resolve to. This is the address that the ENS name connects to. You do not need to connect your new ENS name to the account that bid on it. For example, I set up a new account under Metamask called My Tips. I copied that wallet address and entered it into the resolve to field.
- Make sure you return to your Metamask account that you bid from originally before continuing.
- I opened up a new window and went to the contracts tab
- Follow the instructions under Set the Resolver for your Name
- You can try to find the contract in the drop down menu or you can copy and paste the address.
- Make sure you are using the addresses populated by myetherwallet and not using the addresses from my images above.
- Complete the steps and click WRITE
- Repeat gassing steps 6 - 8 from Day One.
- Set the Address your name will Resolve to
- Refresh the myetherwallet contracts page
- Follow the Set the Address That your Name will Resolve To instructions on the myetherwallet ENS page
- Complete the steps and click WRITE
- Repeat gassing steps 6 - 8 from Day One.
- Check to make sure the transaction was a success
- In the Metamask extension you can check to see if the account was connected. The example below shows a failure where I had not connected the address yet.
- When correct, you should see this:

- In the Metamask extension you can check to see if the account was connected. The example below shows a failure where I had not connected the address yet.
- That is it, you are done!


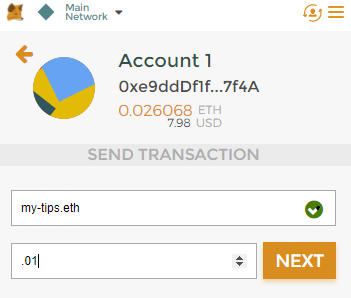
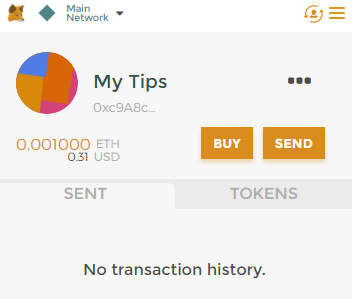
Test Transaction
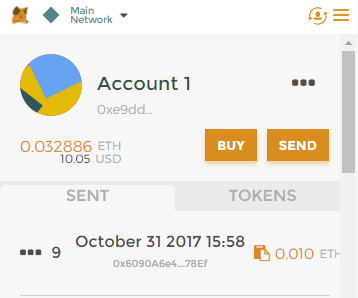
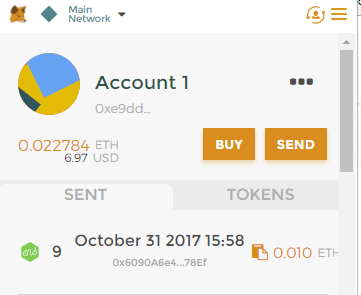
- Send test amount

- Profit?

Next Steps
You can now add sub.domains to your account and there are sites where you can sell or buy names that have been purchased previously. Also listed are sites I used to make my first purchases.
Profit?
This post and research has taken nearly 8 hours of work. If this helped you save some time, a tip would be appreciated.
You can find my wallet at my-tips.eth
Congratulations @embl! You have received a personal award!
Click on the badge to view your Board of Honor.
Do not miss the last post from @steemitboard:
Congratulations @embl! You received a personal award!
You can view your badges on your Steem Board and compare to others on the Steem Ranking
Vote for @Steemitboard as a witness to get one more award and increased upvotes!