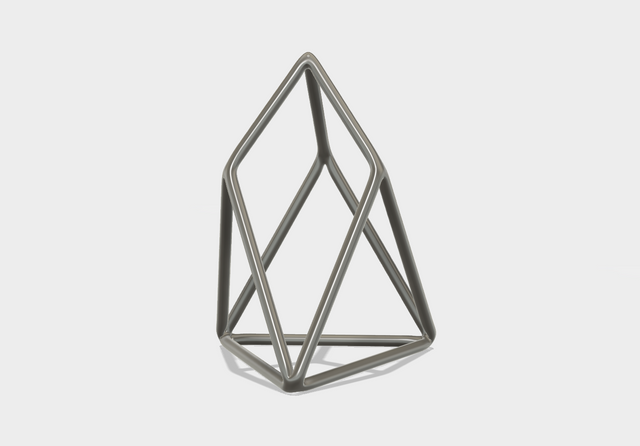
EOS Logo (Chestahedron) in Fusion 360

There doesn't seem to be a 3d printable EOS Logo out their, well that will change today.
Edit: STL file on Thingiverse
I thought it would be a nice idea to create a 3d printable EOS logo since I really love the shape!
The logo has been designed using Fusion360 and here are the steps.
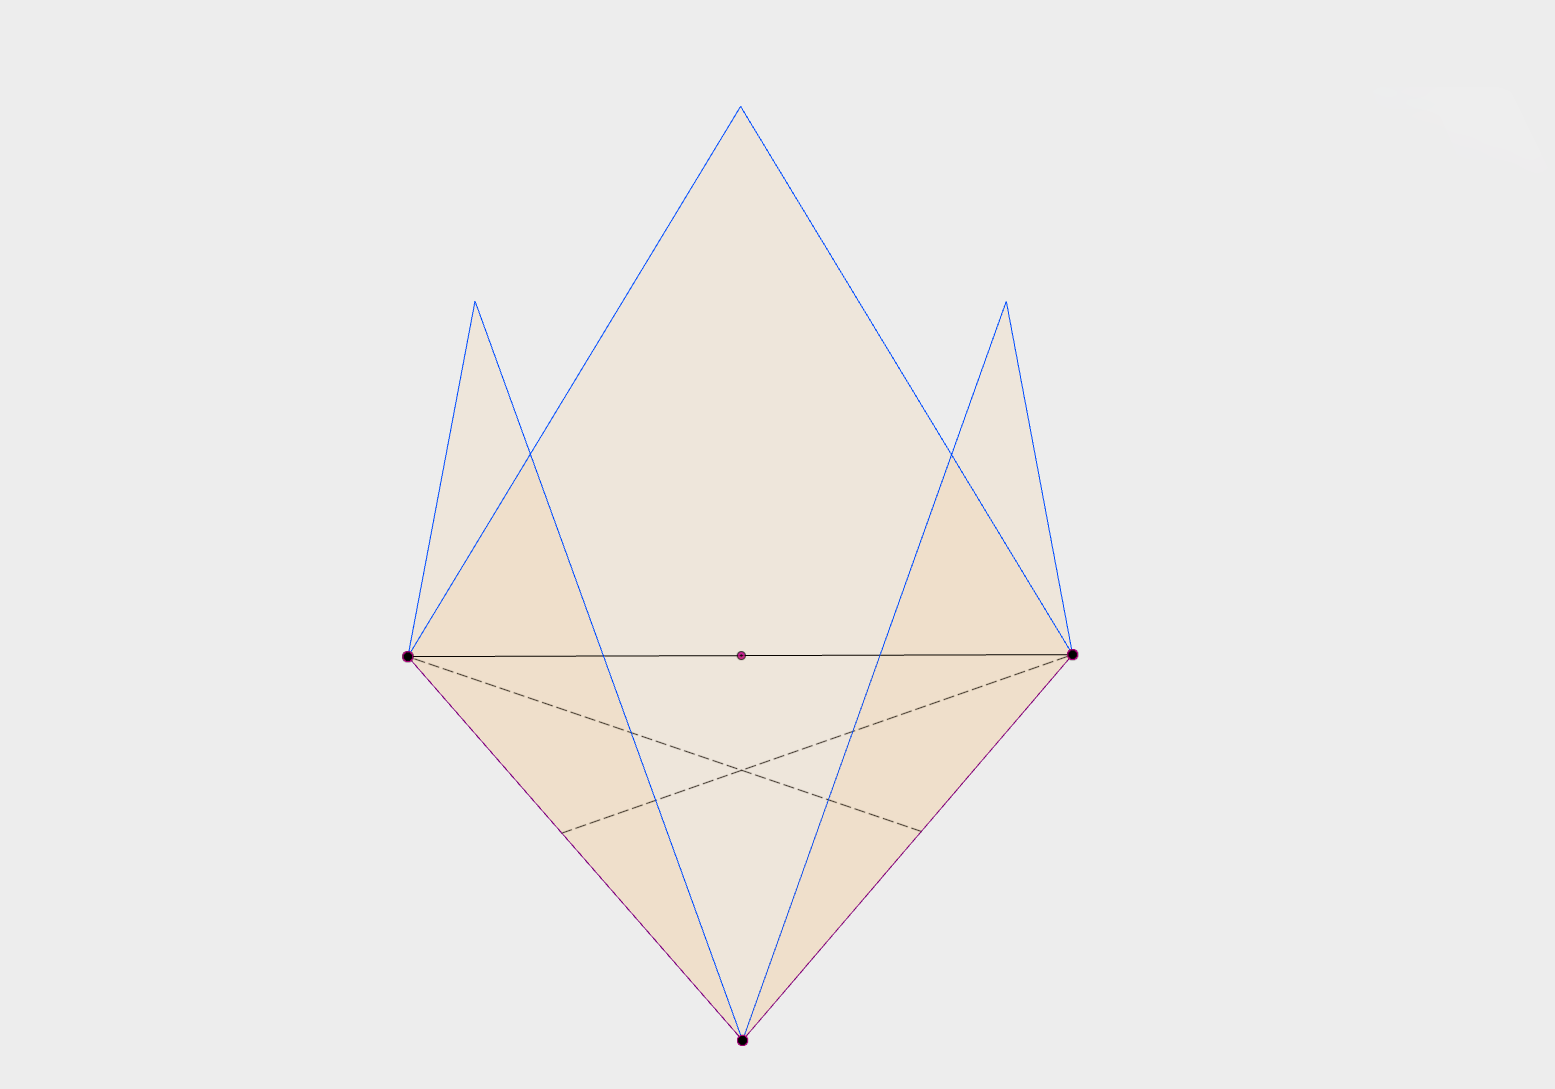
1. Equal sided triangle (Bottom and sides)
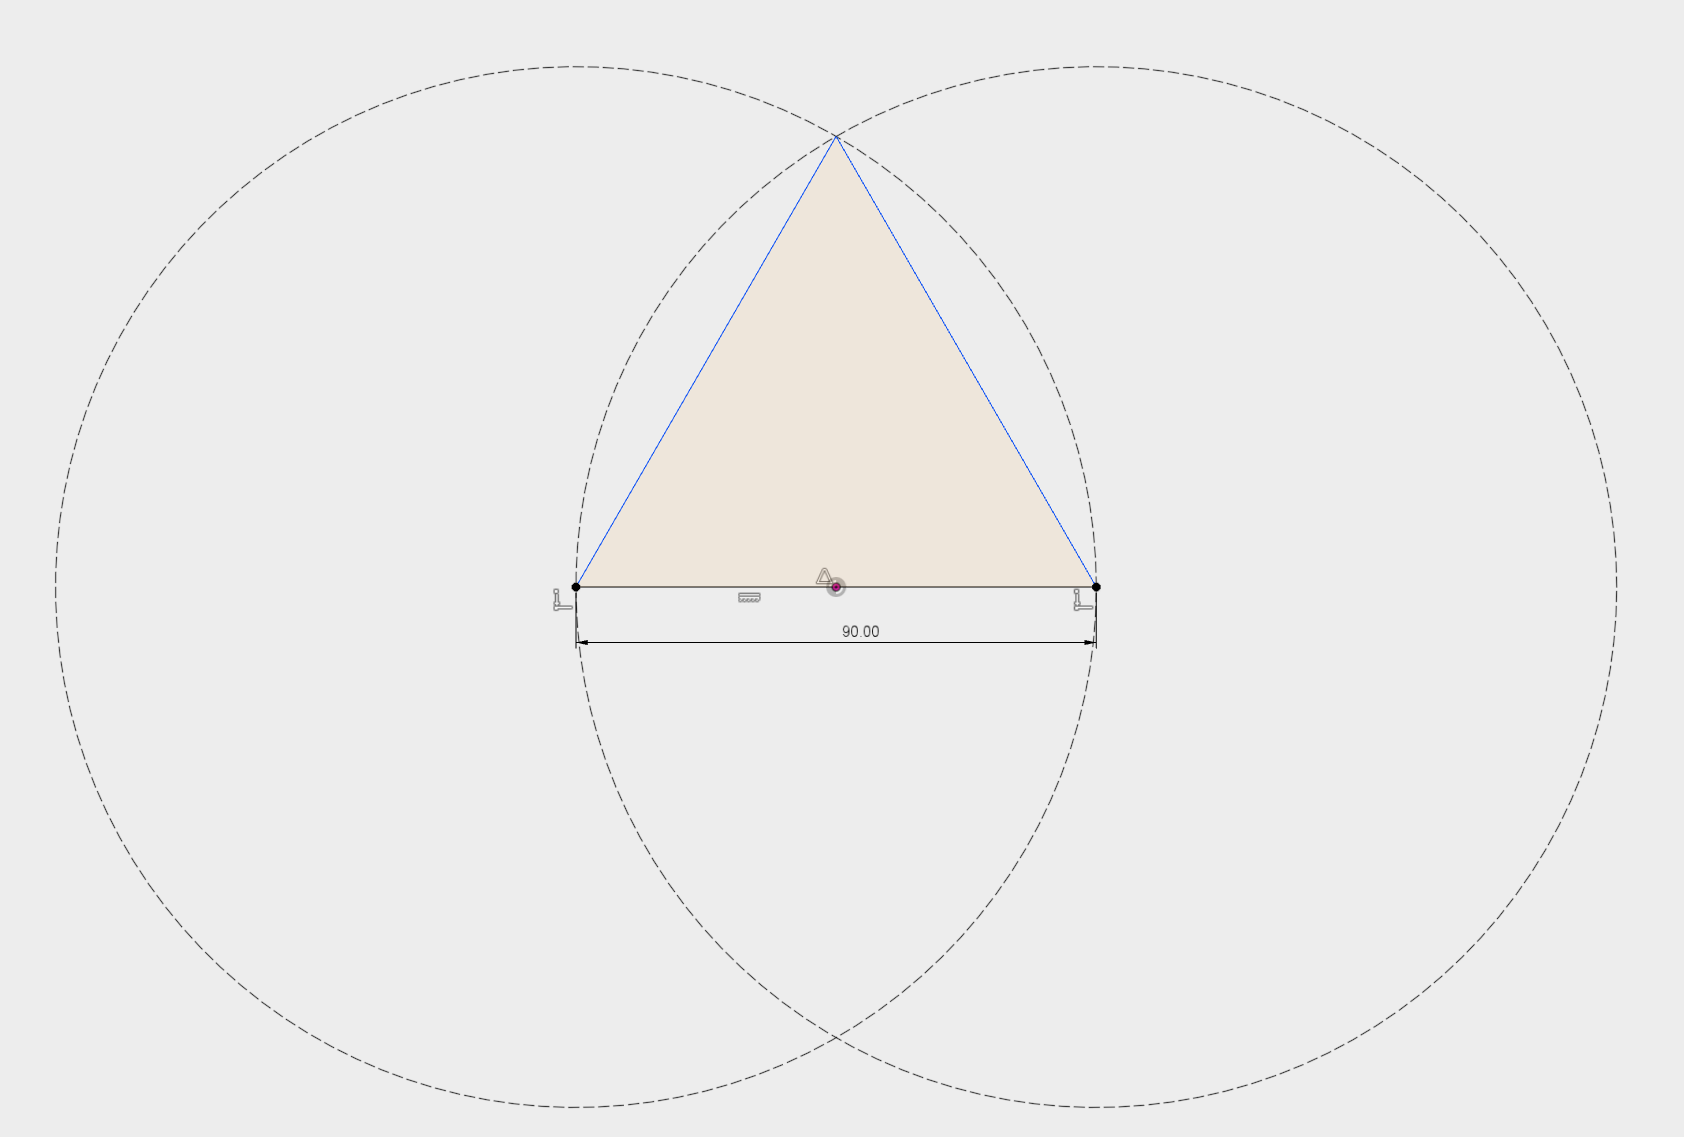
The bottom and side shapes are equal length sided triangles. Easiest way to draw those are by finding the intersection of two circles.
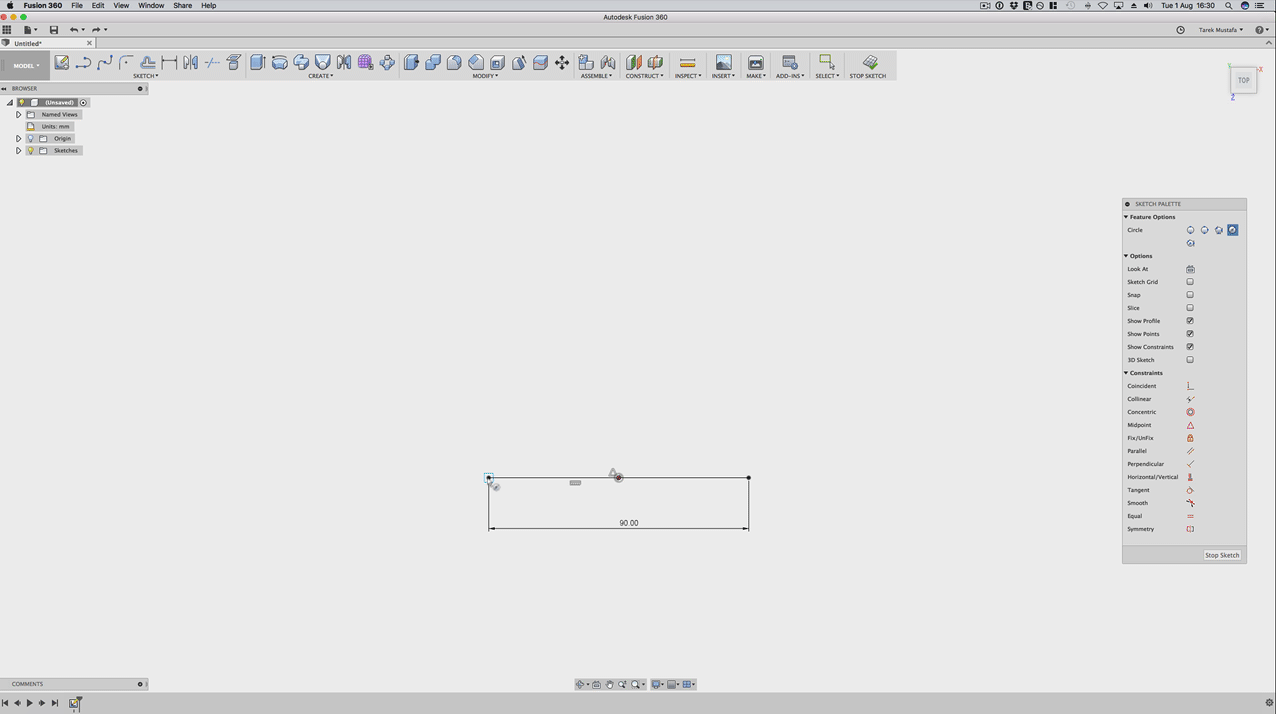
Once done I drew two support lines to determine the middle. I will need that for the top later on.

Next are the triangles on the side. Those are at an angle, I didn't find the exact angle so I just used an angle I thought looks close the original.
To place the sketch at an angle I used the Plane to Angle tool and selected the first side of the bottom triangle.
Than it is a repetition of the first step. Draw two circles and connect the intersection.
The Result for all three sides looked like this.
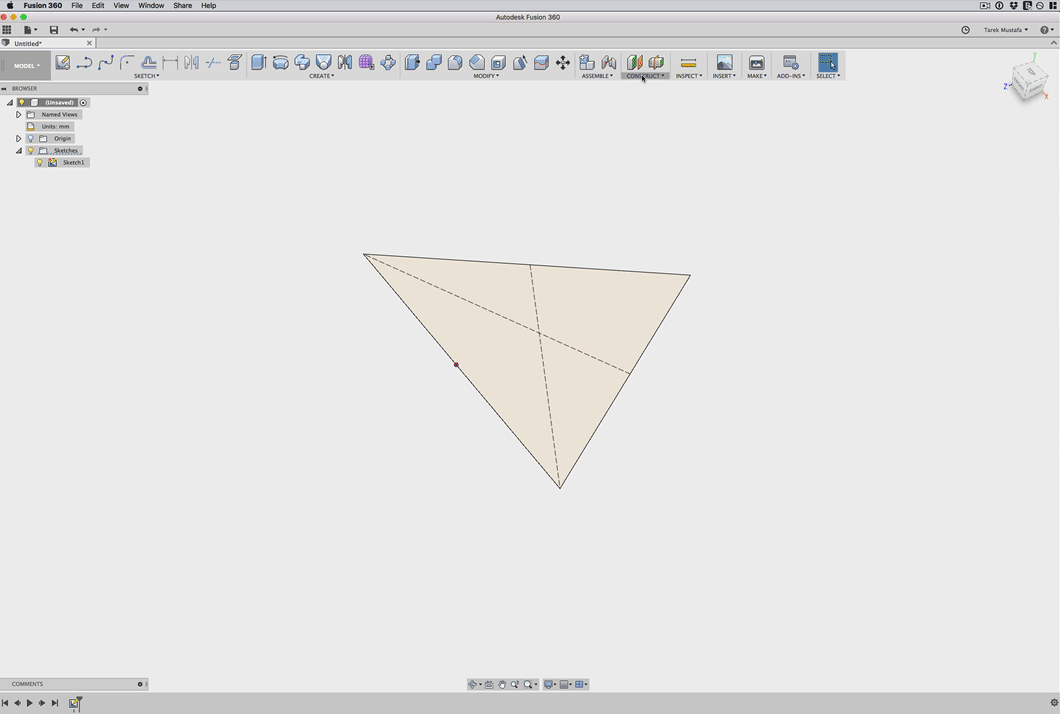
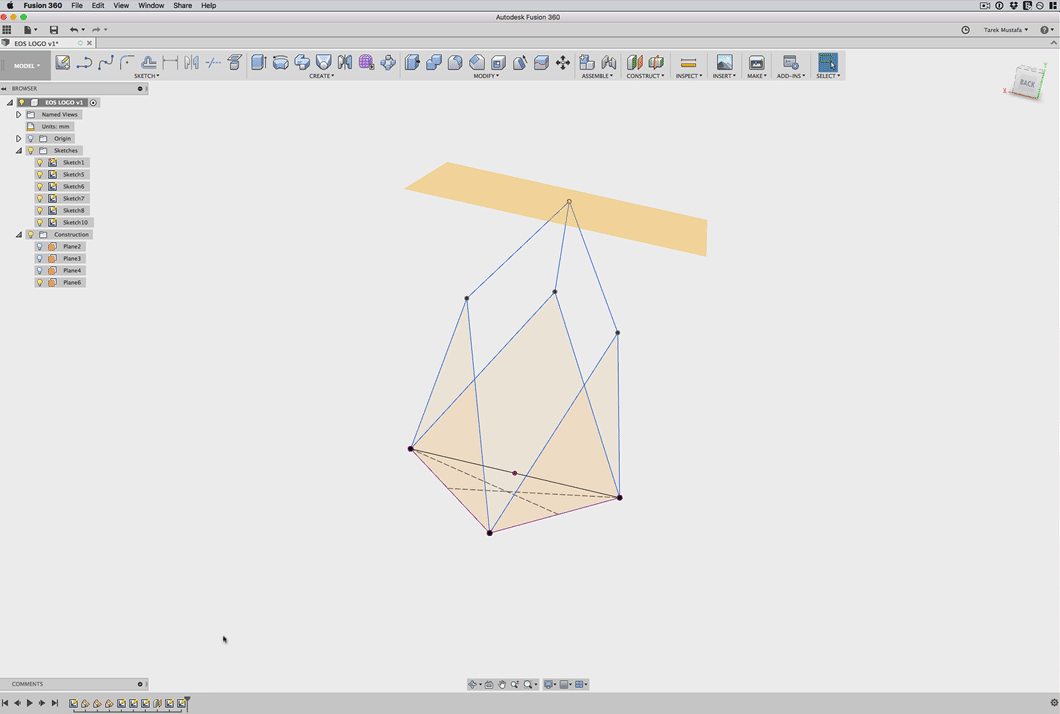
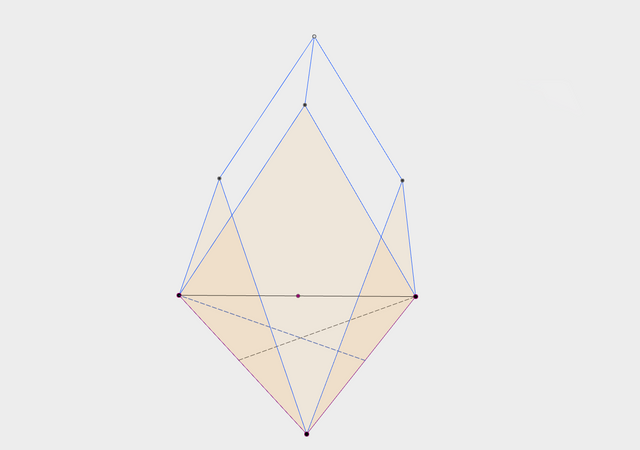
2. Upper Triangles
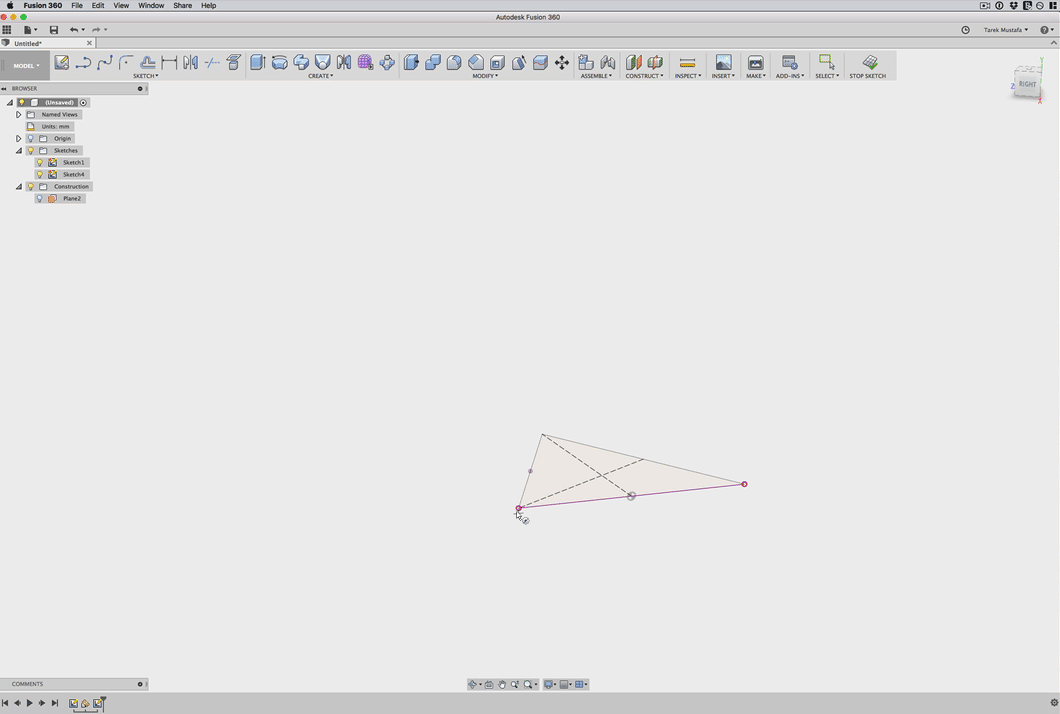
Remember the center point on the first sketch? We need that now for the starting point of the upper Triangle.
First thing however is to create an Offset Plane at the hight of the chestahedron.
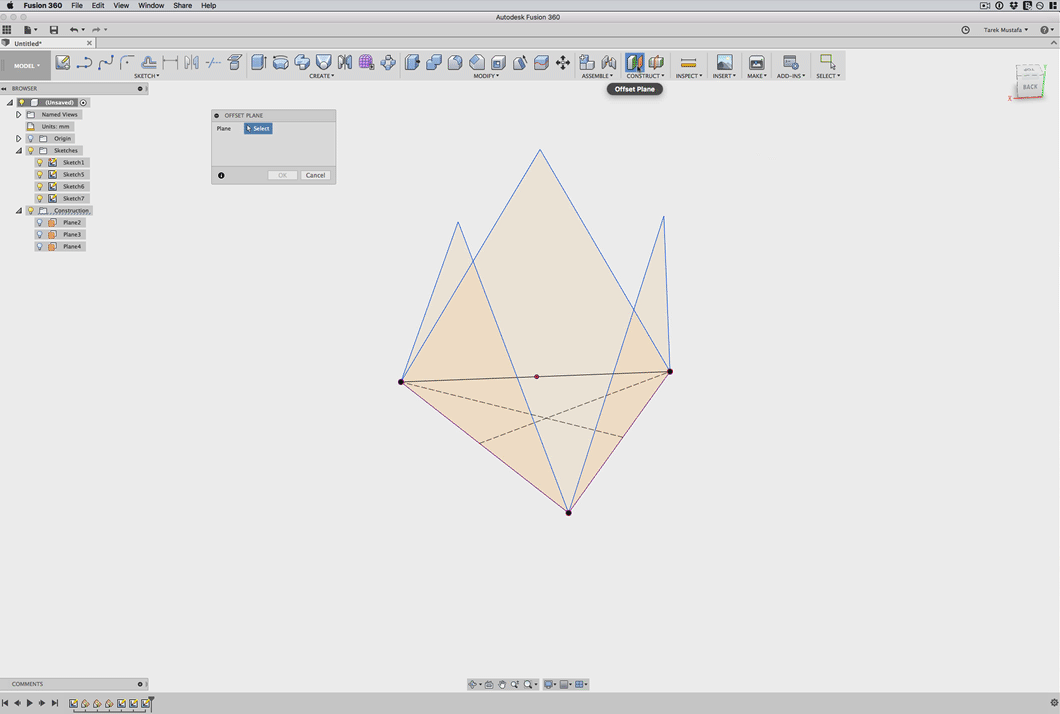
With the point I could now easily connect the other points at the top of the triangles.
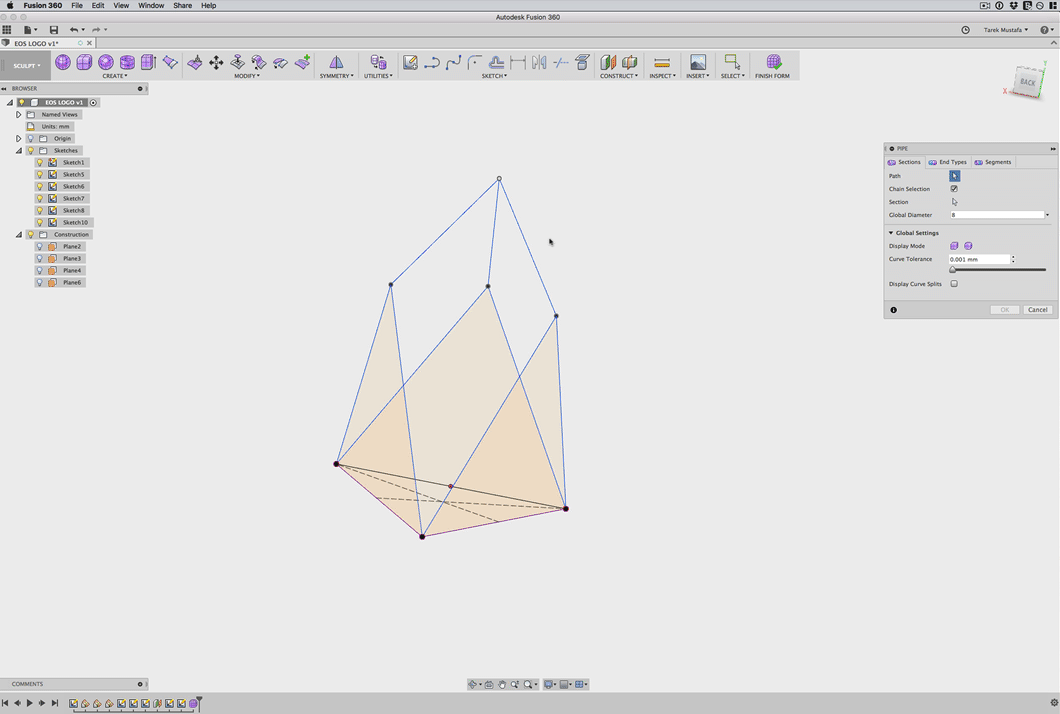
3. Bring sketch to live with using the pipe tool
With the sketch completed the last thing left to do is to apply a pipe modifier that will bring the sketch to live.
I hope you found this tutorial useful. This design has been uploaded to Thingiverse for free download!
The SBD rewards of this post will be invested for EOS token.
Thank you!
Replcation underway :)
Yes! I like to see it once done. Very cool!
White ABS, 4hrs 8mins print time, FlashForge Creator Pro
Fantastic shape, very rigid.
Thanks for upping it to Thingiverse
Cool!
Its great to see Fusion on Steemit, thanks for posting the tutorial. I am trying to follow your tutorial. At part 2 Upper triangles it seems to get a little vague. I can follow making the plane above the triangles, and assume you are projecting the bottom point up somehow. But I can't work out how to select the point and then connect it to the tops of the triangles? You sort of seem to gloss over this point saying it is easy. Could you explain a bit further thanks!
Thanks for your question. You are right, you can add a point to the offset plane using the project tool and selecting the mid point of the first sketch. In regards to the connecting lines. Ones you have the upper point you can start a new sketch using one of the side planes and than use the Line tool to connect the upper point with the triangle points. Please make sure that you have "3d sketch" selected in the constraint tool box. I hope that was helpful. Please let me know once your design is ready.
Awesome I managed to work it out, I had it in mind you could only sketch on planes, so this was a very usefull little tutorial. Thanks again!
I was initially tyring to do the pipe in the model environment and wondering why it was not working. I then realised I needed to do the pipe in the sculpt workspace.
I managed to come up with this:-
That looks awesome! Well done!
That looks great. I really dig it. Well done :D
Thank you, I very much appreciate it.
You did an excellent job! You're very creative
Thank you very much.
Excellent post, very well articulated. Your articles are always helpful - thank you so much. I'll have to retain this in my brains memory banks.:)
very good work. Congratulations,
Very good work my friend like it , cheers mike
It's has some great angles and conceptual forms, very good work.
Thank you!
Very cool. I must say I enjoy EOSs logo.
incredible work you have put lot of effort into this
Thank you, very much appreciated.