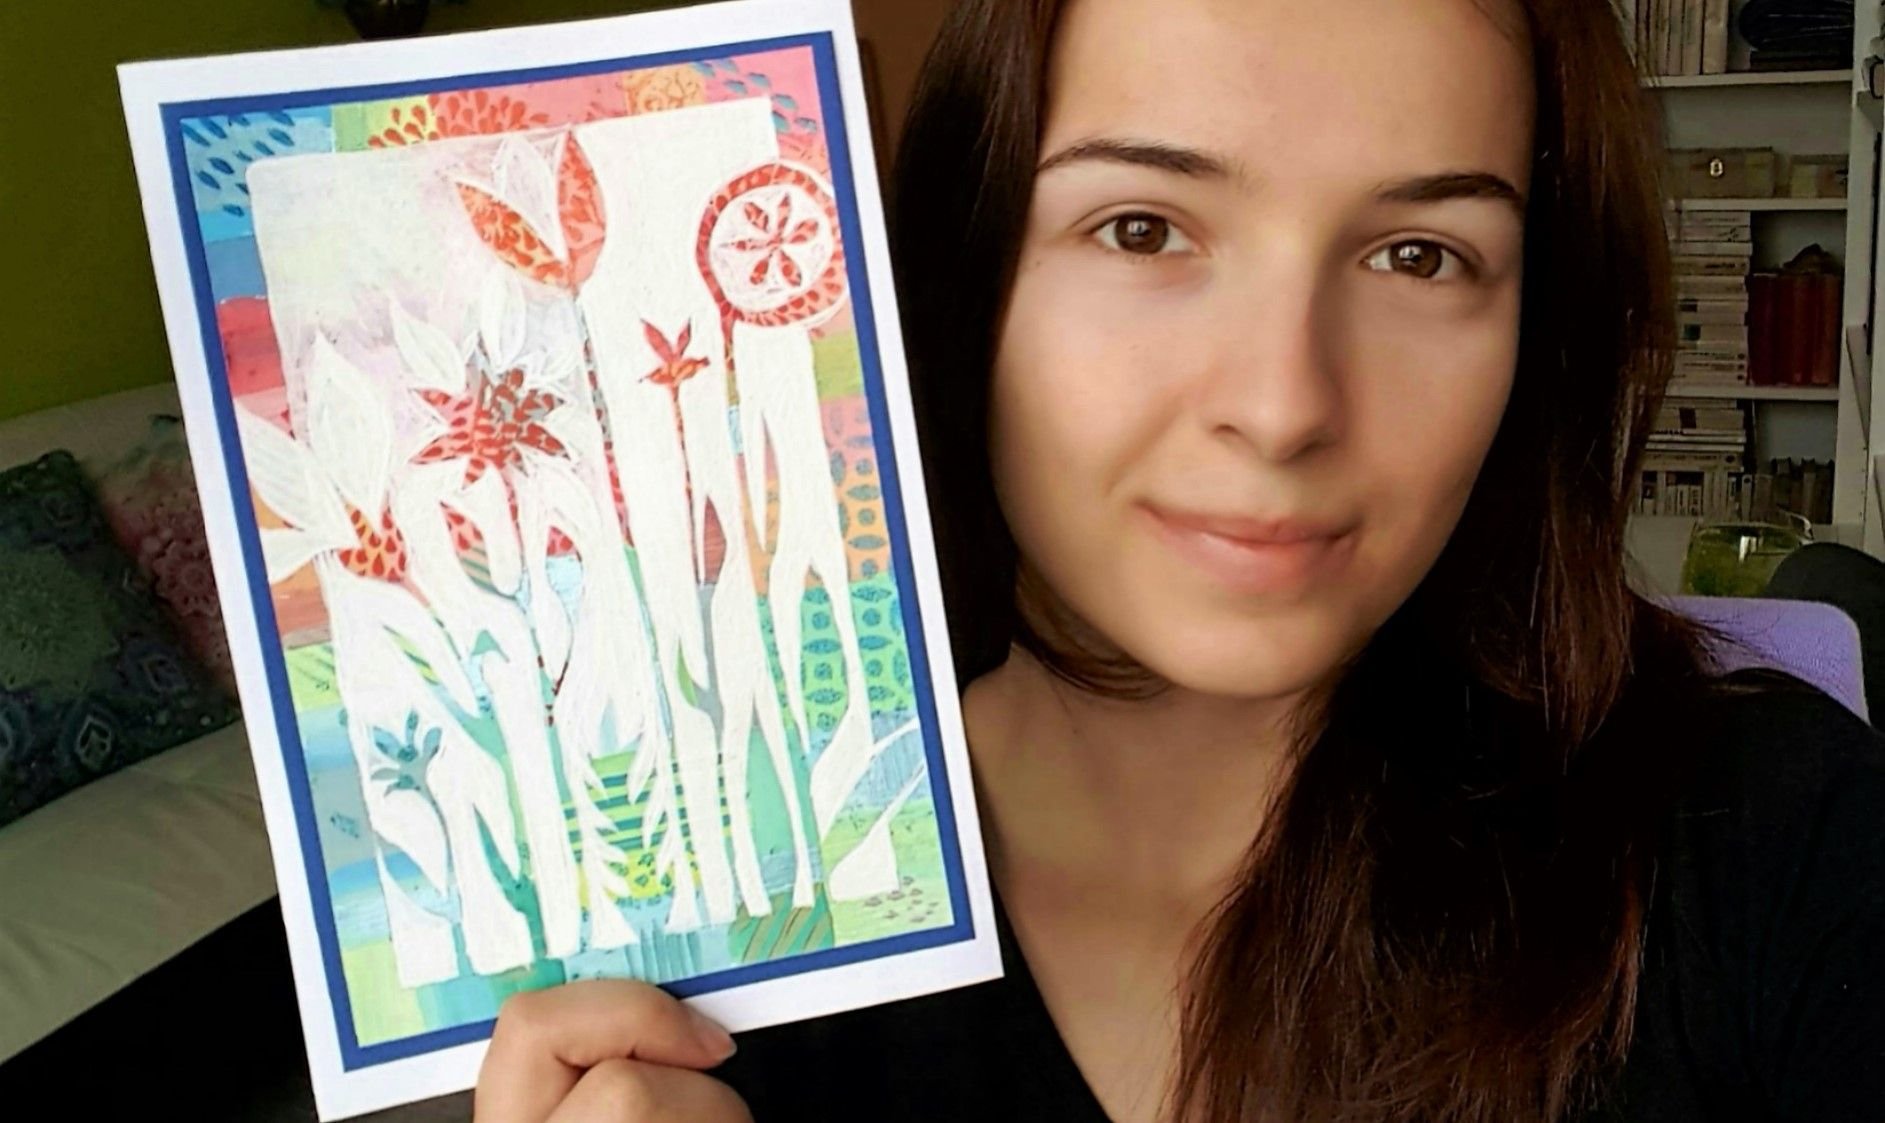
Drawing Challenge#4 - Make PAINTED CARD with Marty - tutorial
I am glad I could attend the Drawing challenge by @helene and my painting got the second prize. You can check it here. You can also join the contest. This week´s theme is: "draw a card for your teacher".
So today I would like to show you how to make this painted card.
You will need:
- hard paper A4 and A5
- blue paper A5
- scissors or paper cutter
- acrylic paints
- flat brushes
- some plastic templates
- sponge
- glue
PROCESS:
🔵 STEP 1
First we need to prepare the papers. A4 paper should be fold in half. It will be the base. We can cut of 1cm from each side of white A5 paper.

🔵 STEP 2
Now we can start to paint on that cutted A5 paper. It is better to use flat brushes for acrylic paint. Start to paint rectangles and stripes in different colors. Remember, there will be flowers, so the lower part can be painted in shades of green and blue and the upper in red, pink or orange. Do not use too dark colors, mix them with white. We can use also some metalic acrylic paint.

🔵 STEP 3
The whole paper should be covered in paint and now we can use templates. Add a small layer of paint on a sponge and push the pattern on the paper.

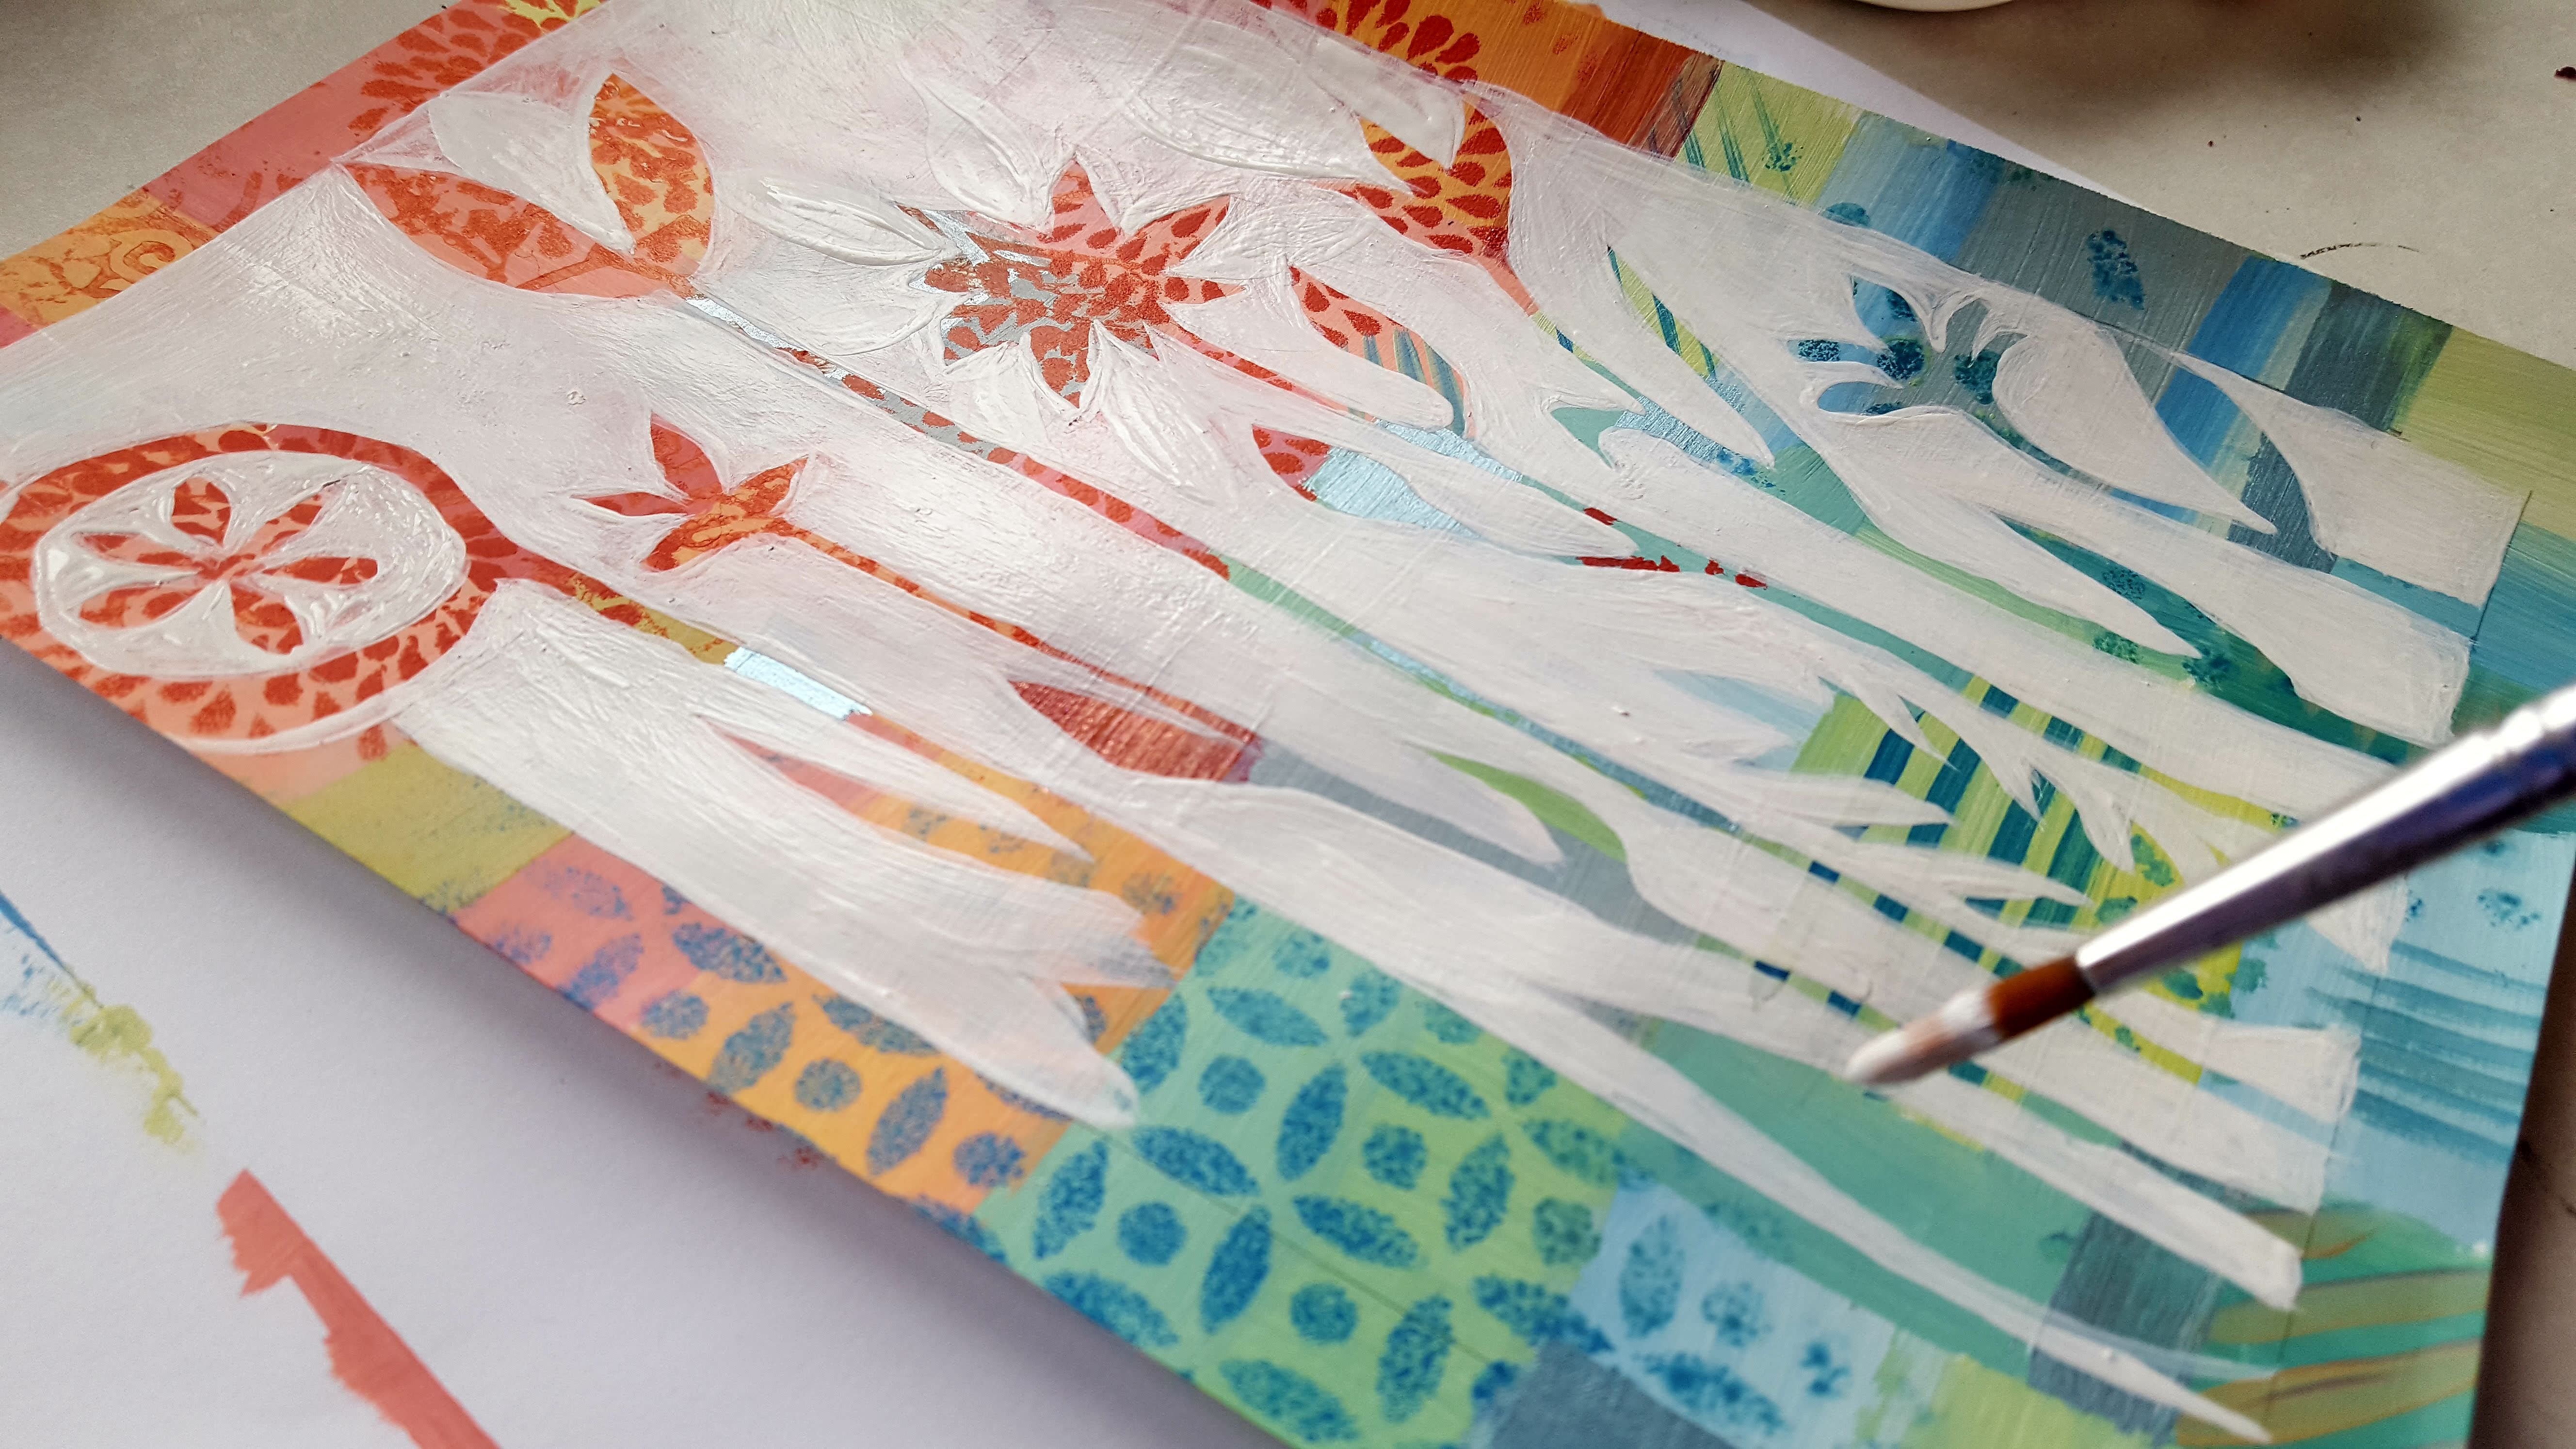
🔵 STEP 4
Mark a rectangle inside the painted paper in a distance 1cm from the edges. You can use sharp pencil. You can start with a white paint now. I didn´t draw an outline for the flowers, but if you are not sure, you can do it. Now paint the rectangle around the flowers white.

🔵 STEP 5
Maybe you will have to do it one more time, because white paint can be too thin and transparent.
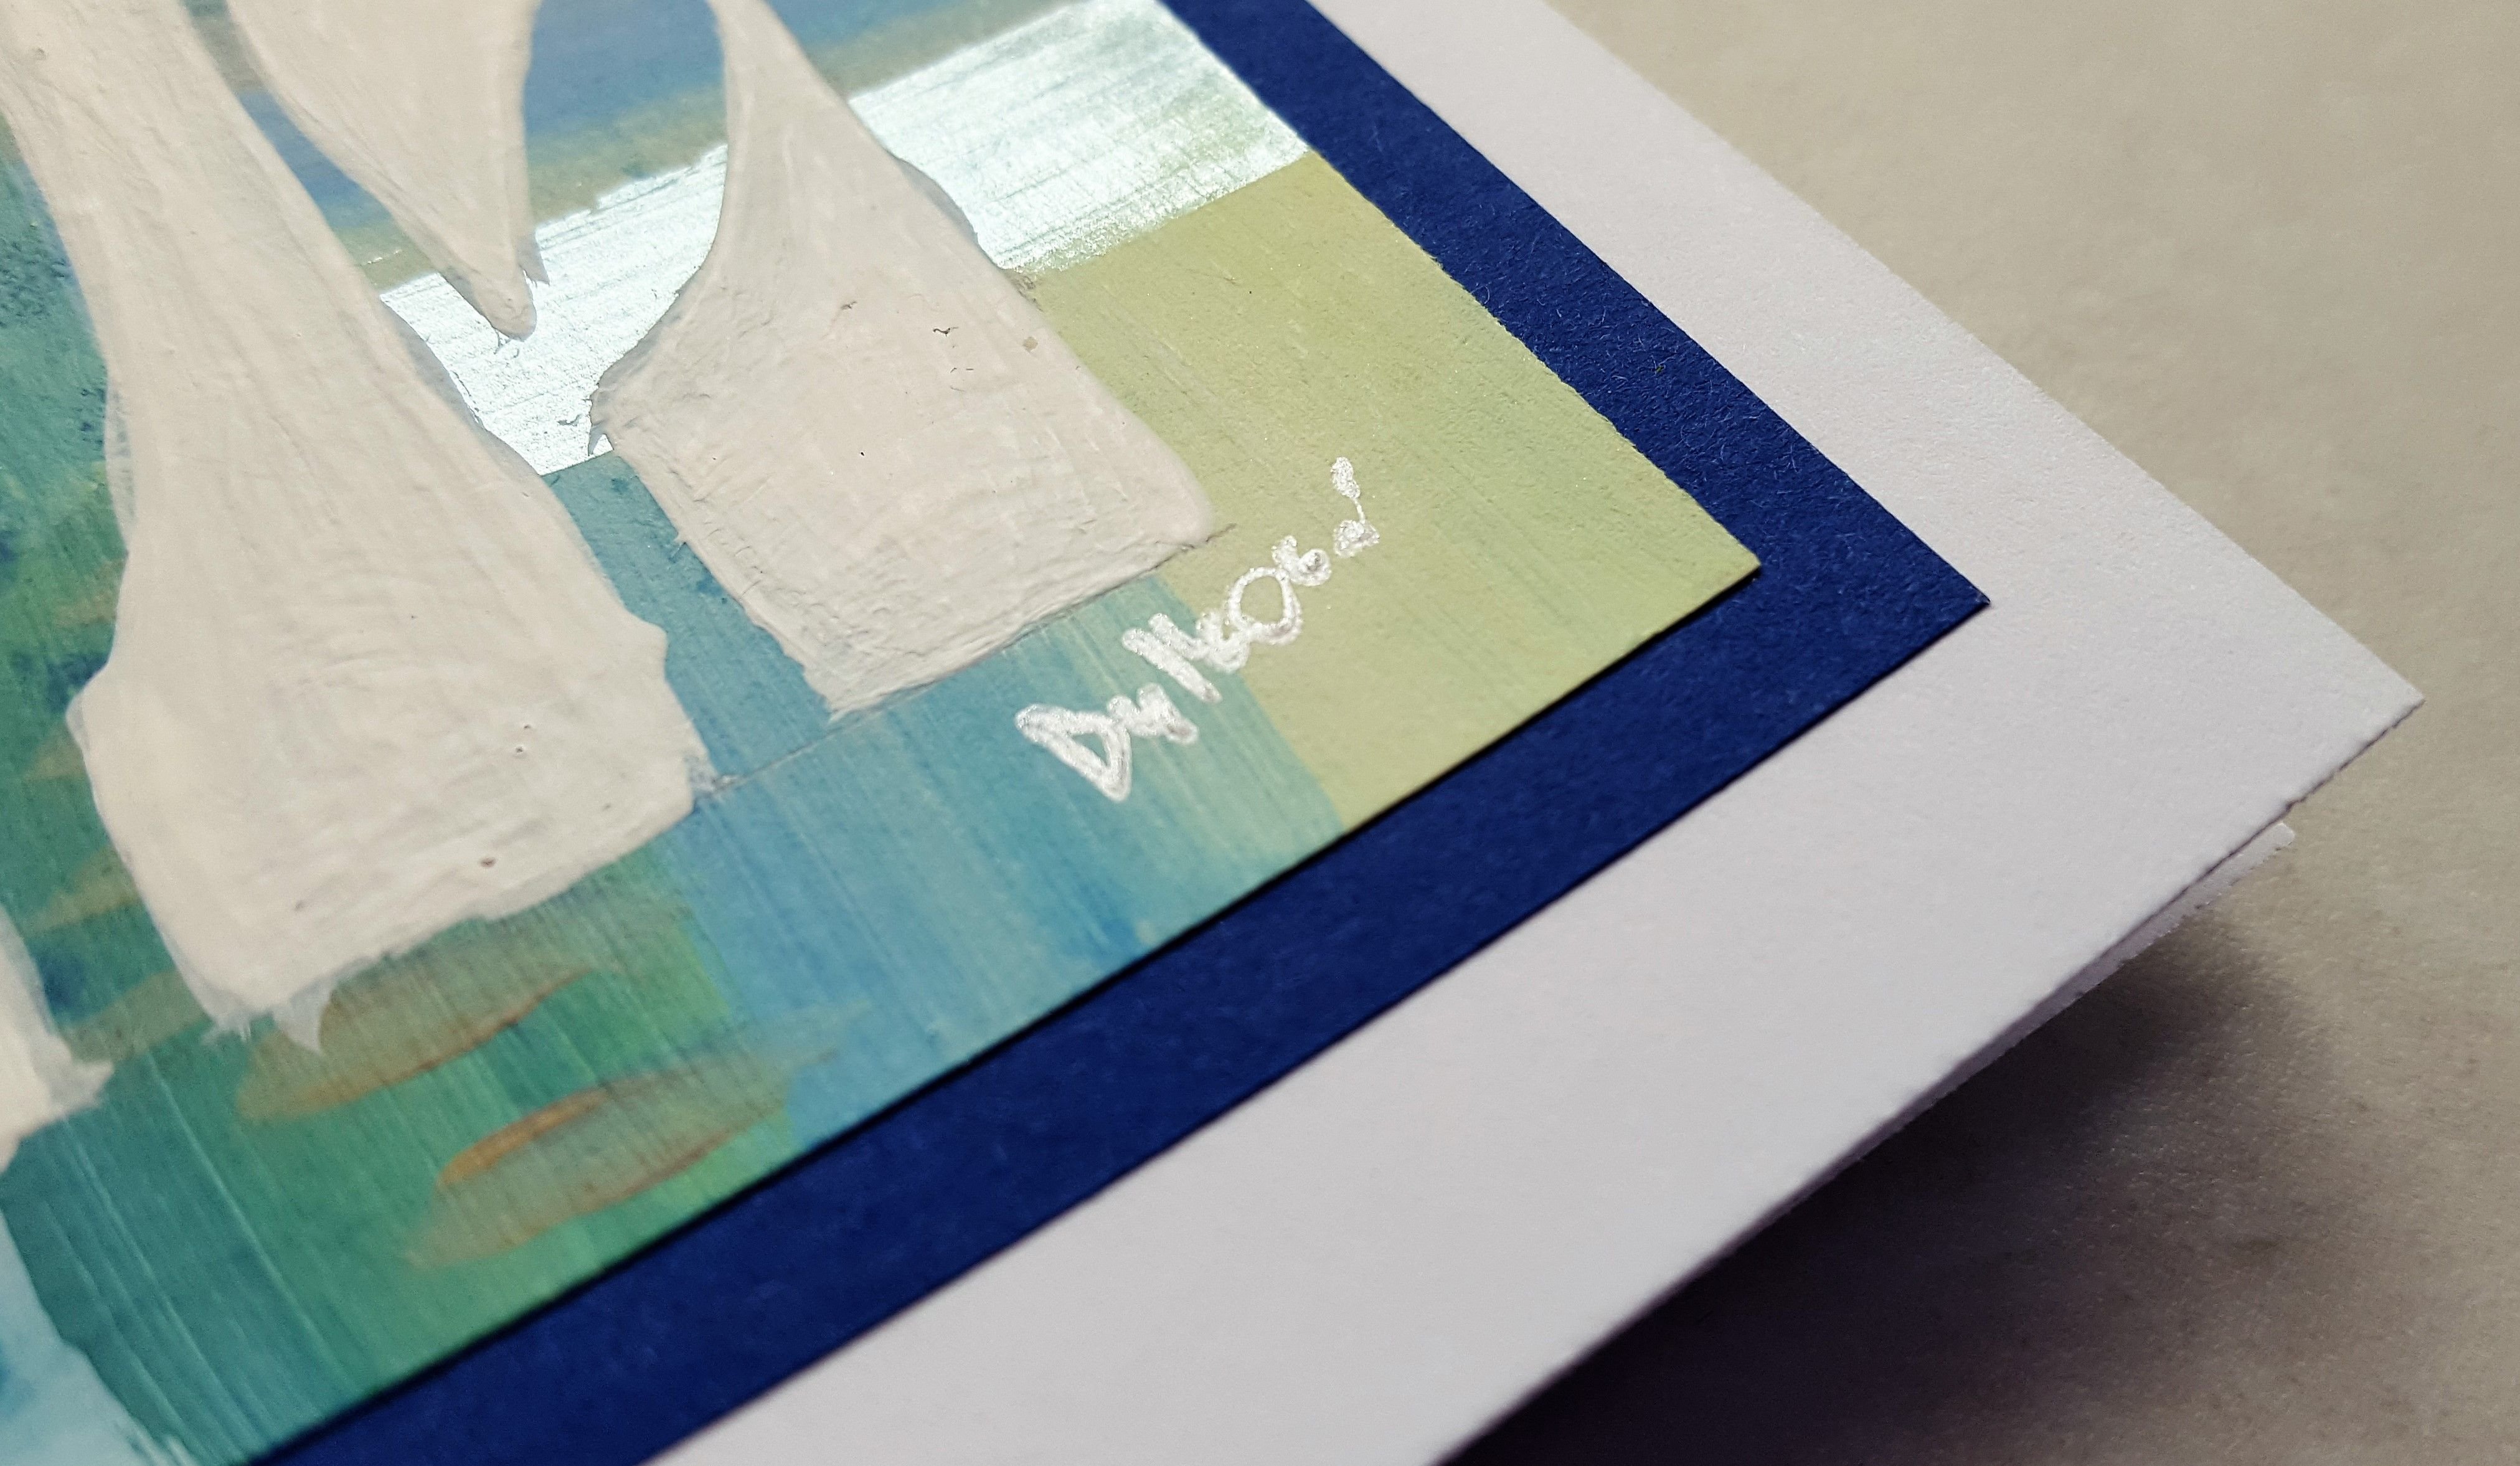
🔵 STEP 6
Now we can use the blue paper. If you want, you can use another color (green, red...), it should be darker to make a nice contrast. Cover the back side of the painting with a thin layer of glue and set it on the blue paper. It should be right in the middle. You can cutt of the edges so just about 5 mm will protrude. Now do the same with the white base.

And it is done!


I hope you guys enjoyed this tutorial and you got some inspiration :)
Thanks for watching!
Follow me on Steemit
@marty-arts got you a $1.29 @minnowbooster upgoat, nice! (Image: pixabay.com)
Want a boost? Click here to read more!
I like it! you are really contributing to the community :D
👉 @paps 👈
Congratulations @marty-arts! You have completed some achievement on Steemit and have been rewarded with new badge(s) :
Click on any badge to view your own Board of Honor on SteemitBoard.
For more information about SteemitBoard, click here
If you no longer want to receive notifications, reply to this comment with the word
STOPBeautiful, thanks for posting it. upvoted and followed you
Absolutely fabulous tutorial. I haven't used templates before or done a lot of mixed media work like this. Will be fun to try sometime. My full 100% upvote and resteem. 🦋
thanks so much :)
Truly a pleasure. 🦋
I was not familiar with this painting technique, I liked it very much, very nice way to make a beautiful composition, I will try it!!
Good using of a "negative space" technique!!!! Very nice, I like it)