Tutorial : How to draw a portrait out of a photography (pencils) and bring it to life !
How to draw (pencils) a portrait inspired from a photography.
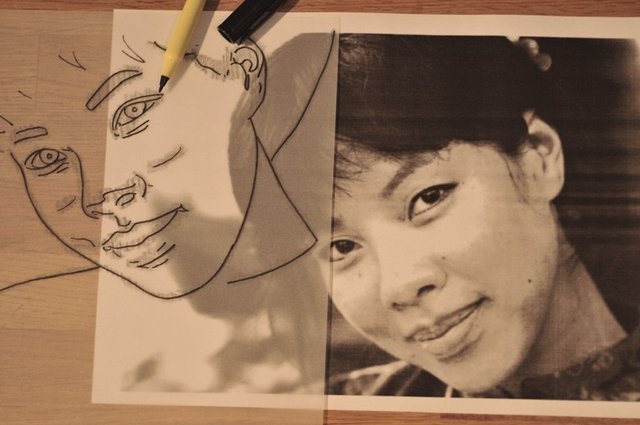
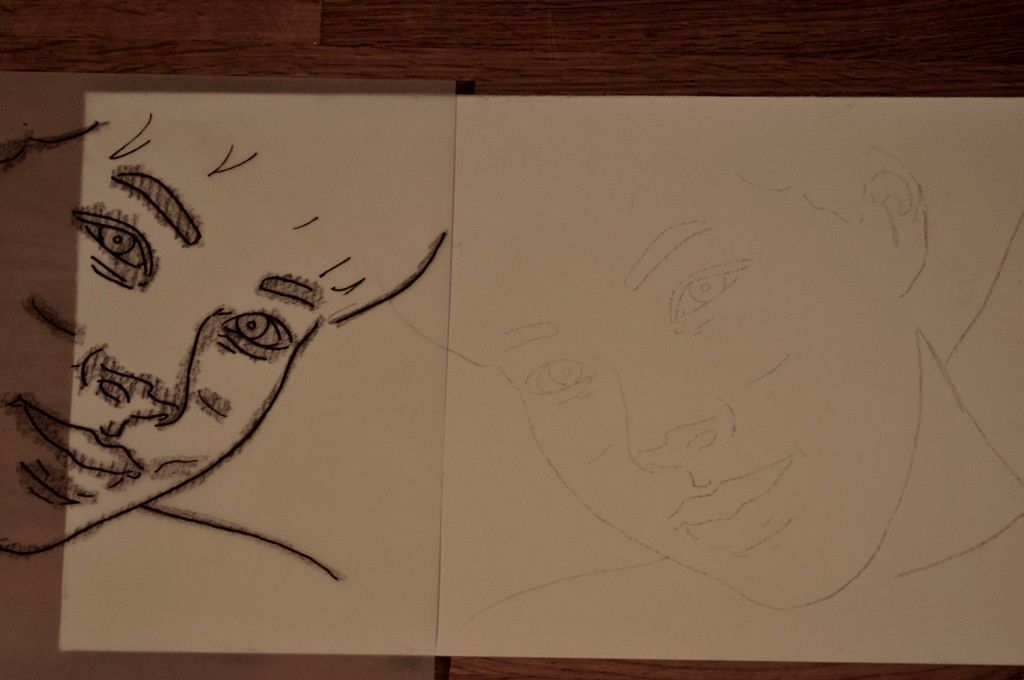
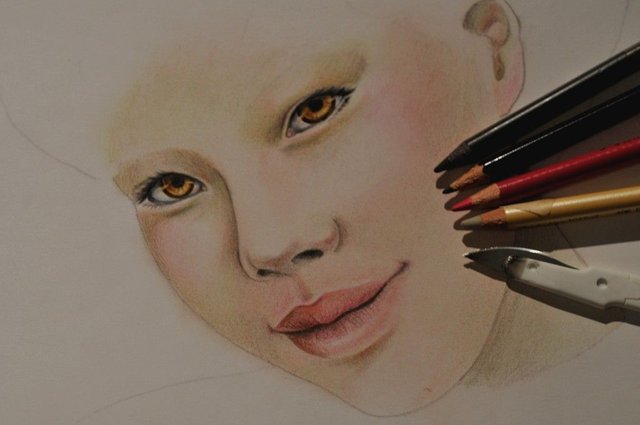
First step : draw the portrait with its main lines, lightly, on the paper, with a "H" pencil. If you are not that good in reproducing a full portrait, use a tracing paper, put it on the model's picture you want to rely on, and copy the main lines with a dark ink pen. Then, report this on the paper by shadowing the back with a B pencil. Be very light when you report those lines, don't press too much on you pencil (H).
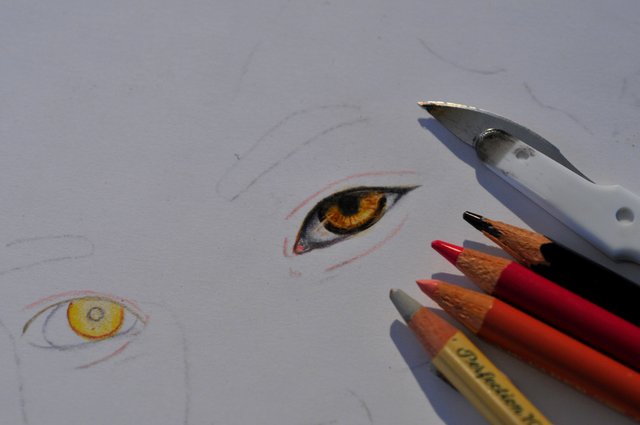
Second step : Begin with the eyes. Here, the picture shows an asian girl with very dark eyes. I want to change this and create amber golden eyes. So, I first chose the color I want in final (yellow) and trace a fine line to encircle the iris.
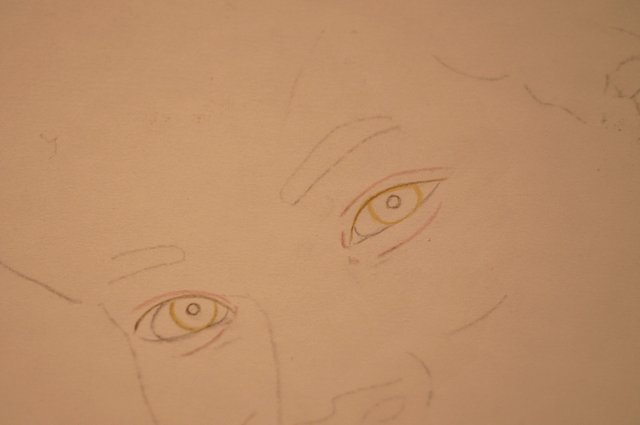
Third step : shade with darker yellow from outside to the center of the iris. The periphery must be darker than the inner area. Go on with darker and darker color, creating a shade from dark to clear, periphery to center.
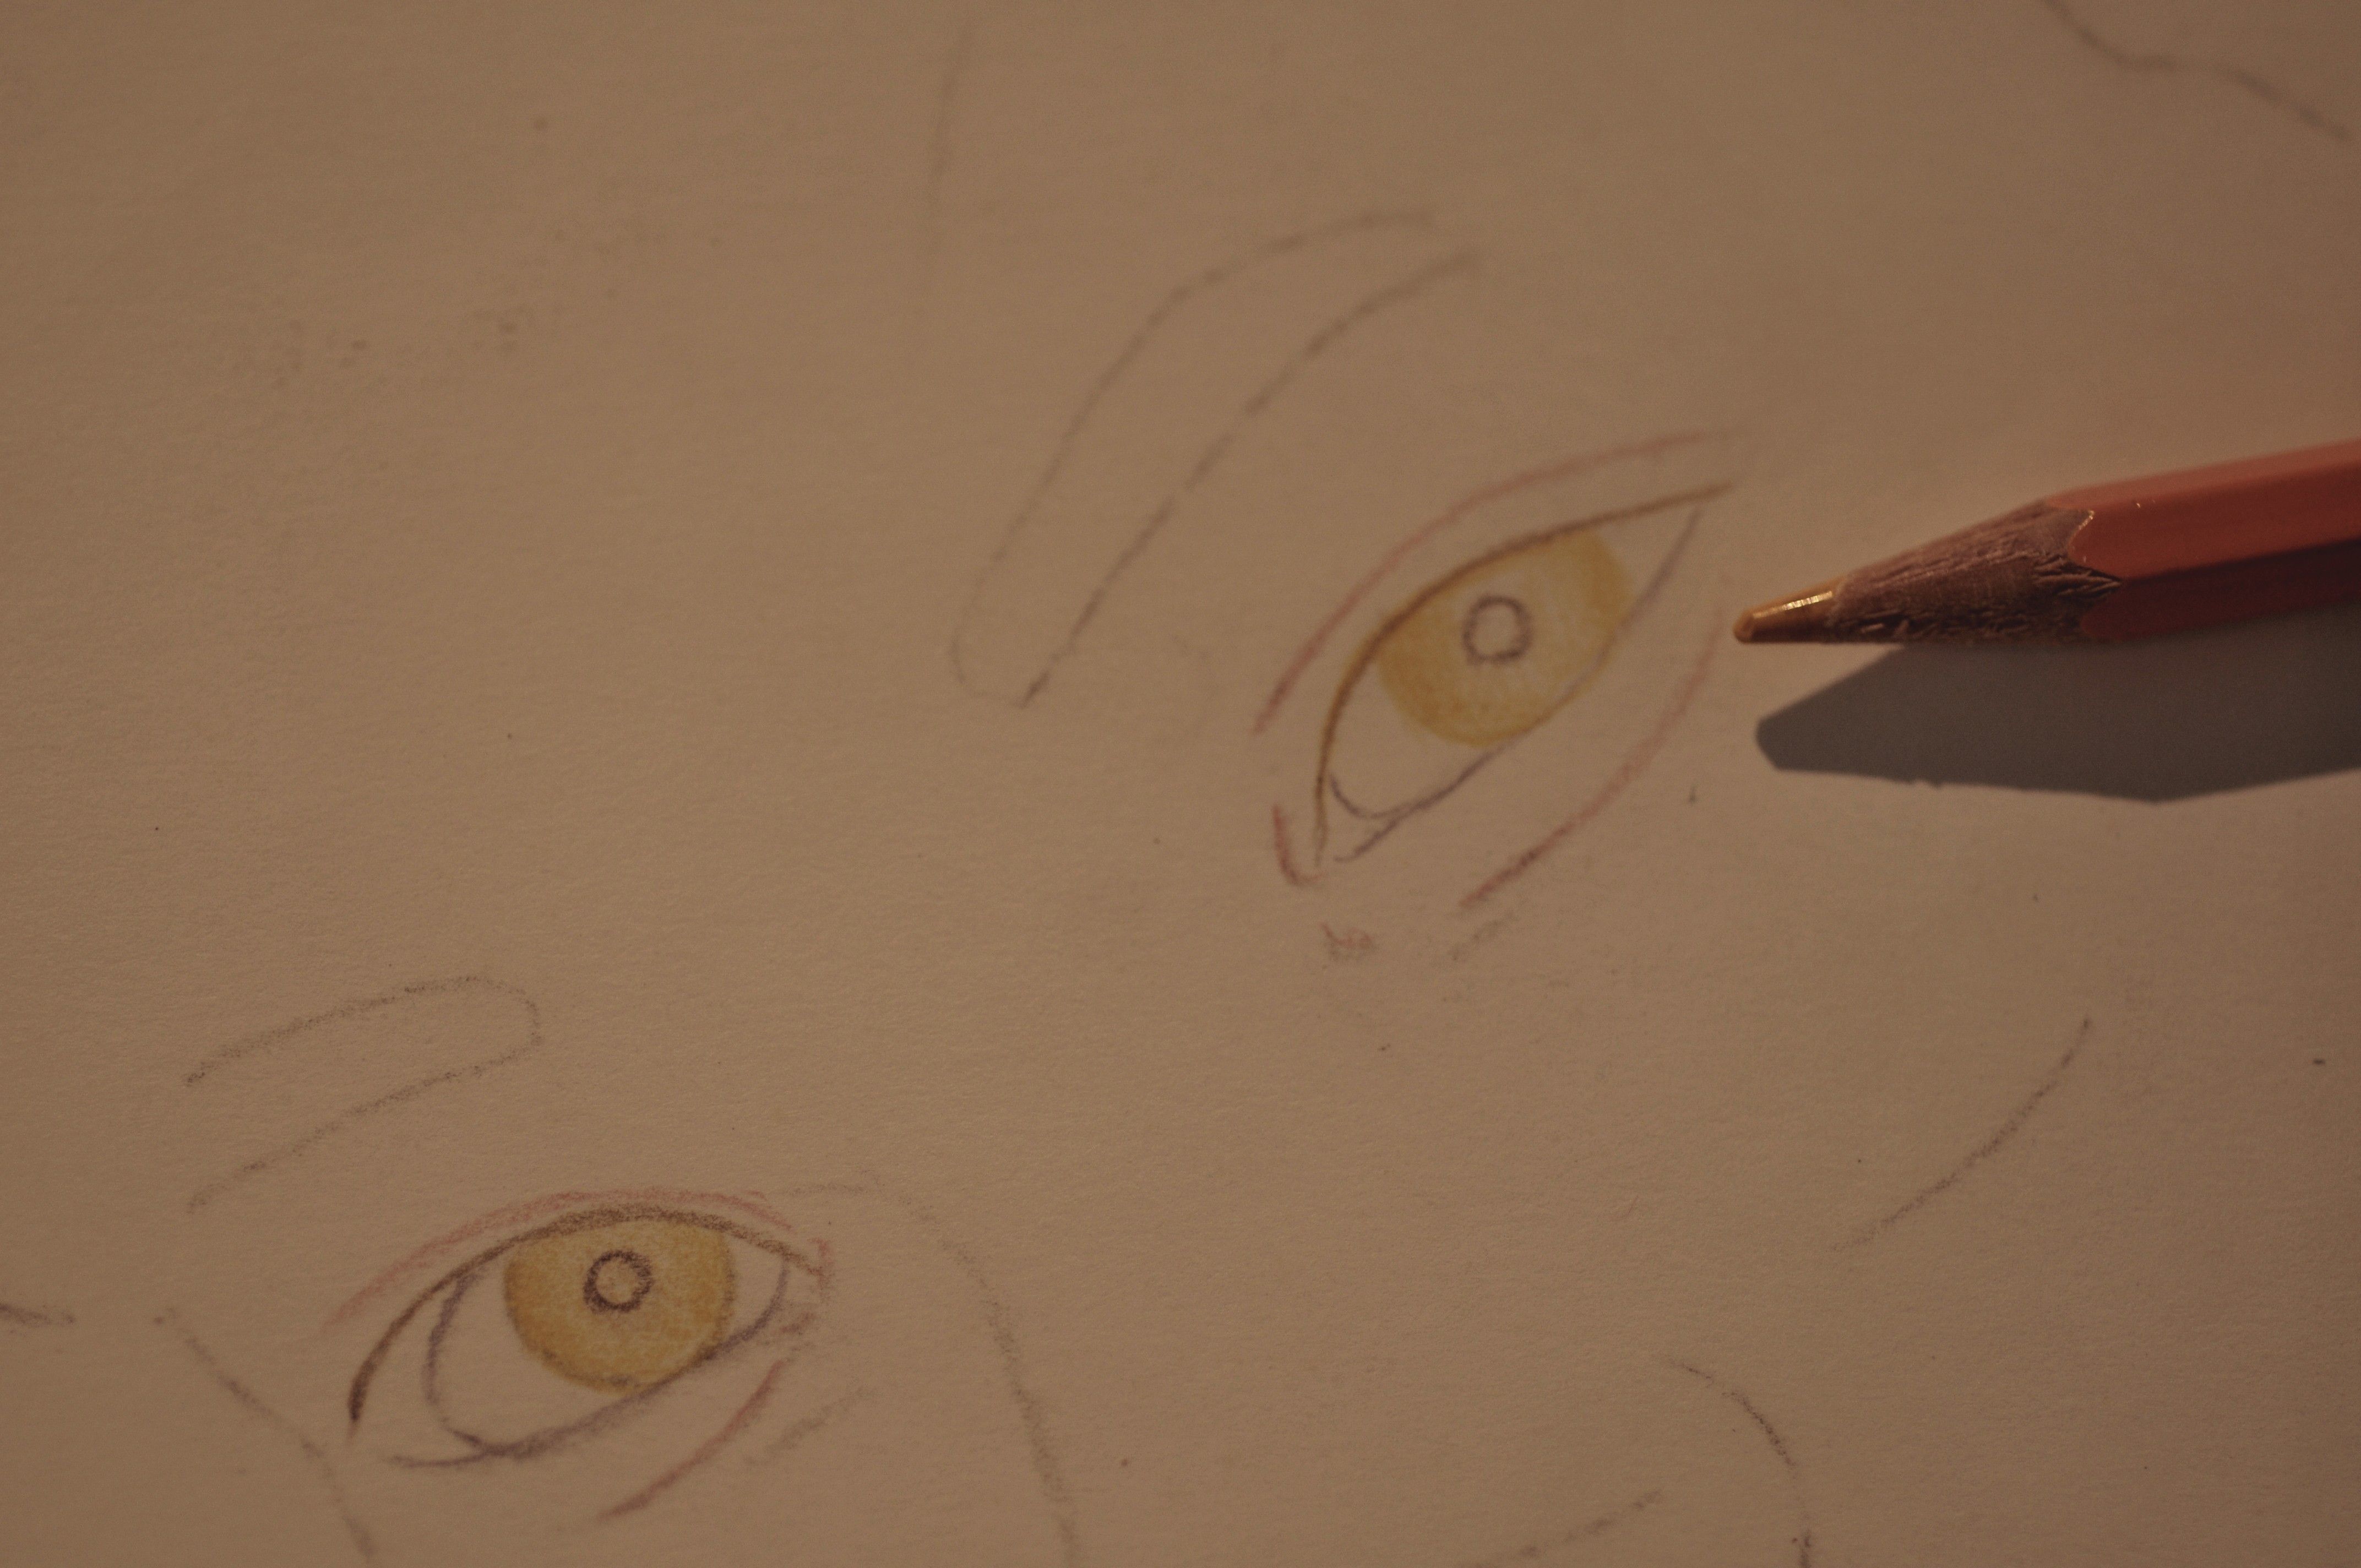
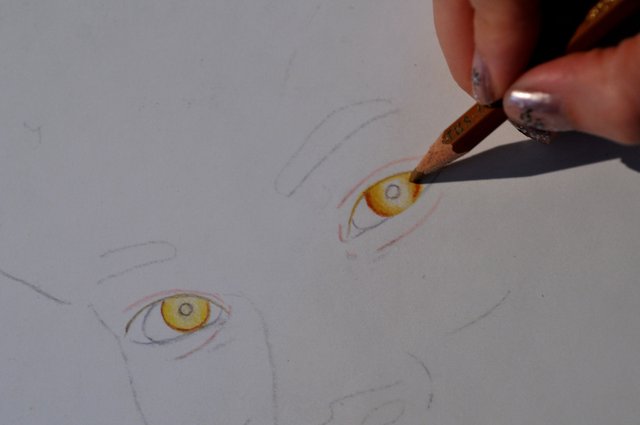
fourth step : Take a blending stick (one made of paper), small head, and melt altogether the colors of the iris. Then, with an eraser pen small head, create a white curve on the lower part : this will give the "translucent" look of the iris. You may draw now little lines from outside to inside forward the pupil to create the iris inner's pattern.
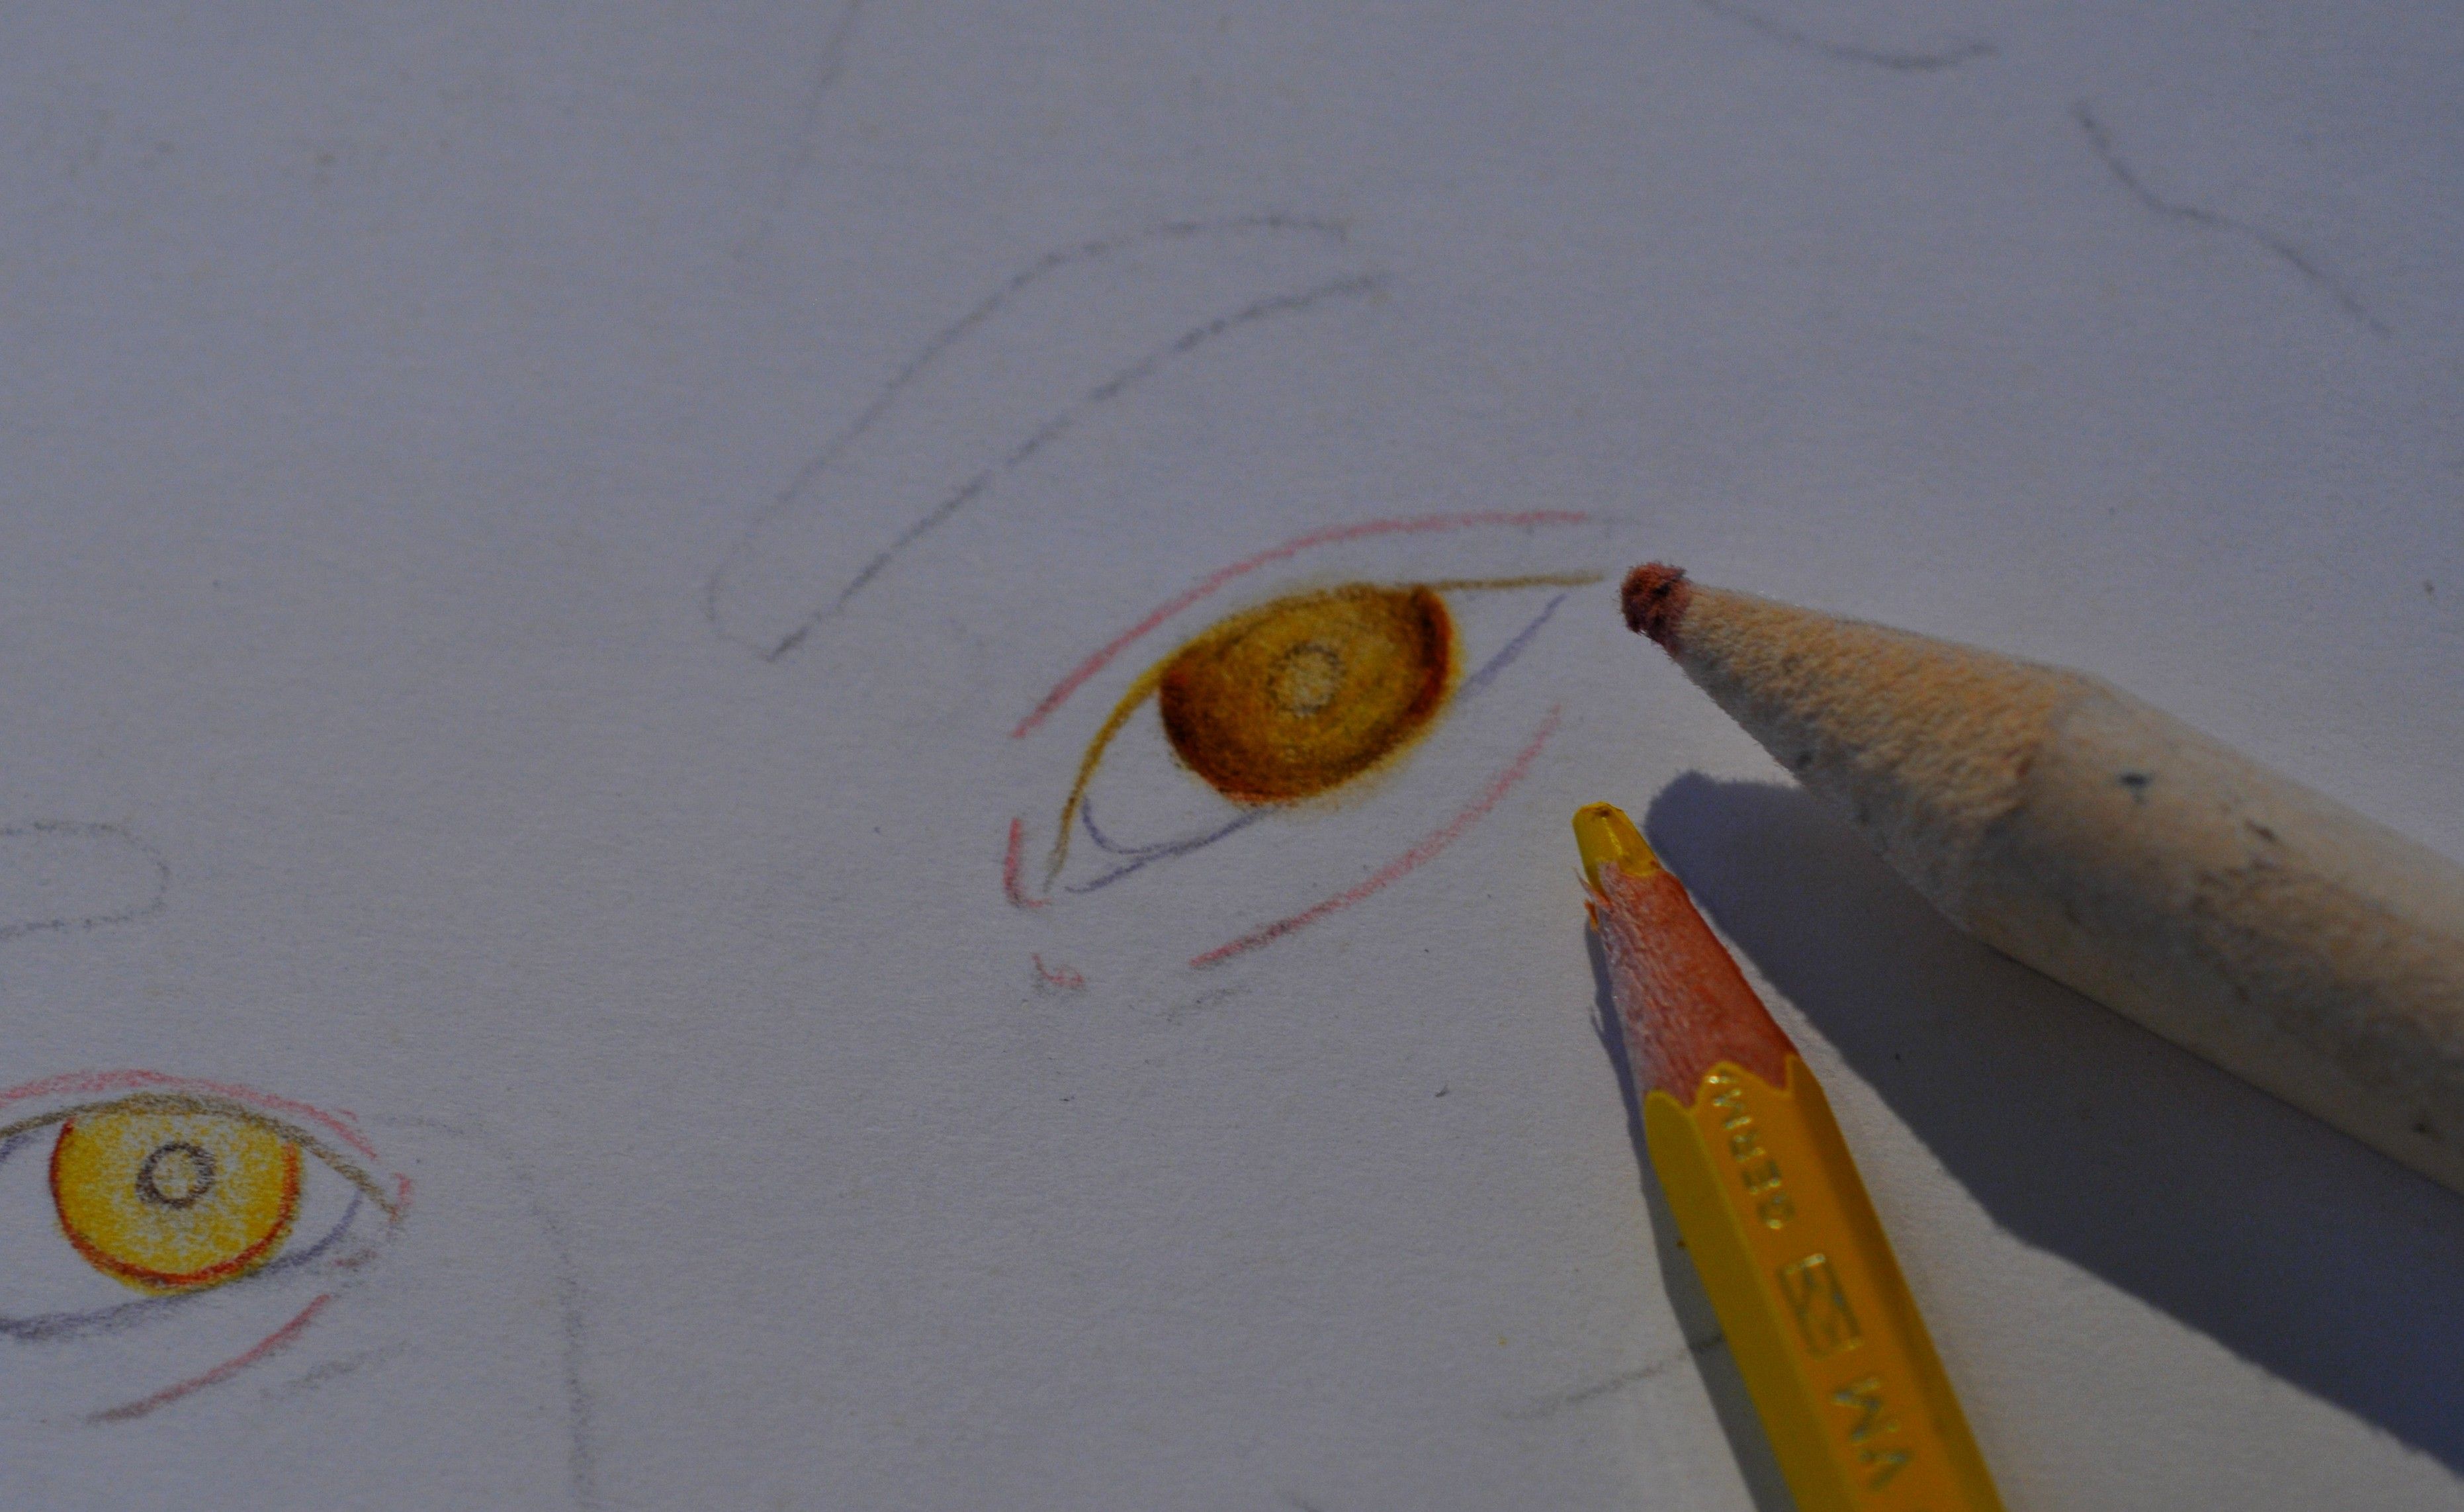
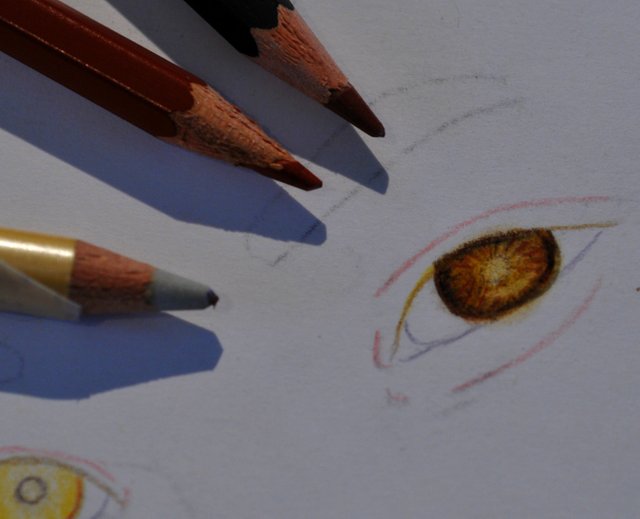
Then, color the pupil with the darkest black available in your pencils. You may draw a dark line also on the upper lashes line, as a eye liner make up. As for the under line, draw just points next to one another, don't make a continuous line.
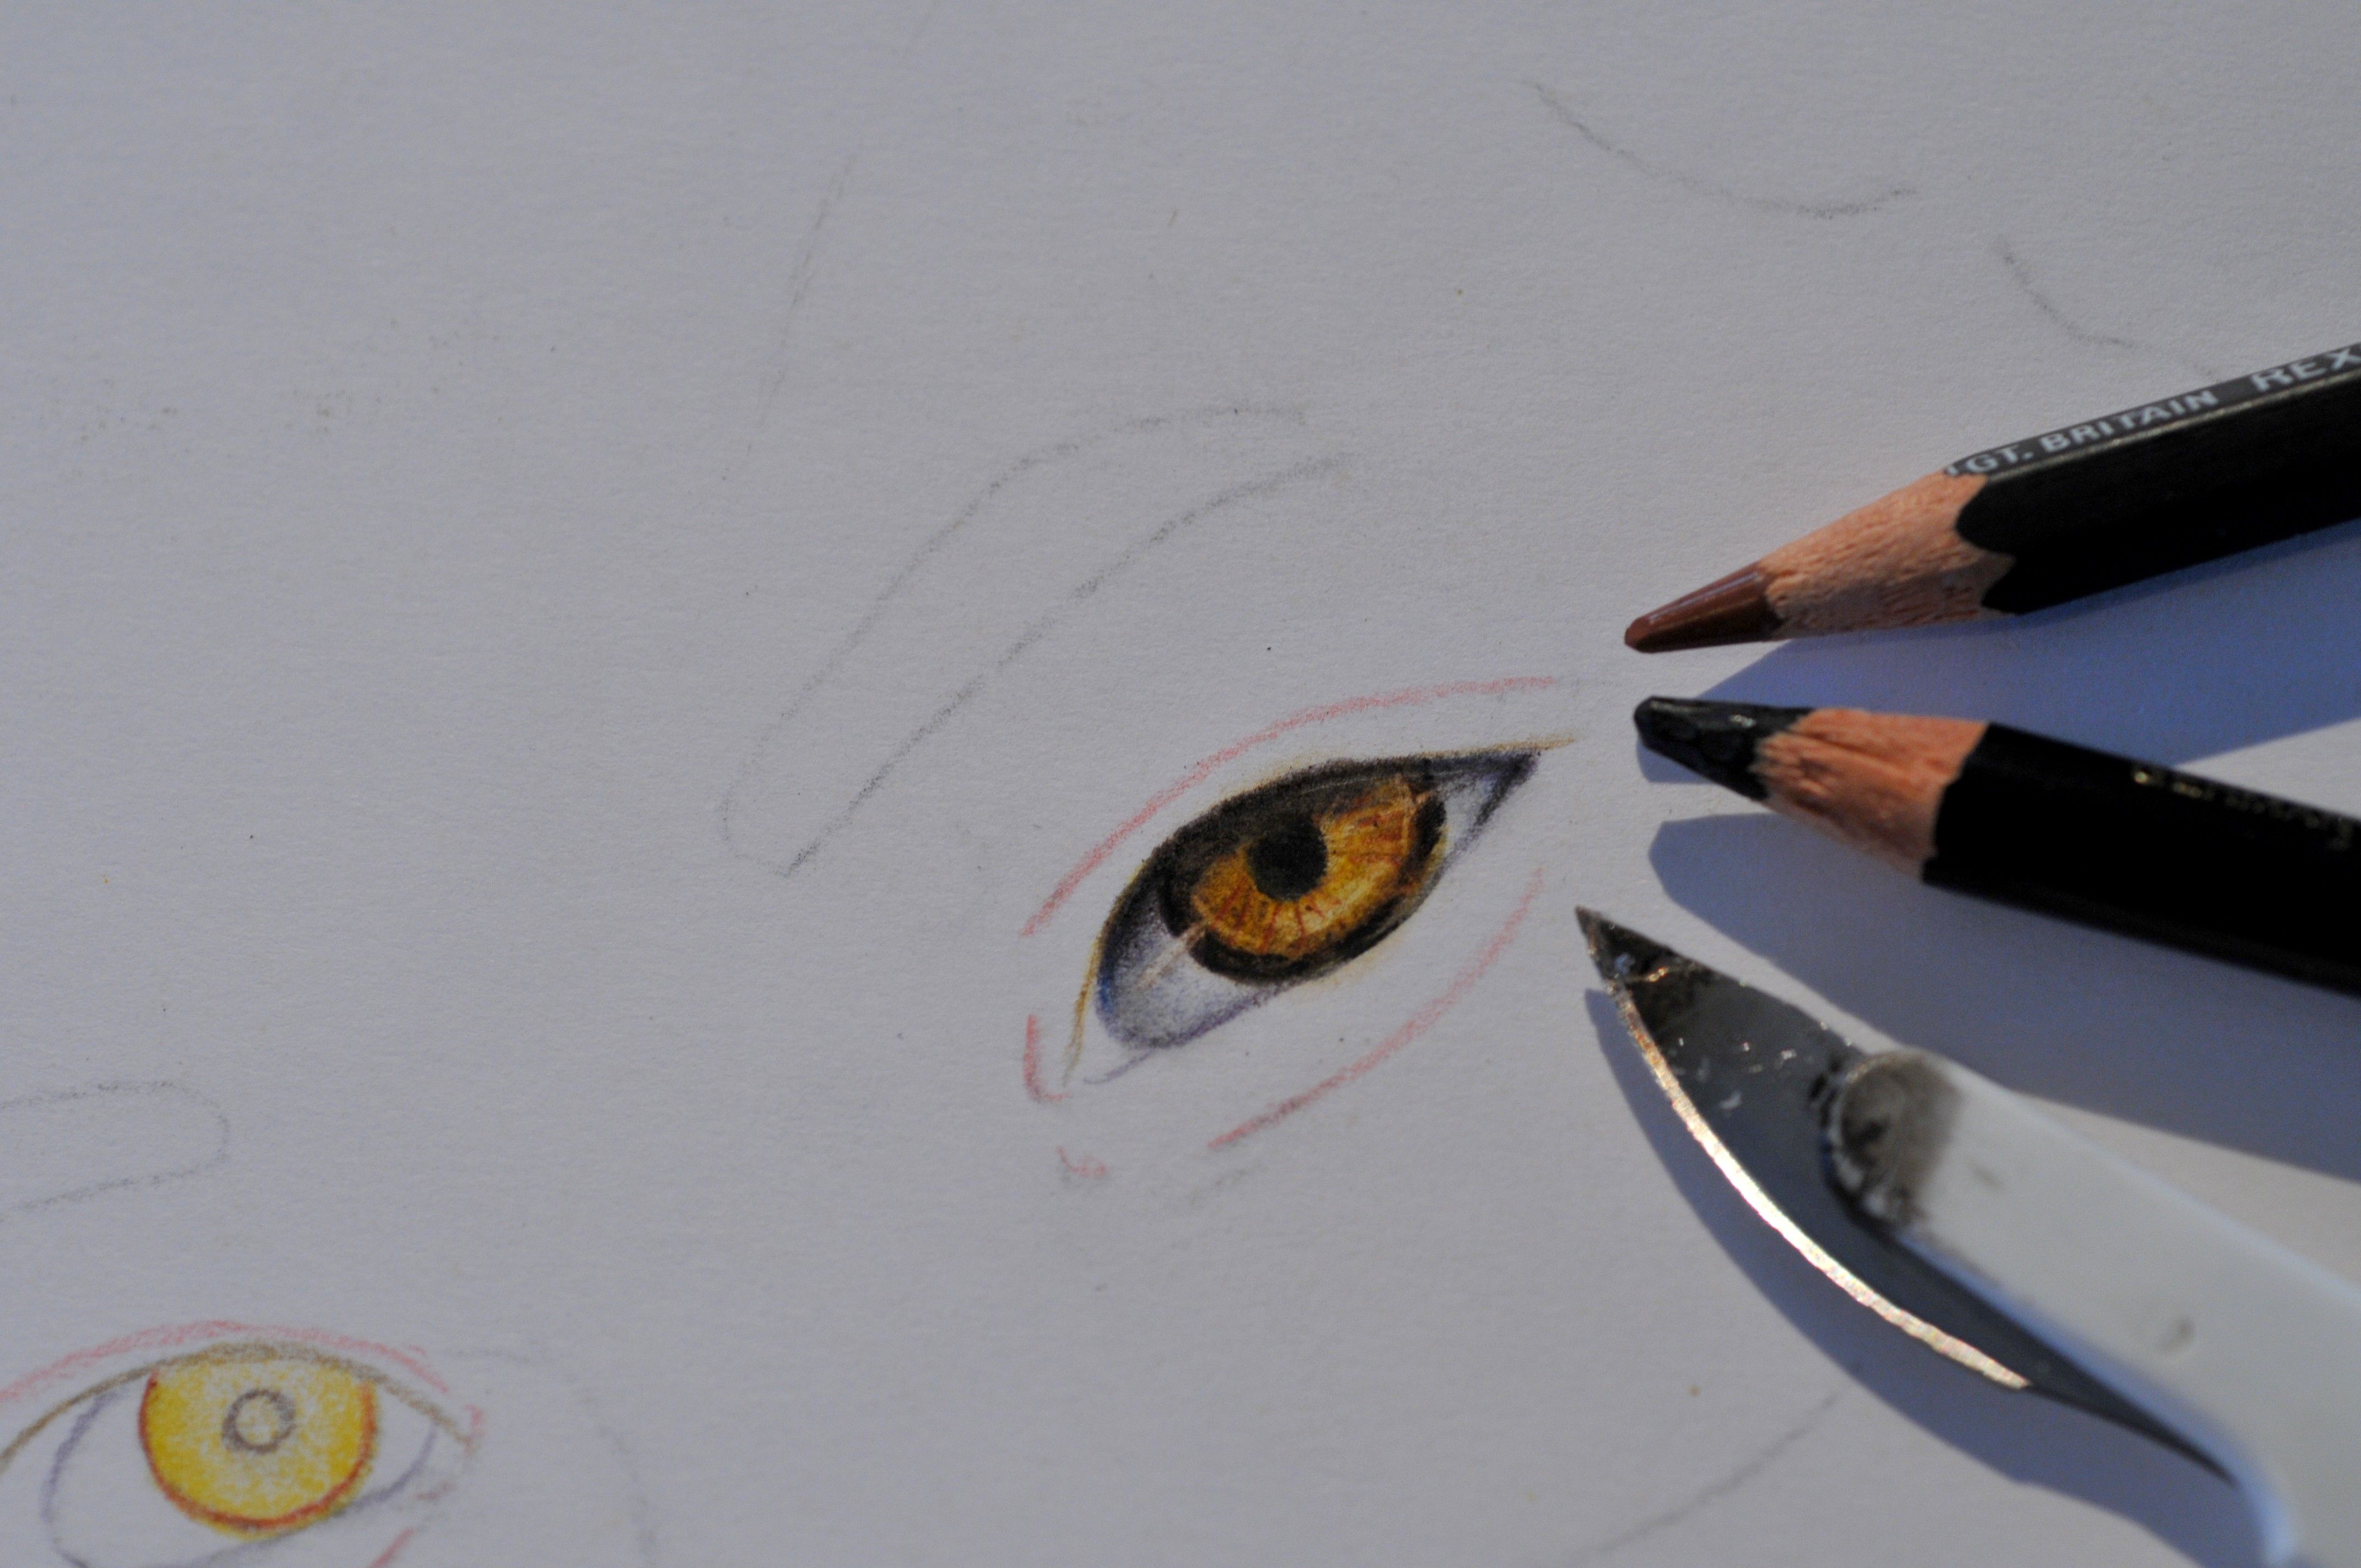
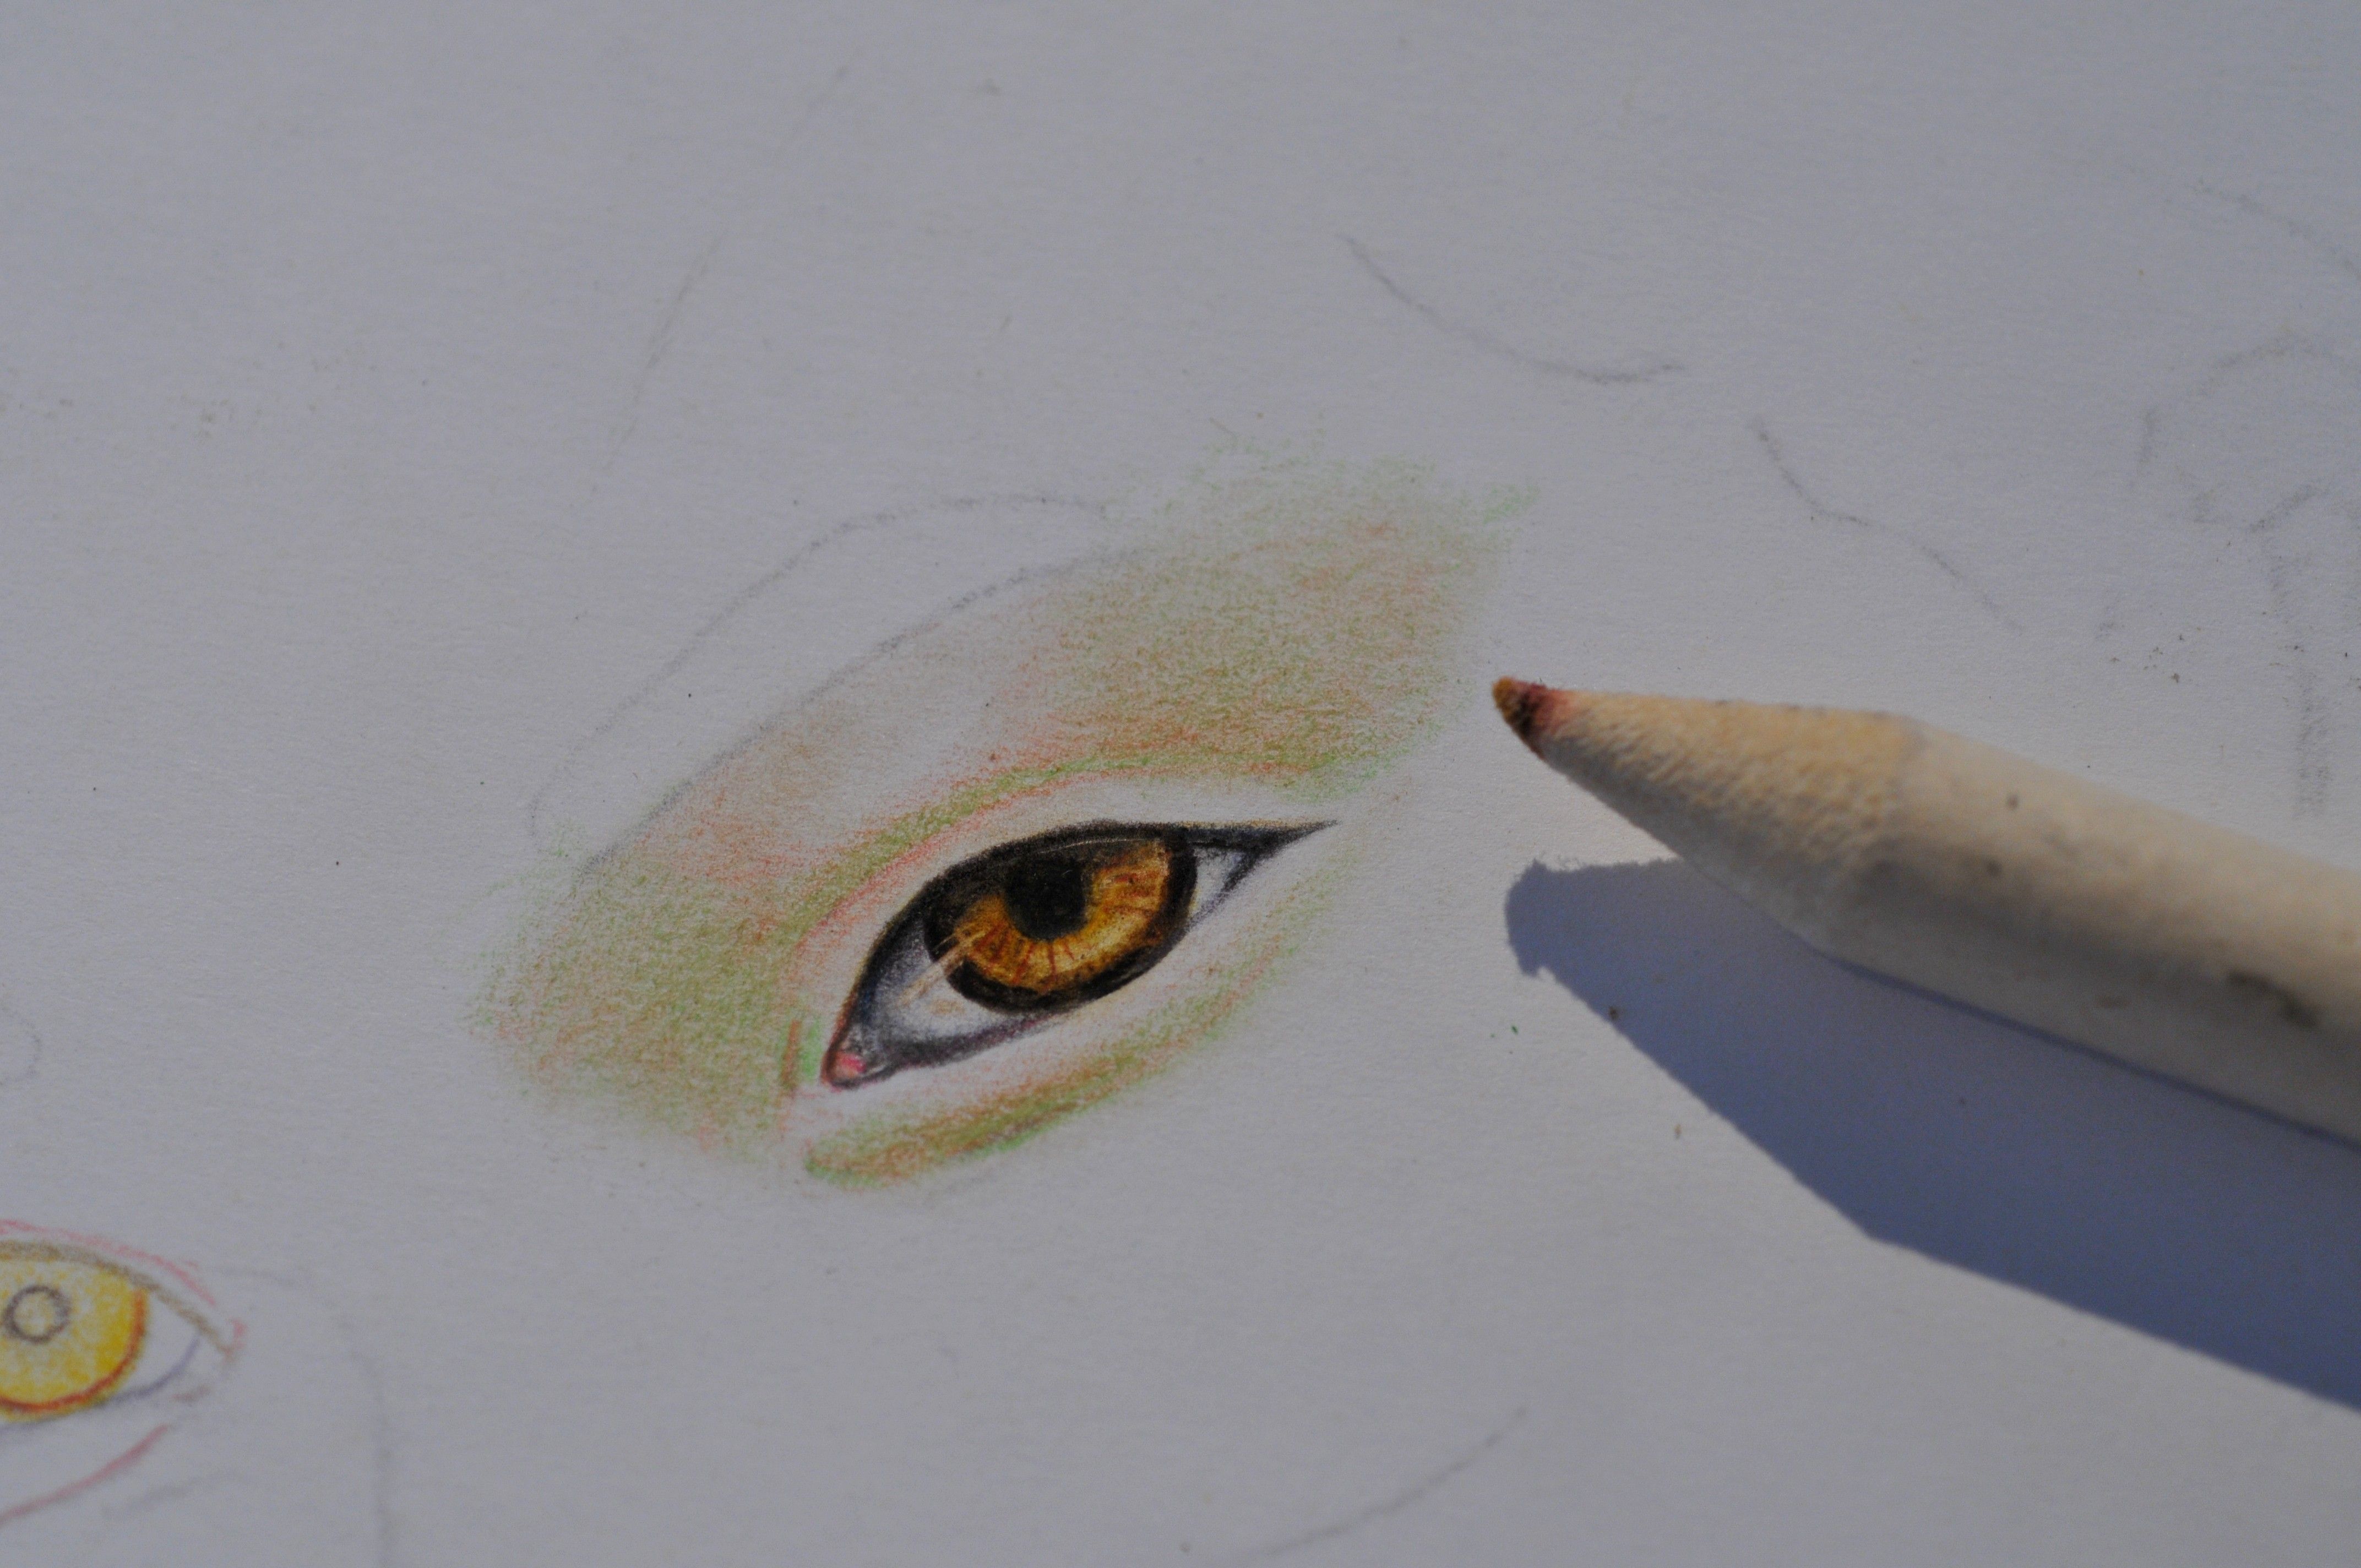
Fifth step : Color the white part of the eye. It will be blue and gray shading. The same thing : dark outer, light inner. Melt it well with the blending stick. When finished, with a sharp bistoury, scratch the paper just for 2 thin lines from the iris to the white sclera, making the illusion of brightness and moisture of the eye.
Now, you have finished the right eye. You may define its contours by drawing the eyelids and lashes :
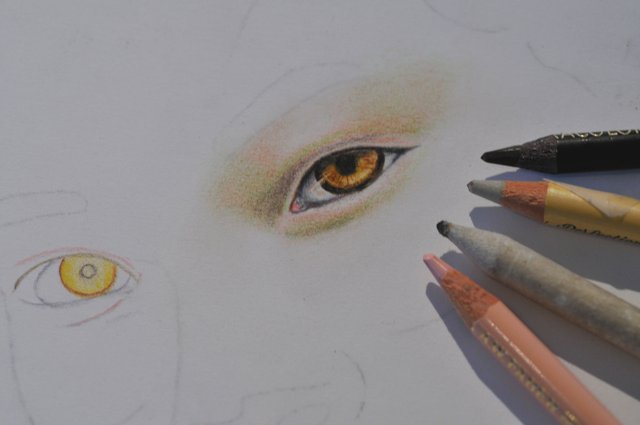
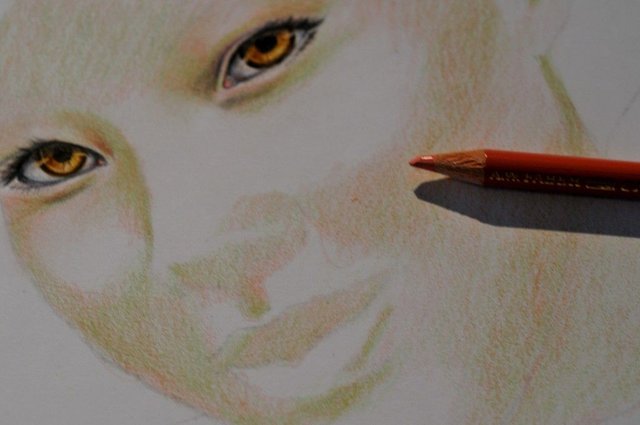
Color all around the eye, where shadow should be, with a green color. Yes, green (spring green). This will offer the transparence of the skin with more natural look, avoiding a plain dead skin color.
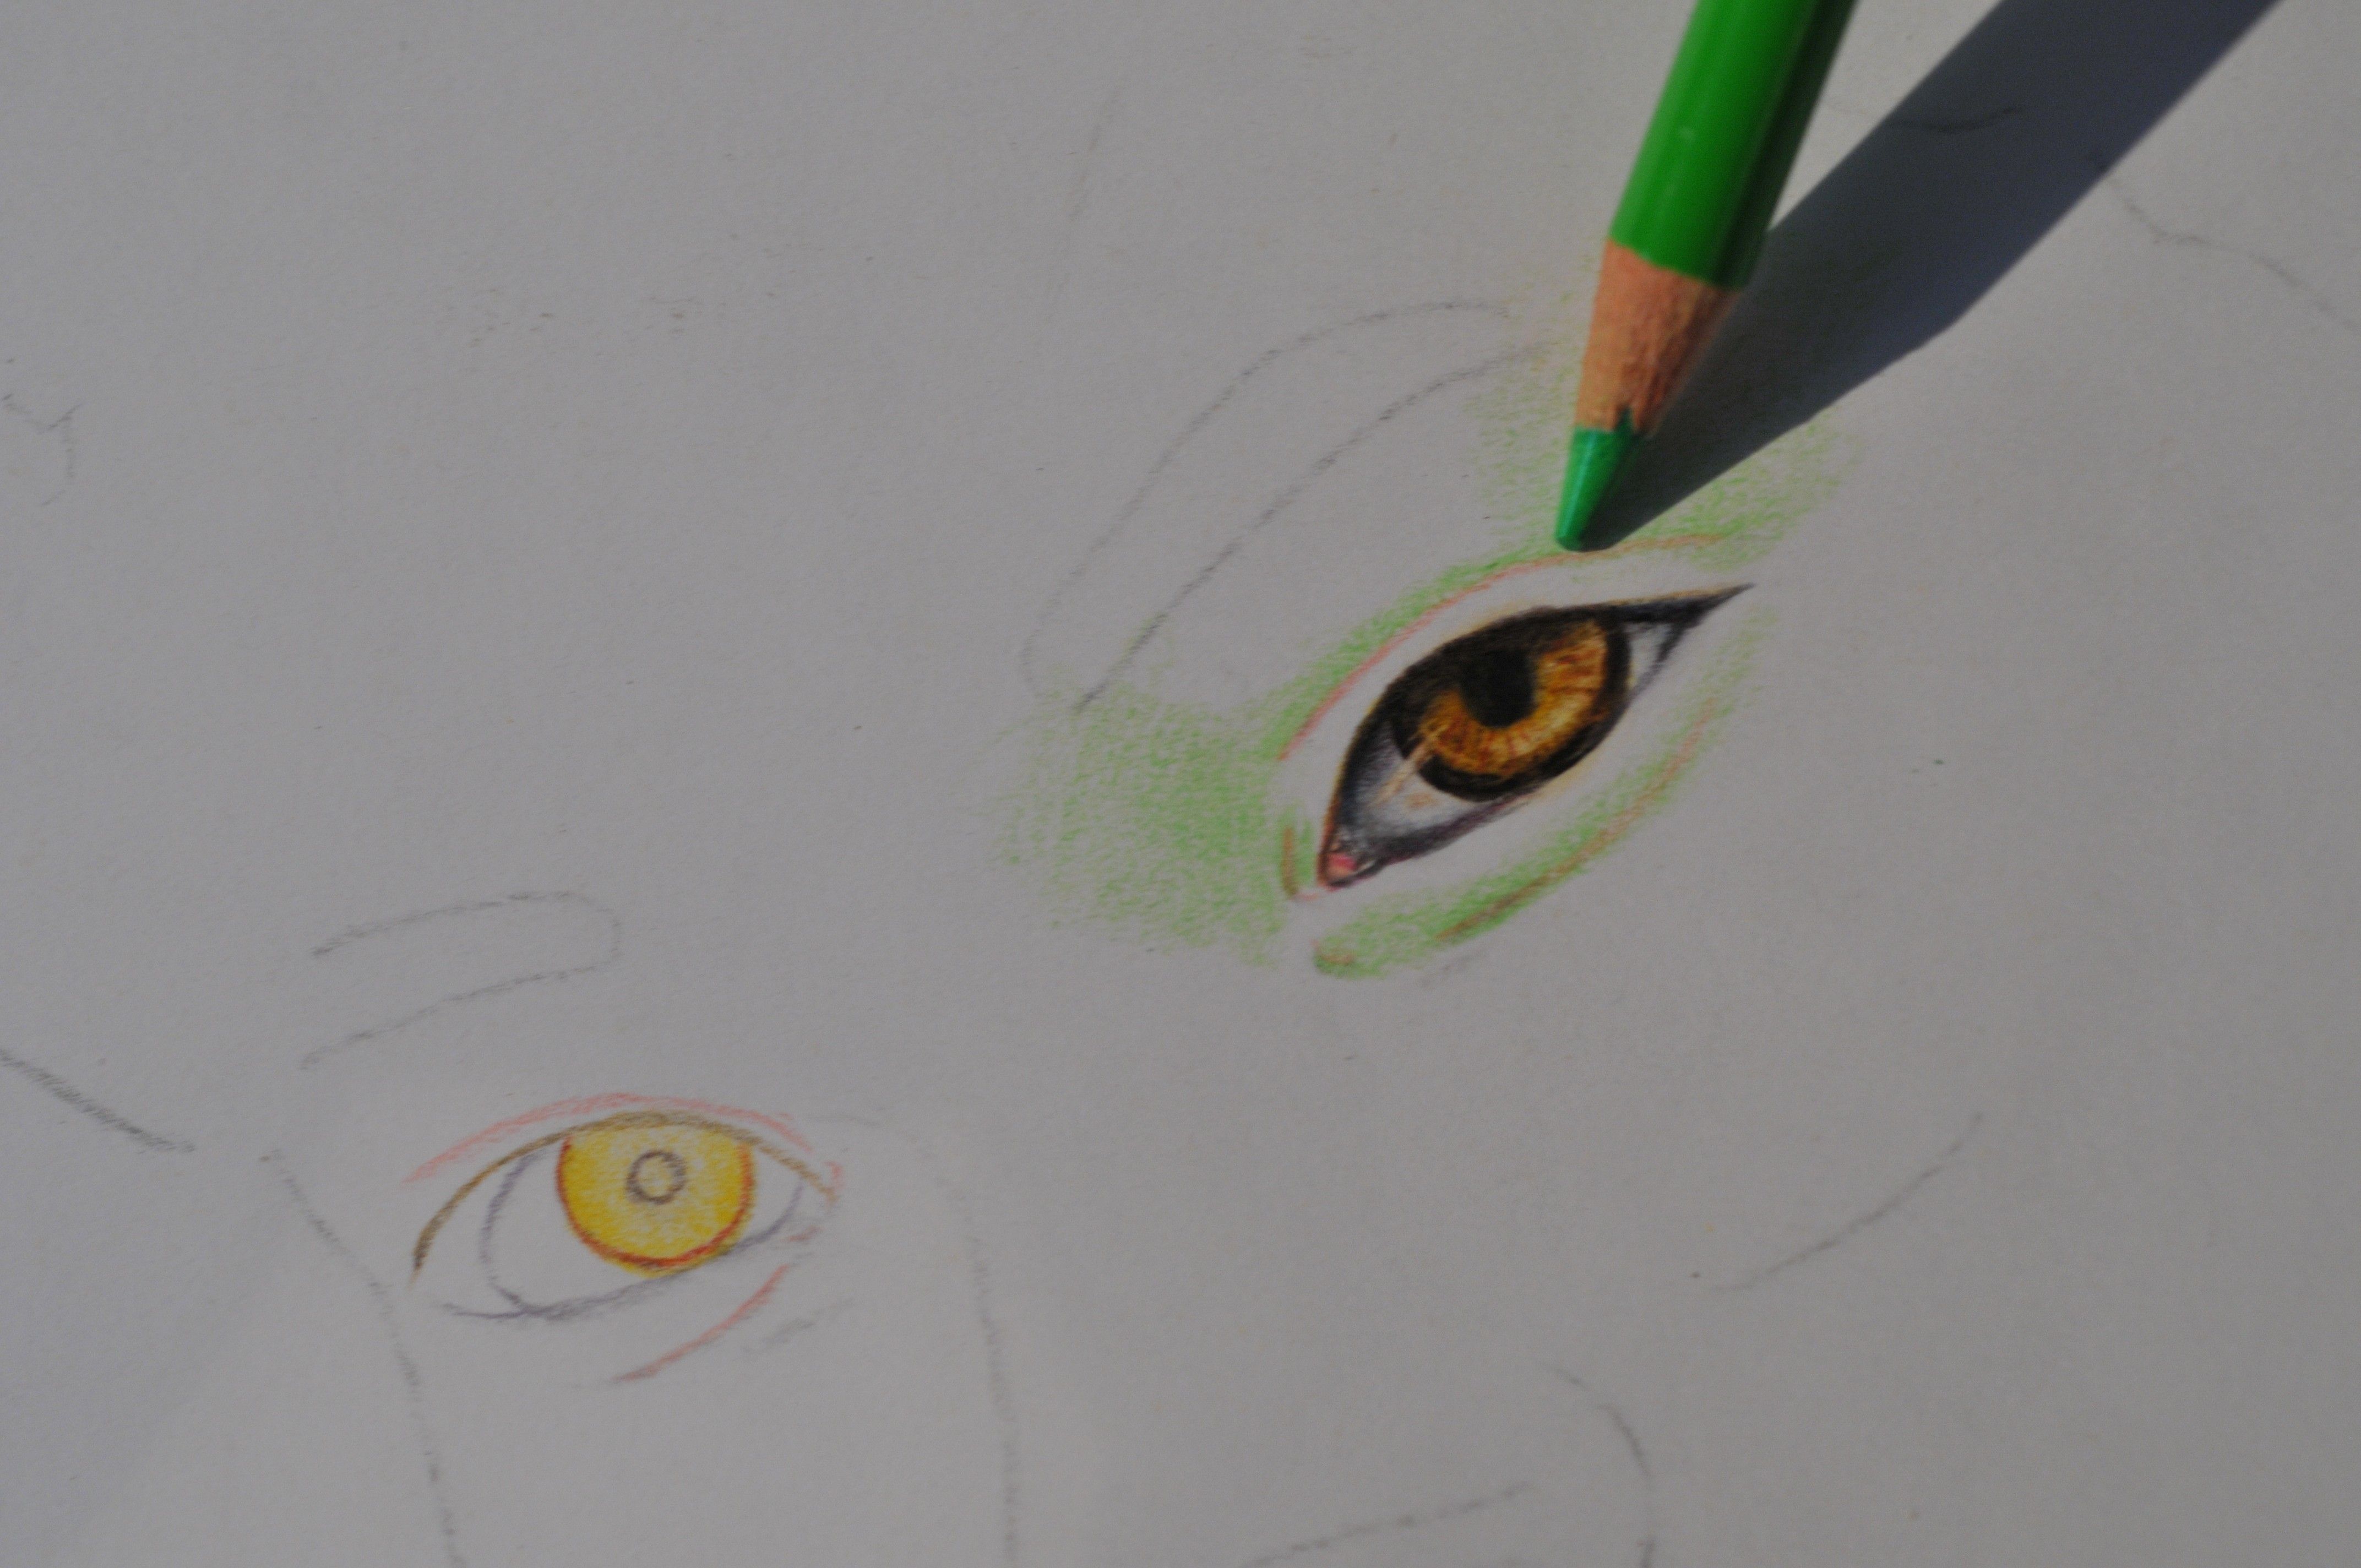
Then, on this green coloration, apply a "peach" color, skin like, not fair but a darker tone than the main skin color you wish.
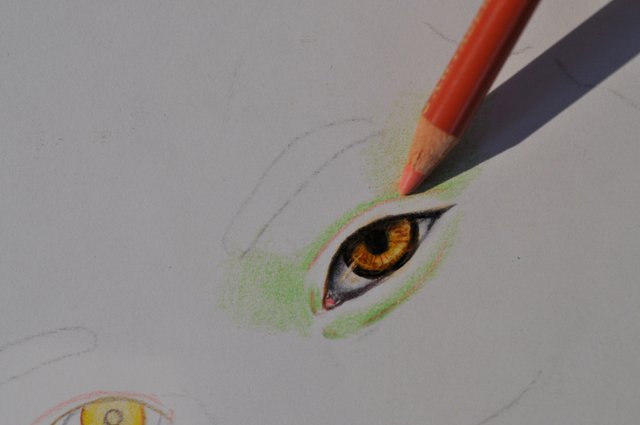
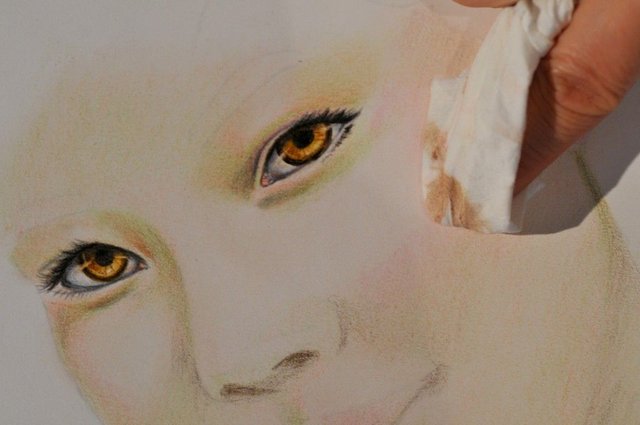
Continue on applying a darker color where the shadow should be and when finished, melt every colors together with a paper tissue.

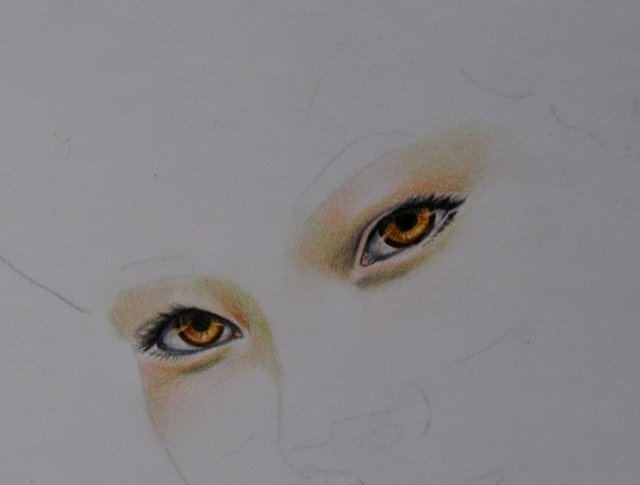
Bringing into life the other eye...
Again, color all the shadow parts with green, and then peach, as above.
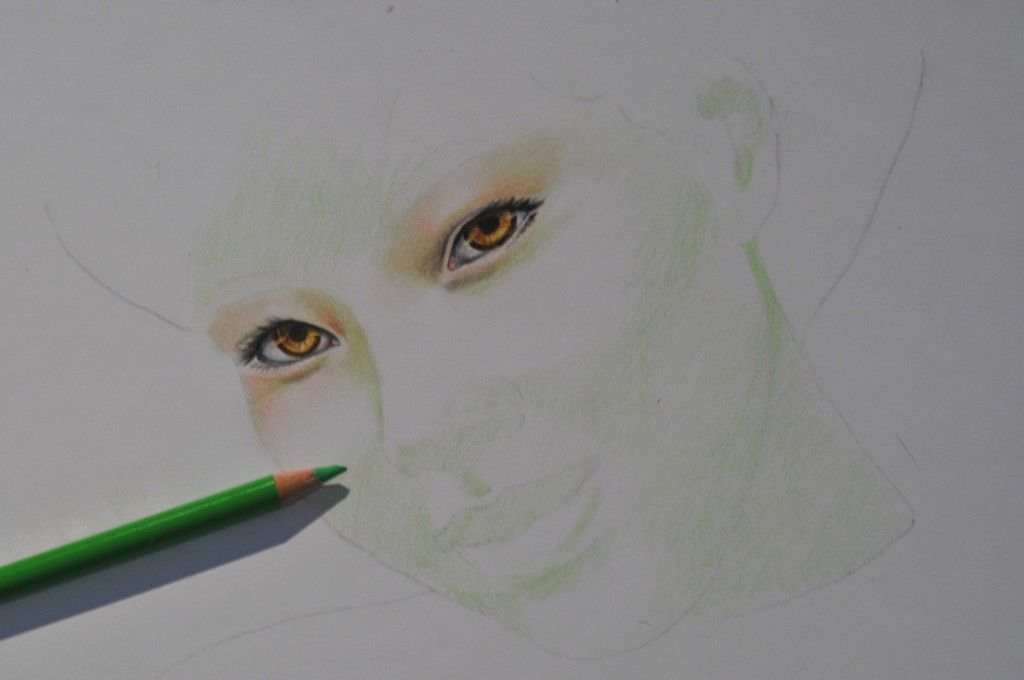
Now, you have the base to work on. With the main skin color pencil, color all surface (including the shadow parts you just worked on), very lightly. Melt again.
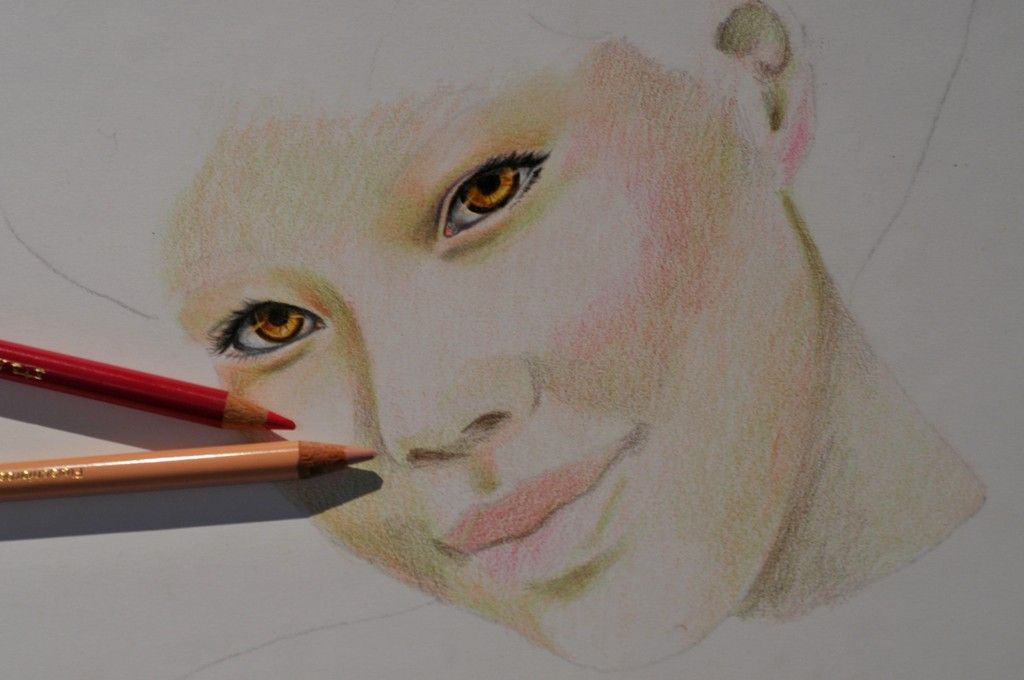
And you may "sculpt" out the shape of the face, with its bumps and hollow parts. Bumps : with light colors and hollow with dark ones (Just as you make up and contour with a base complexion). Beware : NEVER use the black color to shade the hollow areas. The black color kills the luminosity of a drawing, especially portrait. Use dark brown, dark violet to create the shadow. You may use black color only for the nose's holes.
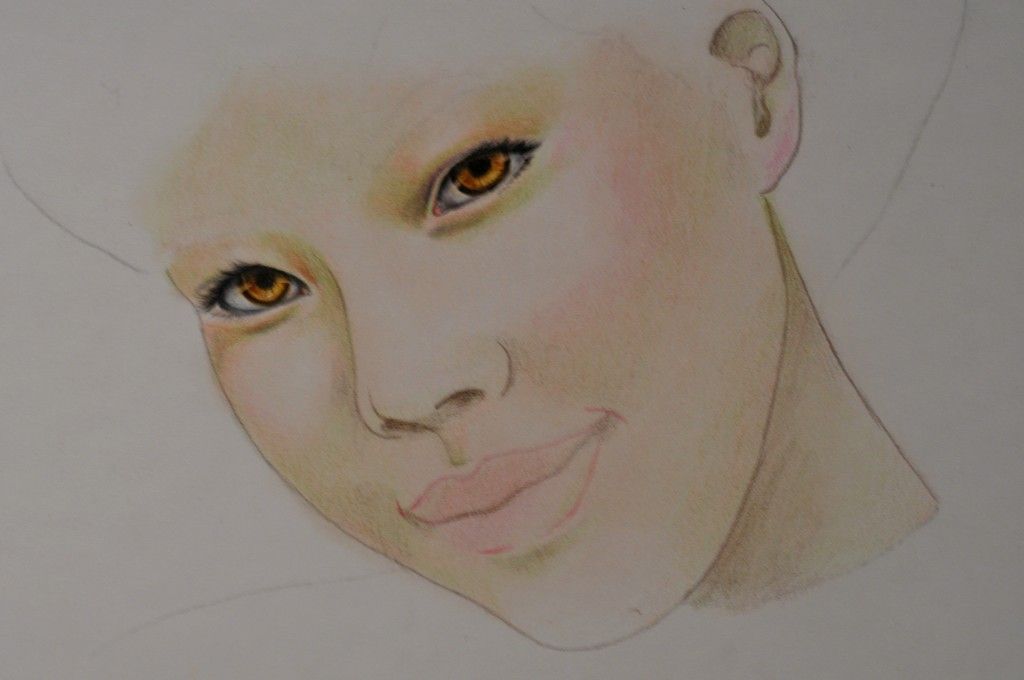
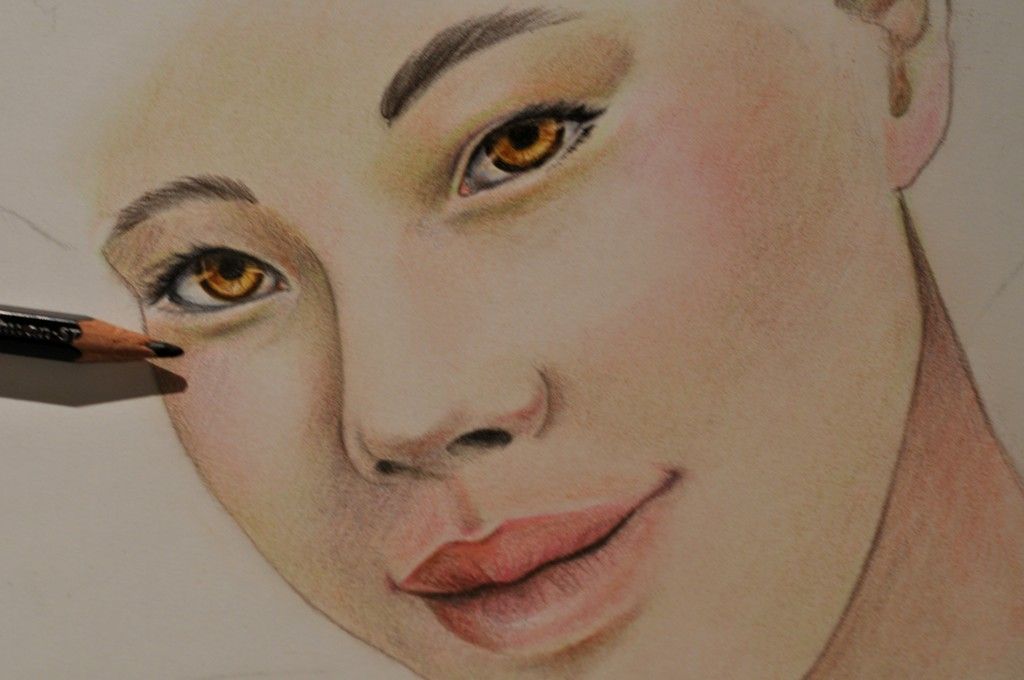
We finish now with the mouth. The upper lips are to be well defined. In other hand, the lower lips are to be barely drawn : They have to be just suggested, not plain drawn, otherwise, you will get a heavy mouth without any vivid expression. The line between the lips gives the smile, make it harmonious and only this line gives the expression of the whole face.
The lower lips have to "shine" with a moister look : use your eraser pen to create a reflection with a white line long in the middle of lower lip. More you shadow the under the lower lip, more the lip will look generous (most of girls know that for their make up and contouring)
Now you're almost done ! Just create a shadow on the right side to light up the drawing... And that's it ! Your portrait is finished !
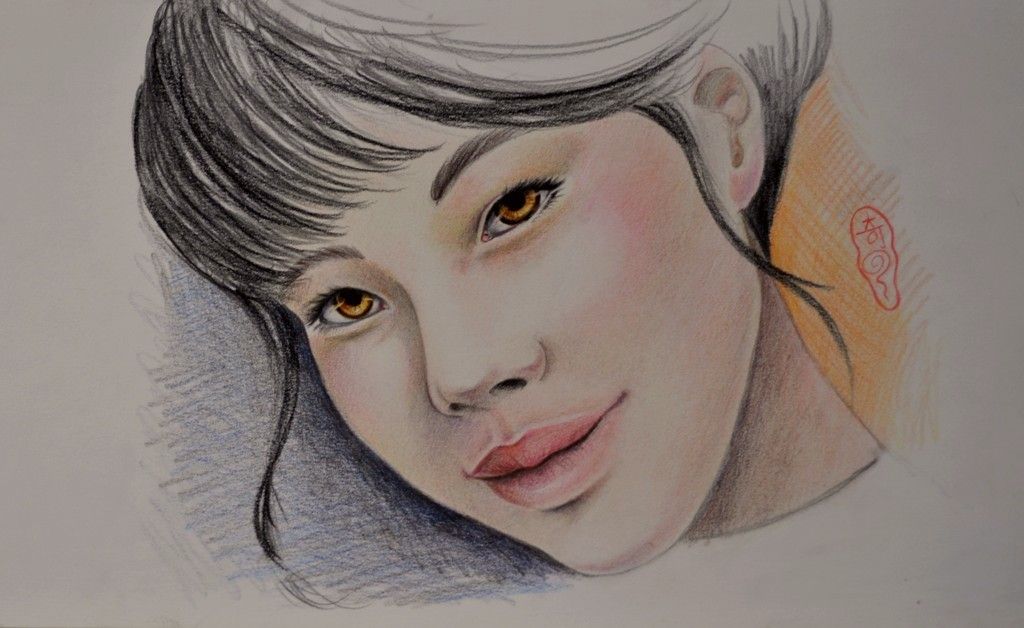
Don't forget to varnish it with a varnish for pencil works or if you don't have any, a spray of hair lacquer will do (not too close).
Thank you for having read this until here : This means you have a pretty good amount of patience, which is needed in all art works...
GOOD creation, all !
Hope you enjoyed this... If yes, please, follow and share, thank you !
Interesting way to capture the likeness, well done!
from you, this compliment means very much to me, because you ARE a great artist ! Thankssss
hello @tiloupsa
This is truely amazing. I like this a lot. Feel like I can draw a portrait already.
Good job.
Cheers
@dante31
Of course you CAN ! It not difficult... just take your time and FEEL the glance of the picture you are drawing. One important thing : You have to be very very faithful to the modeling shadow on the real picture, don't invent them. And when you have finished, then and only then, add some invented projected shadows.
Oh gosh. You are so good. You used green as your undertone. I would definitely resteem this. I also need this as my guide. Keep it up darling. You are doing an awesome job.
so happy to be helpful ! thank you for your support and compliments from you is meaningful to me, because you have plainty talent for yourself ! You are a darling too, you know ?
Oh dear, you are always welcome. Feel free to join contests too. It is a great way for you to be known by the people around. You can try #drawitbetter #doodleon and a lot more 😄
eyes are windows to the soul! just beautiful!
thank you for opening those windows, once in a while, dear friend.
Very nice job done! Thanks for sharing the so detailed process!
Well, thank you for your support. I'm going right on your posts to see your works !
this was so helpful..thank you for sharing :)
you are the most welcome ! hope you will soon post a portrait for yourself ?
i am trying and will definitely complete one soon :)
can't wait to admire it !!
That looks amazing!
Thank you !
Wow, this is awesome. You are very talented and I'm going to keep coming back to your blog to check more of your work.
thank you ! with the firepower at my side, I reach all the passions of painting ! will post more of my works this coming WE and hope to see your ardent glance !
You are most welcome. Awesome! Keep me updated. I will check them out.
Interesting drawing guide, the first for beginners. What is delivered is easy to understand and can be followed.
Thank you for sharing this very useful knowledge. Greetings from Indonesia
Thank you for your support. Yes, I'm trying to be useful... In many ways ;-)
Success for you forever @tiloupsa
I think it is the best XMas gift you gave me here : Your wish will become true for it is "selfishless"... so, I THANK YOU and wish that everything your heart (and not your mind) desires come to reality !
I love to see others succeed and happy. Your skill in painting is certainly a gift God has given you. It is appropriate that people like you get a respectable position in the community. I will look forward to your next work.
Your suggestions will help others to make portraits .... have a good day :)
yes, that's the idea indeed... thank you and you too, a nice day ! (here in France, the weather is awful right now !)
don't worry for weather i follow you .... :)