Install = Nginx + SSL Certificates Certbot + Docker + Docker-compose (For build a node) Ubuntu 16.04
Install Nginx (Virtual Hosts) on Ubuntu 16.04
Now go
 sudo ufw status
 Status: inactive
Inactive is ok.
sudo apt-get update
sudo apt-get install curl
sudo apt-get install nginx
for check
curl -4 icanhazip.com
out:xx.xx.xx.xxx= (*Ip from the server where you want to install Nginx)
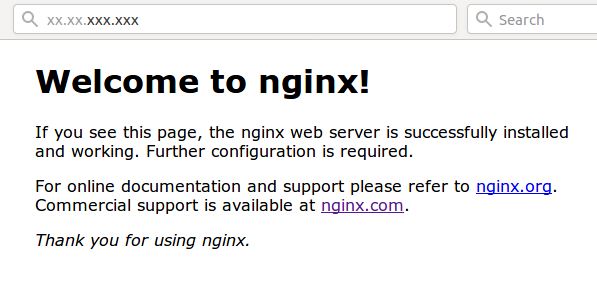
Go to your Browser Firefox for example and go to
http://(*Ip from the server install Nginx)
You should see Nginx page like
configure your host for nginx respond to domain you like.
for the nex step i used VIM use nano is you like more.
create file defaul.conf in
/etc/nginx/sites-enabled$
sudo vi default.conf
 ##
 # You should look at the following URL's in order to grasp a solid understanding
 # of Nginx configuration files in order to fully unleash the power of Nginx.
 # http://wiki.nginx.org/Pitfalls
 # http://wiki.nginx.org/QuickStart
 # http://wiki.nginx.org/Configuration
 # @melea_trader
 # Generally, you will want to move this file somewhere, and start with a clean
 # file but keep this around for reference. Or just disable in sites-enabled.
 #
 # Please see /usr/share/doc/nginx-doc/examples/ for more detailed examples.
 ##

 # Default server configuration
 #
 server {
         listen 80;
         root /var/www/YOURhostnameHERE;   #domain for ssl certificate
         server_name YOURhostnameHERE;    #domain for ssl certificate

         location / {
            # First attempt to serve request as file, then
            # as directory, then fall back to displaying a 404.
            try_files $uri $uri/ =404;
    }

    # pass the PHP scripts to FastCGI server listening on 127.0.0.1:9000
    #
    #location ~ \.php$ {
    #       include snippets/fastcgi-php.conf;
    #
    #       # With php7.0-cgi alone:
    #       fastcgi_pass 127.0.0.1:9000;
    #       # With php7.0-fpm:
    #       fastcgi_pass unix:/run/php/php7.0-fpm.sock;
    #}

    # deny access to .htaccess files, if Apache's document root
    # concurs with nginx's one
 #
    #location ~ /\.ht {
    #       deny all;
    #}
 }


 # Virtual Host configuration for example.com
 #
 # You can move that to a different file under sites-available/ and symlink that
 # to sites-enabled/ to enable it.
 #
 #server {
 #       listen 80;
 #       listen [::]:80;
 #
 #       server_name example.com;
 #
 #       root /var/www/example.com;
 #       index index.html;
 #
 #       location / {
 #               try_files $uri $uri/ =404;
 #       }
 #}
NGINX can check is the sintx inside .conf file is ok
 sudo nginx -t

 nginx: the configuration file /etc/nginx/nginx.conf syntax is ok
 nginx: configuration file /etc/nginx/nginx.conf test is successful
Is ok?
Any time you change any file for NGINX
service nginx reload
so now go to your browser like netscape and go again to your http://yourhostname
if you see welcome page again you are worn here. check your .conf, in the other hand if you see:
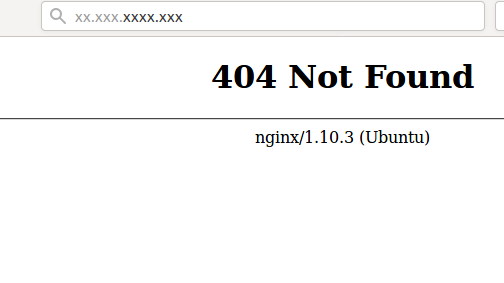
Keep Calm, Dont worry
404 like this is OK and you are fine.
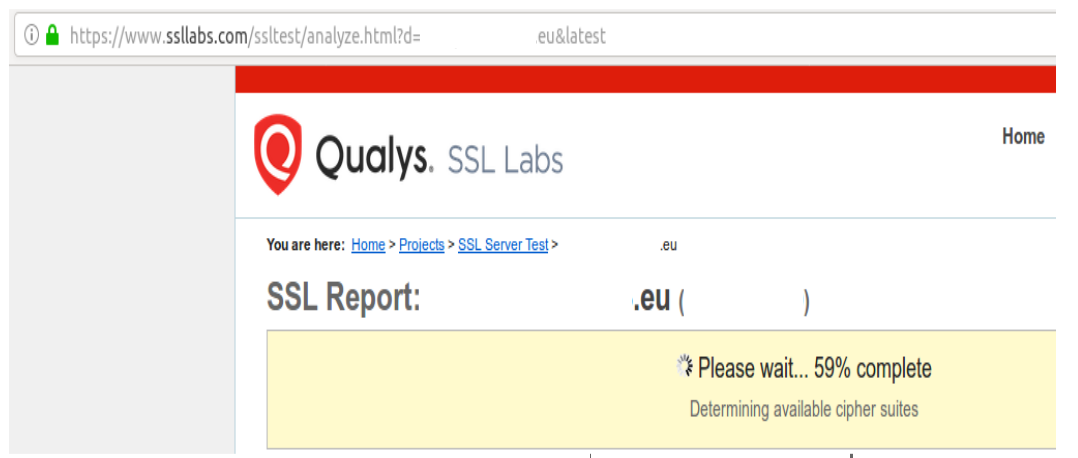
If you want to go to HTTPS:
try now in your browser https://yourhostname.lol = dont work because you dont have ssl for that host-name.
So is time to make one Certificate SSL for your Domain.
Now lets Install install python-certbot-nginx
for run SSL certificates.
Install Automate Mode for Ngnix on Ubuntu 16.04
 sudo apt-get update
 sudo apt-get install software-properties-common
 sudo add-apt-repository ppa:certbot/certbot
 sudo apt-get update
 sudo apt-get install python-certbot-nginx
go for
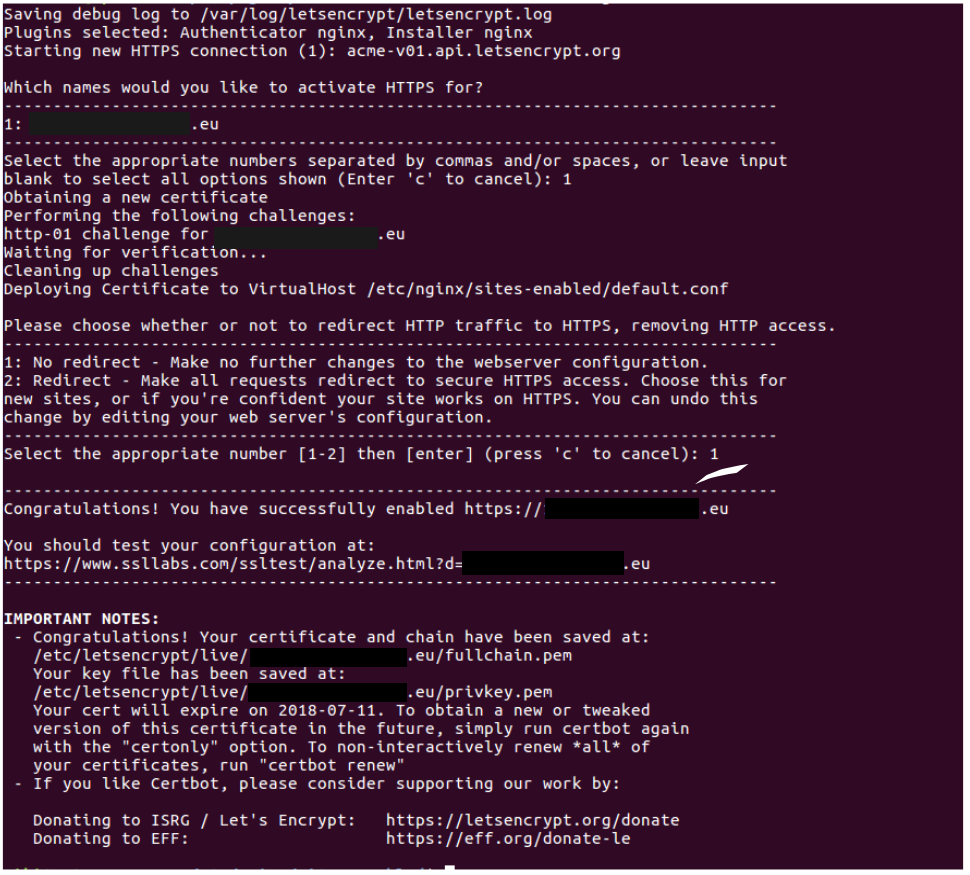
sudo certbot --nginx
Running this command will get a certificate for you and have Certbot edit your Nginx configuration automatically to serve it


now

keep calm after 5-8 minutes or more, you just wait
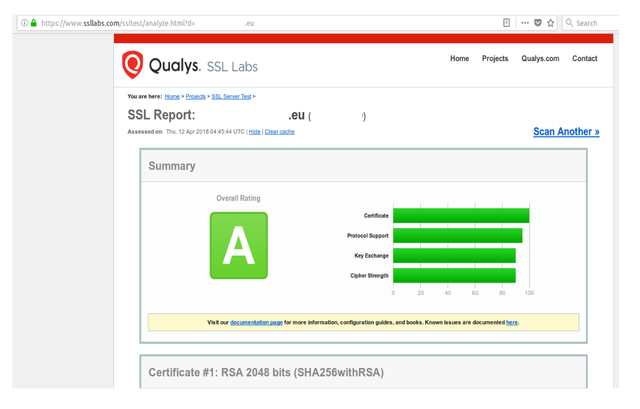
now if you try https://yourhost
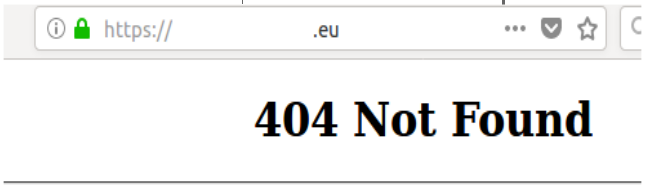
one more time 404 is ok. And SSL is working in your domain.
now go to
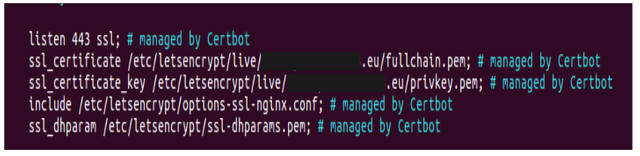
/etc/nginx/sites-enabled$ vi default.conf
now you can see the automate mode write your file and put the path to ssl keys in
listen 443 ssl; # managed by Certbot
like the pic.
close vim and
see this
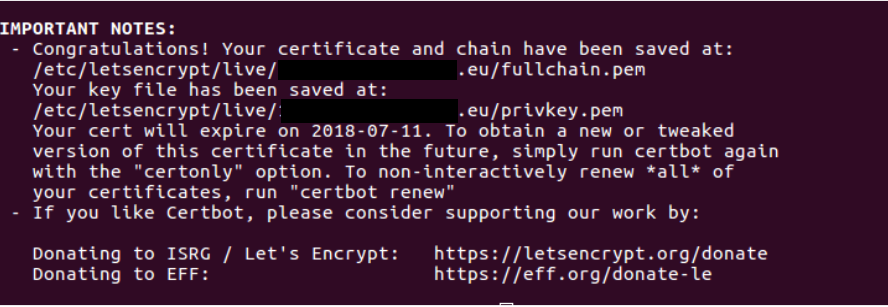
inside /etc/letsencrypt/live/yourhost/

Here you have the keys make a copy for your security.
Copy Done,
for automate renew the ssl cert
sudo certbot renew --dry-run
Done!
now you have here :/etc/letsencrypt/live
for your ssl certificate this files,
cert.pem
chain.pem
fullchain.pem
privkey.pem
You make a copy to other dir Before from this file , in case you need for your node the files
 domain.crt
 domain.key
go to Dir where you make the copy and:
 sudo cp -p cert.pem domain.crt
 sudo cat privkey.pem fullchain.pem > domain.key
Now you have
 domain.key
 domain.crt
Intalling Docker
In case you need docker and docker-compose for your node or Dapp install
Install Docker
 sudo apt-get update
 curl -fsSL get.docker.com -o get-docker.sh
 sh get-docker.sh
 sh install.sh
Add your user to Docker Group
sudo usermod -aG docker $(whoami)
Add more user to Docker Group like
sudo usermod -aG docker username
Install Docker-Compose
sudo curl -L https://github.com/docker/compose/releases/download/1.21.0-rc1/docker-compose-`uname -s`-uname -m -o /usr/local/bin/docker-compose
or
sudo curl -L https://github.com/docker/compose/releases/download/1.20.1/docker-compose-$(uname -s)-$(uname -m) -o /usr/local/bin/docker-compose
Docker-compose install ok
 sudo chmod +x /usr/local/bin/docker-compose

 docker-compose —version
Out like
 docker-compose version 1.xx.1, build xxxxxx
 docker-py version: xxxxx
 CPython version: xxxxx
 OpenSSL version: xxxxx
now you have Docker and Docker-compose Install ok.
For You Know:
It is not my responsibility to explain security issues for your node in this post. That you know that you are responsible for taking the appropriate measures to make your node safe from hackers.
Note 2: Firewall from ubuntu have NGINX on Dapp list so
 sudo ufw app list

 Output
   Available applications:
   Nginx Full
   Nginx HTTP
   Nginx HTTPS
   OpenSSH
Nginx Full: This profile opens both port 80 and 443 for ssl
Nginx HTTP: only por 80
Nginx HTTPS: only por 443 for ssl.
if you activate your ufw firewall, you need
sudo ufw allow 'Nginx Full'
For example. and done!
i hope this can help!
Please remember voted for my
Witness melea-trust
in Peerplays Blockchain (Active and producing blocks)
Witness melea-trust Decent Blockchain
(Servers actives but still waiting for votes for can producing blocks.)
@melea in Steem Blockchain
(Servers actives but still waiting for votes for can producing blocks.)
My proposal and nodes here details.
Peerplays
Decent
https://steemit.com/decent/@melea/melea-trust-witness-propossal-for-decent
Steem
https://steemit.com/witness-category/@melea/witness-proposal-melea-trust
Cheers Happy Building.
BEWARE
This is wron
sudo cp -p cert.pem domain.crt
sudo cat privkey.pem fullchain.pem > domain.key
This is ok. =
$ sudo cat cert.pem fullchain.pem > domain.crt
$ cp privkey.pem domain.key
sorry the mistake.