A Mad Scientist's Automated Factory - How I Built My First 3D Printer
In October of last year, I sold off all of my old DJ gear and bought a 3D printer. It was a kit from MakerFarm, and came in a massive, heavy box. I had dabbled in 3D animation in the past, and figured that it was about time I take a plunge in trying to make some of those digital dreams real. I was done being fascinated with 3D printing and decided I needed to experience it for myself.
In this post, I'd like to show off the construction of the project. All told there was about 30 hours in physical construction over a 3-day weekend, another 10 or so hours learning software, and countless days of tweaking and printing since. I've still not mastered it, and recently there have been some issues that I haven't had the time to work out, but I'm getting closer to tackling that beast once more now that I've cleaned out my office to the point where I can finally reach it again.
It All Starts With A Box
Weighing in around 50 pounds, the massive shipment was nothing but anxiety ever since I clicked "submit order". It's rare that I hold much tension for a product to ship, but this one was special. I took the fateful day of arrival off work just so I could run out to the UPS driver to haul it in the moment it arrived.
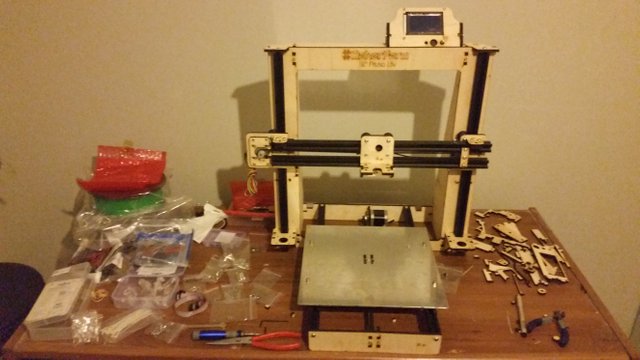
The Unboxening!
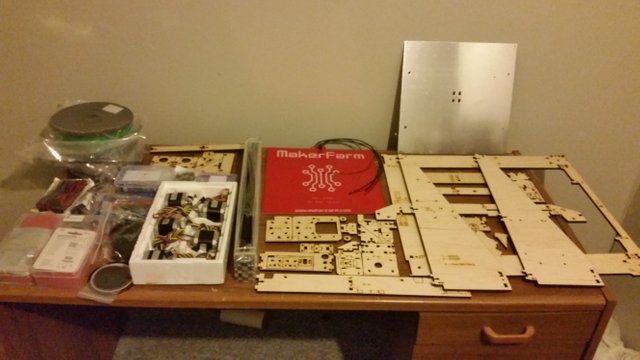
The first half-hour or so was spent simply organizing and gawking at everything inside. The next half-hour was spent hauling my laptop into the construction room and download the assembly instructions and videos so I could start following along.
Starting Small
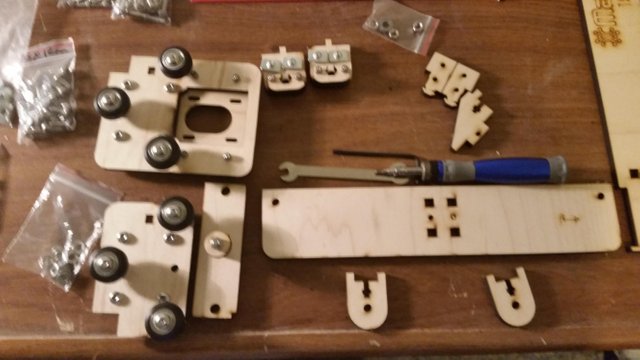
Honestly, when I was putting these parts together, I knew they would somehow magically work with the guide rails, but I had no idea how such wicked sorcery would ever go down. Just follow the instructions, and keep going.
Standing Tall
At the eight-hour mark, I finished my first day. At the end of said day, I had the shell of a beast before me. Unable to move on it's own, it was prepared to house it's future brain and motors. This was a sweet moment of victory all its own.
Braaaaaains!
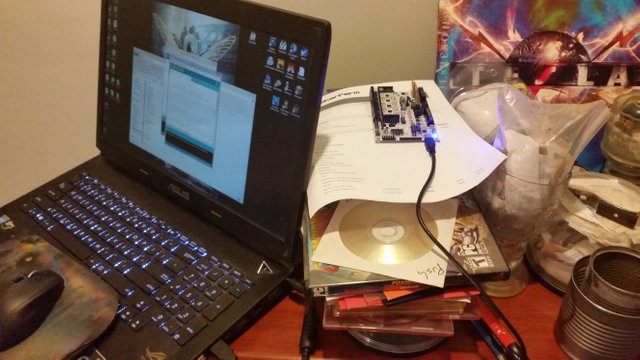
Here we have the mighty arduino board. This one is pre-modified with controls for the stepper motors, but still required a firmware update and some driver configuration. This is my first time with an arduino or similar board, and I have no idea what I'm doing. This is starting to feel like a reoccurring theme with this build, but the instructions were solid, so I just kept on moving.
Blood, Sweat, and Tears
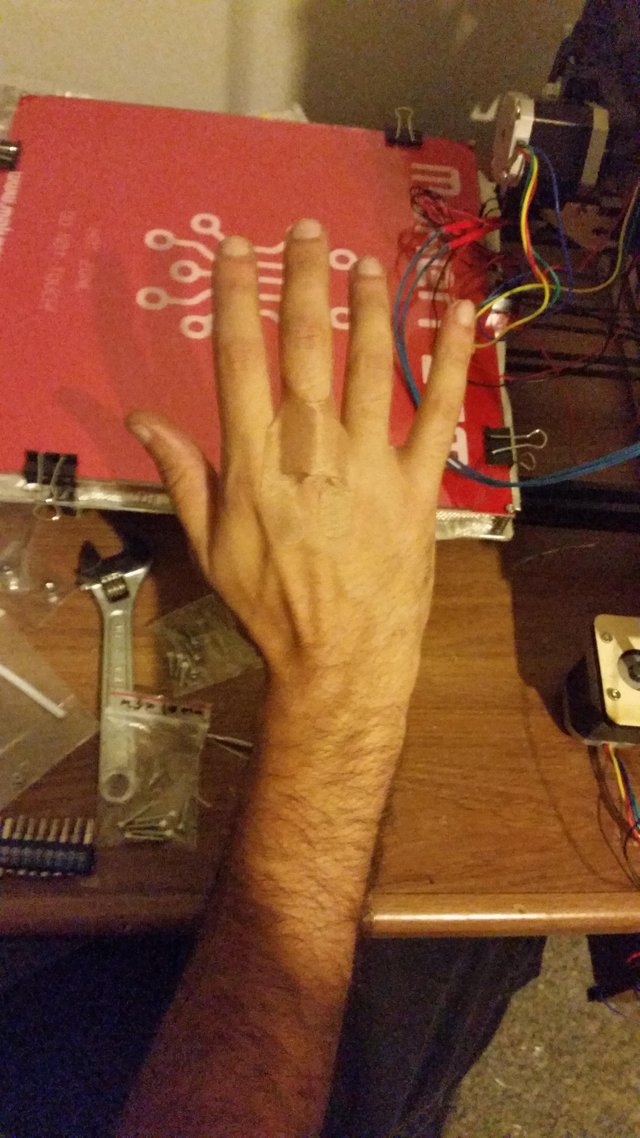
In all honesty, I had literally cried and sweat over this one, because even though I was making progress, it was difficult, and I was afraid I had spent a large sum of money for a purchase I might regret. The last part of the ritual required a blood sacrifice, which came in the form of mis-handling the glass plates I cut to act as a printing surface. Again, cutting glass was something I had never done before, but is a fast teacher of what to be aware of. Luckily, I only lost a bit of my knuckle and nothing worse.
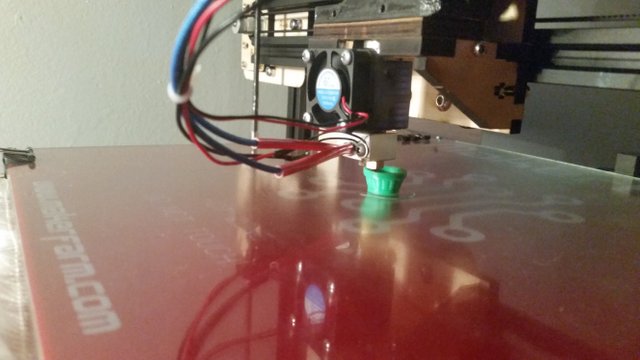
The Moment That Made It All Worthwhile
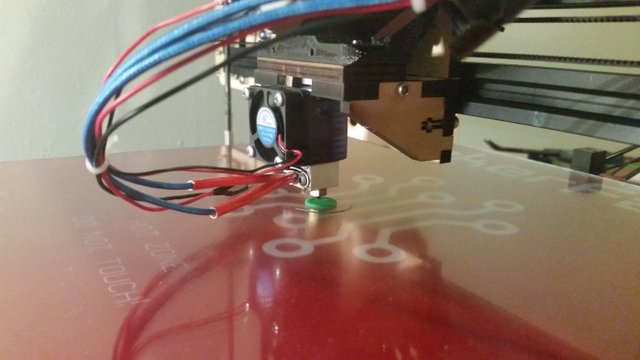
I had already printed the test cube, made some adjustments, leveled the bed, tightened every bolt, and double-checked every connection. This image right here is the moment where everything started to get a LOT more real for me.
Building it Up
I stared in awe the entire time watching it print. The noise it made was reminiscent of an old dot-matrix printer (showing my age here), and was soothing if not a bit noisy. It was interesting to hear the different noises it would make for all the different angles of printing, which made me wonder what kind of object I would have to print to make it squelch out the imperial death march.
Delivery By Drone
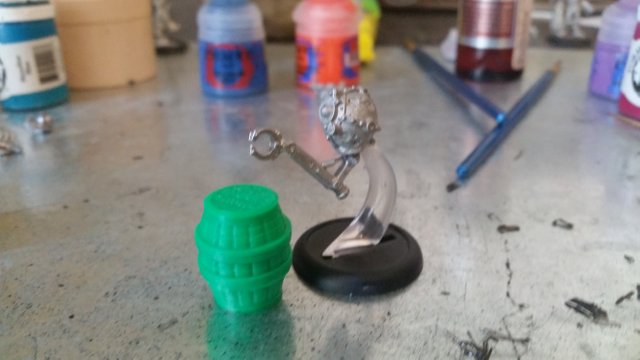
One print down, and it scaled well with a few recent Warmachine figures I had acquired. The next few hours were a rush of changing filaments, downloading files to print, and watching the printer do its thing.
The Next Big Step - Making Your Dreams a Reality
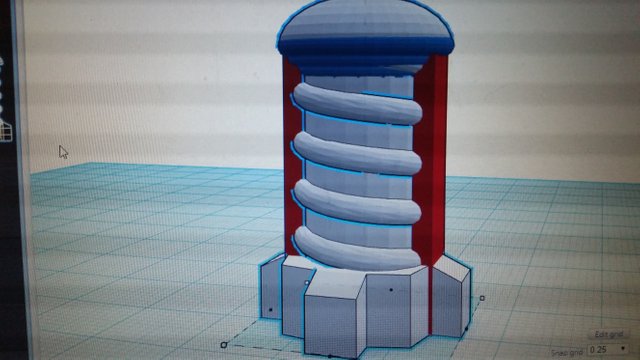
Now that I had proved I could print the things I downloaded from others, I IMMEDIATELY threw a design together fitting of my own style: a simple little fantasy tesla coil. Minimal design, just get it to the printer as fast as possible. It was more a test to see just how real all of this was and less about what I was actually designing. Most of the work was done in autodesk, but I finished it up with tinkercad just to make sure it was the right size and scale, since I didn't yet trust my ability to convert inches to milimeters without skipping a decimal place.
Not Perfect, but It's a Start

I knew little of overhangs, or bed leveling, or any of the tips and tricks to maximize your build potential, but it didn't matter. The strangely phallic little tesla coil was my pride and joy of the moment, but I knew I could do better. Back to the drawing board, I expanded upon my original design.
Bigger, Faster, Stronger
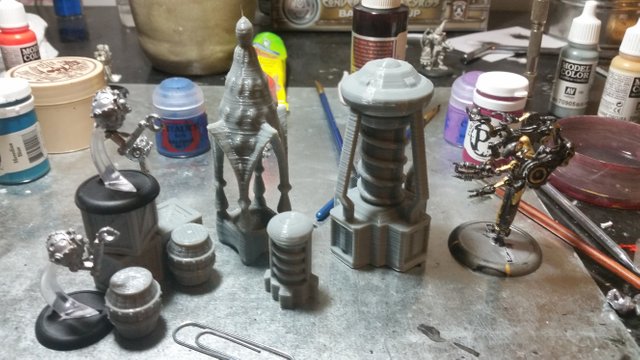
The new tesla coil was almost 4 inches tall, and improved upon my original design in almost every way. At this point I was well on my way to learning everything I could about 3D printing. This of course means that it wasn't long before I started to...
Print Its Own Upgrades
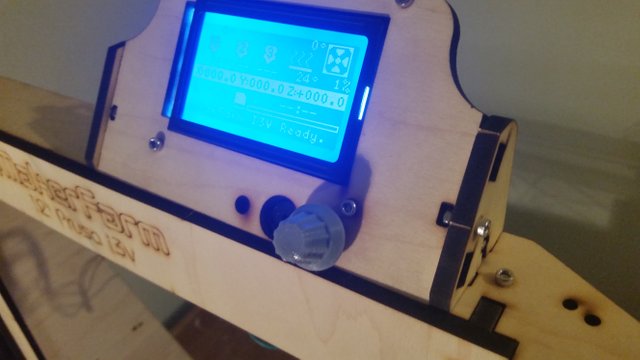
Yup, with a 3D printer, especially one that comes as a kit, it doesn't take long before you start upgrading parts with new 3D-printed versions that you download or design yourself. Here I printed a new control knob so I didn't have to fiddle with the metal peg on my display panel.
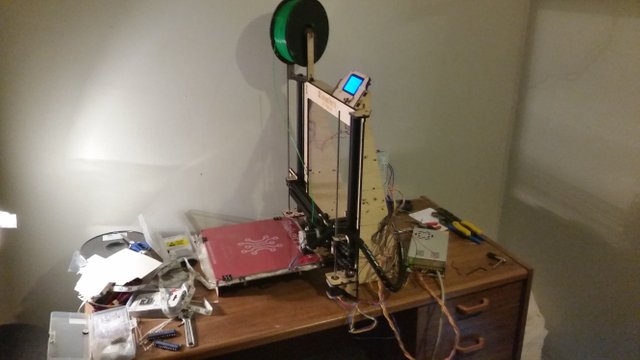
Not Bad For A Long Weekend's Work
I'll leave this post here, where I finished almost a year ago. Just writing this makes me want to break out the torx bits, level the printing surface, and see if I can't work out the bugs that were haunting my most recent prints. All-in-all it was a fun build, and has proven itself rather handy (and profitable) many times in the last year since its construction. If you have any questions or comments, I'd love to hear from you, and I'll see what I can do to post some more recent pics of builds that I've done since.
Edit: I totally didn't expect the response I got from this! Thank you for your support! In the event someone goes and finds the original imgur post (saved you the time there) I have updated my imgur user bio to include my steemit username so there's no question of funny business! XD Thanks again!
I'm yet to see this 3d printer myself, but sure that will happen. :)
How soon until it can print Meat Tornado's? lol
Well, I have yet to perfect a protein extrusion attachment for it, but when I do, no food shall be safe!
You crafty devil! I'm jealous. Every year I got to Maker's Faire and every year I'm tempted to buy one. They keep getting cheaper and cheaper but I've got a lot of excuses. I would 3Dprint a scan of my own skull!
I actually have everything I need to set up a 3D scanner (but not an x-ray) I would just have to dig the stuff out of a box, and then tinker with all of that. First get the printer really well tuned, THEN 3D scan stuff....then, ROBOT ARMY! XD
You should get one! They're a ton of fun, even one of the smaller ones can work wonders, but I warn you, once you get a little one you'll just want bigger and bigger ones! XD
Let's start big then and get smaller. 3-D print the universe.
How do you know I havent already done that? XD
Kind of makes me miss falling asleep to its squeaks and chirps. Glad you made a proper documentation of this process! By the way, did that hunk of hand ever grow back completely?
There's a smooth little spot there, so it lacks the texture it once had, but for all intents and purposes it's back to normal.
Dont worry, I'm sure the hums and whirrs will be back soon enough, once I get the rest of the office cleaned out I'll be back to fine tuning the beastly machine.
Always nice to find that somebody else on steemit is also into 3D printing :)
I have been working on a series of posts about 3D printers and 3D printing that you might find interesting.
I did see your posts actually, even skimmed through your troubleshooting steps one to see if there were any tips in there I didnt yet have in my bag. Good stuff and I'm following you for sure.
I think you should've posted this earlier. Nice job. :)
Hah, fair nuff, like I said tho I've been in more of a fiction mood lately. However, after spending a couple of days working on cleaning the office that houses the beast, I remembered that I had a full photo-blog of the build from last year, and figured I'd post it.
I love living in the future!
amen!