DIY~~APPLYING A STONE VENEER TO AN OUTDOOR KITCHEN
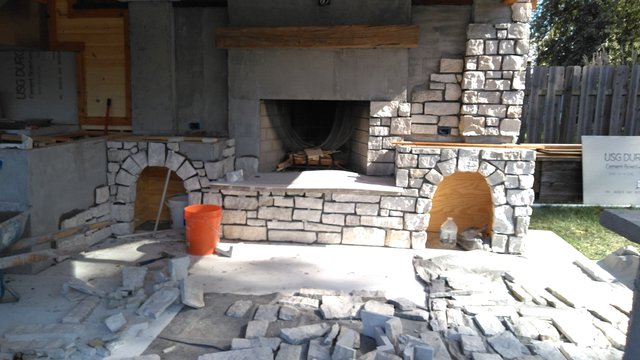
*Mid project
AFTER FRAMING IS DONE
You will want to begin by installing cement board to all areas to be covered by stone. Then metal mesh is installed over the board using screws.
Once these steps are taken care of you are ready to begin the masonary work. We will begin by mixing some premix mortar in a wheelbarrow.
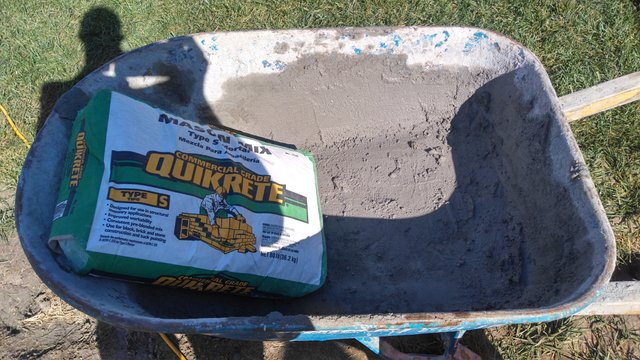
Using premix eliminates a lot of issues with getting the right mixture of chemicals, as it is already premixed and we simply add water. We will want our mortor fluffy(not watery and not too dry of a mixture.) so it sticks well to the cement board.
Then using a trial apply a layer just thick enough to cover the wire mesh. After applying use a trowell to create a larger surface area by striking all the mortar you applied.
NOW FOR THE STONE
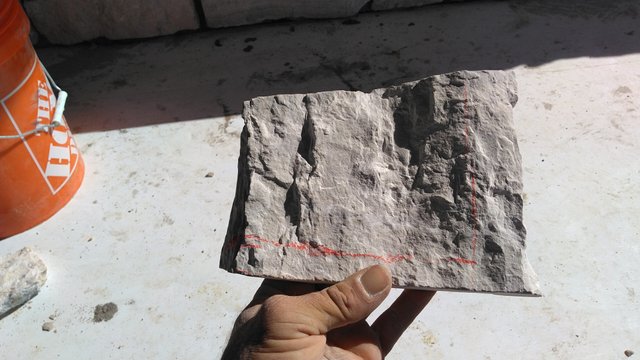
Stone veneers come in a variety of shapes, sizes and colors. So after selecting what you like and getting it home, you are set to finish your beautiful outdoor kitchen.
We will start by mixing up a new batch of mortar in our wheelbarrow. We will also want this batch to be fluffy. After mixing begin by putting a 1-2 inch thick layer on the back of the stone you wish to put up. (Also, you want to start at the bottom and work your way up the wall.) Then gently push it against the wall(make sure it is level) and hold it for a few seconds. Now, to help keep it in place, simply add a small shim(I use little rocks) under the stone and it should hold it's place. Repeat this until you have finished your bottom of stones.
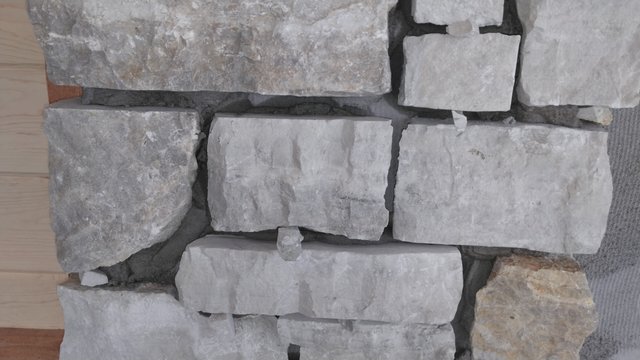
As you seeing the picture above, after your first row, you simple move up one more row. Try to keeps the vertical seams offset and it will help it look even nicer.
FINAL STEPS
After the stones are adhered to the wall we get to play with a tool called a grout bag. This handy item will be used to fill in all the seams between the stones.
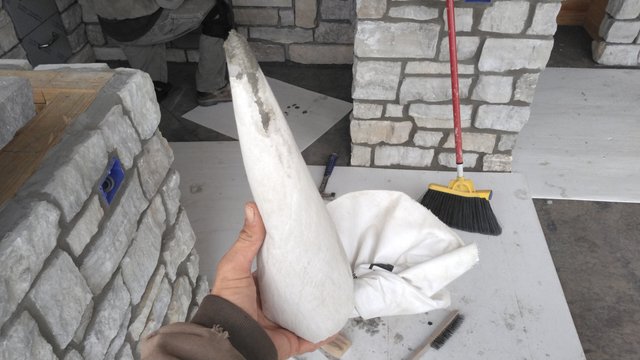
It works the same way as a bakers' frosting bag. You add some mortar into the to(big) hole and when you give it a squeeze it will come out the small hole on the other end in a very controlled manner. This way we can fill the seams without making a mess.
Once you have the seams filled in, you will want to give it a texture that looks natural. This is accomplished by using a wire brush first to remove the excess mortar.
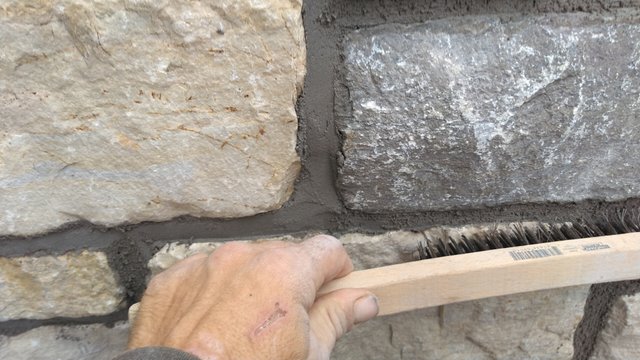
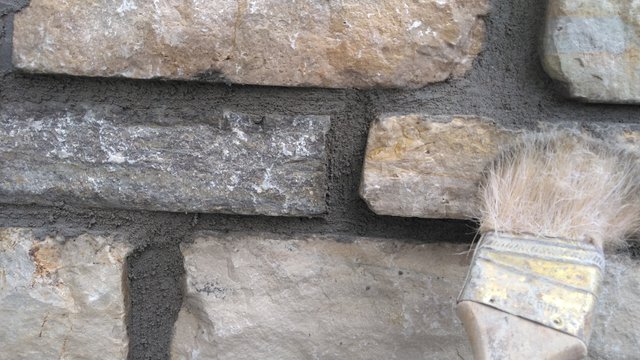
After that you can smooth it back down with your fingers.(I highly recommend wearing gloves if you like you fingers not being torn up.) Then using a soft bristle painter's brush, lightly give all your seams a good brushing. The end result should look similar to this.
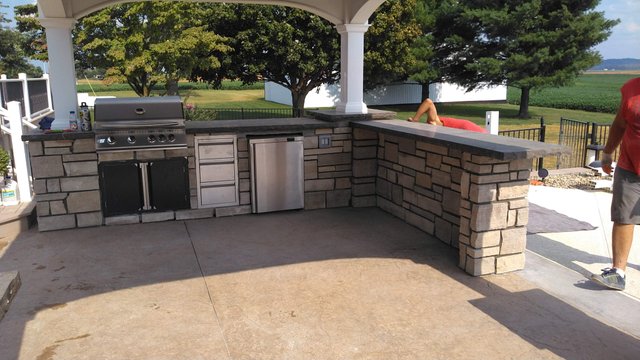
And if you now take a step back to admire your work, it should look a little like this.
Thanks for swinging in to check out my DIY project. I really hope you enjoyed. If you have any questions, feel free to leave a comment below.
S
*All photos are my own taken with my Kyocera phone.
That looks awesome, it'll be pretty sweet when it's finished. Of course you know, if I ever make it to the States, I'm going to have to insist that you cook me something on that bad boy.
That sounds great...but we should probably get the homeowner's permission first, since this wasn't done at my house. We do plan on an outdoor kitchen. But i think we will be using real stone instead of veneer. Thanks for swinging by @sparkesy43!
Nah. If we get caught, we just tell the homeowner we're throwing them a surprise party!!
@tipu curate
Thank you so much @elbrava! I really do appreciate that!
You’re welcome. It’s a high quality post, so it’s well deserved
Tipu did not respond though, still trying to figure out how it works
Great job !
!trdo
Congratulations @sinlg, you are successfuly trended the post that shared by @johndoer123!
@johndoer123 will receive 0.00030375 TRDO & @sinlg will get 0.00020250 TRDO curation in 3 Days from Post Created Date!
"Call TRDO, Your Comment Worth Something!"
To view or trade TRDO go to steem-engine.com
Join TRDO Discord Channel or Join TRDO Web Site
Thanks brother!
I enjoy your DIY stuff mate, keep it up.
Thanks friend! I'll do my best. I'm glad you enjoy it. 😁 It's actually some tough work on this one because everything is so heavy and because mortar is rough on the skins.
Looks like hard work...My office hands wouldn't take too kindly to it I think... 😉
Posted using Partiko Android
Thank you for using the #build-it tag. This post has been manually rewarded with BUILD tokens in the form of an upvote. You can buy, stake, and exchange our "BUILD" tokens for steem on steem engine
Build-it is a central hub for DIY and How-To projects. It's an opportunity to find and share the latest in DIY, and How-To tutorials. The recommended tags required when creating a DIY article are #diy, #build-it. #how-to, or #doityourself. Please read our guide
Chat with us on our discord and telegram channels Discord, Telegram. Are we adding value ? your witness vote will be appreciated! Click here to vote
Thank you all so much! I really appreciate it!
Congratulations @johndoer123, your post successfully recieved 0.00030375 TRDO from below listed TRENDO callers:
To view or trade TRDO go to steem-engine.com
Join TRDO Discord Channel or Join TRDO Web Site