Turning a fridge into a Walk-in Cooler - Status Update 2
"LOOK PA! NO NAILS!"


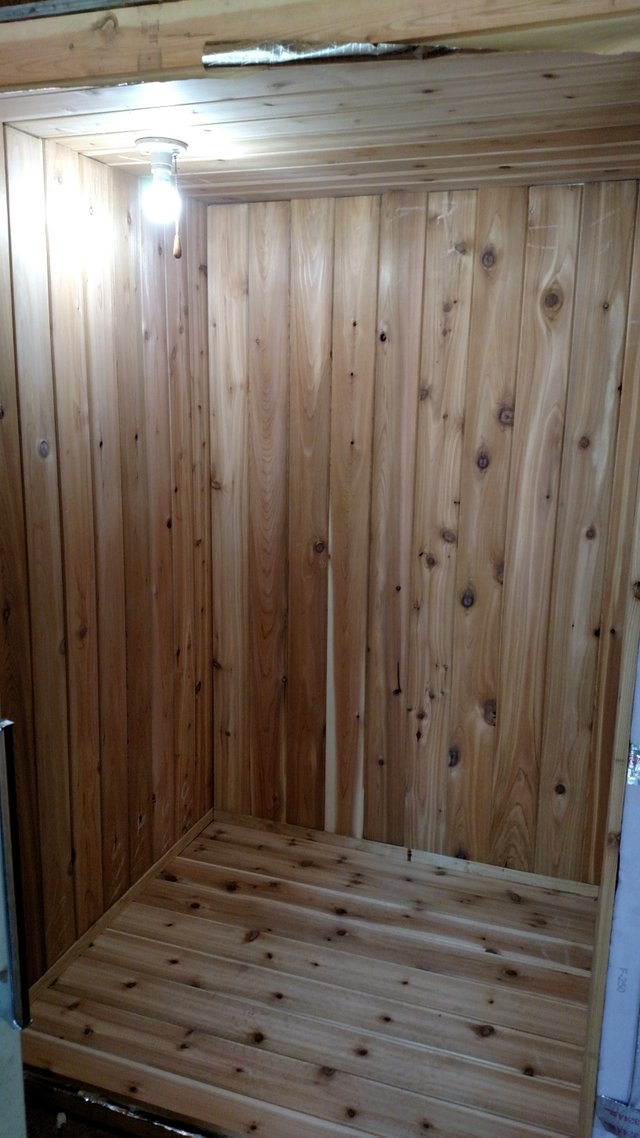
The main cooler box is finished! I have all the cedar in and I did not use any nails to hold it in place. I have one small drywall screw helping to keep one wall from moving, and then 5 longer screws are holding the ceiling foam in place. Everything else is tension held.
I'm taking a short break for a drink and a post after I just emptied all the produce from the cooler fridge into the house fridges. Luckily tomorrow I am delivering 45 pounds of squash and 27 pounds of beans which will draw down our harvested stock. The beer fridge is PACKED with beans and the squash is in front of the window a/c to keep them cool until tomorrow when I deliver them to the co-op.
I moved the light closer to the wall in hopes of not hitting my head on it regularly. I have to build the shelves next which will be made from redwood 2x4s and I will be screwing the brackets to the wall to keep the shelves up. I am figuring there will be 4 or 5 shelves that will be about a foot deep. Now that the fridge is empty I will be able to get it mounted into the cooler. This is the important part as the fridge needs to be sealed and insulated extremely well. The door will be pretty easy and I will build that last.
Now that I have finished my drink I need to get back to this thing and try to get the fridge in place. Hopefully the next update post will be a finished and working product tomorrow!!

Check out my blog @flemingfarm
Fleming Family Farm
FLEMING FAMILY FARM, LLC
Sustainable & Organic Methods | Heirloom Produce
All images are original works of Fleming Family Farm unless otherwise notated and credited.
If you find this post useful or entertaining, your support is greatly appreciated by upvoting, resteeming, following, or setting us to autovote on SteemAuto!


That must have been one of those projects where you measured twice, cut once so that the tension was just right! Very clever and really interesting. One day maybe I will be a homesteader, but I do what I can here at my apartment with my vermicomposting. Was not able to plant in my portable greenhouse on my stoop. The weather has been too crazy this year.
I do a shit ton of thinking out my projects. I am naturally an introvert so I spend a lot of time in my own head anyway, and when I get going on a project I spend a fair amount of time standing in a veritable daydream as I envision what I will be doing next. Luckily the wall planks did not need a single cut as they are all 73" tall and needed a 1 1/2" shim board under them to raise them to the correct level. A lot of things with this build have fallen into place with relative ease. Many of the supplies I have had on hand for other projects that have never been done.
This is one of the few builds I have done that could be accomplished in an apartment. A person could build a box of 4 sides in the fashion I have for the cooler box. Only the box will be 3 sides and a roof. The sides can all attach individually or be hinged to fold up into a flat-pack. This can then get setup in front of a fridge and be a "cool out room" in the vain of a "bug out room". When the heat gets to be just too damned much, you can set this up and bask in the cool of your fridge.
Finding the homesteaders and looking at all of their projects they are documenting on steemit is fascinating. I never even thought someone would go as far as building a walk-in cooler. I imagine you already posted about it but I'd be curious to see what you are using to cool it and how its interfacing with the room?
I have not posted the full how-to yet as I have not had time to get the post together. My update posts haven't gone to far into the build but I am using a small refrigerator that I have removed the door from. The fridge is my cooling device. I hope to finish today so I can turn it on and see how well it holds temp.
Fascinating, I'll definitely keep my eyes open for that one. Using an existing reefer and expanding the storage space in a manner that looks good too. One more DIY project to keep in mind for the future!
Looks awesome man! It's a reverse sauna!
It is actually the cedar that I had bought to make a sauna but never could get a good heat source built. This is why I never used the wood, so I could build this kick ass cooler.
This is starting to take shape. Very nice
On the side of the picture is that F-250 insulation that you used? That should work well
Yeah it is the f-250 r-10 rigid. It was ~$26/sheet after my military discount at Home Depot. The side walls are over 4 inches thick, the ceiling is about 2 1/2 inches thick, and the floor about 3 inches in total.
Nice. Its coming along great.
I love the discount, It makes a big differance
Good job. It looks really good and what a thrifty build so far. Using that sauna wood for a cooler is brilliant ;) Can't wait to see the finished product.