Weekend DIY project: Ball Joints on a car
Hello Steemians!
I know lots of people post videos on this type of stuff but I don’t see many DIY projects posted here on Steemit. I love to do things around the house and to the cars we own so I figure I’ll post some of mine!
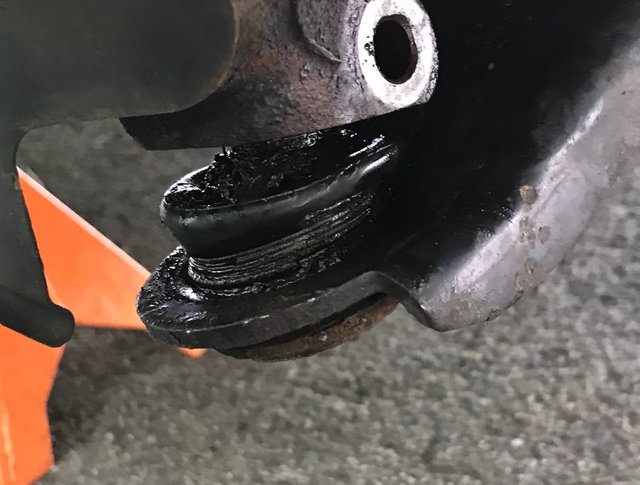
This project was replacing the lower ball joints on my car. The ball joints are movable joints that help stabilize the suspension so it’s not so rigid and can move when necessary without breaking anything. A classic way to know if your ball joints are bad is if you go over a bump and hear a thud coming from one or both of your front tires. This means that the joint has failed and has too much motion. A brand new ball joint is very stiff and almost immobile in your hand. If you look at the joint picture below you can see that I moved it with just a finger so it was toast.
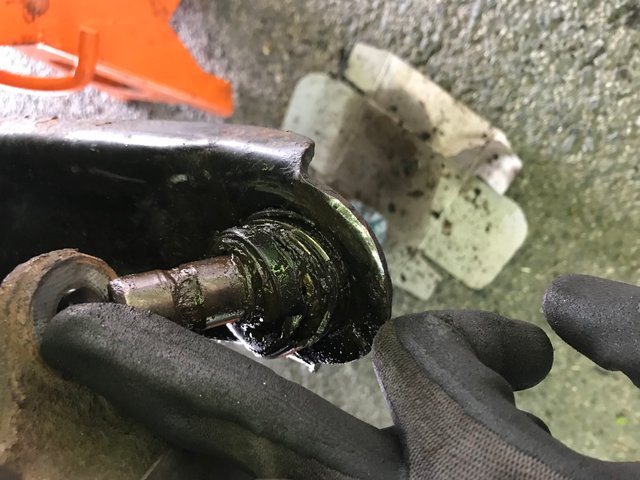
That’s one of the ball joints I was replacing. I like to do these things in a pair though it’s not necessary to do it that way. I figure if I’m doing one now and the other one hasn’t been replaced might as well do it while I’m doing the other one! Less work later.
Preparation
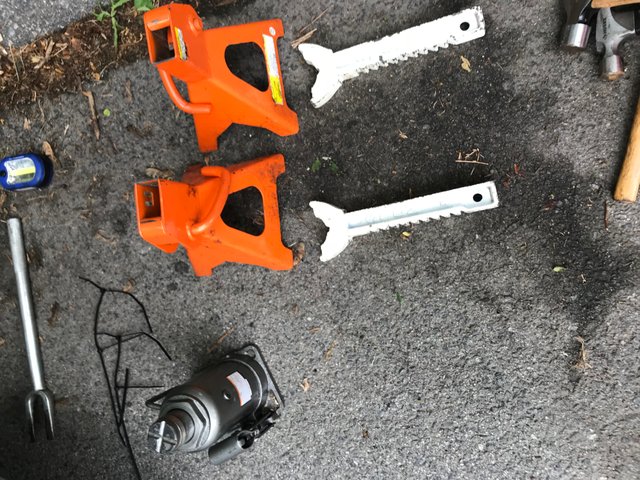
First you need some essential tools though;
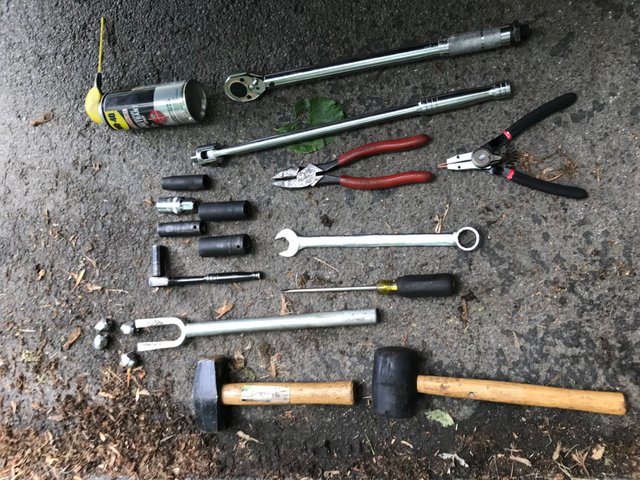
Sorry about the sideways orienting of the picture not sure why Steemit did that. From left to right is:
Sledgehammer, rubber mallet
Pickle fork
Screwdriver (flat)
Long arm wrench (size varies depending on vehicle)
Ratchet with various sockets depending on the size of the nuts and bolts
Lineman pliers (electrical pliers, great for cutting or breaking stuff when needed)
Snap ring pliers
Breaker bar
Penetrating fluid
Torque wrench
One of the most important things you can do is be safe. There’s no point in doing anything on a car if you’re not going to be safe about it! You need the proper jack and jack stands. I have seen many people raise a car on a jack without supporting it by jack stands or anything. If you don’t have jack stands you can use sturdy blocks, sturdy wood and even old car tires with a rim on it as long as it’s not going to break. Jack stands are the way to go though.
First things first
The best thing you can do is prepare the space properly. Get your tools out, get your products out and set up a game plan.
If I am working on something like a ball joint or any other space where I know it hasn’t been changed before or has been a long time since it’s been changed I spray all of the bolts with a great amount of penetrating fluid before I set up my workspace. If you are doing work that requires taking off a tire then it’s easiest to loosen the bolts at this stage before you raise the car otherwise you are putting unnecessary pressure on the transmission and jack/jack stands that could do damage.
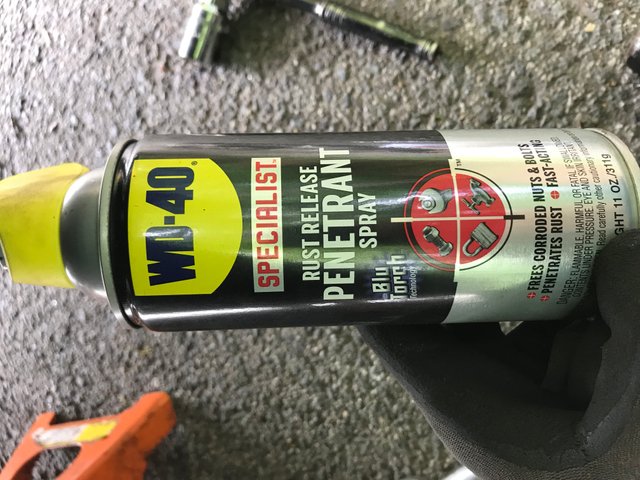
This is going to make your life a LOT easier. It works by penetrating and lubricating the desired spot to make removal much easier. It’s also important to be clean about it, cover under the space with something to catch the run off. This fluid isn’t good for the environment so be nice and keep it clean. I use the boxes of the products I just bought.
Raising the car
Before you raise the car, use a wheel chuck or a block of wood and put it behind the rear tire of the opposite side you are working on, this ensures the car won’t accidentally move backwards when you raise it. It’s important to find the right spots to raise a car on. You need to find the solid steel cross members or other solid parts. Underneath many cars has a lot of soft metal parts that’s just meant to stop debris from ruining lines. It’s also important to not jack it up on the transmission, the oil pans or the engine! That could ruin your car for good. Here is the three spots I used.
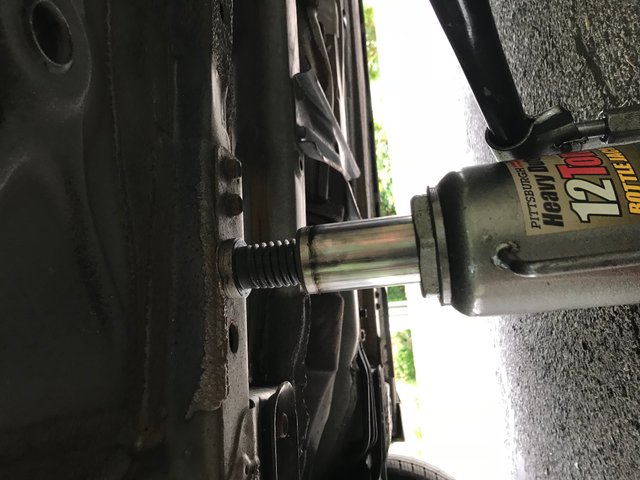
The jack starts it all; I jacked it up to the right of the tire, middle of the car just under the drivers door.
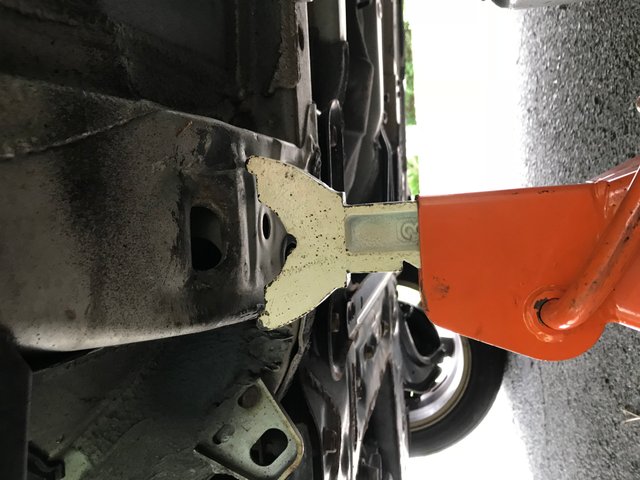
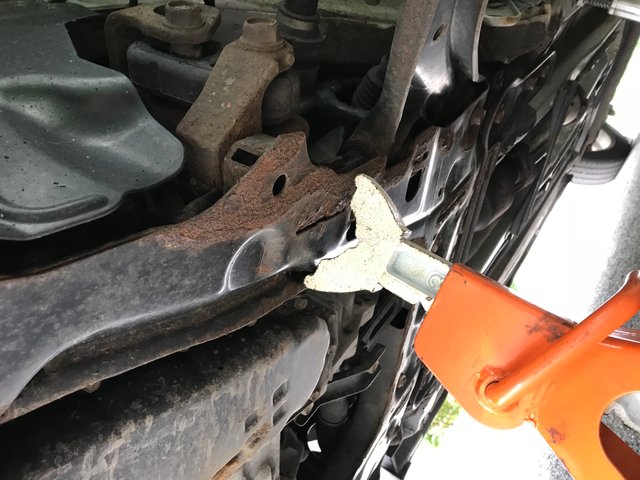
Just as important as the jack position is the positioning of the jack stands. I typically put one near the jack somewhere and then one near the front of the vehicle at one of the steel cross members. You can see from the positions of the jack and jack stands that they all reside on thick steel members of the car. Surrounding them are soft aluminum areas that will get ruined. These are also many of the same spots that a mechanic will use on a lift. This gives the car a good spread of the weight so it’s balanced between the points.
Taking off the tire and parts
It’s important when you do any work on a car to keep all of the nuts and bolts organized in one space. I can’t tell you how frustrating it is to lose one because you were careless. Bolts on a car are extremely strong and can’t be easily replaced with something from a hardware store and are often out of stock at an auto store so keep them organized!
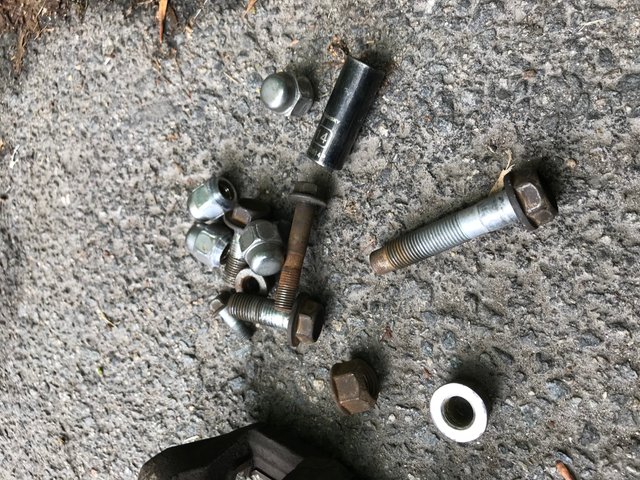
Once you have the tires lugnuts off, remove the tire and place it nearby. Depending on the vehicle I am working on I sometimes put it underneath the vehicle like in a truck but in a car here there wasn’t room so I put it behind me.
Next task is disassembling the disc brake system gently. Most vehicles have disc brakes in the front at least which makes life a whole lot easier. You want to remove the caliper first and properly support it once it’s off. 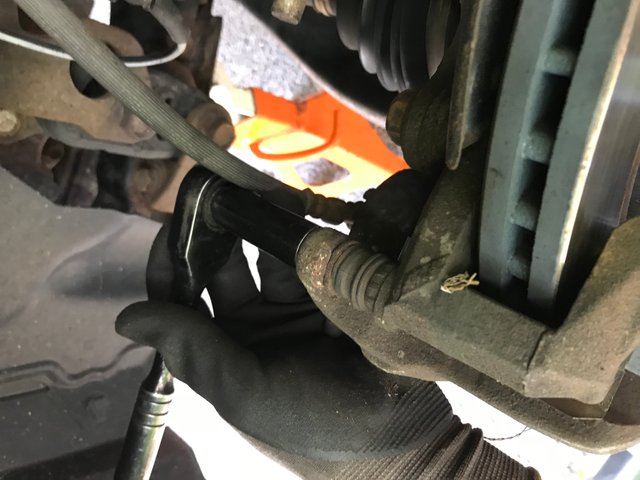
The caliper is what is connected to the brake fluid line and you do NOT want to break that line! Once you remove the caliper I learned a trick is to hang it from the suspension coil as in the picture below.
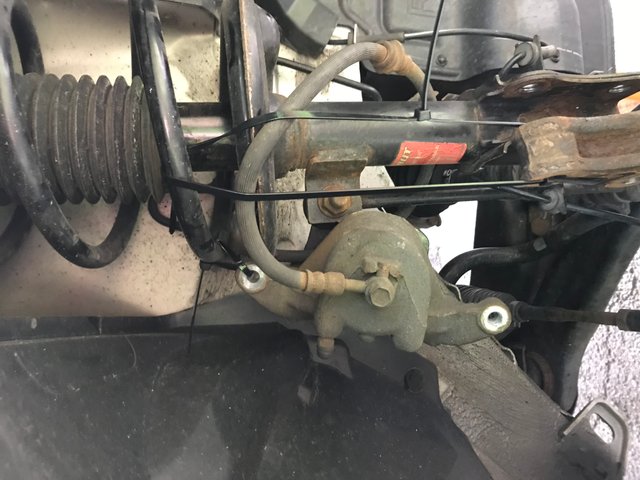
The caliper is the top middle section that has 2 silvery looking holes on the end. That’s where the caliper bolts come off. I take a zip tie or a piece of metal wire and loop it through the caliper bolt hole and attach it to the suspension coil. This keeps the caliper secure, out of the way and most importantly it keeps that brake fluid line from getting stressed or broken. You can see the brake line coming off the caliper.
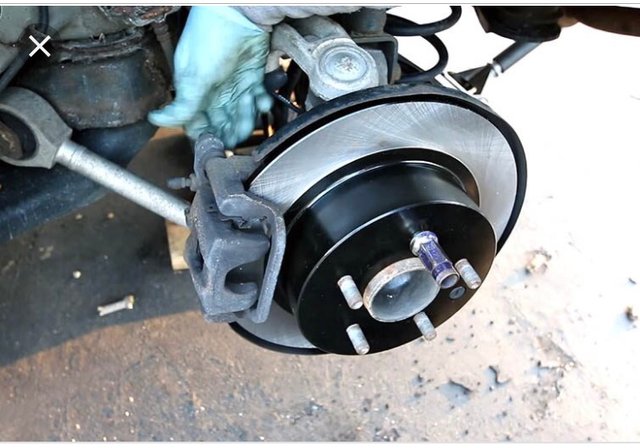
The first few times I did things involving brakes I took pictures of the stages so I knew where things went. I didn’t do it this time so I apologize there aren’t more of each step but it’s a good idea until you are familiar with the process. Here is a picture from google.
<a href=“https://www.google.com/search?q=Disc+brake+on+a+car&prmd=isvn&source=lnms&tbm=isch&sa=X&ved=0ahUKEwizq9Kch9HdAhVJhOAKHQDSBjsQ_AUIESgB&biw=375&bih=558”>Source
You can see the brake caliper bolts where his finger is pointing. You can also see the rotor which is the big silver looking round disc near his hand. That’s what provides stopping power for the brake system.
The last part of the brakes are the brake pad clips which are secured by two more bolts. 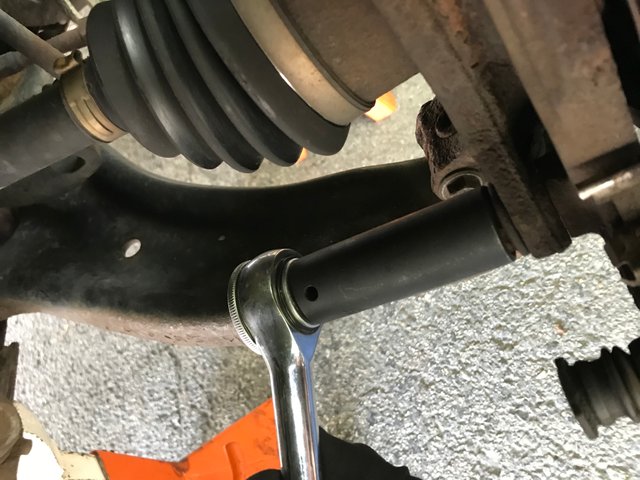
Once the brakes are removed the steel rotor is left. Use the rubber mallet and whack the face of the rotor in spots to kind of make a triangle. Start at the top, hit the face of the rotor, move down to the bottom left, hit it and then the bottom right. This loosens the rotor without damaging it if you are planning on reusing it like I was. If you are replacing it it’s faster to use a small sledgehammer since it hits with more force. Once the rotor is off you want to work on removing the bolts to loosen what’s called the knuckle.
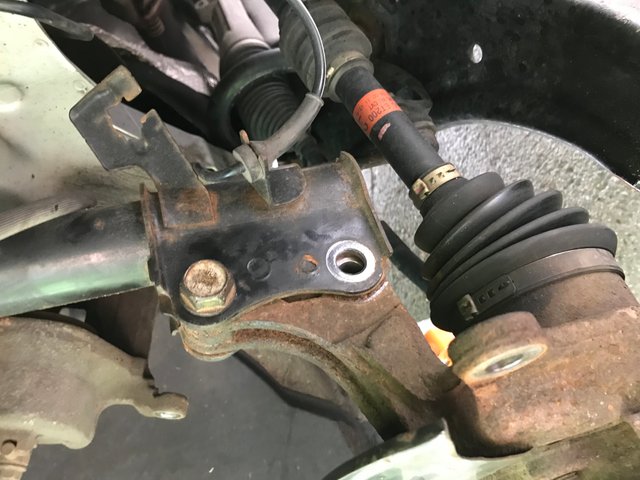
These two bolts will release the knuckle from the suspension allowing access to the point of the project: the lower ball joints.
Removing the ball joints
Removing the ball joints is a tricky task. First you have to undo the bolt that secures the ball joint in, as seen here
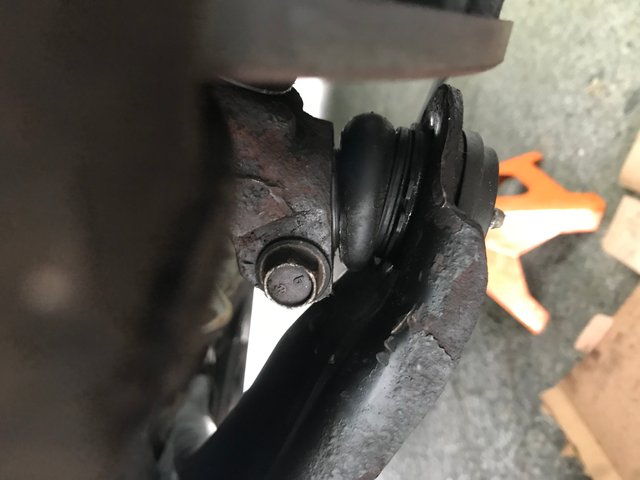
Once you undo that you can now start the lovely process of unseating the ball joint from the knuckle. This process takes a while but that’s good because it means the joint is secure. You will need to use the pickle fork for this process by jamming it under the knuckle, but pressing the joint down.
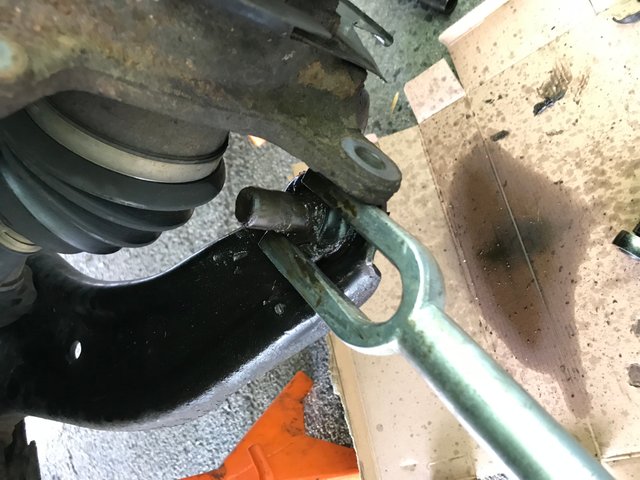
Once that is complete and the vulgarities subside then we need to remove the snap ring that keeps the ball joint from falling out. It should be fairly simple. The snap ring looks like this:
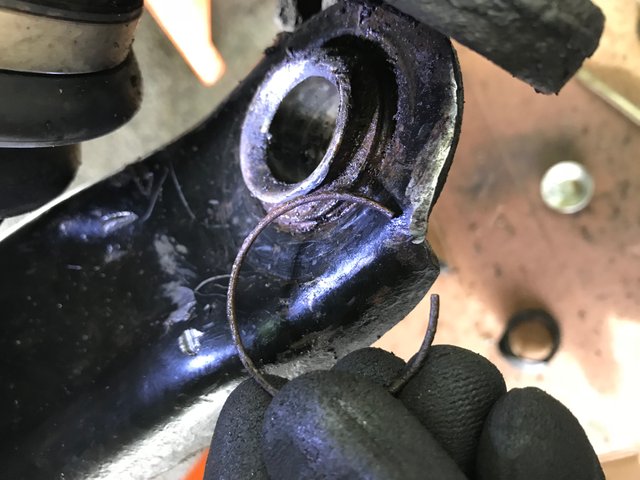
I forgot to remove the snap ring, as you can see behind it the ball joint is still there. What not to do! The actual ball and cup that holds or are blurred in the background if you wondered what it looks like, I didn’t know either.
We then move on use one of the most important tools for the job: the ball joint press.
The press puts pressure on the frame of the joint to either remove or inset the new ball joint while not breaking anything which is kinda important!
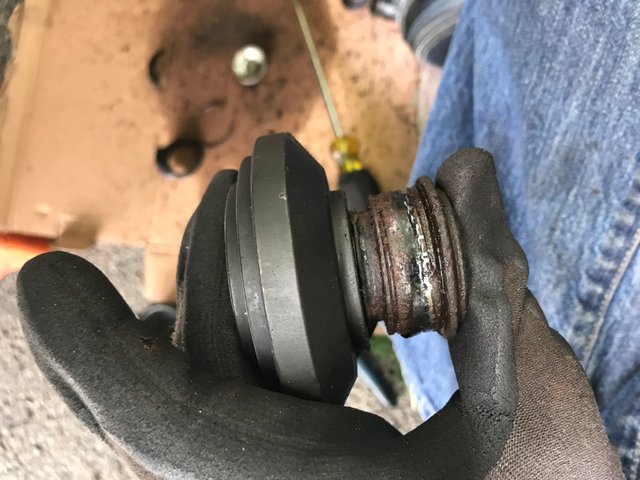
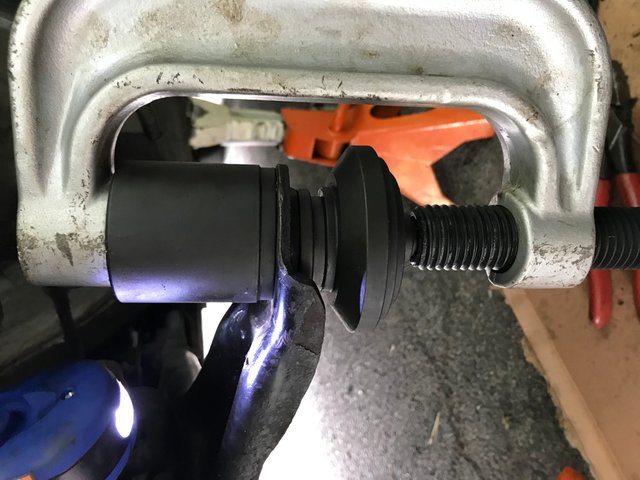
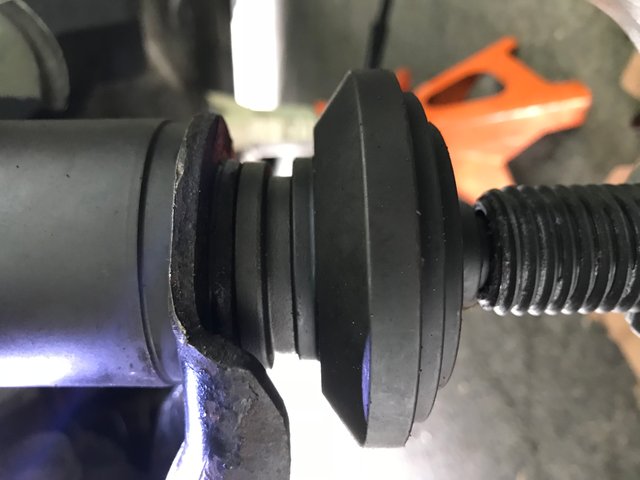
Once the old ball joint is out follow the directions on putting the new one in. There is a particular way it goes in; the joint is designed for movement in multiple directions but the frame of it fits into the knuckle in one specific way to ensure optimum fit.
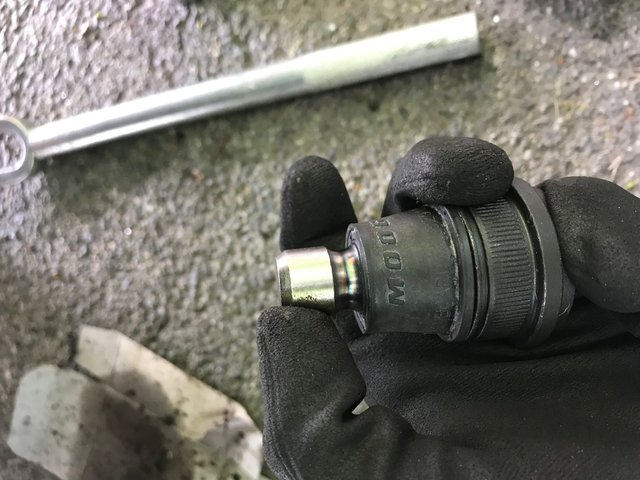
Once you get a rough direction, you are going to reverse the press. It is important to press in the right direction otherwise you’ll damage your new joint. Once your new joint is in, seated properly and securely reverse the process. Put the new snap ring on, put the bolt that secured the ball joint there, attach the knuckle to the suspension, put the rotor on, the brake clip frame, the brake pads, lower the caliper back into place over the brakes. Before you put the tire back on you need to add grease to the joint per the manufacturers recommendation. There are some that will pre-grease them but those aren’t the best quality I’ve found.
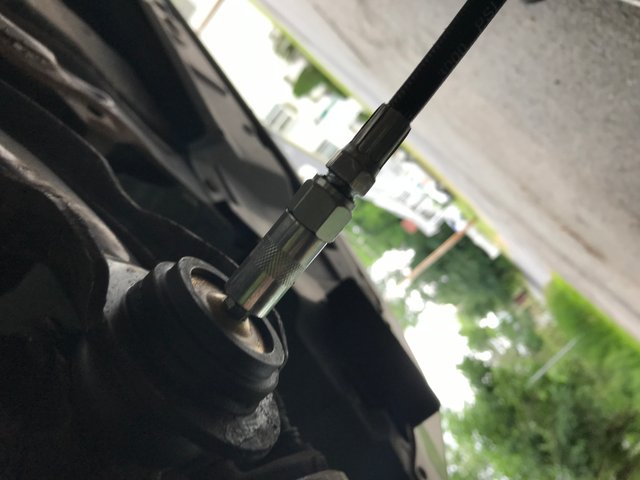
Finally put the tire back on, lower the car so it’s on the ground. This is when you tighten the lugnuts with the torque wrench. Most lugnuts are torqued to 100 foot pounds of pressure to ensure they don’t loosen. The final step is to double check all of your work!! This can’t be understated. Before you take that thing on the highway you need to make sure you did everything properly. We’ve all done it once where we forgot something important and didn’t realize it until we drive away and hear a noise or brake something unfortunately.
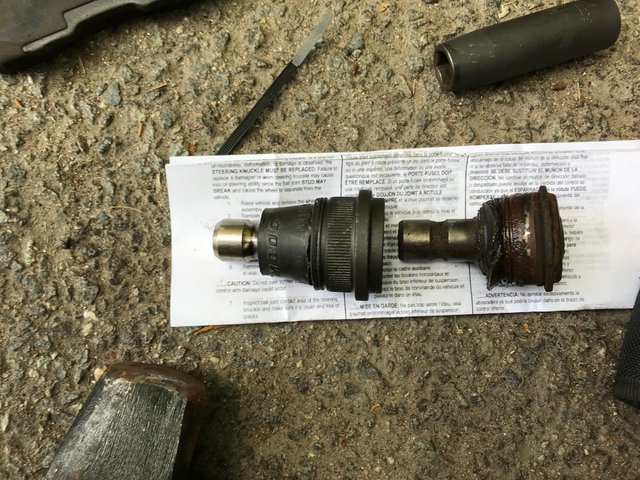
That’s a side by side picture of an old worn out ball joint and a nice brand new one.
You would get along well with my husband..he too.is a deft hand at DIY and mechanics. But he's too busy fixing the bearings on one car, changing the oil on the other, and rebuilding our Series 3 landrover. Plus he's a slow typist.
Posted using Partiko Android
Thanks! Laminate floors are awesome. They improve a rooms look at such a great price.
I think I would get along with him well! I learned from the best; my dad. He’s an electrician and I worked with him on weekends for about 11 years so I got very accustomed to doing work for myself.
I’ll be doing some of that same work on one of our cars soon! It is now at 100k miles so I’m doing some preventative maintenance; I did the suspension earlier this summer and next is doing all 4 brakes.
Ah yes!!! I think if you are a son of a handyman it's more likely you will be..J's step father was a diesel mechanic and his father was a police diver and then a detective lol. It's both a blessing and a curse because you know how much things cost and you could do them yourself however it takes up a lot of time full stop on the other hand there is the satisfaction of being resourceful and saving money. What kind of car is it? We have quite a few on the go which is ridiculous but Jamie does love his cars. I have to keep interrupting his mechanics to get him to do other DIY things for me. We ended up putting pine flooring all through the house but we got it at a bargain price which meant not all bits we're straight so that was pretty funny watching him and Dad trying to Jimmy them into position. But it was probably $15,000 cheaper than getting a hardwood floor fitted and I am not a fan of carpet. Is philosophy is that you can figure out how to do anything with YouTube, book, or your brains which is one of the reasons I fell in love with him. I couldn't be with anyone that didn't know how to fix stuff lol
Posted using Partiko Android