Profit Trailer And You: A Newbie Guide To Setting Up Profit Trailer Part 2: Windows VPS

In my 1st post on this subject, I covered the actual set-up for Profit Trailer but, as fate would have it, we weren't able to get a Virtual Private Server (VPS) set up at that time. After around a week or so of seeing how the bot runs on our local connection here (and a lot of, “holy god, how are you even running it without a VPS????” on Crypto Gnome's Discord), we have decided to go ahead and get the VPS set up. This process isn't that hard but, as I said in Part 1 of this guide, most of the other guides out there assume a level of familiarity with the tech aspects that, sadly, most people don't have. If you are experienced in VPS set-up and bot function, this guide is not for you. This guide, as the title implies, assumes that you have nothing more than a desire to trade and money burning a hole in your pocket. So, without further ado, here is Profit Trailer Set-Up For the Complete Noob Part 2: Windows VPS.
Step 1. Purchase A VPS
We went with VirMach as our server provider, mainly due to the price. For $10 a month we couldn't find a better deal....(PSST! If you know of one, hook me up!) VirMach makes the purchase process pretty painless as well, taking Visa, PayPal and Bitcoin as payment methods. Although it is not necessary to create an account with VirMach BEFORE purchasing the VPS, you will need one to manage it. Go ahead and make an account now before purchase, that way you can look at the dashboard a little before you buy. I do not know if you need a VPS if you already have an ultra high speed connection, 1Gbps or higher. If you do not, you WILL need a VPS.
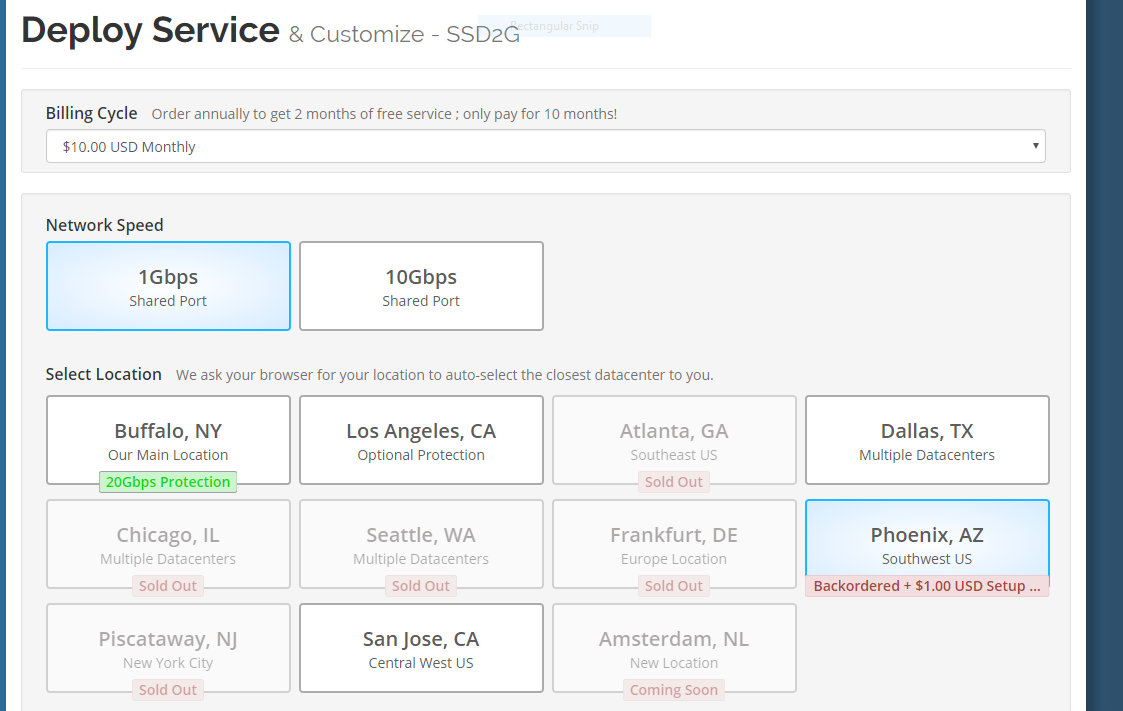
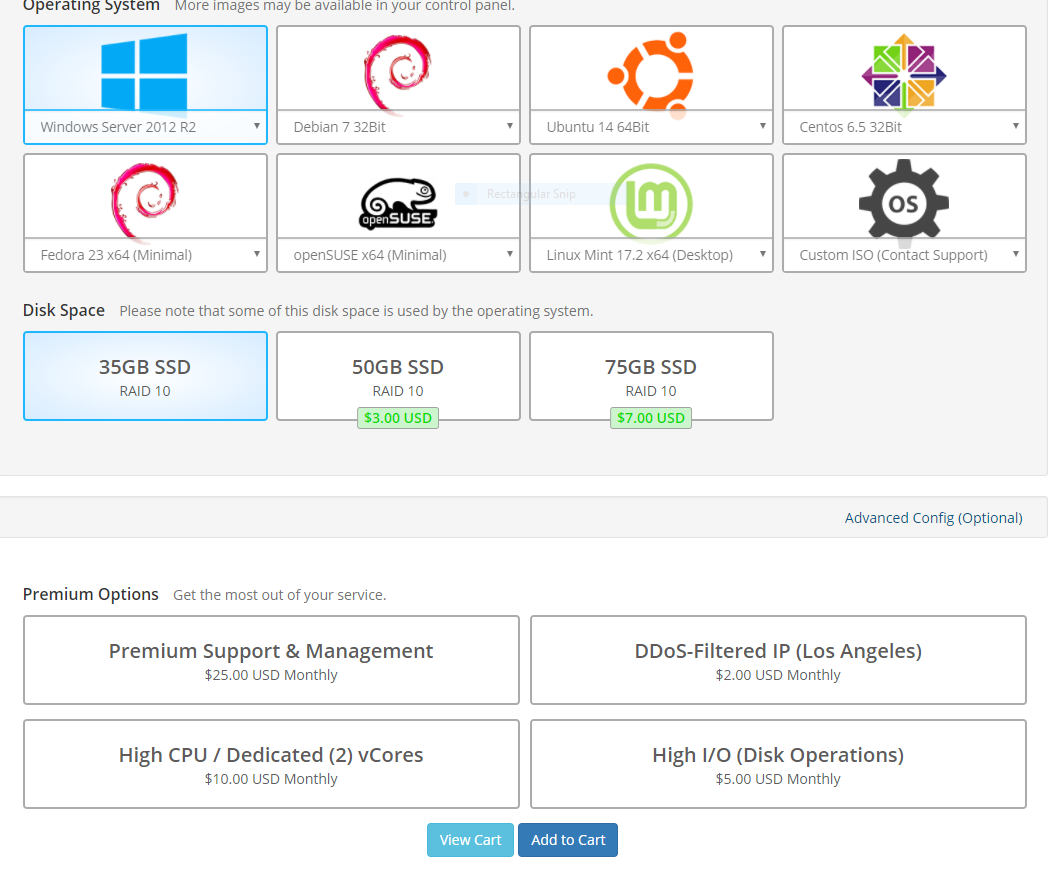
Click on Windows VPS button on the VirMach home page. Next it will ask you for your plan, which is how much you want to pay a month. Select the $10 a month plan, which is a SSD2g server. On the next page (see pic 1 & 2), you will select your server options.
Pic 1
Pic 2
As you can see, the choices are easy to make, but might be confusing if you don't understand them. We chose a 1Gbps connection and the L.A. data center. That means that our bot will be running on a virtual server hosted in Los Angeles, Ca., and it will have a guaranteed 1Gbps connection to the Binance servers. Your data center, however, should be based on the closest location to you. This will allow for the lowest possible latency between you and the bot for monitoring. I cannot stress this enough -this is to reduce latency between YOU and the bot, not the bot and your exchange. For those of you who don't know what latency means, it's a measure of how long a single packet (piece of a message from your computer to the server) takes to go from your computer, to the server and a response to be received by your computer. The lower the latency, the faster and more responsive your connection to the bot will be. You will receive information on what the bot is doing faster, and have a better, more responsive VPS interface. (Crypto Gnome says that the Buffalo, NY and L.A. data centers have the best connections but you should choose the data center that will allow for the best connection to you. Typically, this would mean the closest PHYSICALLY to where you are.)
Use the drop down menu and choose Windows Server 2016 R2 as the operating system. Select the 35GB SSD storage option (since we don't need a lot of space), click “add to cart” and finish the order. Go on....I'll wait.
Step 2. Boot The Server Up
Once you've paid for the VPS, navigate to the VirMach dashboard. (see pic 3)

pic 3
You will see your server in the “ You're Active Products” section. Click on it. This will open the VPS dashboard. (see Pic 4)

pic 4
Now, click on the “Boot” button. In an area below this, on the same screen, you will see the server status go from offline to online. Wait for it to say online before continuing. I know...a lot of hurry up and wait.
Once the server status reads online, you'll want to click the “VNC (DESKTOP)” button. This is actually launching the OS set up on the server. Clicking this button will bring up the Administrator Account set up for Windows Server 2016. (see pic 5)

pic 5
See Pic 6. Notice that the User Name is Administrator. This is will become important in a few steps here. Go ahead and create a password here. As with all passwords, KEEP IT SAFE!

pic 6
Next, accept the license agreement on the next page and then click 'done' on the last page. This will launch the server login.
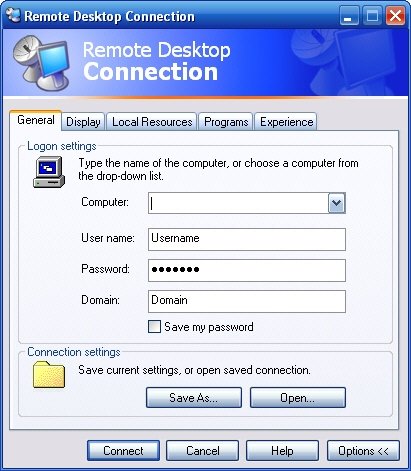
At this point, use the search bar on your computer next to the start button to search for Remote Desktop Connection. Launch the Remote Desktop Connection. (see pic 7)
 .
.
pic 7
Enter Administrator (the whole word, not Admin) and the password you created for the administrator account. Where it's asking for the computer, you will want to go back to the VPS dashboard (pic 4) and copy/paste the IP address from the lower area of the screen here. Click connect.
Now here's where it gets a little confusing. Remember when you finished the administrator account set up? It launched a window with a login screen right? Well, lets go back to that window and enter the administrator password you made. This will launch several screens in succession, so you'll need to wait 'til they all load.
First you'll see a screen that resembles your desktop, only it's inside another window that will expand but won't expand that desktop view. (see pic 8)

pic 8
While it may appear this is your sever interface, it is not. Another screen is about to launch, the Server Manager window. (see pic 9)

pic 9
Again, this is NOT your server interface for the bot. What we are waiting for is the 3rd and final screen, the Windows Server OS Interface.(see pic 10)

pic 10
This is the screen we want. Once you see this screen, go ahead and log into the account using your administrator password.
Once you are logged in, you should have a very responsive Windows 10 screen. You will use this interface just like you would your computers interface. Keep in mind that you cannot copy/paste files from your computer hard drive to the VPS hard drive. You will need to follow the instructions from here in Profit Trailer Set Up For The Complete Noob Part 1, with one exception.
Before you download the bot and get to work setting it up, the ports the bot uses must be opened. So, click on the search bar and search for Windows Firewall and open the program.
First you will select Inbound rules on the left side of the Firewall Manager Window (see pic 11)

pic 11
Next you will select New Rule on the right side of the next screen that loads (see pic 12)

pic 12
You will select Ports on the next screen. The very next screen that opens will ask you which port you wish to create a rule for. Type in 8081 (see pic 13 & 13.5)

pic 13

pic 13.5
The next screen will ask you what the rule is for. Select Allow Connection and hit Next. (see pic 14*)

pic 14
The last screen wants you to name the rule. I would suggest something like Inbound PT (or something similar, it's really up to you), and then finish. (see pic 15)

pic 15
Now, go through the exact same process, except for an outbound rule. The only difference is when you get to the screen asking to allow/block the connection. For the outbound side, the default is to BLOCK the connection, so will need to change that to allow. Finish up and close the window.
That's It! You have just successfully set up and launched your very own VPS. Now it's time to install The Java 8 JRE and download the Profit Trailer files (and any other settings files you may want). Head on over to Part 1 of Profit Trailer Set Up For The Complete Noob and get your bot running. That Crypto won't buy itself!!
Very comprehensive set of instructions. I was able to use these step by step instructions to set up my vps account.
Thank you. Glad I was able to help.
Thank you so much for putting together these two tutorials~ much appreciated!!:)
Your very welcome. I hope they were helpful.
so one would either need to have their computer running 100% of the time to keep the bot active or run it off a VPS?
Yes, that's exactly right.
aight. thanks for the clarification.
So if your computer is off the bot could keep runing on the VPS?
Yes
amazing - very detailed information - thank you so much!
very nice thanks. I have see that in Vultr I need to pay 10$ for the VPS and 16$ for having Windows installed. Is only 10$ included Windows on VirMach ? thanks
I do believe you get Windows on VirMArch for the base $10 price