Creating custom trees
While creating te surroundings of Klein Waldberg I have/had to plant many trees and bushes. Currently almost 100 trees are growing in the area.
You either have to buy them, or create them on your own for better looks and saving money.
In this post I will show you how to create them in a few easy steps:

~ ~~~~~~~~~~~~~~~~~ ~
ATTENTION
The process may pollute your room and your wife/husband/flatmate may hate you! :D
~ ~~~~~~~~~~~~~~~~~ ~
The first step is already the hardest: find proper raw material.
Depending on where you live and how the vegetation outside looks like, you may find usefull stuff on your own. In my case though, I purchased dried seafoam. You can use basically anything that can look like a small tree when dried.

Only downside: because of the packing the "soon-to-be-trees" are quite compressed and bent.
To straighten them up again, simply put them in some water and let them re-hydrate for a few minutes.

Next step, hang them up and let them dry again. BUT place some weights at the lower end. Gravity will do the rest for you. You also can adjust the form a bit if some parts are too flat or deformed.

Butterfly shaped weights from the tablecloth optional
Important
Let it dry completely in this position. Depending on the thickness at least 24 hours. You dont want to get them moldy later on, right?!
After everything is dry again, you should have some decent looking tree shaped pieces. Little pieces that broke out can be used as bushes easily.

The next two steps need to be done right after each other: Getting it green.
Simply cover the treetop with sprayglue. Make sure you reach the inner areas as well. You also may want to use tweezers or similar to avoid getting glue on your fingers.
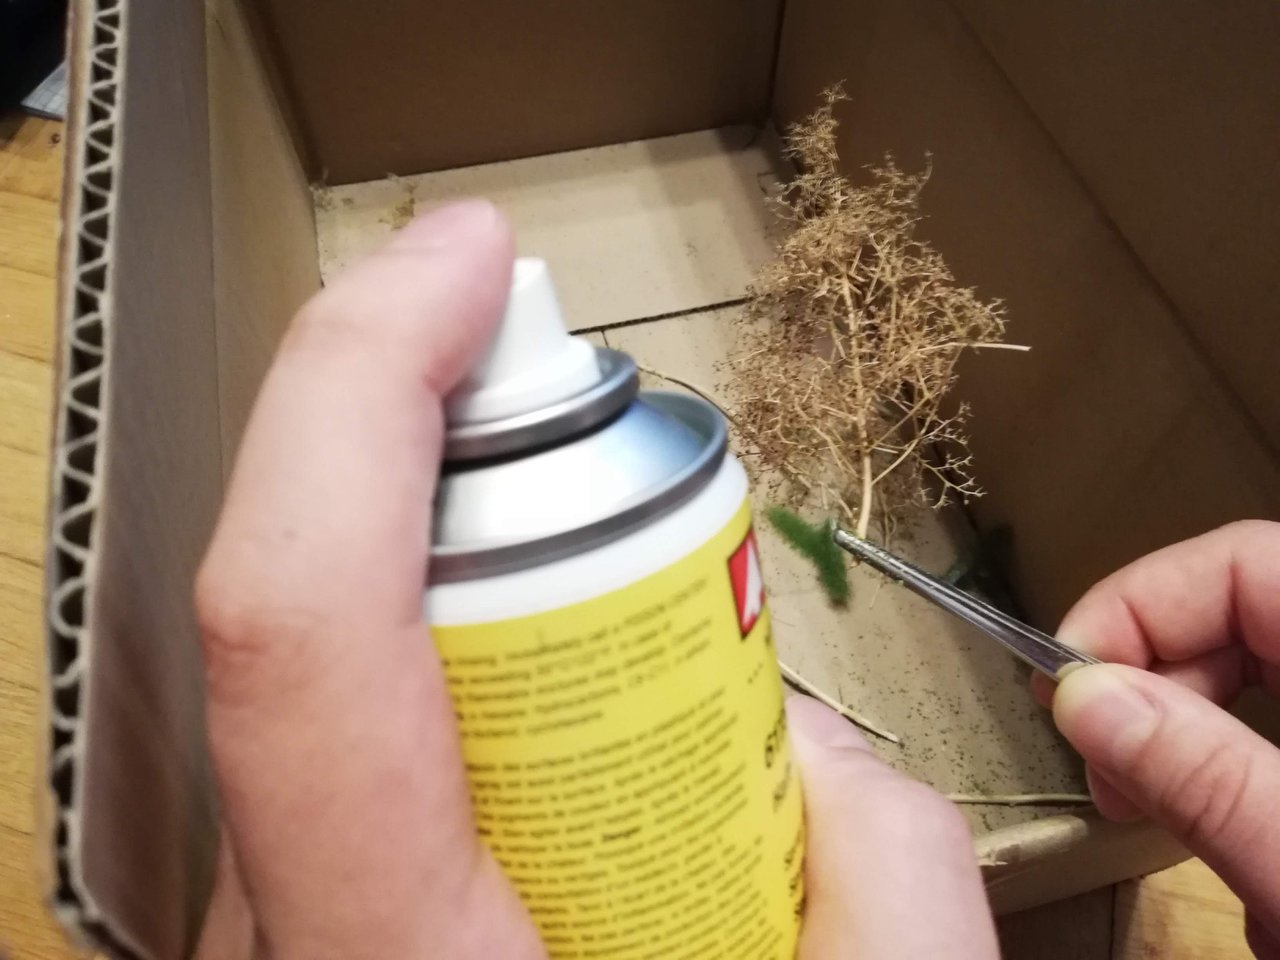
Right after this (sprayglue tends to dry rather quickly) spinkle some green litter on top. You find this in any modelling store on the web. In my case I used a mixture of two different sizes to simulate bigger and smaller leaves.

You can repeat this process (spray and sprinkle) until you achive the desired density of green on your tree.
Last but not least: find a neat place for your new little buddy
Of course, you could use more sophisticated techniques like air brushing the trunk and adding more colors to the leaves by adding different layers from inside out, but to be honest, it would take ages to create 100+ trees this way and I think they look good enough for the little time effort they require.
What do you think?
Let me know in the comments :)
hey dear @wirago, great job !! it's very nice to have the ability and creativity to create the things you like! I guess this gives you a lot of satisfaction !! congratulation :-))
You put a lot of detail in your models. Simply fantastic! Those trees are looking very realistic. Excellent job!
Thank you for the compliments :)
Posted using Partiko Android
This post was shared in the Curation Collective Discord community for curators, and upvoted and resteemed by the @c-squared community account after manual review.
@c-squared runs a community witness. Please consider using one of your witness votes on us here
Hi wirago,
Visit curiesteem.com or join the Curie Discord community to learn more.
M...magical * ___ * You made trees happened !! Tiny and beautiful and really tree-looking trees * ___ * What magic!!!! I love~ Aaaah~
Congratulations @wirago! You have completed the following achievement on the Steem blockchain and have been rewarded with new badge(s) :
You can view your badges on your Steem Board and compare to others on the Steem Ranking
If you no longer want to receive notifications, reply to this comment with the word
STOPIt looks very nice, your work looks like television, congratulations for your effort friend!
Thank you for the kind words. I am glad you like it :)
Posted using Partiko Android
Wow! That is amazing! It's a pity that you're not based in Switzerland as we have a new museum called Smilestones in Switzerland and they actually have people like you who help them to create the whole scene.
It's a great hobby and I can imagine that while you do it you forget everything around you. It's such a detailed and complicated work that you have to have a clear mind to be able to do it.
Thank you for your tutorial. That drying process is so easy but I wouldn't be able to figure it out myself :)
Have a nice day!
Fantastic. Great tips.
I find it fascinating that some tiny parts of plants can be a small version of entire trees (on scale). Unfrtunatelly without the help of chemicals and glues they would decompose and fall apart. I have seen some artificial mini trees that look very realistic, but have no idea how they were made.
It's always good to visit your posts. There is something new and exciting worth copying.
Yeah, there are many other ways. The best results are achieved by using thin wires. You can form every branch as you like. Downside besides of the workload: you need to use plaster or something to create a wooden structure and repaint everything.
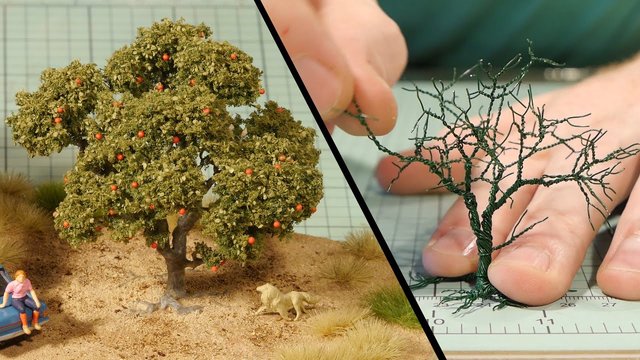
But the results are indeed impressive, like here:
(Image from Luke Towan)
Wow. That's fantastic. Thanks for sharing that tip.
Hello @wirago, thank you for sharing this creative work! We just stopped by to say that you've been upvoted by the @creativecrypto magazine. The Creative Crypto is all about art on the blockchain and learning from creatives like you. Looking forward to crossing paths again soon. Steem on!