DIY. Decorate a wooden suitcase with napkins.
Today I want to show you how to decorate a wooden suitcase with napkins!
For this project I used a wooden suitcase that was made to keep your brushes and pain in. I bought it many years ago at a market.
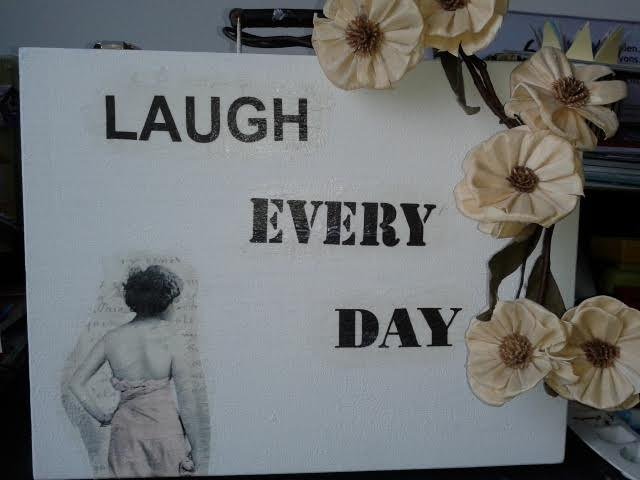
This is my end result! Lets start so you can create this as well.
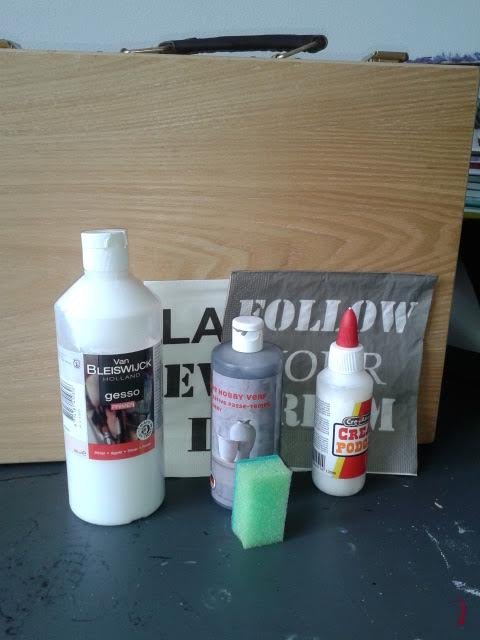
What do you need for this project!
-A wooden suitcase.
-Napkins with prints you like.
-scissor.
-sponge. ( I use dish washing sponges. I cut them in three before I use them.)
-Gesso paint. (This is special crafting paint you can also use on bottles etc.)
-Mod podge/ crea podge
-Soft brush
-Time, loads of time or a blow dryer.
* Decoration for when you are done!
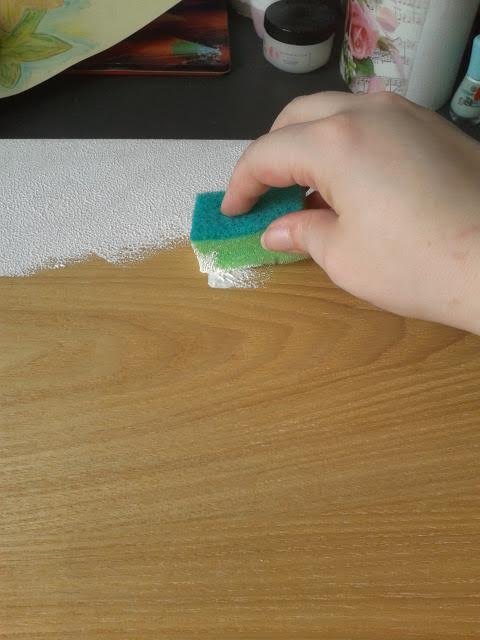
We start by dipping the Gesso paint onto the suitcase with the sponge. I always put the pain onto a plate and dip my sponge into it. You can also put the paint directly on the object but I don't like to use too much paint.
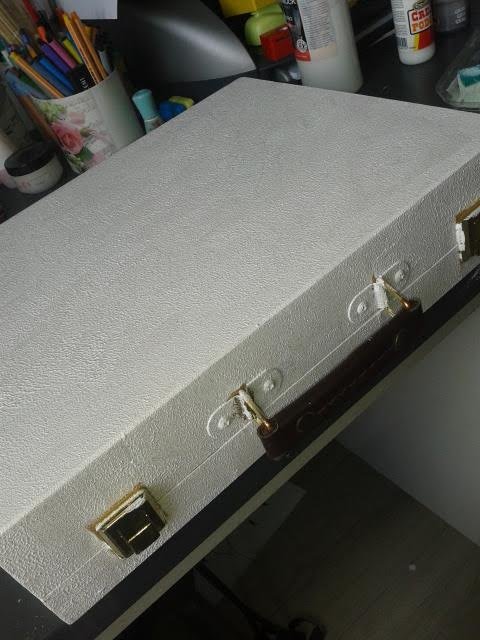
Cover your whole object ( Suitcase) with the paint and let it dry or use a blow dryer to speed things up. You will have to repeat this step at least 2 more times to get the best results. This picture is taken after one layer of paint. The end result shows a perfect white suitcase and for that I use three layers of paint. If you let it air dry it will take between 30 minutes and a hour before its dry enough to paint over it again. If you use a blow dryer the pain will be dry within 10 minutes and less.
After painting your suitcase it's time to cut the napkins into the shapes we want. Do this carefully because this is much softer material than paper.
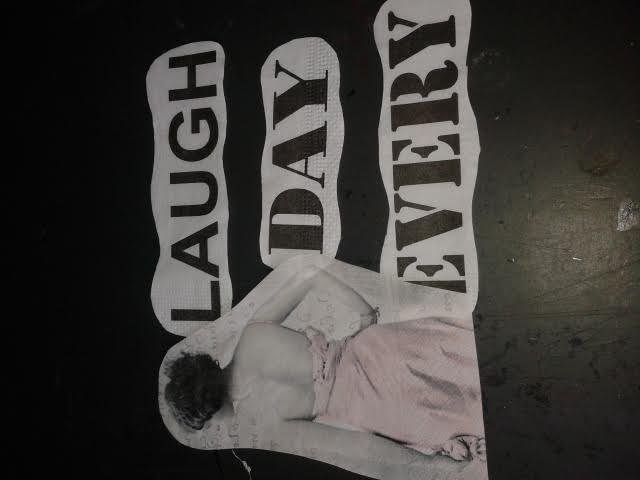
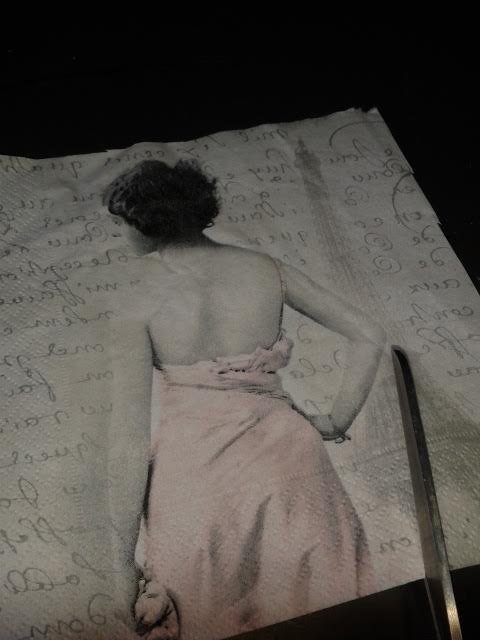
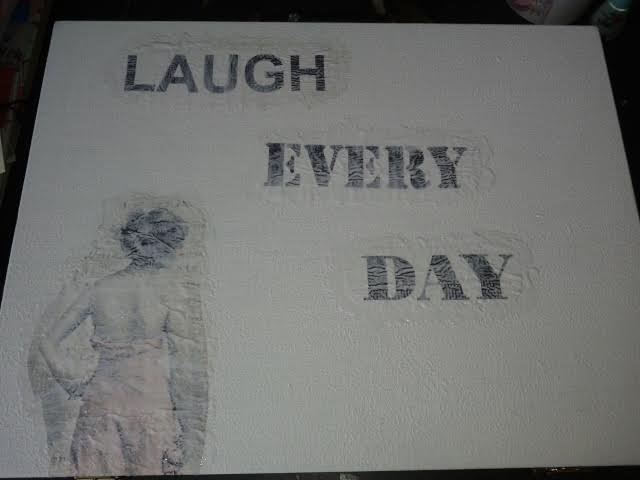
I used a woman and three words. I prefer to see a bit of white around the shapes so I did not cut my napkins on the printed lines.
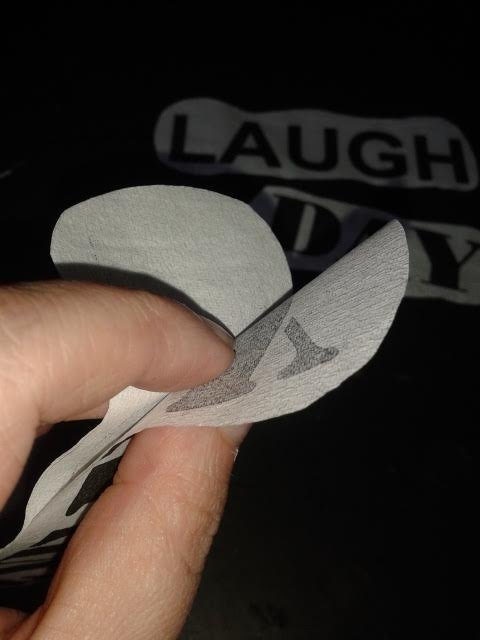
When you have cut the napkins it's time to carefully pull some layers of them. most napkins contain of three layers and you only want to use the top one. Most of the time, after cutting the napkins they will open up by themselves. If this is not the case you can blow some air against the edge or use your nails. Pull the layers off nice and calm. They rip easily.
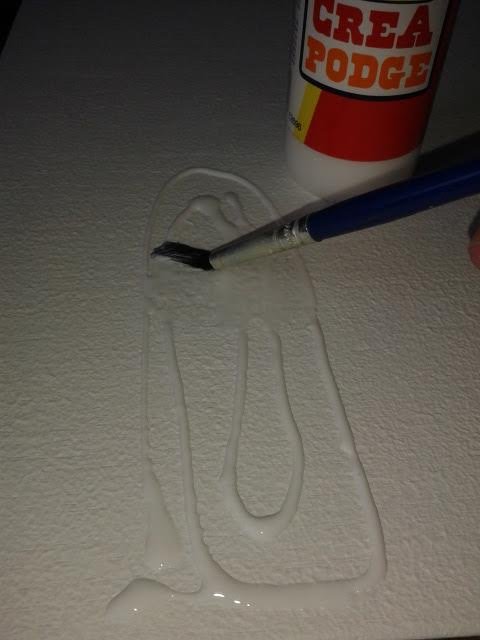
Now we are going to use the mod podge/crea podge. Decide where you want to glue your napkin to the suitcase and put some of the podge there. use a brush to wipe the glue out.

CAREFULLY put the napkin on the glue using either your brush or fingers to slowly let the napkin go down. This is really tricky! If you do this without thinking you will get loads of bubbles under your napkin. So, really take your time to do this. Make sure there is podge/glue under the whole napkin.
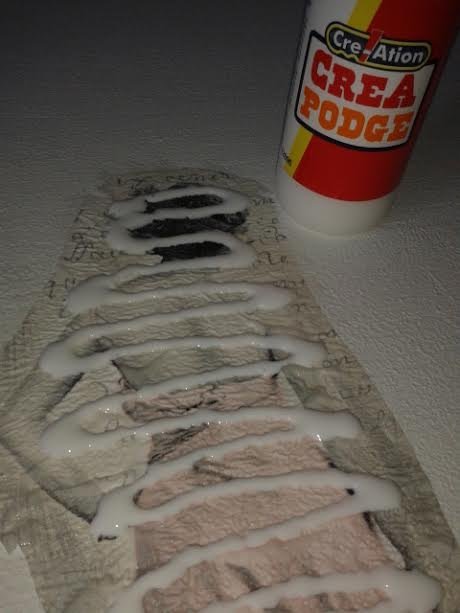
When you look at this picture you might think... Is she going insane? No. Covering your whole napkin piece with the podge makes sure it will dry up the best way. Cover your napkin with the podge and use the brush to even it out. Again, do this carefully because your napkin is now wet and very fragile. Also make sure you add some podge over and on the edges! Don't worry about the glue drying up! On white and light colors you won't see the glue, it dries up transparant.
This is how it will look after covering it with the podge. Just set it aside and let it dry for a while. the milky glow will disappear and the napkins will show their own colors again. The drying will take some time. I mostly have to wait 2 to 3 hours before it's dry. You can use a blow dryer but I prefer to let this air dry.
And there you go! A wonderful new item to decorate your house with. I used a string of paper flowers to decorate it some more. I attached the flower string to the handle of the suitcase.
If you enjoyed watching my artwork, the tutorials I share, want to ask me something or want advice, want to give me some advice, feel free to leave a reply and I will get back to you as soon as possible. If you create something from your heart inspired by my tutorials it would be great to see the end result in the replies.
Don't forget to push the follow button! Replies are really appreciated.
Happy crafting!
@Poeticsnake
@poeticsnake upvoted very creative!
Thank you so much!
It turned out great! I like the effect of the gesso paint.
Thank you! You can also bring the paint on with a brush but I kinda like how it dries up when I use the sponge. It makes it more alive if that is the correct term for it.
Yes I like the texture that the sponge makes. I have experimented with it in the past but with watercolors.
I was wondering now that you said it, can you really use watercolors with a sponge? How does it dry up if I may ask?
Very Neat Technique.
Thank you! I always enjoy working with things like this.
:))
:)))
very nice.
Thank you!