The Problem and the Solution - December 9, 2019 @goldenoakfarm
It all started with wanting attic space. It also had to do with the layout of the rooms on the north wall. But a crucial design was left out and fortunately for us, we found it before it would be really hard to fix. This early heavy snowfall caused the problem to surface.
My husband left his job as a Project Manager, where he also kept all the AutoCAD drawings up to date, for a local hospital 20 years ago. He started finding mistakes in his work, and there was no one checking his work. He often was working with patient care areas, and did not feel comfortable about the mistakes.
The reason for the mistakes, it turned out, was his invisible chronic illness he never knew he had for 40 years. He contracted a blood infection from the air injector vaccination guns during Navy boot camp in 1971. This is why he is a disabled veteran. It caused him to be forgetful among many other things.
I did most of the design for all 3 building projects. But I had to leave the finer points, like laying out joists and rafters to him. I work on graph paper, he uses the AutoCAD. I also don’t know enough about those points of construction to be able to check his work.
That’s one reason for the mistakes with the foundation, and for this problem with the wall. I couldn’t check his work. The building inspector was supposed to check these drawings, but obviously didn’t.
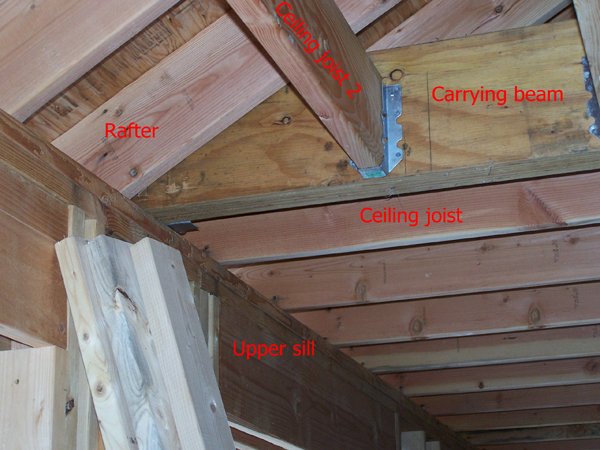
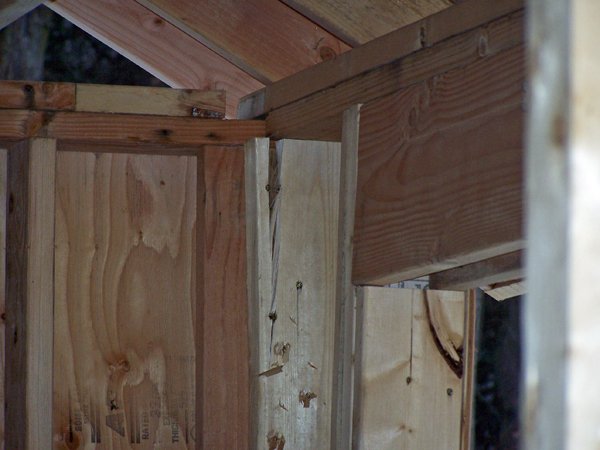
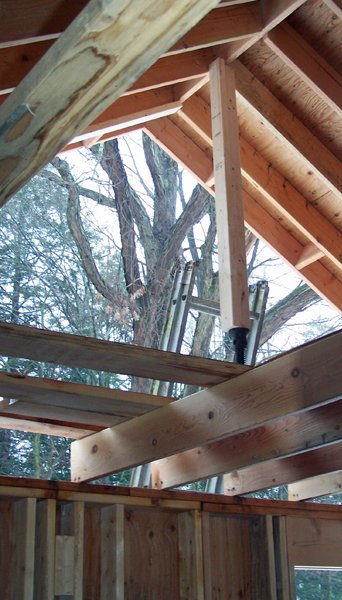
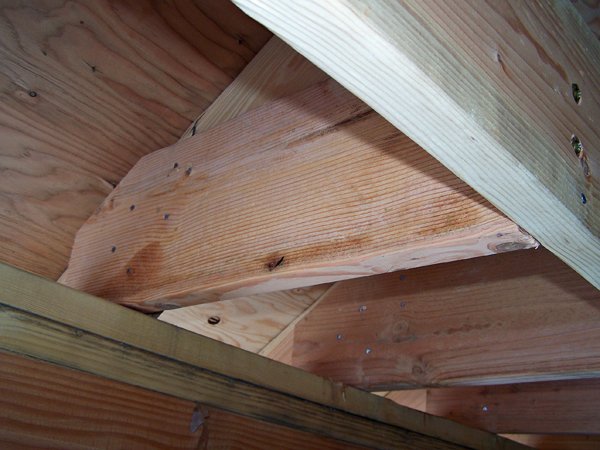
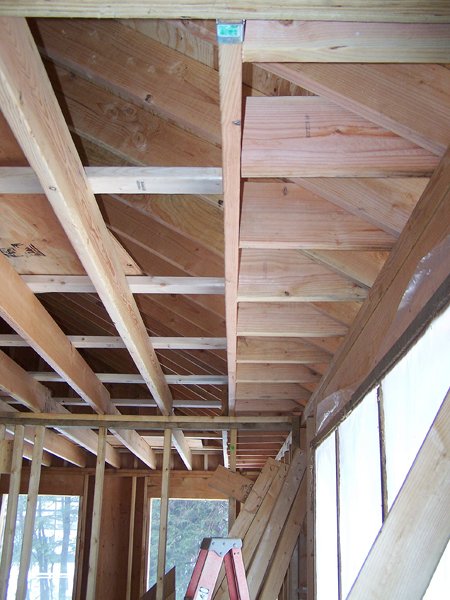
This photo shows where the problem starts, and ends. The ceiling joists (ceiling joist) over the living room each tie into a rafter up to the carrying beam across the dining room.
But after that, the joists (ceiling joist 2) run perpendicular to the rafters. There’s no tie in. And that was the problem.
You can see here the ceiling joists run parallel to the upper sill on the outside wall.
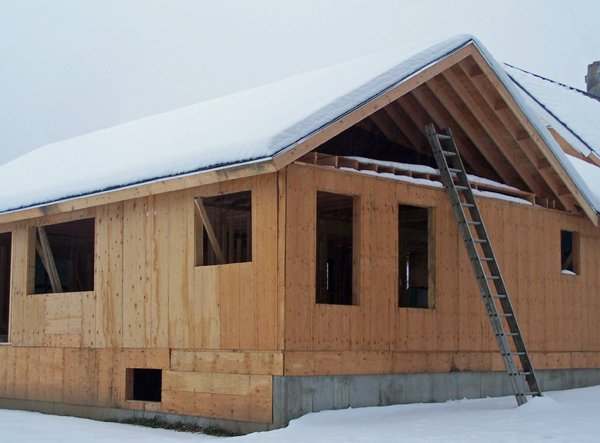
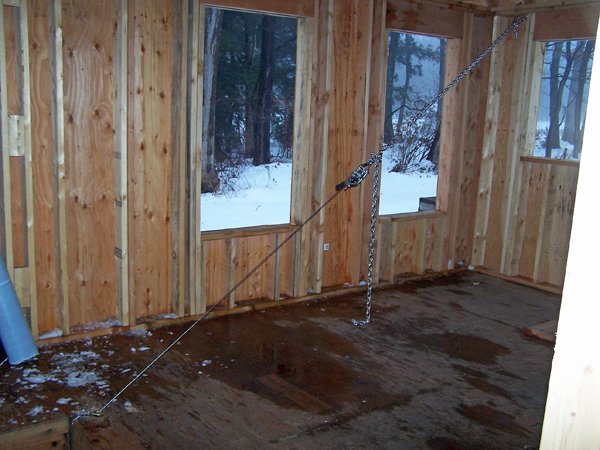
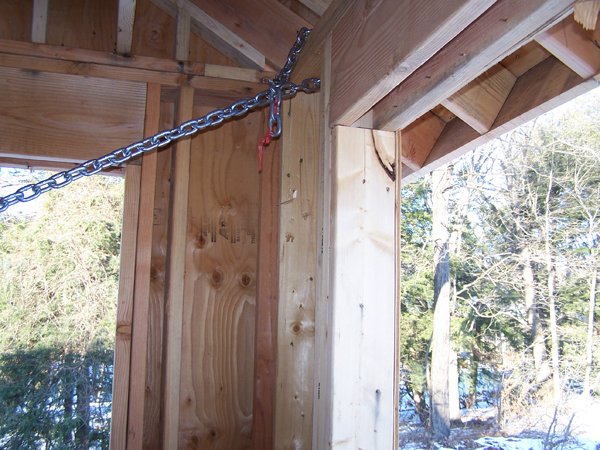
He was looking over the house on Monday morning and found this. That’s the wall stud coming away. Above it you can see the gap.
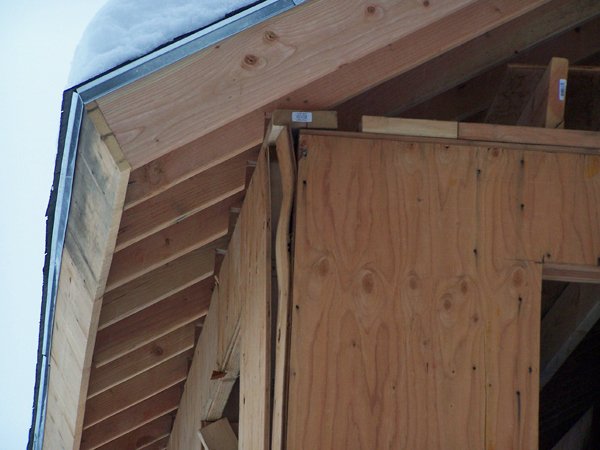
Outside this is what it looked like.
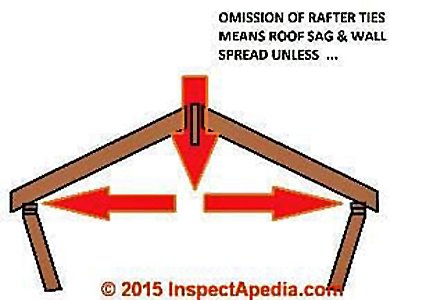
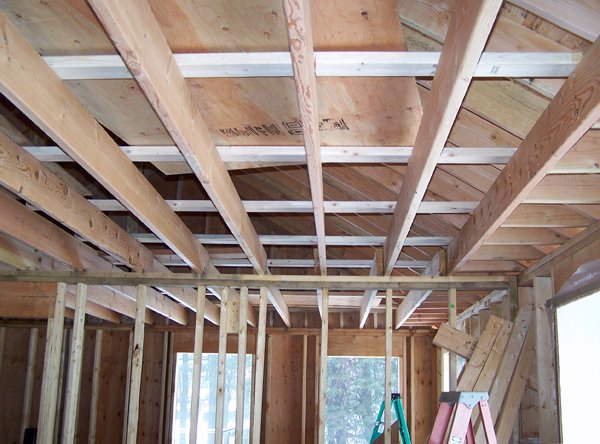
This shows there’s no tie in from the north wall to the east wall. The rafters rest on the upper sill and there’s nothing to keep them from pushing that wall away from the house.
First thing was to lessen the snow load on that roof. He borrowed a snow rake and got off as much as he could.

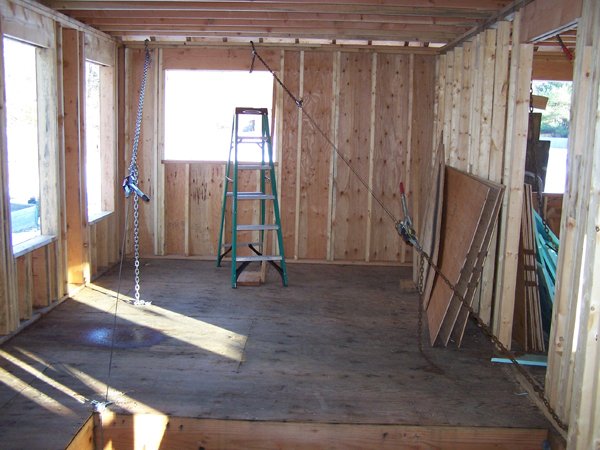
Then he used a stout chain and a come along to pull the middle of the wall back into alignment.
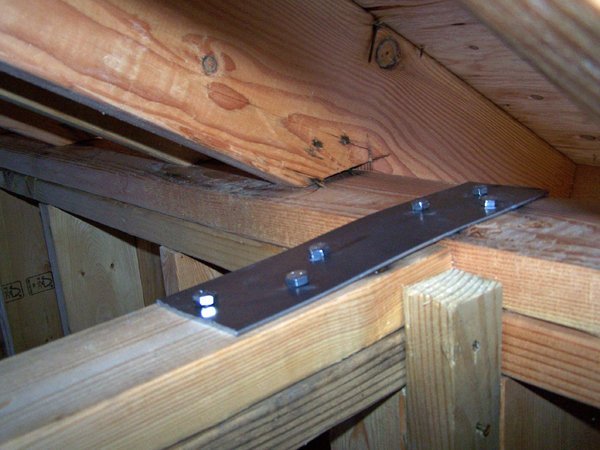
In addition, he lagged in this plate, connecting the wall to the bearing wall across the kitchen.
Then he got a chain and come along on the northeast corner and stabilized it. That evening he went and borrowed house jacks and another come along from a friend.
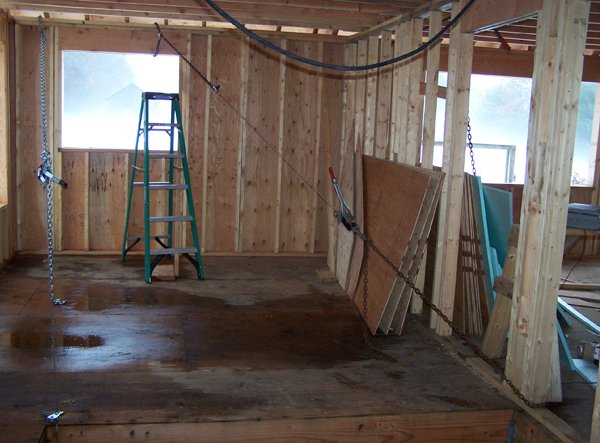
The third come along holding the east wall corner
The first jack was near the lam beam for the north valley. The idea was to take the strain off the ridgeboard, allowing the wall to come back into alignment.
The second jack was closer to the gable end. The open gable end was also part of the problem, as it offered no support.
These actions allowed the gap to close and the wall to return to alignment.
The wall is supported and stabilized and back in alignment. He put a plate in the corner to help hold it together.
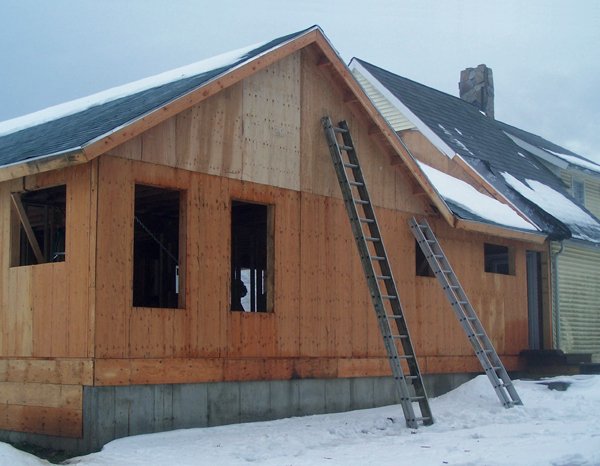
Then he put the gable end in place.
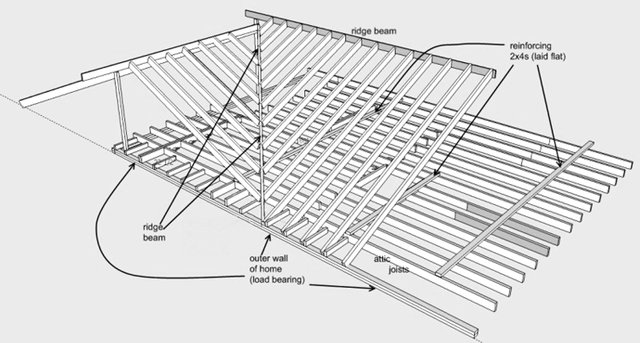
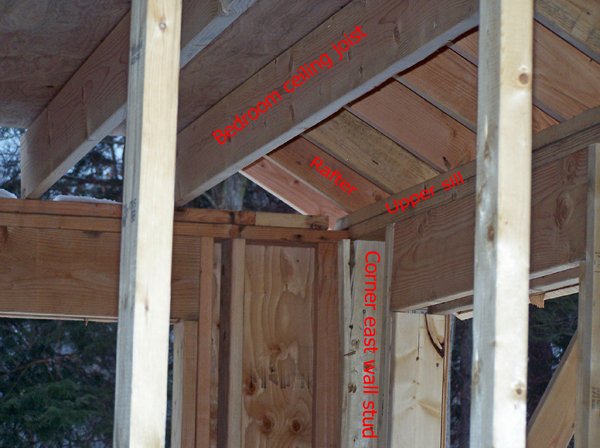
He found the solution in this plan diagram. The idea is to bring support to the wall by tying it into the first joist, and bring support to that joist by tying it to the back joists with a flat 2” x 4”.
So he cut these connecting supports and nailed them to the rafters from both sides.
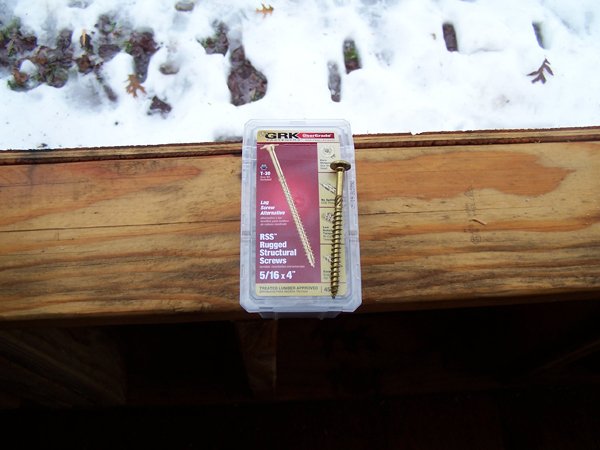
He heard about these structural screws from his friend.
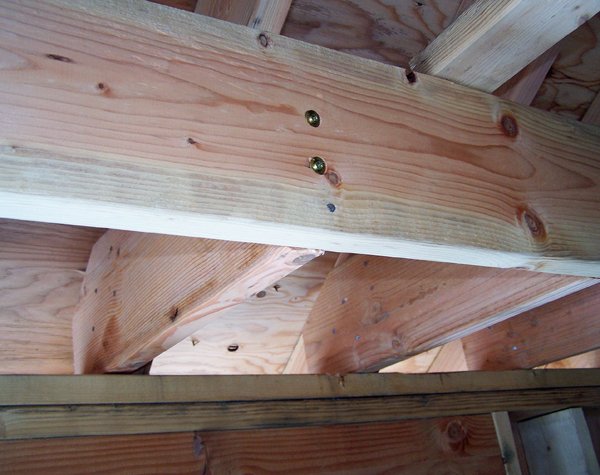
He put 2 in the end of each support.
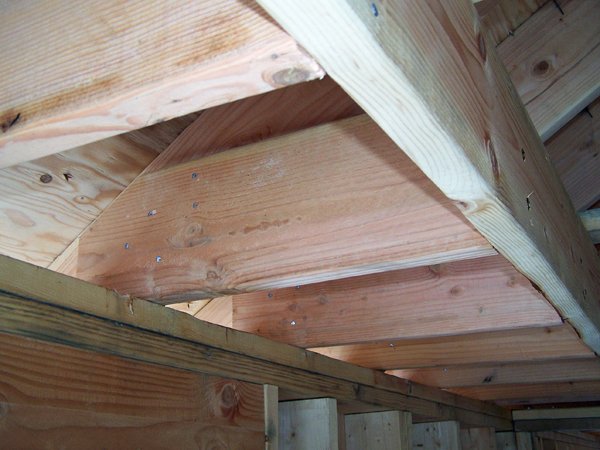
Supports running across the bedroom
Supports running across the dining room
The he ran the flat 2” x 4” across the ceiling joists, connecting 7 of them to the end support joist. He nailed each intersection. They are on 32” centers for now. He has to insulate the ceiling from above, once the ceiling is installed over this area.
Once the insulation is done, he will lay more flat 2” x 4” so they are 16” on center. Above them he will set 2” x 8” joists screwed into the sides of the 2” x 4” and to the rafters. Then lay a floor for the attic.
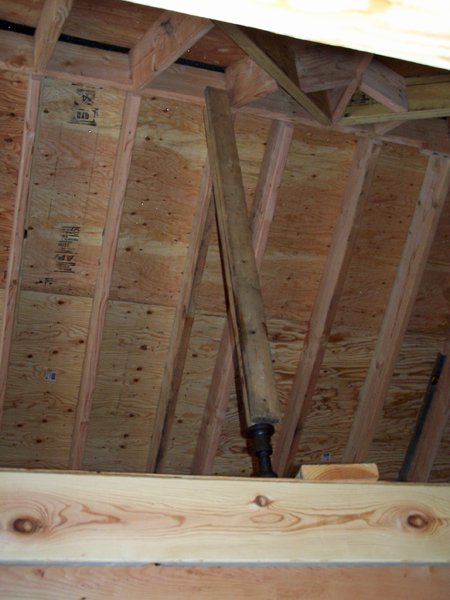
The jacks will be replaced with permanent posts to support the ridge board.
Sources: https://www.doityourself.com/forum/roofing-gutters-all-waterproofing-anywhere/428180-rafters-spreading-ceiling-cracked.html
https://inspectapedia.com/structure/Roof_Collapse_Forces.php
Glad you caught this when you did and well done on managing to fix it. That was some pretty clever work to pull it all back together.
Brings back memories of my dad and his old garage. He pulled and lifted, and pulled..and lifted that thing sooo many times and ways. It's still standing, even now, 30 some years since then.
Glad ya got it fixed! And now ya know a few more things than ya did before. hehe
I didn't understand most of the words in here, but it's impressive work, judging by the photos!
Posted using Partiko Android
Congratulations @goldenoakfarm! You have completed the following achievement on the Steem blockchain and have been rewarded with new badge(s) :
You can view your badges on your Steem Board and compare to others on the Steem Ranking
If you no longer want to receive notifications, reply to this comment with the word
STOPTo support your work, I also upvoted your post!
Vote for @Steemitboard as a witness to get one more award and increased upvotes!
Thank you for using the #diy tag. This post has been manually rewarded with BUILD tokens in the form of an upvote. You can buy, stake, and exchange our "BUILD" tokens for steem on steem engine or SteemLeo
Build-it is a central hub for DIY and How-To projects. It's an opportunity to find and share the latest in DIY, and How-To tutorials. The recommended tags required when creating a DIY article are #diy, #build-it. #how-to, or #doityourself. Please read our guide
Chat with us on our discord and telegram channels Discord, Telegram. Are we adding value ? your witness vote will be appreciated! Click here to vote