Top-Rope Solo: Controversial, Useful
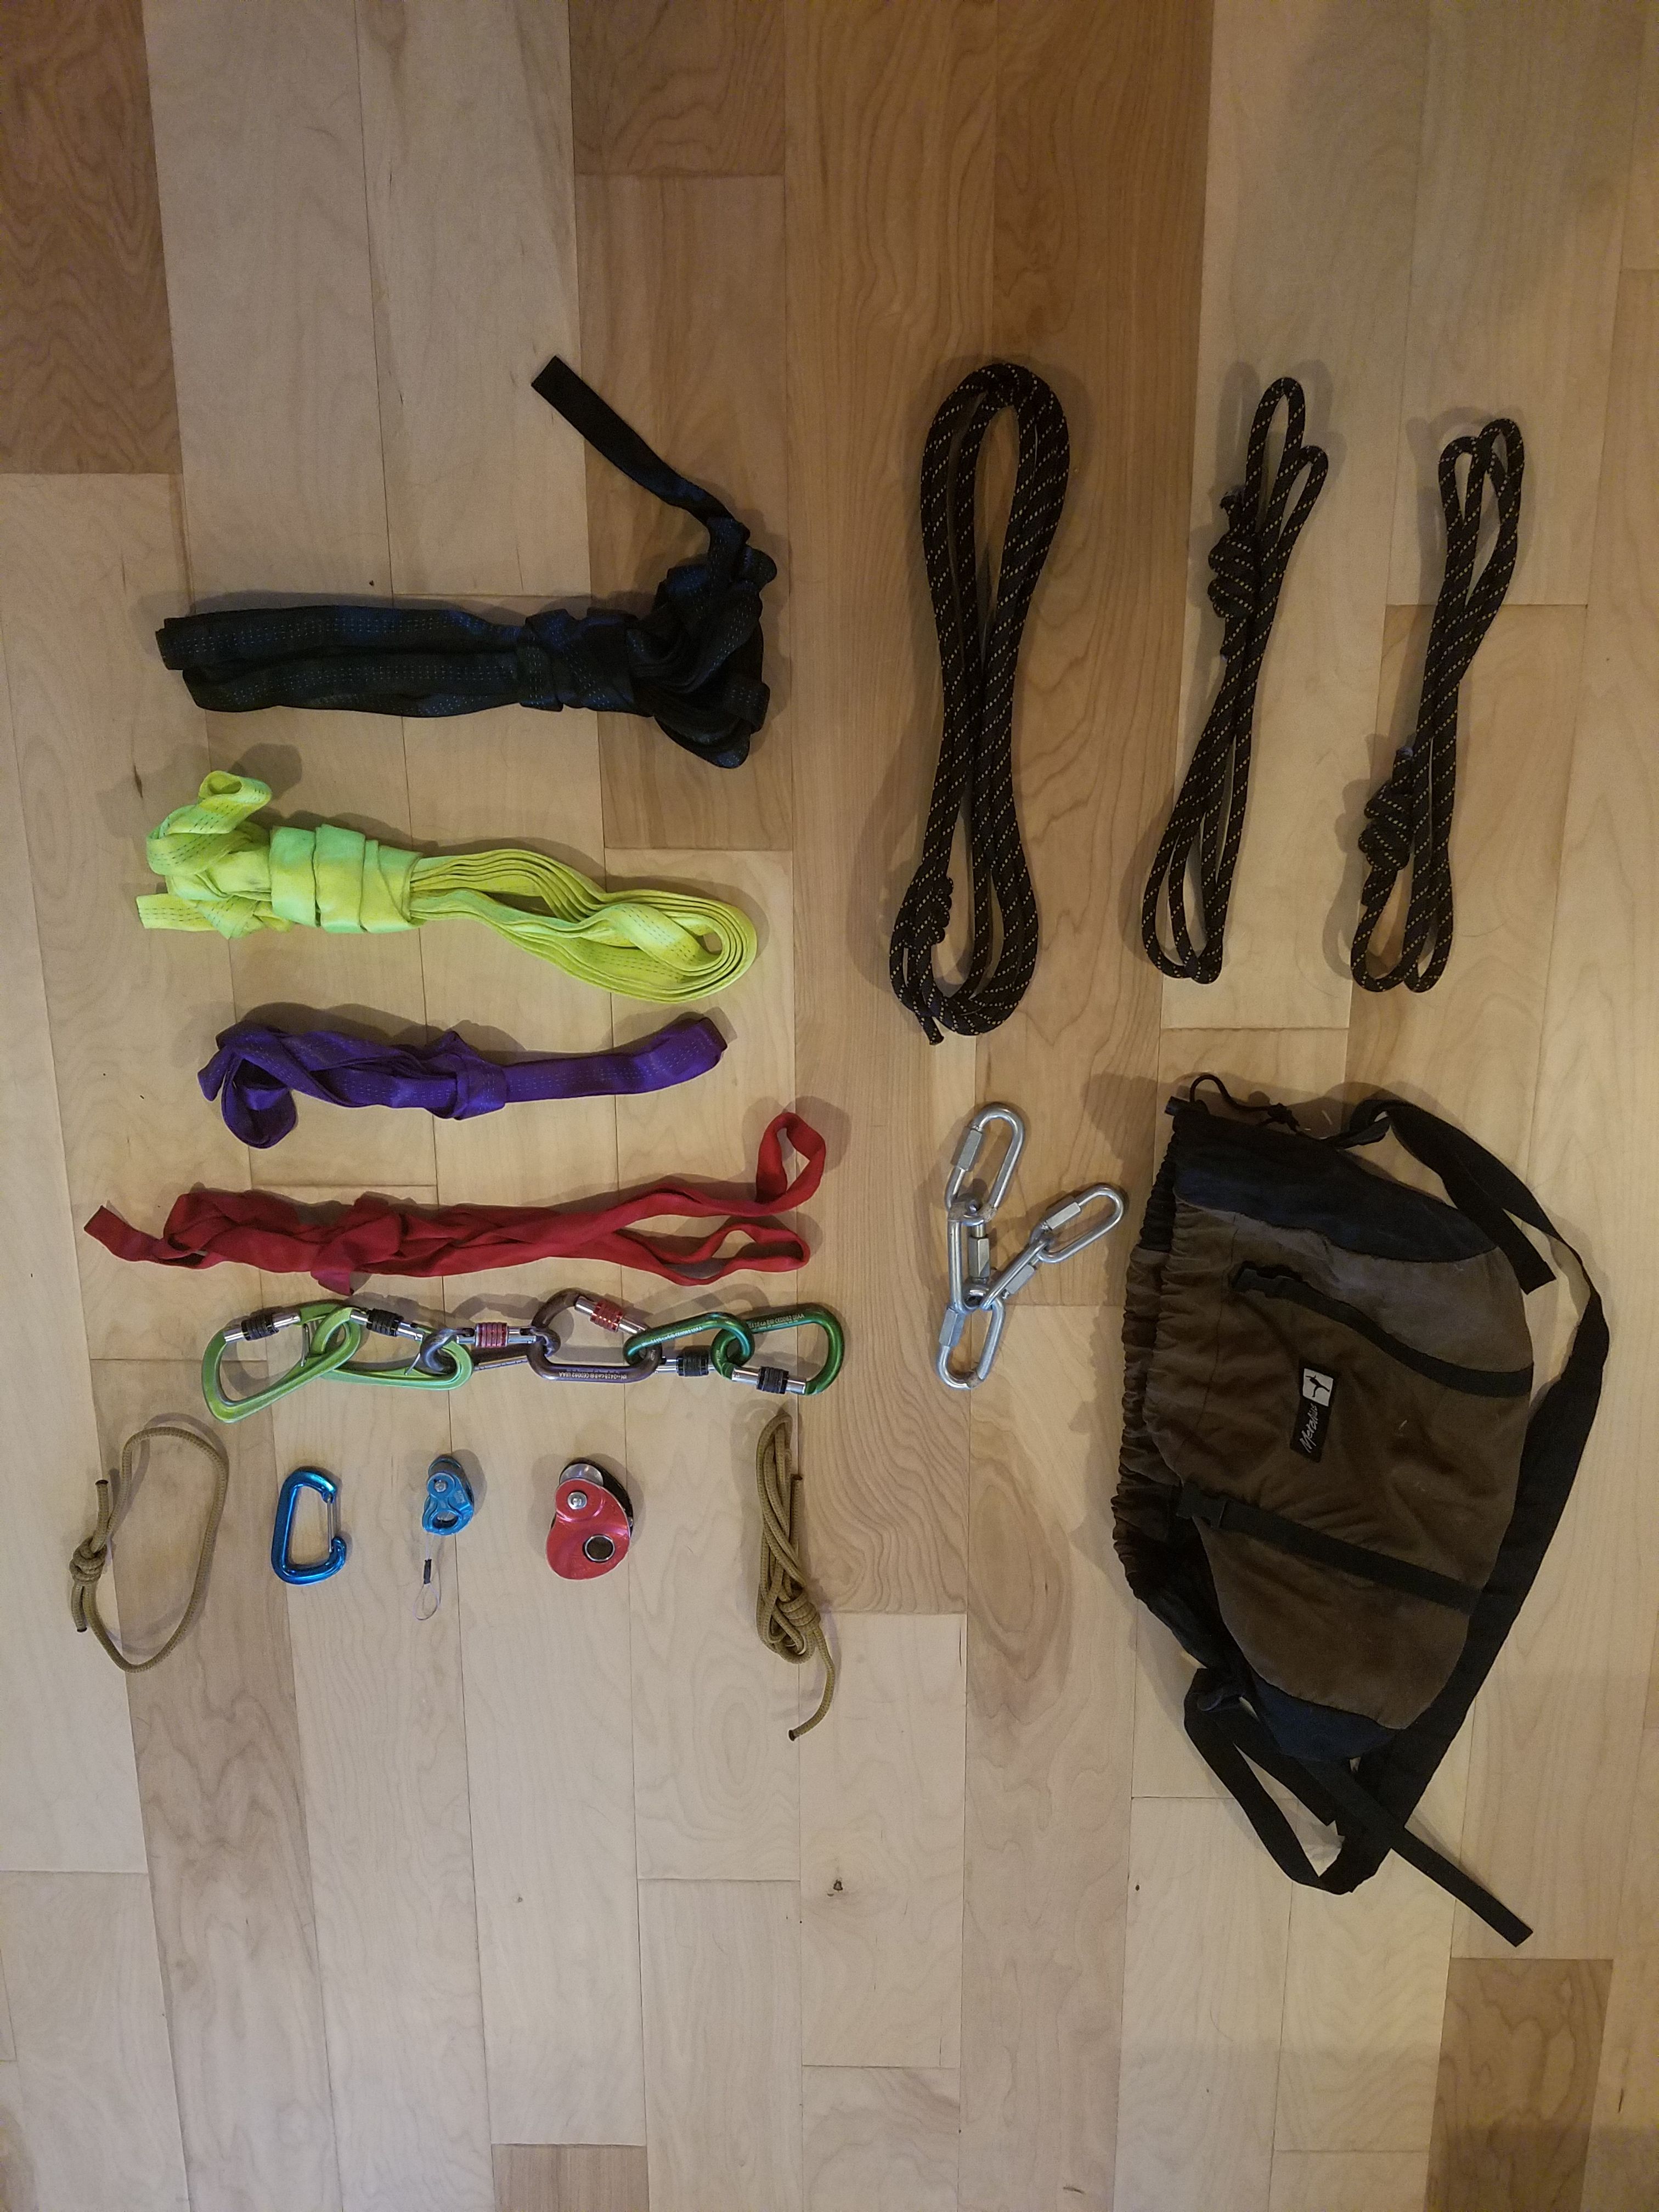
A simple gear rack I will get to explaining later in the article...
Top-roping is how most people enter the world of rock climbing. It involves a pretty easy set up, a short fall and an opportunity to try hard moves a few times while hanging on the rope; a great training method but not generally accepted as an "ethical" way to ascend natural rock. That status is reserved for sport-lead or trad-lead climbing. While top-roping provides it's benefits to the beginner and veteran alike, there is another way to access those benefits without the need for a belay partner.
Enter top-rope soloing. With the advent of new devices (some specifically intended for top-rope soloing), many climbers, from boulderers to big-wall climbers, have taken up top-rope soloing to rehearse projects alone. With a plethora of devices and set-ups available to the aspiring roped soloist, it can be daunting to research the possibilities and decide what's best for you. Personally, I have tried a few different roped solo configurations and settled on some devices and a method that works for me in several situations. I use top-rope soloing both to have fun on easier and shorter routes with a simple walk-down approach and to rehearse taller boulder problems that may have a bad landing or one awkward move that needs repetition to stick. Before I begin showing the methodology behind my solo rig and other possible configurations, I would like to stress that nothing written in this article is a substitute for real world learning and experience and you are fully responsible for your own safety. That being said, let's first understand why roped soloing has been so controversial in recent years.
The internet, in all its glory, can be an intense sounding board, especially around potentially risky endeavors like climbing. So it's not hard to imagine the objections from the greater community as to why roped soloing is not favorable: "being alone on the wall is dangerous...", "that gear isn't made for that...", and my personal favorite, "the rope can get damaged or severed in a fall..."
Actually, all of those things are true. But none of them is a valid argument against soloing since all of those objections also apply to almost any other type of climbing. Truthfully, roped solo is no more or less dangerous than other outdoor climbing methods. Let's tackle them one by one. Being alone while climbing is a personal choice which many, many climbers make after calculating risk and reward. Some of the gear that is viable for roped soloing is not intended for that purpose by manufacturers, but some is. And there is so much evidence for the safe operation of these devices in a roped solo application that they are now widely accepted as soloing tools. By the way, the rope can and probably will get damaged somehow if you climb outdoors enough. Ropes are dispensable, so we watch for wear and damage, then replace them as necessary. This risk is also mitigated by a dual-strand method that duplicates the entire system for redundancy. But again, let's be perfectly clear that choosing to engage with the risks associated with roped solo or climbing in general is a personal choice based on previous experience, mental comfort, physical ability and risk management.
Now that we've understood why roped solo can be controversial and just as risky as other types of outdoor climbing, let's check out some general principles of outdoor climbing.
The first thing we need to do at the crag is identify our climb then place an anchor at the top of the pitch. Let's briefly discuss building anchors and why it is necessary.
An "anchor" in climbing is a redundant point of protection, either natural or man-made, that we attach devices and ropes to in order to catch a fall. Acceptable anchors are proven to be so with an acronym: SERENE.
S - Solid; the point of protection (a tree, a crack, boulder or other rock feature) is bombproof, not going anywhere, surviving the apocalypse.
E - Easy; the design and access to the points of protection is as simple as it can be while satisfying the rest of the criteria. Complication can be dangerous since it takes longer to assess potential problems.
R - Redundant; the anchor should utilize at least two bombproof points of protection and the functional elements of the system, like carabiners, should be duplicated when possible in case of failure.
E - Equalized; with multiple points of protection, each point must be connected to a masterpoint that is in line with the direction of the load when the rope is weighted. This means that the lengths of slings or static ropes from the protections points to the masterpoint carabiner(s) must be adjusted to create equal pressure on each other. The angles that those slings or ropes make in relation to each other should not exceed 60 degrees.
N, E - No Extension; the whole system should not extend when the rope is weighted, nor should any point of protection extend if another were to fail. This is generally already achieved if the anchor is properly equalized.
Practical anchor building is not especially difficult but different situations can call for different gear or techniques. Always consult someone who has done a climb that you intend to do and see how they achieved a safe and fun experience and what gear they found useful. Sometimes, crags have an abundance of large, healthy trees at the top of the pitch which make very solid and easy anchors but may require very long lengths of webbing or static rope. Yet other crags will require the use of the natural rock features to build an anchor, in which case camming devices, stoppers and nuts may be useful. And still others have permanent bolts at the top of the routes which makes anchor building a breeze.
In any case you encounter, make sure you decided on a safe method using the SERENE acronym as a guide. Here are some examples of possible anchor situations that you may encounter while setting up for a roped solo.

This anchor utilized a horizontal crack, into which two camming devices were placed, a single self-equalizing sling connects the two with a single carabiner. This set-up is minimal but adequate. I would personally place a third cam, a second independent sling and a second carabiner opposed to the first.

This setup is similar to the first but with more redundancy while still keeping it simple and efficient.

These rappel rings attached to permanent bolts is an easy anchor set up that would look quite similar to the first example when completed.

You may find some bomber trees at the top of the crag, in which case your anchor may end up similar to this one.
With so many possible correct and safe (and incorrect, unsafe) methods for building anchors, I implore you to seek more knowledge on the gear and techniques used to build adequate protection before you embark on this roped solo journey or any other outdoor climbing endeavor.
Now that we have seen what it might take to anchor our rope to the top of the pitch, let's move down the system and see how our rope and harness rack will be set up.
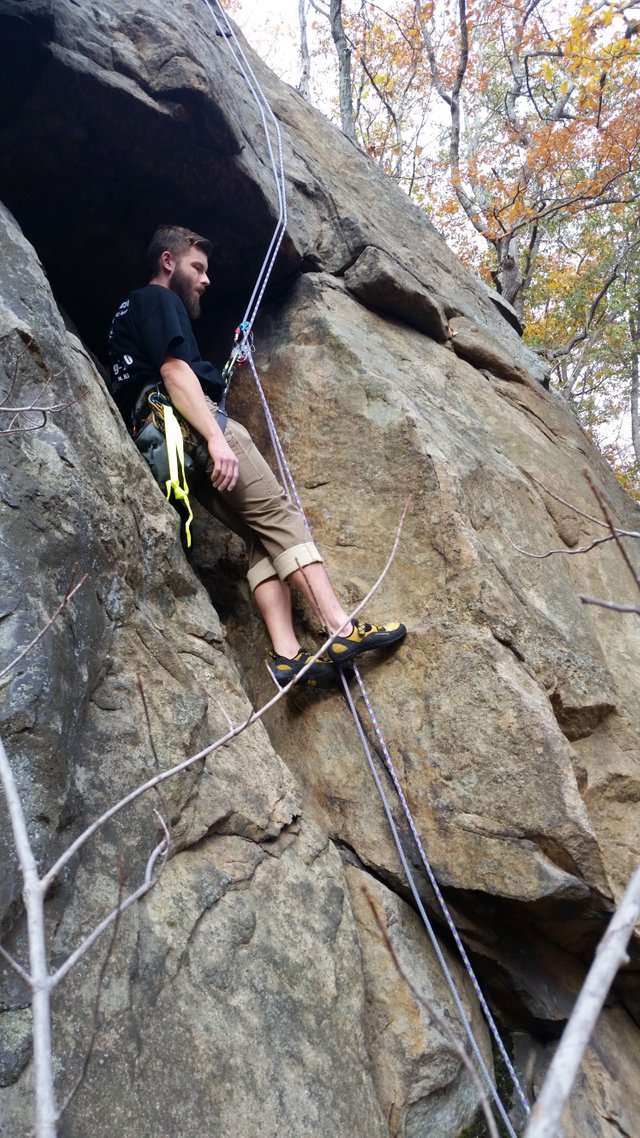
As you can see in the picture above, I prefer to climb shorter pitches (30-50ft) on top rope solo which allows me to double the 75m rope over. To set up in this way, find the middle of your rope, tie a bomber, double loop figure 8 at the mid point and attach both loops to your anchor carabiner(s). The rope strands will not be sliding through the anchor carabiner(s) as in a typical top-rope set-up, they will be held in place by this figure 8. If the rope needs to run over a section of rock, place a tarp or article of clothing between the rope and the rock to prevent fraying or extend the anchor out over the protrusion. Then, with the rope attached to the anchor, flake it out, butterfly coil it and send it over the cliff face with a shout, "ROPE!!"
Listen to hear the rope hit the floor and then double check all of your protection points, anchor construction, carabiner gates and rope lay (where and how the rope will be weighted if you fall). If all is looking healthy, head to the bottom of the crag by walking or rappelling and begin your harness and device set up.
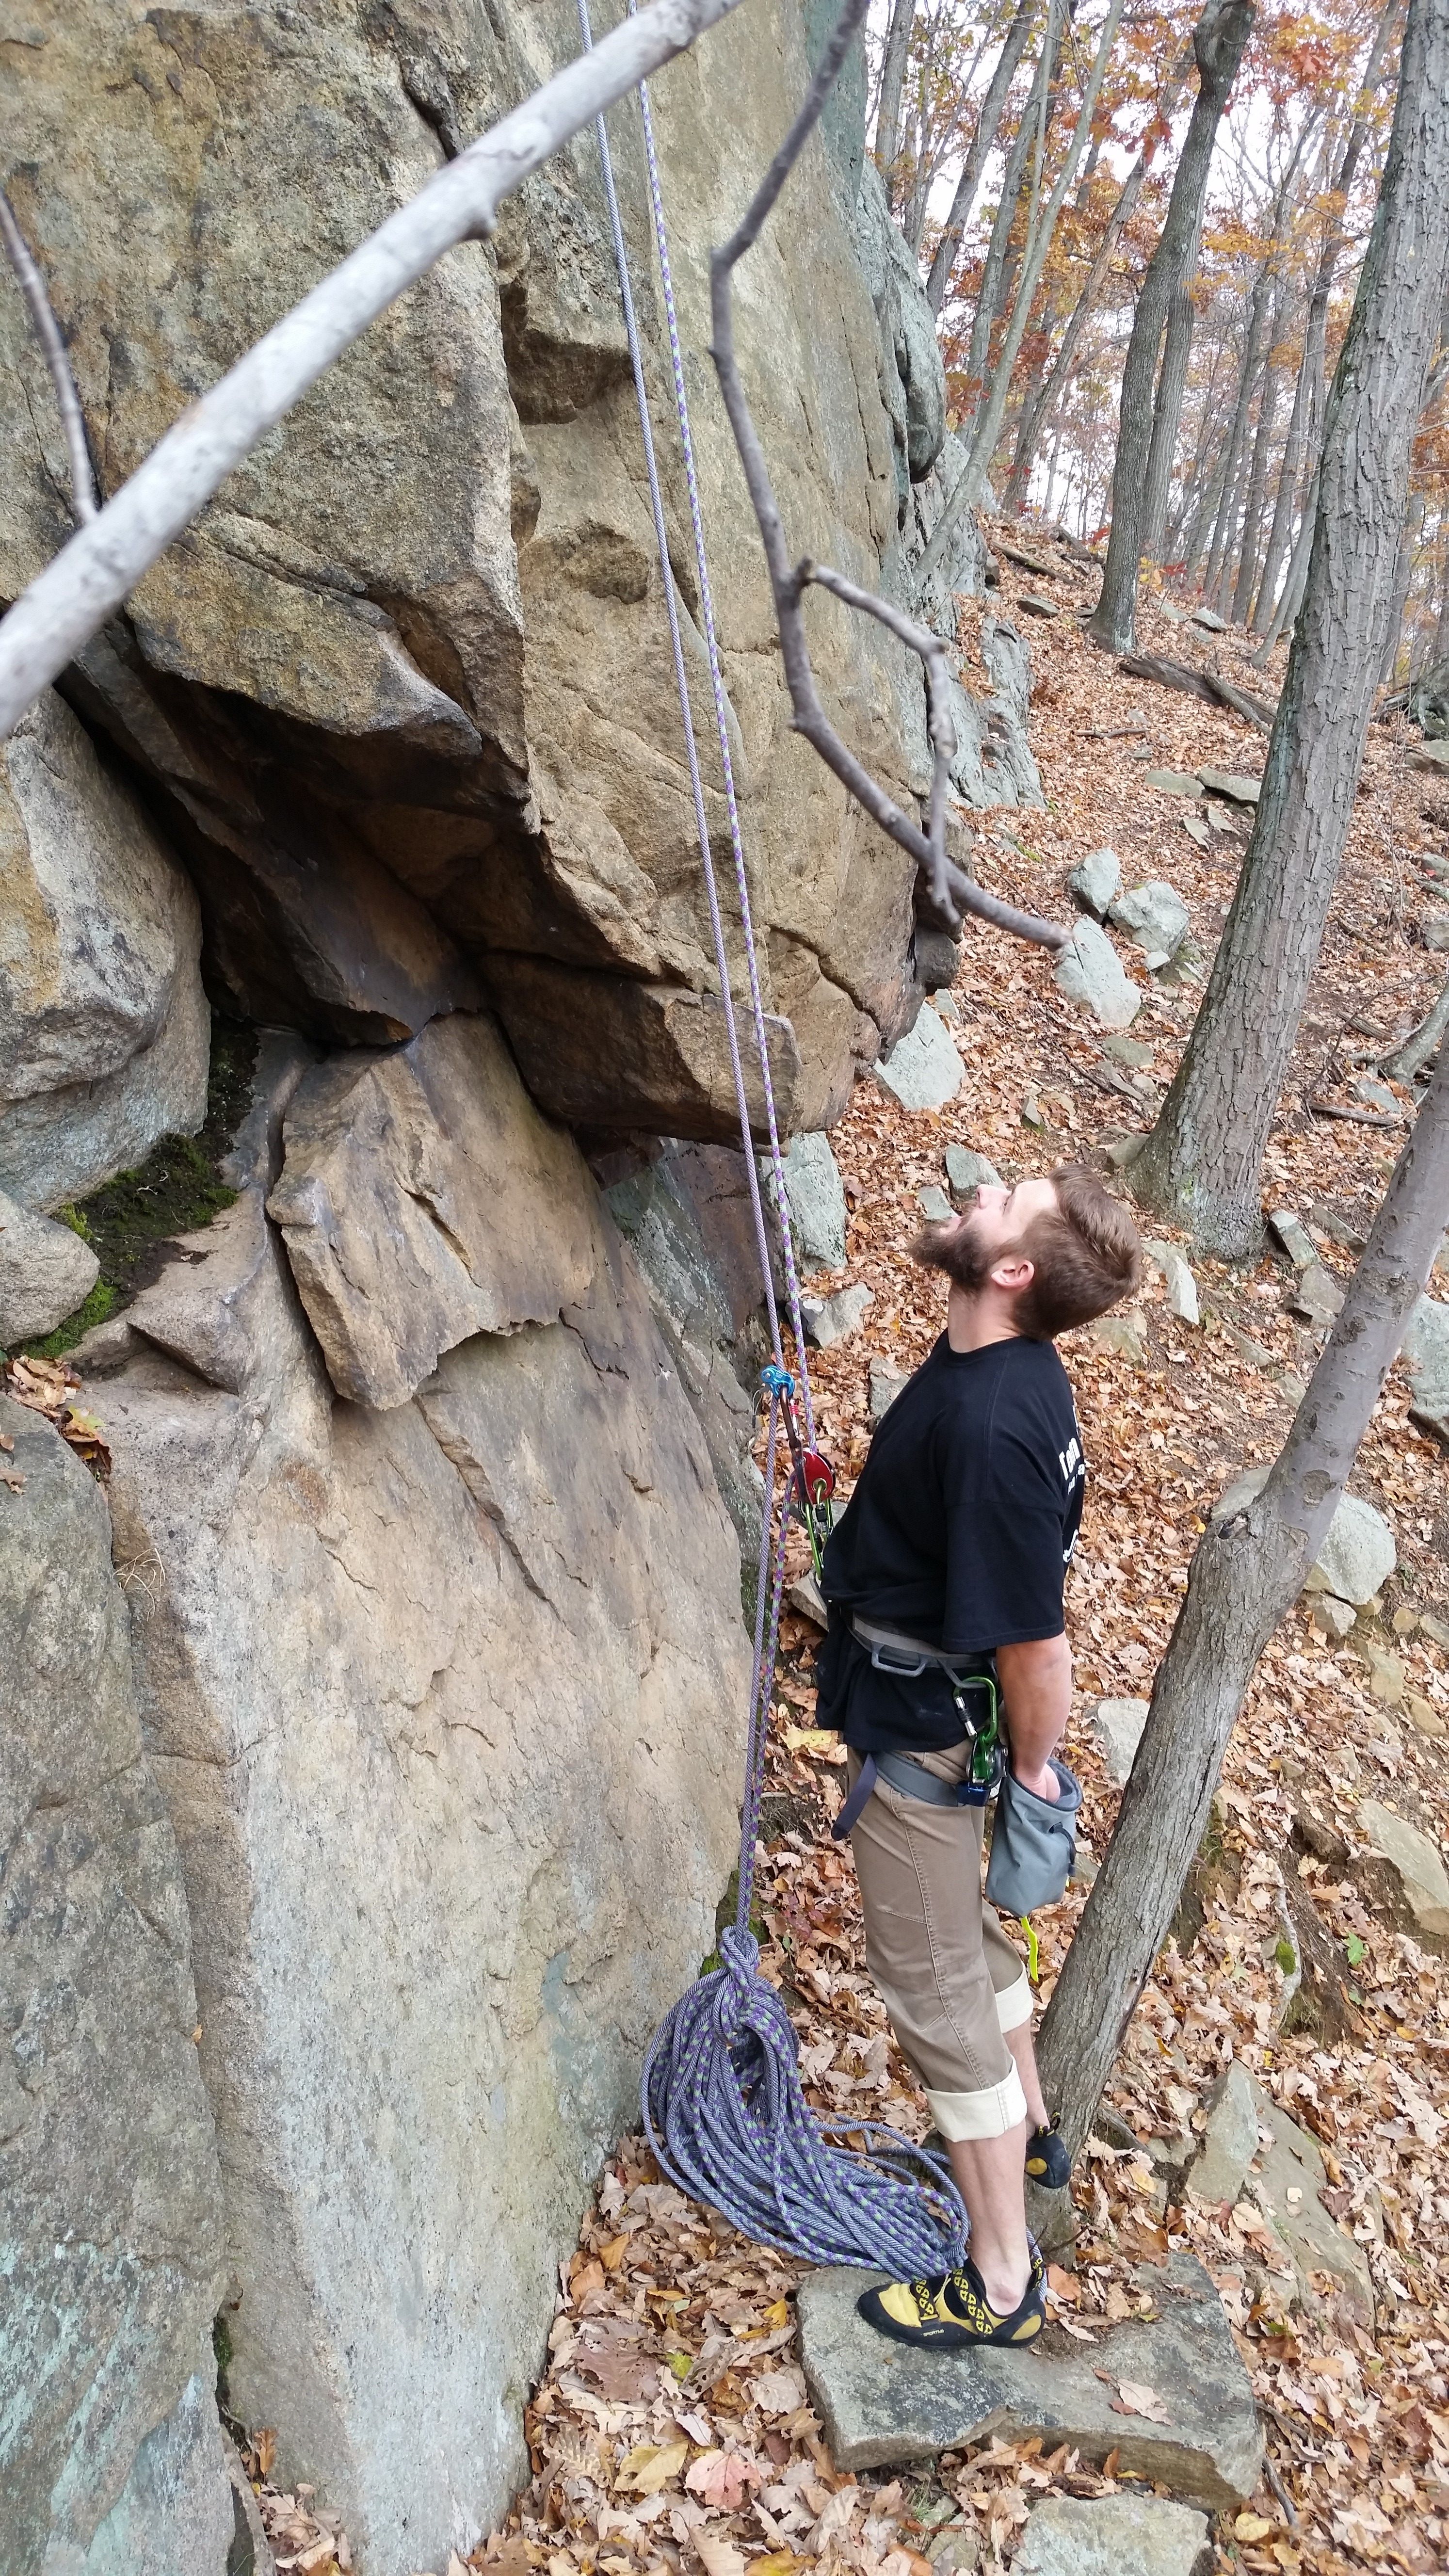
Here you can clearly see some very important aspects of my preferred top-rope solo method. I will list everything I use to safely ascend and escape the system if necessary.
First, there are two strands of rope in use, the excess of which is coiled and tied, hanging neatly at the bottom of the wall. Two strands means each strand only carries half your weight and it also means one more strand available to hold you if one is damaged. It also allows true redundancy for your chosen devices. The big rope coil will weight the rope strands as you climb, allowing your devices to run up the rope smoothly and ensuring that there is no excess slack or extension in the system. This can also be achieved by simply tying the rope to something on the ground with tension.
Some folks put two devices on one strand and that's fine but I prefer to put two devices on two strands. My chosen devices are the Petzl Mini Traxion and the Wild Country Ropeman2. There are a few reasons why I chose these two devices in particular. The Mini Traxion is a device that has been used for big-wall hauling, generally. Recently however, many rope soloists have chosen it, or it's smaller counterpart the Micro Traxion, for it's diminutive size, ease of use and reliability. It's a great tool in a small, inexpensive package. Can be had for about 80 dollars or cheaper if used. The second device I like to use is the Wild Country Ropeman2 and that's because it's an exceedingly simple and inexpensive device. Not to mention, it's super tiny, about the size of a golf ball. (This particular iteration has sideways grooved teeth instead of the needle-like teeth on the Ropeman1) It can be had for about 45 bucks brand new. I got mine for about 25 on eBay.
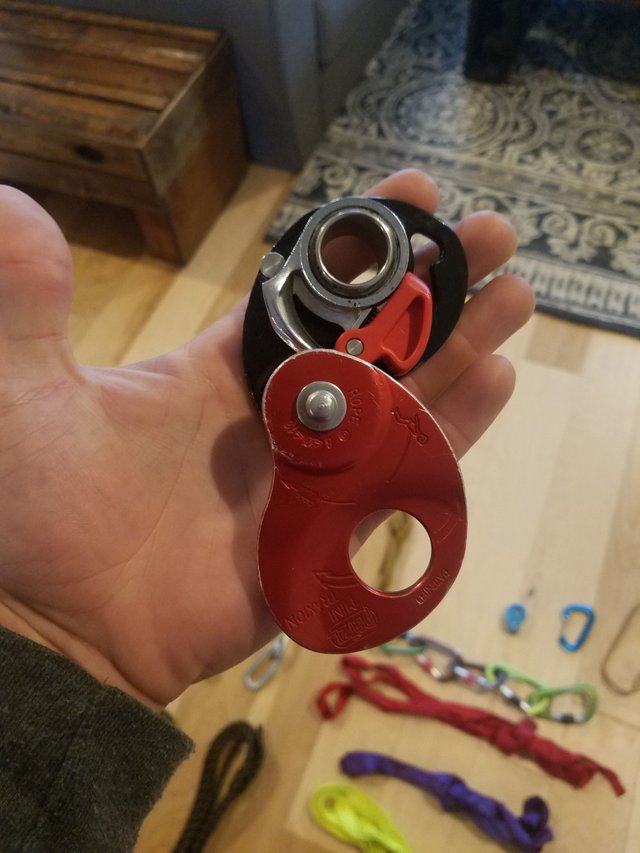
Petzl Mini Traxion
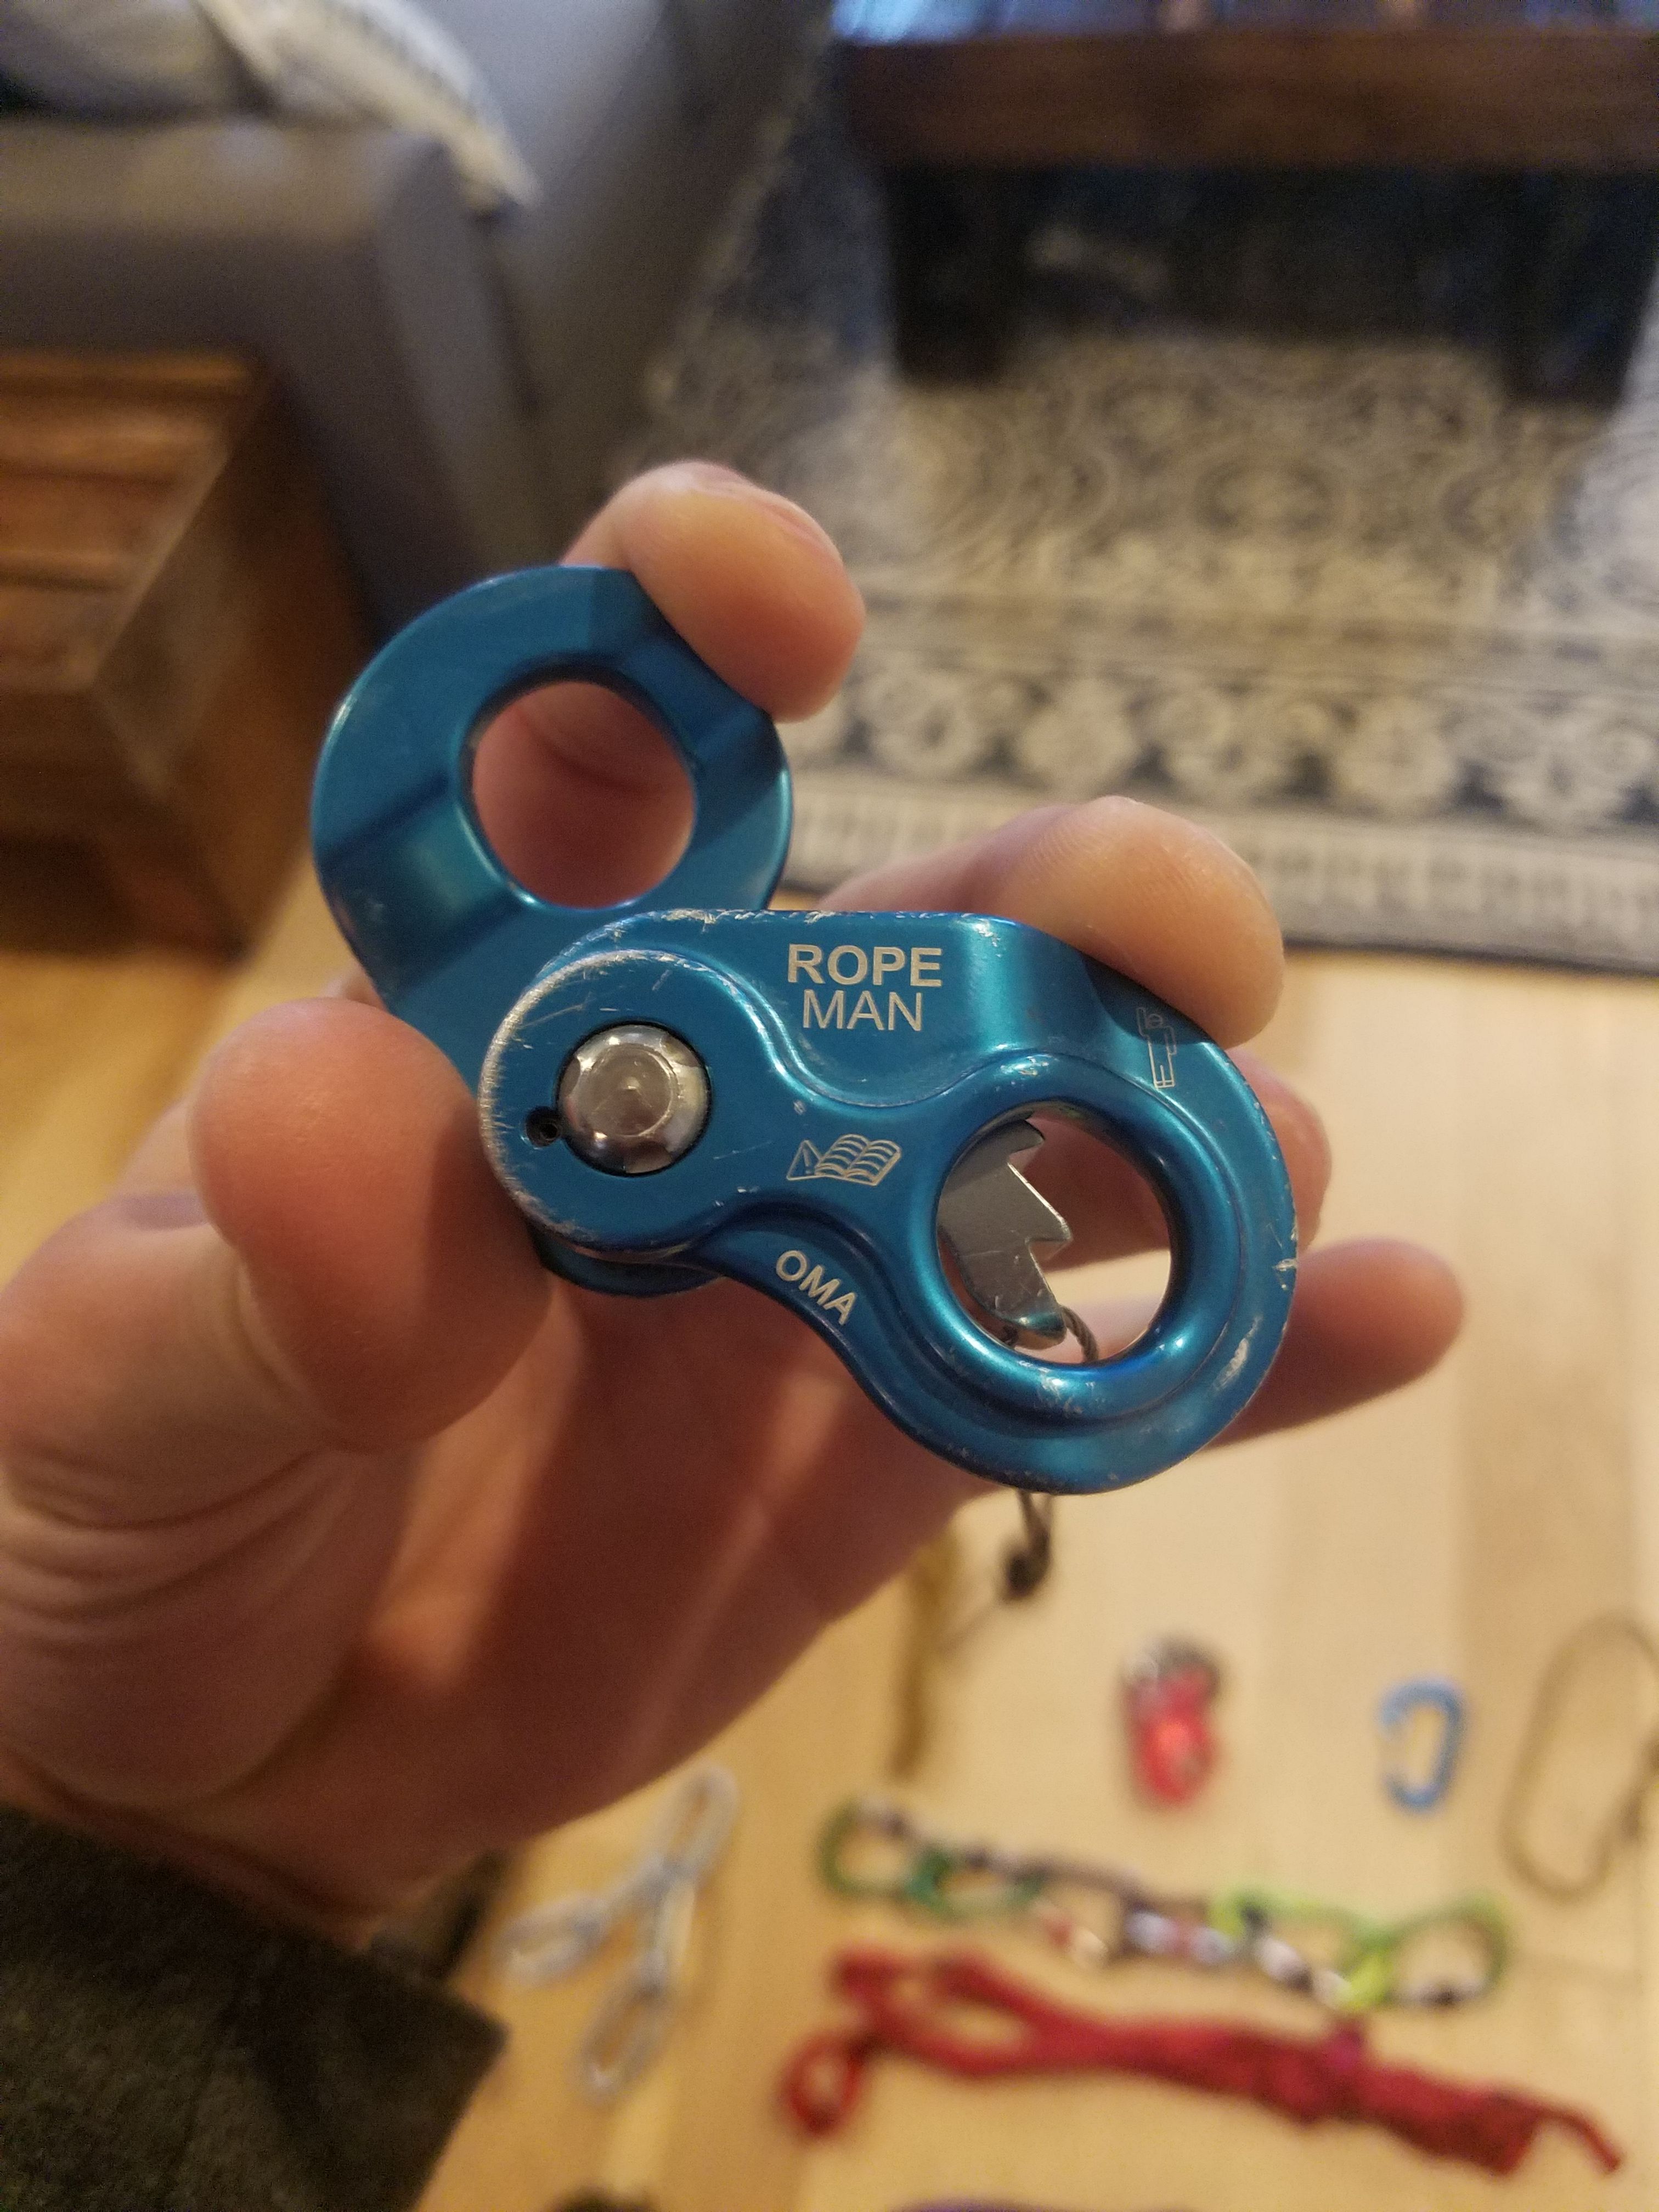
Wild Country Ropeman2
Those two devices are attached to my harness belay loop (you may choose to construct a second belay loop for added redundancy) with Metolius locking carabiners with a keeper. The keeper on the carabiner is an additional gate or feature that keeps the carabiner oriented properly. I highly recommend getting two of these types of carabiners for this purpose since you need the system to work hands-free. If you choose to not use a dedicated belay carabiner like these, you will need to modify a regular locking carabiner with tape or sling it in the proper orientation. Experiment with these things at your own risk. Below is pictured all of the items I use (plus some extra anchor building gear) to top rope solo, except the rope and an ATC belay device.

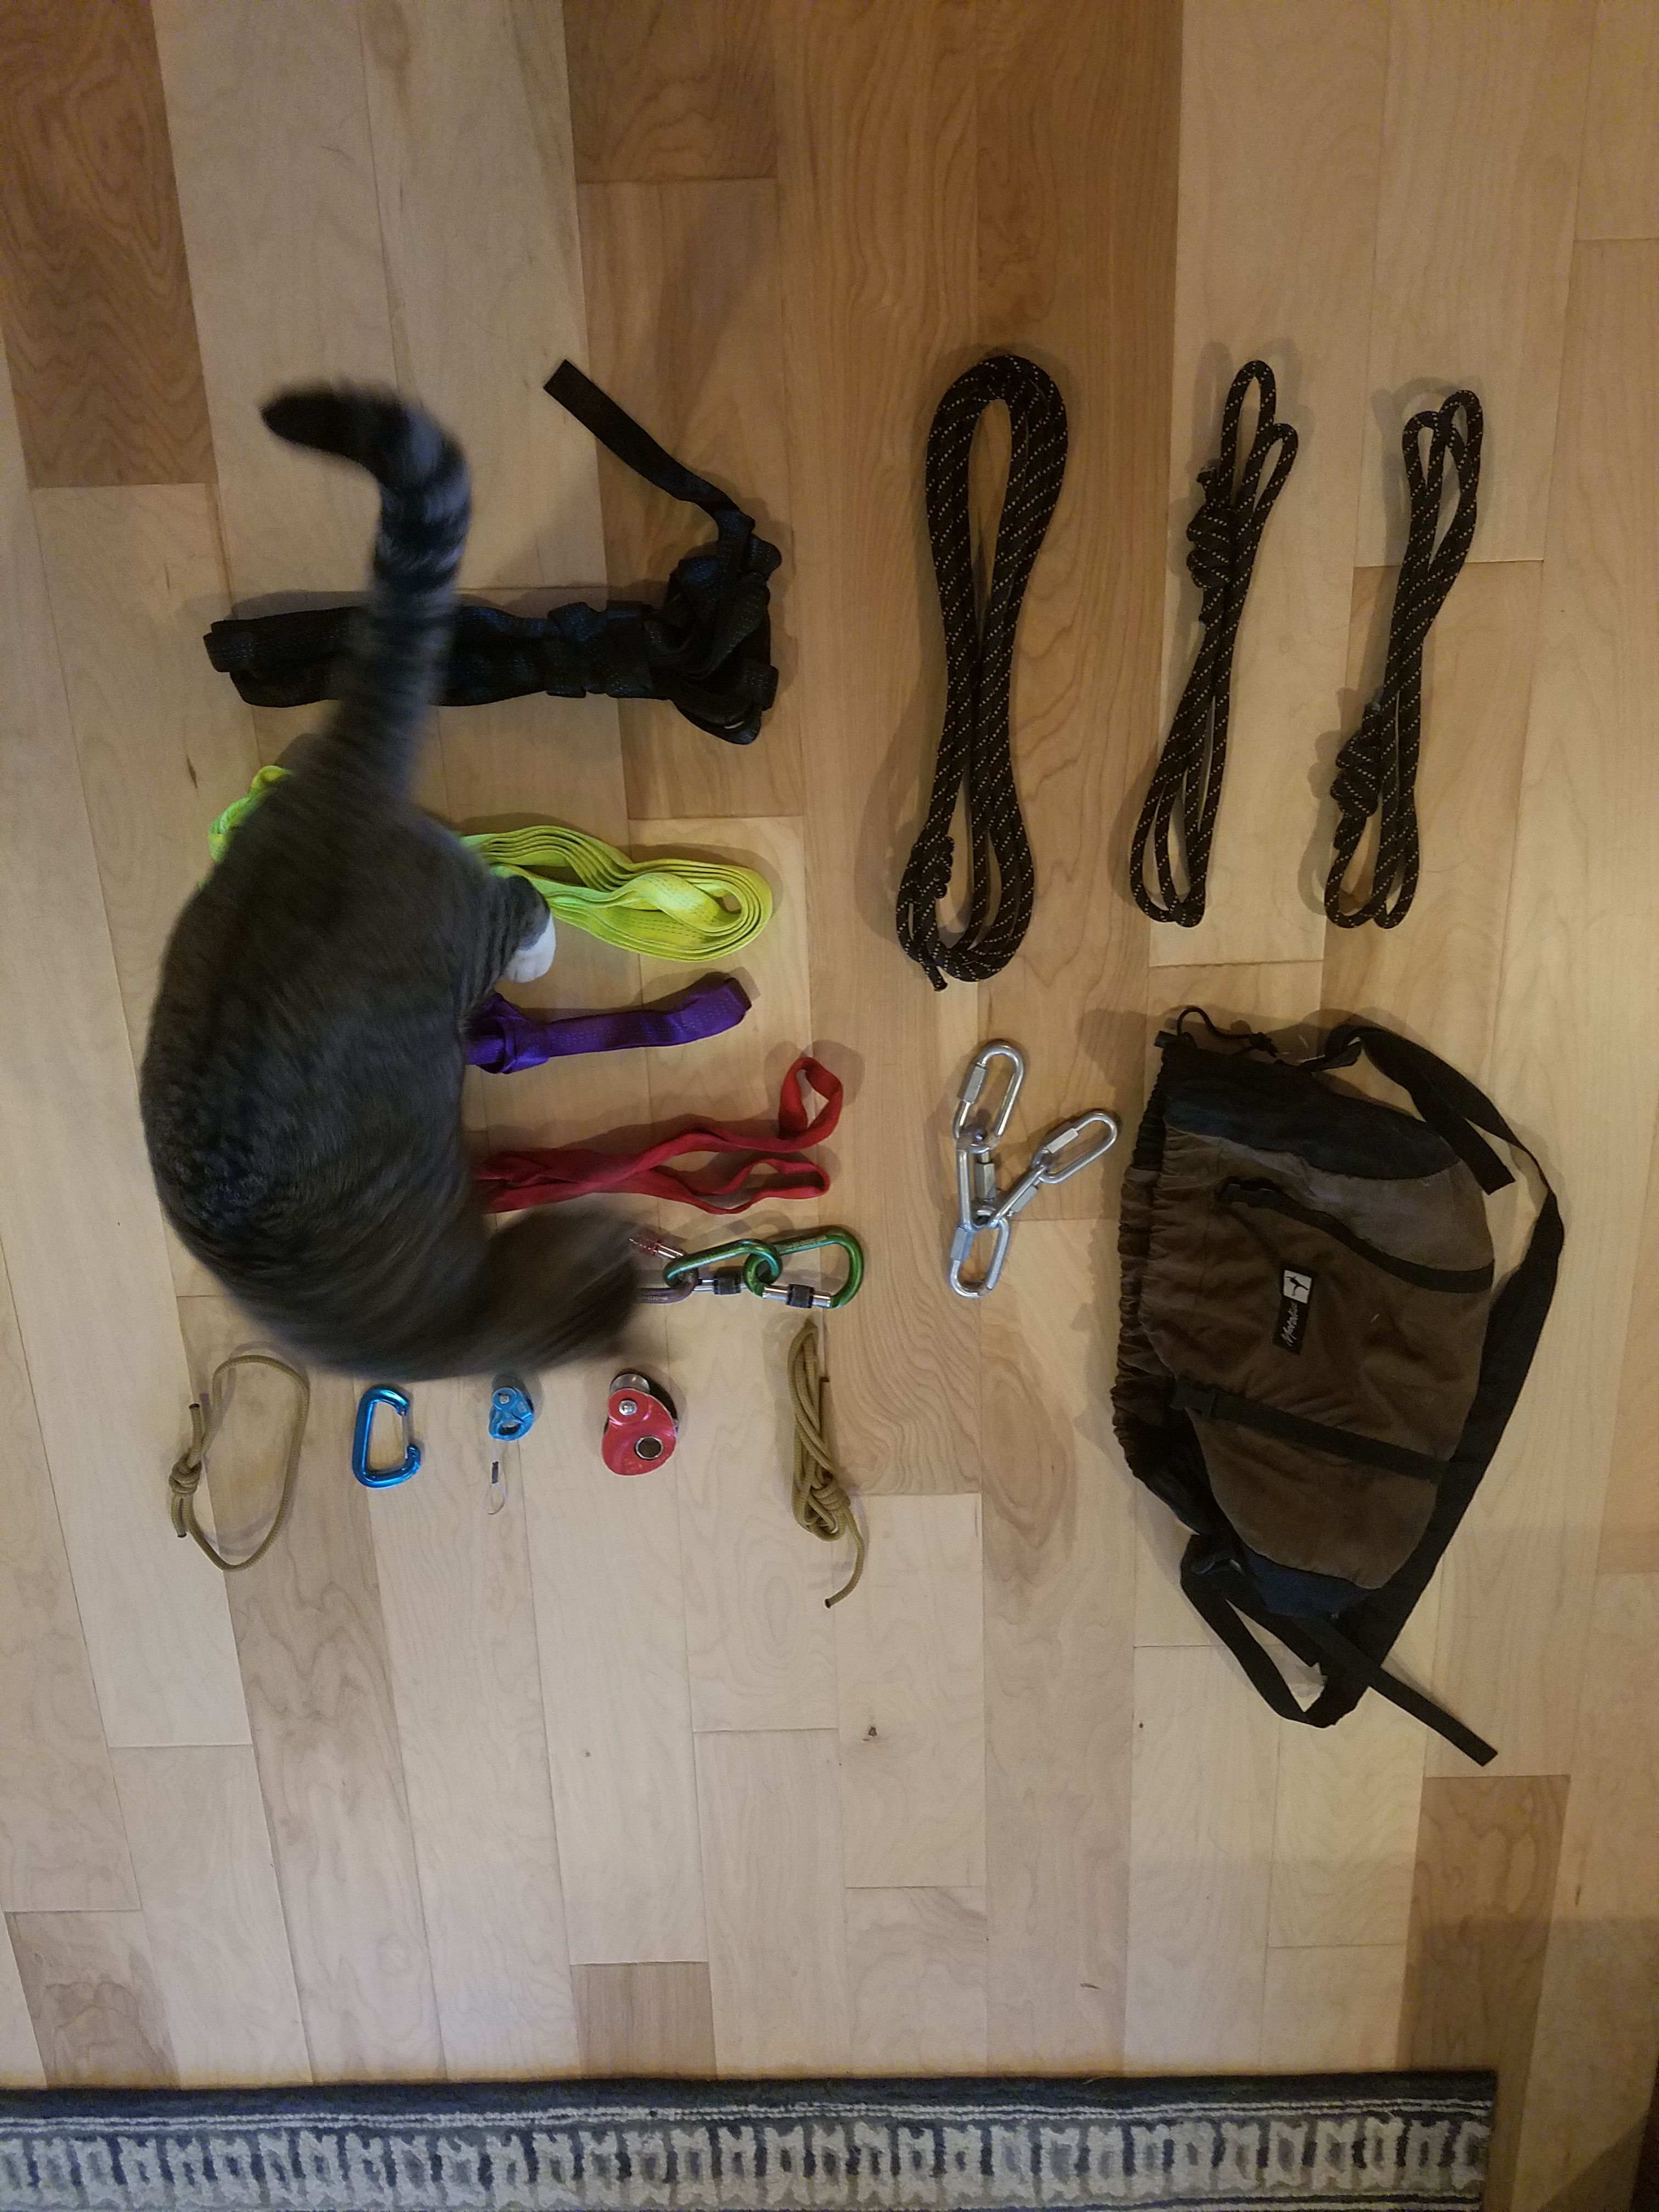
Kitty cat not necessary or recommended for top-rope soloing. You can see, I pack it all into this Metolius bag that also has a tarp to put under the rope for protection.
So now that we've covered which devices I like to use on short top-rope solo routes, let's inquire about some other options for roped soloing and reasons to utilize them. There are plenty of other ways to achieve that result as well. n other systems, you may utilize an assisted braking belay device like the Petzl Gri-Gri or the Trango Cinch in order to allow oneself to rappel without adding another device. Another very simple solo setup is to use only a Gri-Gri on a single strand while working a boulder problem. This type of setup is not acceptable for longer routes, in my opinion.
Additional gear that I like to utilize as pictured above includes various lengths of tubular webbing, lengths of 8mm static line, 6mm cordalette for prussics or jumaring and a bunch of locking biners as well as maillons for anchor building. The actual rack that I put on my harness is a 6ft webbing length, three locking carabiners, one wiregate biner, ATC belay device, 3ft cordalette and a 1ft cordalette. All of these tools can help escape the system or make safe if something goes wrong. In my set up, both strands are independent of one another which allows escape from the system with relative ease; simply place an ATC belay device with an extra locking carabiner on both strands below the devices as if to rappel, tie a prussic onto your harness leg loop and around the rope for backup, then detach each solo device, maintain control of the ATC and prussic and rappel. Your mileage may vary based on where and how you climb so be prepared to rack up differently so you can react to your particular situation properly.
Considerations and concerns are aplenty in this situation and it's why top-rope soloing has gotten a bad rap in the past. Let's give it the recognition and respect it deserves as a training tool and treat it well. The climbing community in general is growing rapidly and new climbers come in to the scene every day that can benefit from every reasonable tool at their disposal. And many pros have lauded roped solo methods for sending hard when alone. However, the scope of this article is narrow and applies to short, single pitch, top rope soloing and should not be construed as safety advice for other rope soloing situations nor should this article be considered a substitute for experience or training in anchor building, rope solo racking, escaping belay or any other advanced roping techniques discussed herein or in the comments.
Thank you to everyone interested in this particular realm of climbing and please ask questions you may have about anything rope-solo related! Hope to see you at the crag one day!

Nice post man. You seriously put a lot into this. Really great. If I don't have my brother yelling at me from the bottom, I get sketched just falling on lead, let alone trad, let alone...climbing by myself. But I've always had a bad headgame. Kudos to you my friend......I guess I should post something climbing related now.
Thanks dude! Haha yea the idea of being alone on the wall is pretty scary to some... I guess I have that introverted type head game; more comfortable solo-dolo. It definitely took a while to be cool with it though! Just like it takes a while to trust those damn auto-belays at the gym XD. Definitely get some climbing stuff up! I'll come check it out!
Awesome. I posted my training wall. I am looking for ideas to make it more useful because it is a little overhung, which I like, but it gets old. If you have ideas or know anyone who might be able to help with some ideas, here is the post:
https://steemit.com/climbing/@ljv/climbing-wall-my-training-wall-in-my-basement-suggestions
Thanks!
You just gave me a full tutorial on how to rope solo! Sooo much information to digest man!
I'm stoked you're interested! It's crazy because I feel like I'm leaving a lot out but I know it's hard to pin down every little thing. It eventually comes down to everyone using their own brains right?! LOL thanks for reading brother.
You feel that you are leaving out a lot because you know a lot about it, i'm not very knowledgeable about the topic so i feel as if i was introduced to a new world xD
I just posted something, in my word file it had 3 pages full of text, and i still feel like i left out a lot of information i could put in there, but i was afraid some people could get scared because of the size of the post
@originalworks is a solo-dolo ascendero
Dig your style man. My climbing partner has been getting into top rope soloing (guess I'm not always available). I need to give it a try this summer.
Say you ever use a Quad or Equalette. Changed my life the quad did. Specially for quick two bolt anchor set ups on top rope or multi pitching. It's a great system that self equalizes, far superior to the sliding X in my opinion.
https://www.climbing.com/skills/learn-this-build-a-quad-anchor/