Growing Cannabis: Seed to Dank
Growing Cannabis: Seed to Dank
How to guide for growing cannabis: A summary of everything you need to know
Sections:
1) Supplies, Seeds and Seedlings,
2) Genetics, Mothers and Clones
3) Vegetation and Flowering
4) Harvesting, Drying, and Curing
Yesterday, I saw a post by @seanengman – Growing Cannabis 101: Acquiring Seed. It inspired me to write my own version of Growing Cannabis 101 that is basically a condensed version of everything you need to know to produce some dank. It will be a great overview for anyone that is interested in growing cannabis. I’ve also included some useful nuggets of information that I have found to be helpful in my experience. Seanengman’s post about acquiring seed had some good information and its popularity inspired me to impart the wisdom that I have gleaned from my experience and my friends over the years. I do not recommend doing anything illegal and this is only written for educational purposes. I would also recommend a book that I read years ago entitled: The Indoor/Outdoor Medical Grower’s Bible by Gorge Cervantes, which is considered by many to be the definitive work on the subject.

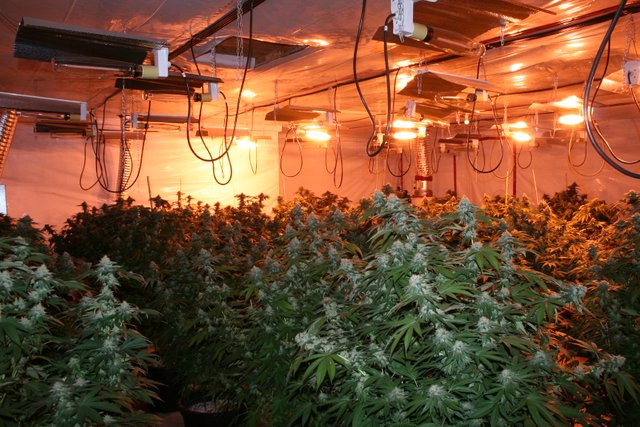
Note: I personally believe hydroponic growing is the way to go but this guide will include what you need to know to grow in soil or hydroponics. Indoor or outdoor is the other big question. Outdoors, the sun will produce many times what can be produced indoors, even with powerful indoor lighting, but indoors can give more control over the climate, so this guide will cover both of indoor and outdoor routes as well.
1) Supplies, Seeds and Seedlings
Supplies
Soil supplies: seeds, seed starting kit (from wal-mart or local store that includes seed starters and container to create 100% humidity), nutrients, water, soil, pots or land.
Hydroponics supplies: (like soil, you still need seeds and seed starter kit) hydroponic nutrients, hydroponic system - which can be easily built with a plastic container, a blade to cut holes in container, an air pump with tubing and air stone, net pots and hydroton and rockwool cubes – which are all available online or at your local hydroponic store.
Indoor supplies: indoor seeds, seed starting kit, big pots that can handle plants up to 6 ft tall, indoor climate monitor for temperature and humidity, humidifier – unless you live in a very humid climate already, and indoor grow lights (such as a 400 watt High Pressure Sodium or Metal Halide lights which would be by far the biggest investment for the project), light timers
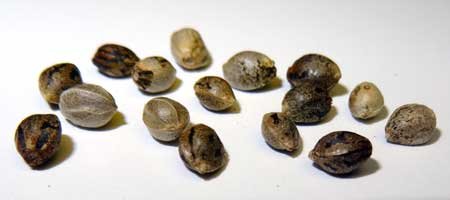
Seeds
Nugget: F1 hybrid seeds grow bigger and more vigorously than seeds whose genetics have been stabilized. F1 hybrid seeds are created when two distinct varieties of cannabis - one male and one female, are bred to produce a new strain. I will not go too much into acquiring seeds because this post by @seanengman gives some good info about that which many of you read yesterday here - https://steemit.com/marijuana/@seanengman/growing-cannabis-101-acquiring-seed. He explains how to acquire seeds from Amsterdam privately through Thor, which I think is good info for people who are unable to acquire something locally.
The main thing to know about seeds is that some seeds have been specially bred to grow indoors. It is essential that these types of seeds are used when growing indoors. When growing outdoors you can use seeds that have been designed to grow indoor or outdoor but when growing indoors, you must specifically acquire indoor seeds if you want to save yourself a lot of headache.
Nugget: Seeds that come from very poorly grown weed in Mexico, aka shwag here in Texas, can be used to grow very high quality cannabis. When cannabis, like any other plant, is not given the proper nutrients, climate, and care in harvesting, drying, and curing the end product will suffer greatly in quality. If a seed from this shwag is planted and given all the nutrients, light, climate that it needs and proper care is taken at the end, you will have nuggets of dank that are about 4 times more valuable than shwag and on an entirely different level of quality.
Wherever you acquire your seeds, it is only with proper care that your end product will be comparable to high grade or medical grade marijuana. It may not have the thc percentage that a particular strain may have been bred for, but the quality and taste will be on the same level and worth every bit as much. Mexican sativas often make plants with an excellent end product and work well to make f1 hybrids with more common indicas and hybrids that are available in the U.S.
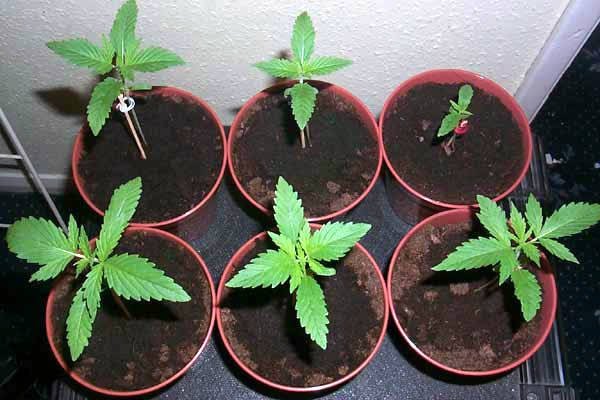
Seedlings
Now that you have acquired your seed you must turn it into a seedling. You should also note that you can skip this step and acquire clones if you’re lucky enough to live in an area where this is possible. But, if you’re like most of us, you will have to at least start with seeds and then begin cloning later.
If growing hydroponically, the easiest way to start germination in the seed is to plant them in rockwool cubes, which are available online or at your local hydroponic store. There are ways around this but they end up being more trouble than it’s worth, so I don’t recommend doing it without the rockwool.
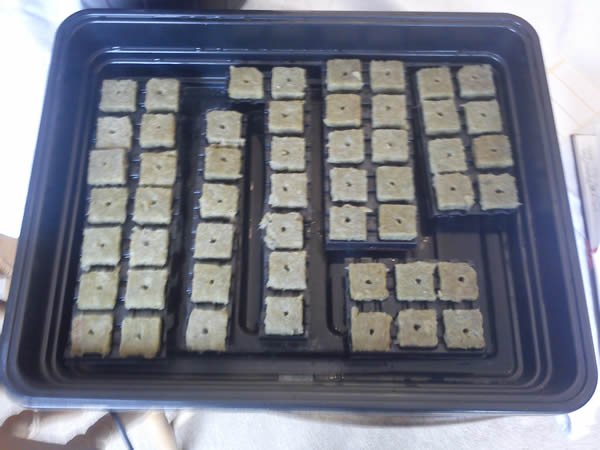
Soil type seed starter kits are also the easiest way to germinate the seed and start the growth of seedlings for soil growing. It makes it as simple as soaking your seed starter and putting the seed in it, squishing the top to cover it, and soaking again before putting the lid on the container. I find it helpful to put 3 or 4 small holes on the top of the container to allow for some fresh air. It also works best to open your container every day to give your seedlings a breath of air, and/or spray them to keep from getting too dry. Be sure to put some nutrients in your water sprayer. Hydroponic nutrients and other fertilizers should have information about the amount to use for every stage.
Nugget: When cannabis is in the seedling stage, this is a very delicate period when any time outside of ideal climate conditions will severely stress or kill the plant very quickly! Make it pass this stage and you can pat yourself on the back and breathe a small sigh of relief, but don’t relax too much, your work is just getting started!
2) Genetics, Mothers and Clones
Genetics
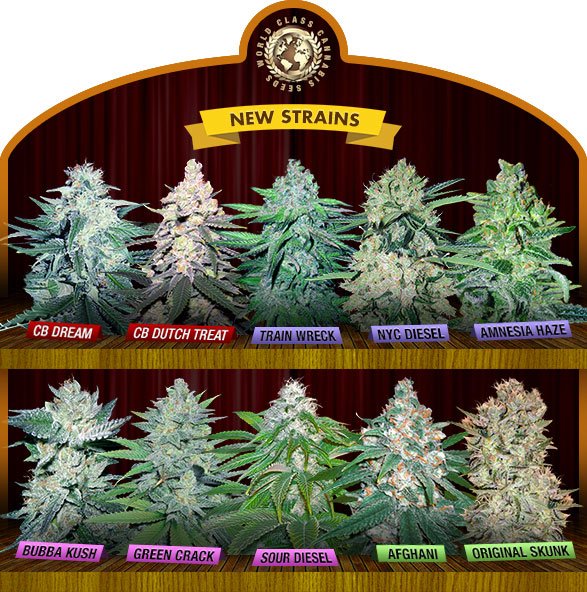
An important thing to note here would be that if you decide to order seeds from Amsterdam, you have the opportunity to read up on all the qualities of different strains of cannabis seeds that are available for purchase, so you can grow exactly the type of weed that you want to produce!
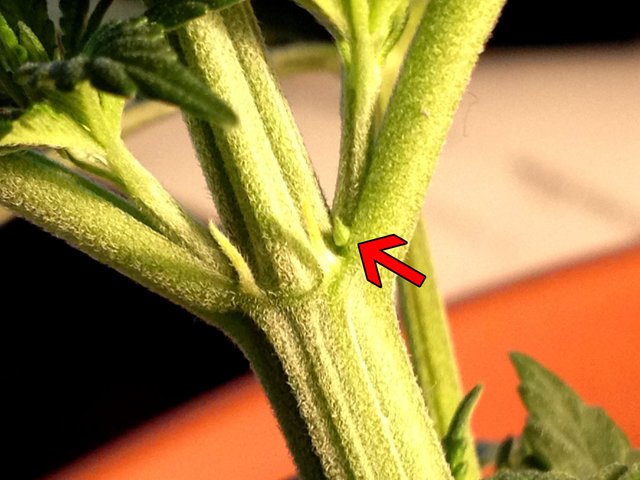
It is also important to remember that only female plants produce the buds that are smoked, or consumed in various ways. Usually when growing from seed, male plants are removed as soon as they are identified as males. This is done by looking for certain traits, such as the spike like growths (see picture below) that come from the nodes of male plants. If breeding is desired, then male and female plants are grown together and will produce buds with many seeds.
Mothers and Clones
Nugget: Using a mother plant and cloning is a way to avoid having to start from seed every time. A mother plant/cloning system can make production about twice as fast, because the seed germination, seedling, and long vegetation stages are skipped. With a clone snipped from a mature mother plant, you are sure you have a female plant and it can be kicked into flowering after only a couple weeks in vegetation mode.
To establish your mother plant system, you have to first grow your mother plant from seed. If you are growing indoors, you will need a room or closed off area that is getting 18+ hours of light to keep your mother plant in vegetative stage. You must have this separated from the room or area that you are flowering your plants in so that you can give the flowering room 12 hours of dark and 12 hours of light. More details in the next section
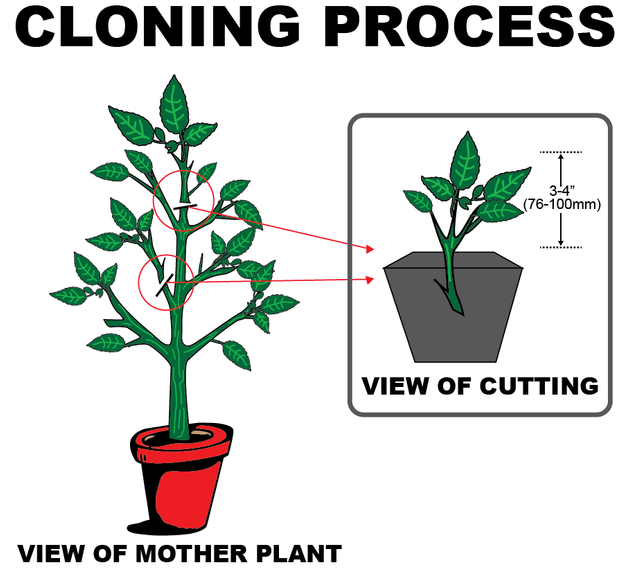
Clones are best taken from new growth near the bottom of the mother plant. Rooting hormone is applied to the stem of the clone and then the stem of the clone is inserted in the soil or the rockwool cube and then watered and kept in a seedling container for a week or so. Like seedlings, clones should be sprayed with water/nutrient solution every day.
3) Vegetation and Flowering
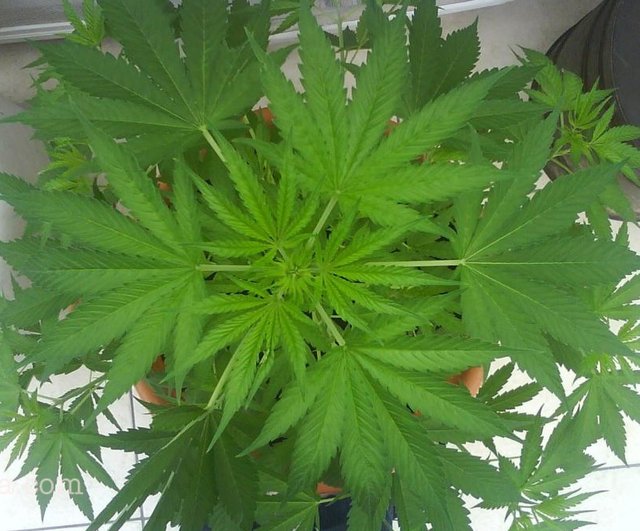
Vegetation
The vegetation period of growth for cannabis is usually for about the first 2 months from the time the seed is germinated and is when the plant will grow big with all its green leaves. During this growth stage your plants will require nutrients with more nitrogen or a higher N number on the NPK scale. If growing indoors, this is when you will have your light timers to come on for 18+ hours a day.

Flowering
When the flowering part of the growth cycle begins your plants will need nutrients with more phosphorus of P on the NPK scale. This will also be the time to switch indoor lighting to 12 hours a day to make sure your plants go into flowering mode. You definitely want to keep an eye out for any males you may have missed that are making male pollen bananas. The flowering stage will usually last 6 to 8 weeks. You will know flowering is done and it is time to harvest when you have more red hairs on your buds than white hairs.
Nugget: The most effective way to time your harvest just right is to get a small lighted zoom microscope that will magnify 100x so you can see the trichomes with clarity. When trichomes begin to turn milky white, or amber instead of totally clear, this is the ideal time to harvest.
4) Harvesting, Drying, and Curing
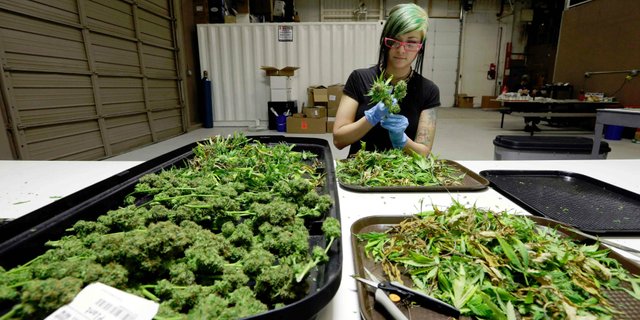
Harvesting
It is a bittersweet moment when you decide to harvest. All of the large branches are cut off of the plant, and then each bud is trimmed so that all the leaves are removed to leave mainly the calyx parts of the buds.
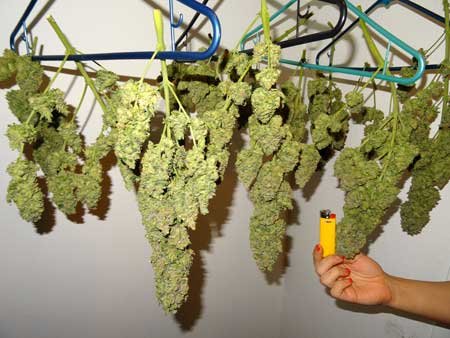
Drying
The branches with trimmed buds are then hung to dry for around 6 to 8 days, depending on your local climate. The stems will snap in two instead of bending when folded – and that’s when you know your buds are dried to where you want them to be. Don’t be alarmed to see that the buds have shrunken considerably and seem to be too dry at this point.
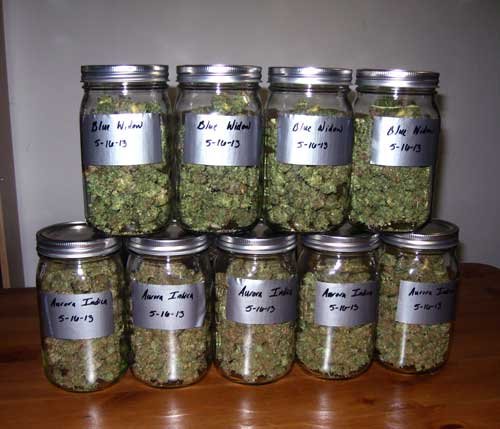
Curing
To cure the buds, cut the dried, trimmed buds off of the main stems and put them into mason jars. Over the next few days to a week the buds will begin to develop a sweet taste and smell, and lose the more plant-like taste that they began with. The buds should cure for at least two weeks, but can then be cured for months afterwards.
If you follow these steps and grow with a passion to provide your plants with everything they need, you will produce some of the finest dank around.
I grow hydroponic tomatoes, looks like we use alot of the same practices, great write up!
Thank you!
I feel confident with everything up to harvest. If you could go more into detail about the curing process I would appreciate it. Mine always seems to have some hay or grass taste to it...
Great question! If you have given your plant all the nutrients and climate specifications it needed, and made sure it was completely dry before curing. The sweetness that overcomes the hay or grassy taste should start to show up after a few days being sealed in mason jars. Another tip is to avoid fertilizer right before harvest. In hydroponic growing, you should give your plants 3 days of fresh water, without nutrients. Hope this helps! I could do an entire post about it, if that would be helpful...
A Couple Tips
The Grassy Smell is Chlorophyll Breaking Down
Same reason your lawn smells after being cut. Wet, warm cananbis will cause chlorophyll to break down with the grassy smell you don't appreciate. Causes an off-taste as well if left unchecked.
Dry Properly Before the Cure
I hang my branches and when the stem of a flower barely cracks as I break it off, the moisture is about right. (When dried in a 55%Rh/70F area) This is when I put them in jars and place them in a dark area about 68F. Check them 8 hrs later and they're rehydrated. Open the containers and let them dry out for an hour before re-closing. Let them sit a good 12 hrs and check again.
Use a Hygrometer
Pop a digital hygrometer into a jar with your cannabis flowers. After 12hrs at 70F, you're looking for 55% RH. More than 55%, keep opening the jars every 12 hours for an hour. (burping) Lower than 55%? Oops. :( No cure for those flowers. They won't mold though. :)
Once the cannabis is at 55%, seal it up in an airtight (preferably glass) container and it's on to the cure.
The Cure Takes Place While the Cannabis Sits
The longer the container sits without opening, the longer you can say it has 'cured.'
That's some really good and thorough advice. I appreciate all the specifics, it'll really help so I can quantify my process. I appreciate it!
My pleasure. :)
You'll love the terpene preservation when you get the hang of it. ;)
Also, I just read that opening your jars every day is a good idea to let the sugars in the buds break down. I naturally do that every day to checkout the buds, but apparently if your not doing that, it can cause it to retain that green taste
Sugars have nothing to do with green taste, that's chlorophyll. Flowers at too high of a humidity need further burping.
Once your airtight container reaches 55% and stays there, seal it up and leave it. Absolutely no need to open occasionally when the humidity is correct.
Wow, never seen anyone talking about being able to get good product from shwag seeds, but I concur, totally possible.
Glad to hear someone else here knows the word shwag! Haha
Also the most success I have ever seen with cloning is to just take the cutting and put it in a cup of water for about 2-4 weeks and start checking it for little white runners after the 2nd week. You can put many cuttings into one cup, just don't let the new roots get too entangled before you place them in grow medium, or separate them.
Good point, I put clones in a cup of water as soon as I cut them from the mother and they stay there until i put rooting hormone on them.
Excellent work
Thank you
richardcrill Great content great post! Please keep me updated in future I am looking forward to seeing more.
You can view your post at https://www.facebook.com/MarijanesDiary/