Bonsai Maintenance: Preparing a tree for a new winter home [Bonsai]
As the leaves change from green to yellow, it signals the time of year to start preparing young bonsai trees for winter. Such duties include removing dead branches and leaves, cleaning trees of signs of mildew and rot, creating a dry outdoor space for the trees to be given a heavy blanket of mulch, and analyzing which trees are ready to be re-potted.
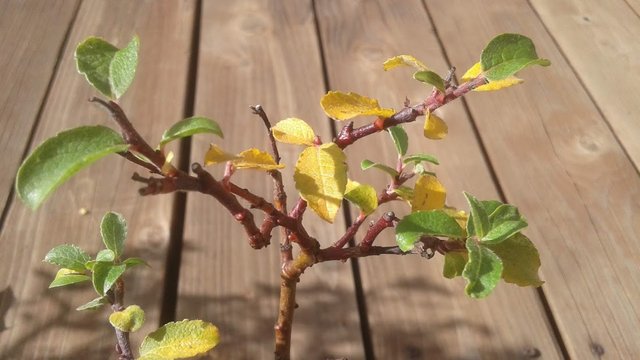
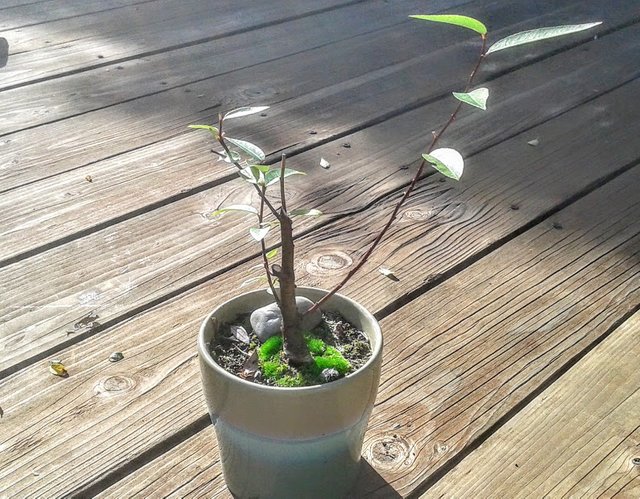
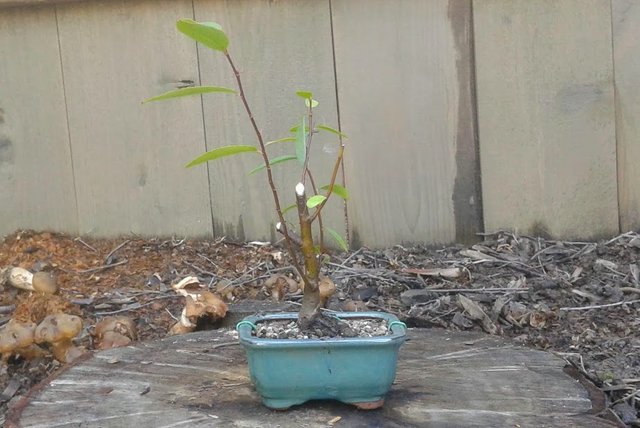
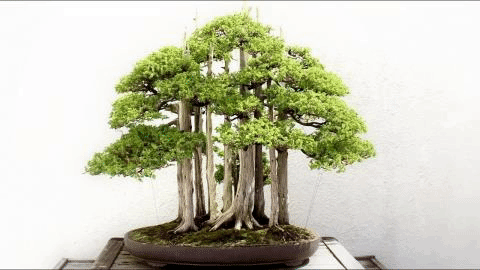
Pictured above in my click-bait -- I mean -- cover photo, is one of my young pussywillow bonsai trees. I'm outside daily picking off the yellow leaves to promote the tree's remaining growth into the leaves and roots. Too many leaf clusters are just a trap for mildew and bugs this time of year when it rains a lot. Removing the ripe yellow leaves does not harm the tree.
In this article, I'm going to show the stages of how I analyze a tree and transform it into a shape for a smaller bonsai pot.
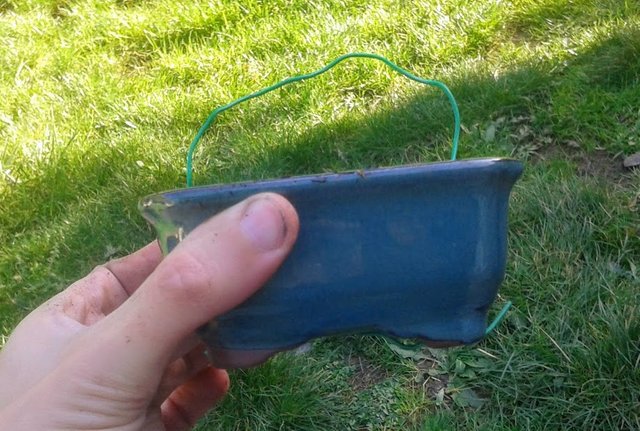
Yes, the new Winter Home I am showing for my tree is quite simply a new bonsai pot. Some refer to a bonsai pot as a shallow dish, to better describe the proper shape proportions.
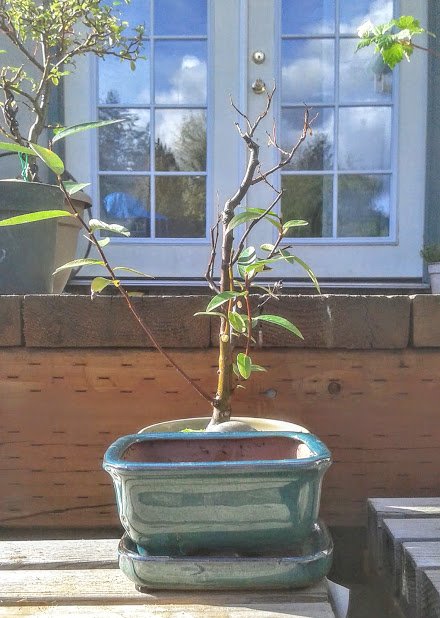
It is good to place the new pot in front of the tree to see if you like it or not. Get a sense of its size and proportion. Is the pot too small? Is the tree too heavy and tall for the pot, that it might tip over?
I like to take a photo to stand back and decide if I like the new picture of the tree as it might appear in the new pot. I had a few different sizes and shapes of pots to choose from, and I liked this one best.
Historical Details of This Tree
ID: 0019
Nickname: Jubilee
Type: ???
Age: 3 years
Grown: yamadori
Last repotting: Today, November 2, 2018 (last time was 2016)
Wired: never
My past posts featuring the growth cycles of this tree:
- Burst of Colors
- Pruning a Messy Shrub into an Elegant Tree
- Bonsai Maintenance: Bushy Growth to Branching Tree
The photos of this tree in the past post are quite surprising! I recommend you take a quick glance at the first post I linked above to see the striking colors and growth this tree can exhibit. If you recognized what kind of three this is, I would love to know in the comments below.
Next I'm going to analyze this tree's needs and determine a strategy for my work.
The current pot is too tall and cylindrical, which is not ideal for a perennial, because the roots will eventually spiral around the bottom, instead of spreading out evenly from the base of the tree. This pot also only has one hole at the bottom, which is not enough to provide full drainage for the volume of soil.
The new shallow pot with better soil should help improve the the quality of the root shape, and also improve the health of a quality bonsai tree.
This tree has some dried out deadwood on top I will be pruning off. Those dead branches have become the focus of the tree, because it has replaced what used to be the apex. Knowing this tree is a quick healer, and sends out lots of new growth in the Spring, I do not fear removing all of the dead portions. Let's make this tree symbolize life and renewal, and not be a reminder of the struggle or death it has overcome.
A few quick cuts, and now only the green wood remains.
The taper of the tree is easier to focus on now. The curve of the trunk has a more natural conclusion to the top of the tree.

Next I remove the tree from the pot.
It slipped out very easy, in one piece! That's a good sign the tree is ready to be removed from the old pot. It wants out!
If the soil was falling out around the roots, then that would be a sign that the tree is not ready to be moved from the pot, or perhaps the tree was anchored down too loosely, or the roots might have health issues. None of that seems to be the case here.
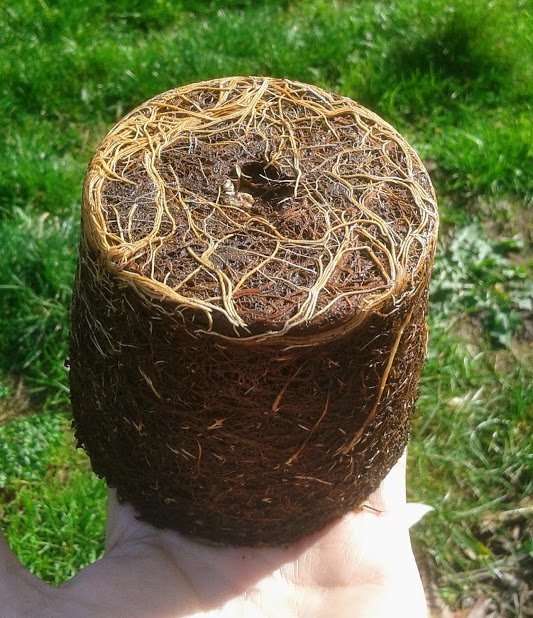
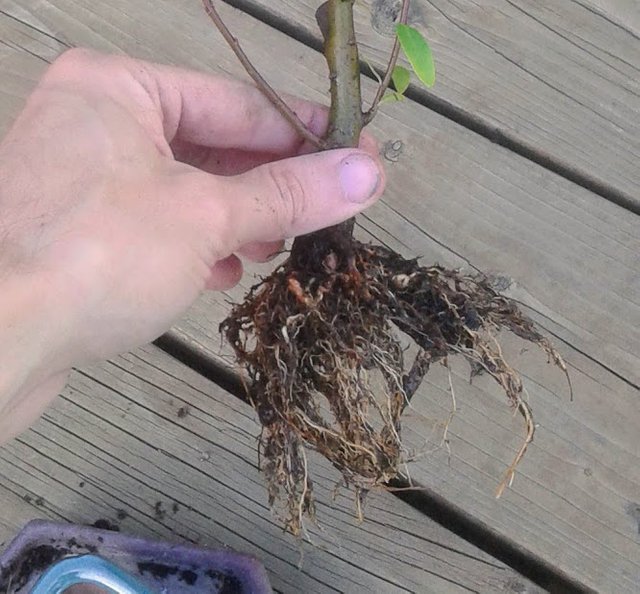
Long spindly roots are not ideal for any potted plant or tree. We want radial roots spreading out in all direction evenly from the center of the tree out to the edges of the pot.
This is going to get messy! Avert your eyes if you are sensitive or squeamish to seeing a sudden loss of roots.
First thing that had to go was the bottom. None of the bottom roots were serving the future of the bonsai tree, they were just forming a thick tangled folding mat of roots.
This bottom puck of removed roots looks a lot like a hamburger patty to me. Vegan burger?

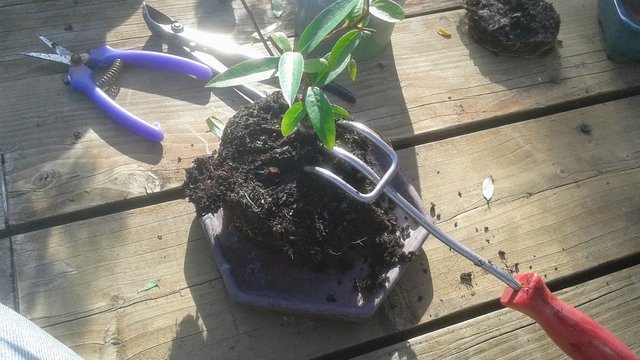
Next I dig.
The soil quality in this tree was pretty bad. It was almost all peat, decomposed matter, and 20% inorganic matter. The entire mass was probably 70% roots, and the roots inside looked very malnourished, old, weak, and copper brown. The healthiest white roots were growing closer to the surface. That could mean there is a lack of oxygen in the soil.
The worst part was when I found a mesh bag interwoven through all the roots. This pot was originally being used to grow some sort of vegetable or flower that started in a peat plug. The little Jiffy brand peat seedling starters come inside a nylon mesh bag that holds the peat pellet together. I thought those things were supposed to disintegrate after a year or so. The truth is they don't even compost! False advertising. I have been finding them filling my compost pile, and they are just worthless landfill garbage.
Eventually the vegetable in this pot died, but I let the the random tree growing here remain undisturbed until today. It was quite a mess removing the mesh fabric from the roots, and it involved some root tearing.
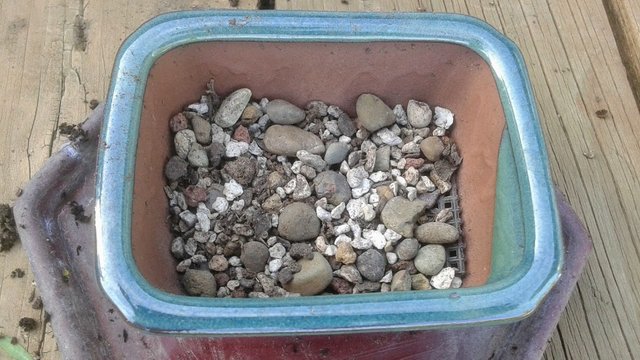
Inside the pot, I prepared a bottom layer of screen material and covered it with small dry rock soil. The coarse screen is required in bonsai to keep the soil from spilling out the large hole in the bottom of the pot.
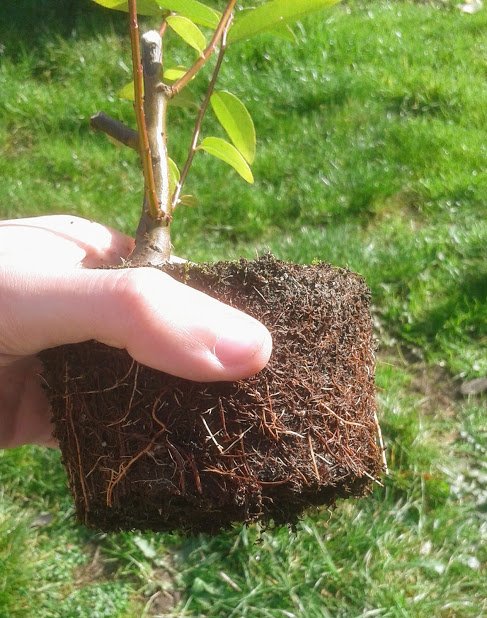
After washing the roots out in the bird bath, and combing out the roots, this is all I had left. That's okay, because I only want to keep enough roots to fill the edges of the new pot.
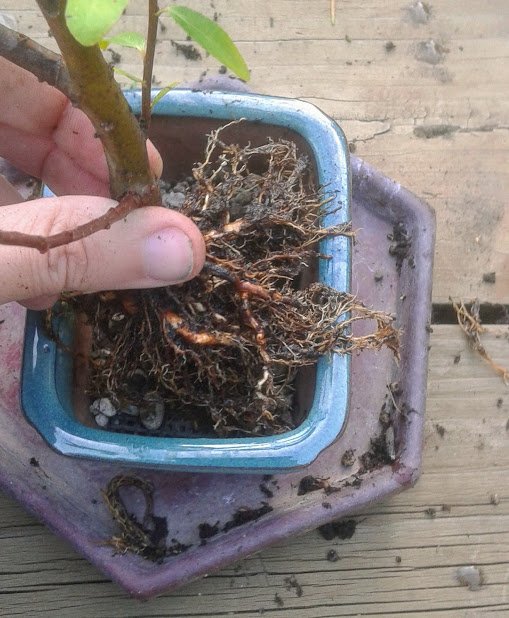
By laying the tree inside the pot, I can stretch out the roots into the direction they need to be. Anything that expands beyond the limits of the pot edge can be trimmed.
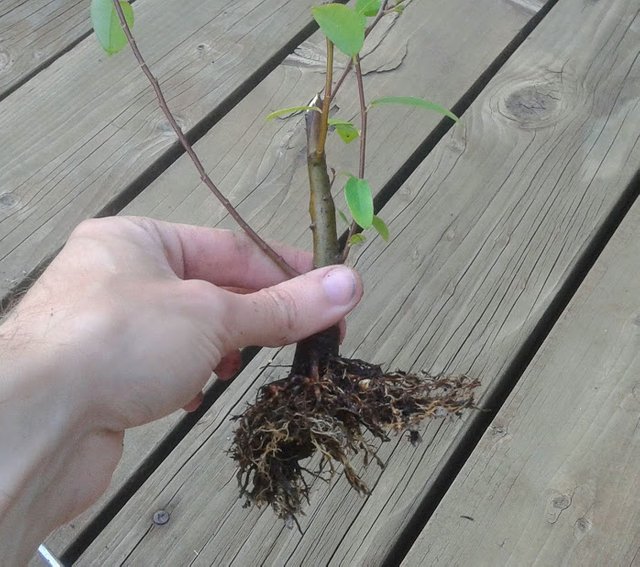
I know there isn't much left! This tree will be fine.
However, I should warn to be very careful when working on the main mass of roots closest under the trunk. This is the part of the tree where it is most important to preserve as many of the fine root hairs as possible. Fine roots are the feeders of the tree, allowing the tree to drink when it gets thirsty. The thick roots also must be preserved as much as possible, as they are the tunnels where sugars made by the leaves are currently being stored in the tree, and also form the beautiful nebari that gives the tree structure and strength into the soil.
Above, this is the final shape of the roots. It now fits inside the pot, and the root shape actually has a new footer shape to hold the tree upright. No roots will be mashed, crushed, or folded under the tree with the new root design.
Before burying the tree into the pot, I prepared a wire loop. I make it longer than I need, just in case I misjudge the length needed to secure the tree firmly against the base. The wire ends are directed through the hole.
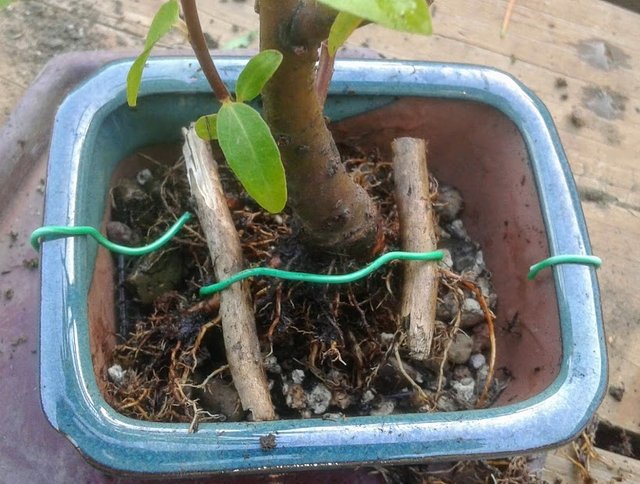
The top roots are very thin on this tree, so I like to use sticks between the wire and the tree. That way, when I tighten the wire, it will not cut or constrict the roots. Sticks make a good cushion against the roots as the thin wire is tightened. A thicker wire would probably work better, but I am not very skilled at using heavy gauge wire.

This pot and bonsai soil was gifted to me recently. I was incredibly thankful, because I have many trees soon needing to be re-potted, and I am running out of material and resources to use.
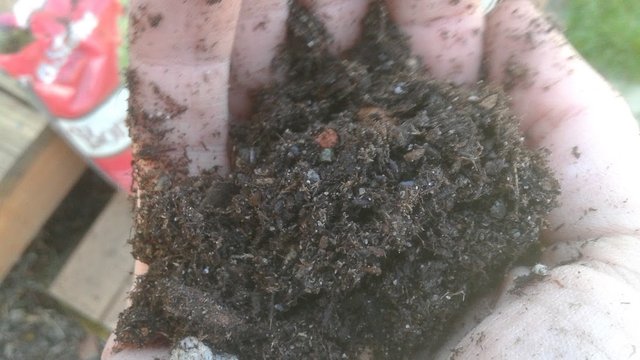
This soil is not the best quality for bonsai, but I have used it before, and it works alright for deciduous trees that prefer organic matter in the soil. This is the only soil for bonsai that specialty garden stores sell locally. From what I remember, the soil here contains small pieces of decomposed pine bark chips, as well as lava rock, pumice, and other minerals.
This new soil I took a photo of so you can see what you are getting if you choose this brand. There is not nearly enough inorganic matter, and using this soil straight as it is would act like a sponge around the tree roots, possibly causing it to rot. Fortunately, this soil can be amended by adding what it needs.

Here is the tree fully replanted in the new pot.
For the soil I decided to do a bit of a lasagne layering style. The bottom layer was approximately a centimeter of rocks. The middle layer was two centimeters of the organic soil mix. As a top dressing I used more of the lava rocks, pumice, and akadama clay, about a centimeter thick. I had to tamp down the top dressing into the soil quite a bit, and refilled with fresh rocks on top until it was level just under the edge of the pot.
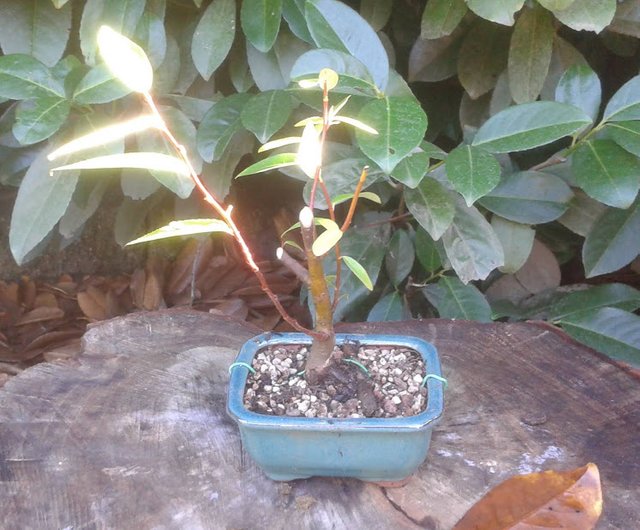
Look! Can you see the new nebari? The thick root under the trunk was previously hidden under the soil line. Now it makes a handsome base for the tree to build up on.
Wish I could leave the tree here on the old cherry tree stump next to the brown mushrooms, but I'm afraid the squirrels would undo all the work I did on it, and dig it out of the pot. In the coming weeks I'll keep it closer to the house on the deck, and eventually bury under a thick layer of soft mulch to keep it warm when winter freezes the air.
Bonus Photos

Any time I find the angel light on my trees, it's a miracle from heaven.
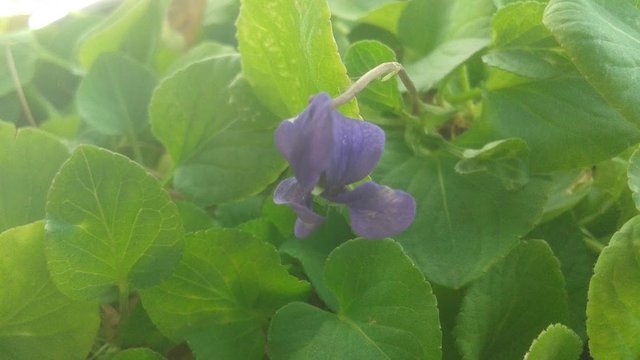
The Early Violet has been blooming every day for a month. They love the cool morning air of the season.
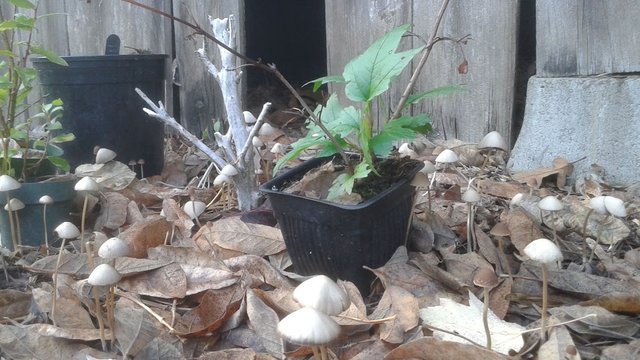
Mushrooms, mushrooms, everywhere!
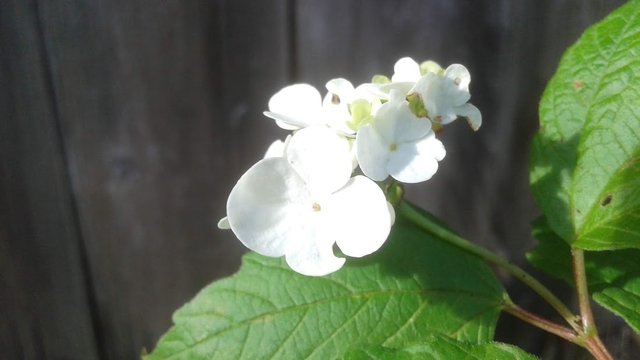
First flowers on the hydrangea tree.
Photos in this post are all #originalworks by @creativetruth, unless stated otherwise.
Find me on discord and chat with other tree growers, bonsai enthusiasts, and gardeners. We have quite a few accredited experts filling out our ranks, and a helpful Spanish-speaking community.
Bonsai!
| Account Value: $1,465.26 | Votes Given / Received: 4,107 / 10,217 |
| SP: 1,840.389 | Posts / Comments: 248 / 1,902 |
| STEEM / SBD: 0.753 / $7.074 | Delegated In / Out: 187 / 180 |
| REP: 62.997 | Followers: 1,630 / 196 following |
| Curation Rewards: 1.598 SP | Author Rewards SP / S / SBD: 28.852 / 0 / 0.013 |

| STEEM In / Ex = 0.792 / 0.79199 | BTC / ETH/ LTC = 6459 / 210 / 54 |
| SBD = 0.98366 | Gold/Silver oz. = 1,231.75 / 14.82 |
#how-to #diy #inspiration #hobby #autumn #leaves #roots #branches #trunk

You put so much effort in this post, great job, I think this is vert useful information
Great post! I love your throughly written and well illustrated posts. I have only repotted a few plants. I am amazed at how aggressive you were in removing the old roots. And also the way you used sticks and wire to hold the tree in place while the new roots grow.
Good and informative post!
I first grow Adenium seeds, so your article is useful for me.
Thank!
It is indeed a long work before we see a miniature tree on a pot @creativetruth