My First PC Build - Custom Loop with 1080 Ti SLI & i7700k DIY
My First Custom Gaming/Workstation PC
I've been a casual gamer for a long as I can remember, but never really had the money to build my dream pc with highend parts. The recent rise in crypto has given me some extra cash so I finally said f*ck it, its time for an upgrade. I'm usually tight with money but for this build I spared no expense to create this work of art.

Build Specs
2 x GIGABYTE AORUS Xtreme GeForce GTX 1080 Ti Waterforce WB 11GD - $1700
1 x MSI Z270 XPOWER GAMING TITANIUM LGA 1151 Intel Z270 Motherboard - $300
1 x HP S700 Pro 2.5" 128GB SSD - Free
1 x Intel Core i7-7700K Kaby Lake Quad-Core 4.2 GHz LGA 1151 91W BX80677I77700K Desktop Processor - $310
1 x Phanteks Enthoo Luxe PH-ES614LTG_BK Black Aluminum - $190
1 x EVGA SuperNOVA 1600W TITANIUM 1600W Fully Modular - $450
2 x G.SKILL Ripjaws V Series 16GB 288-Pin SDRAM DDR4 3200 Intel Z270 - $272
1 x Monsoon Series Two D5 Basic Dual Bay Reservoir - $85
1 x Alphacool NexXxoS Monsta Radiator 240, 120mm x 2, Dual Fan - $117
1 x PrimoChill 420mm EximoSX Slim Radiator - $85
1 x D5 Pump $75
1 x Tubing and Fittings 3/8 ID - $80
1 x RGB 2 Meter LED Strip - $25
3 x Thermaltake Riing 14 RGBHigh Pressure 140mm Radiator Fans - $58
Total Build Cost: $3747

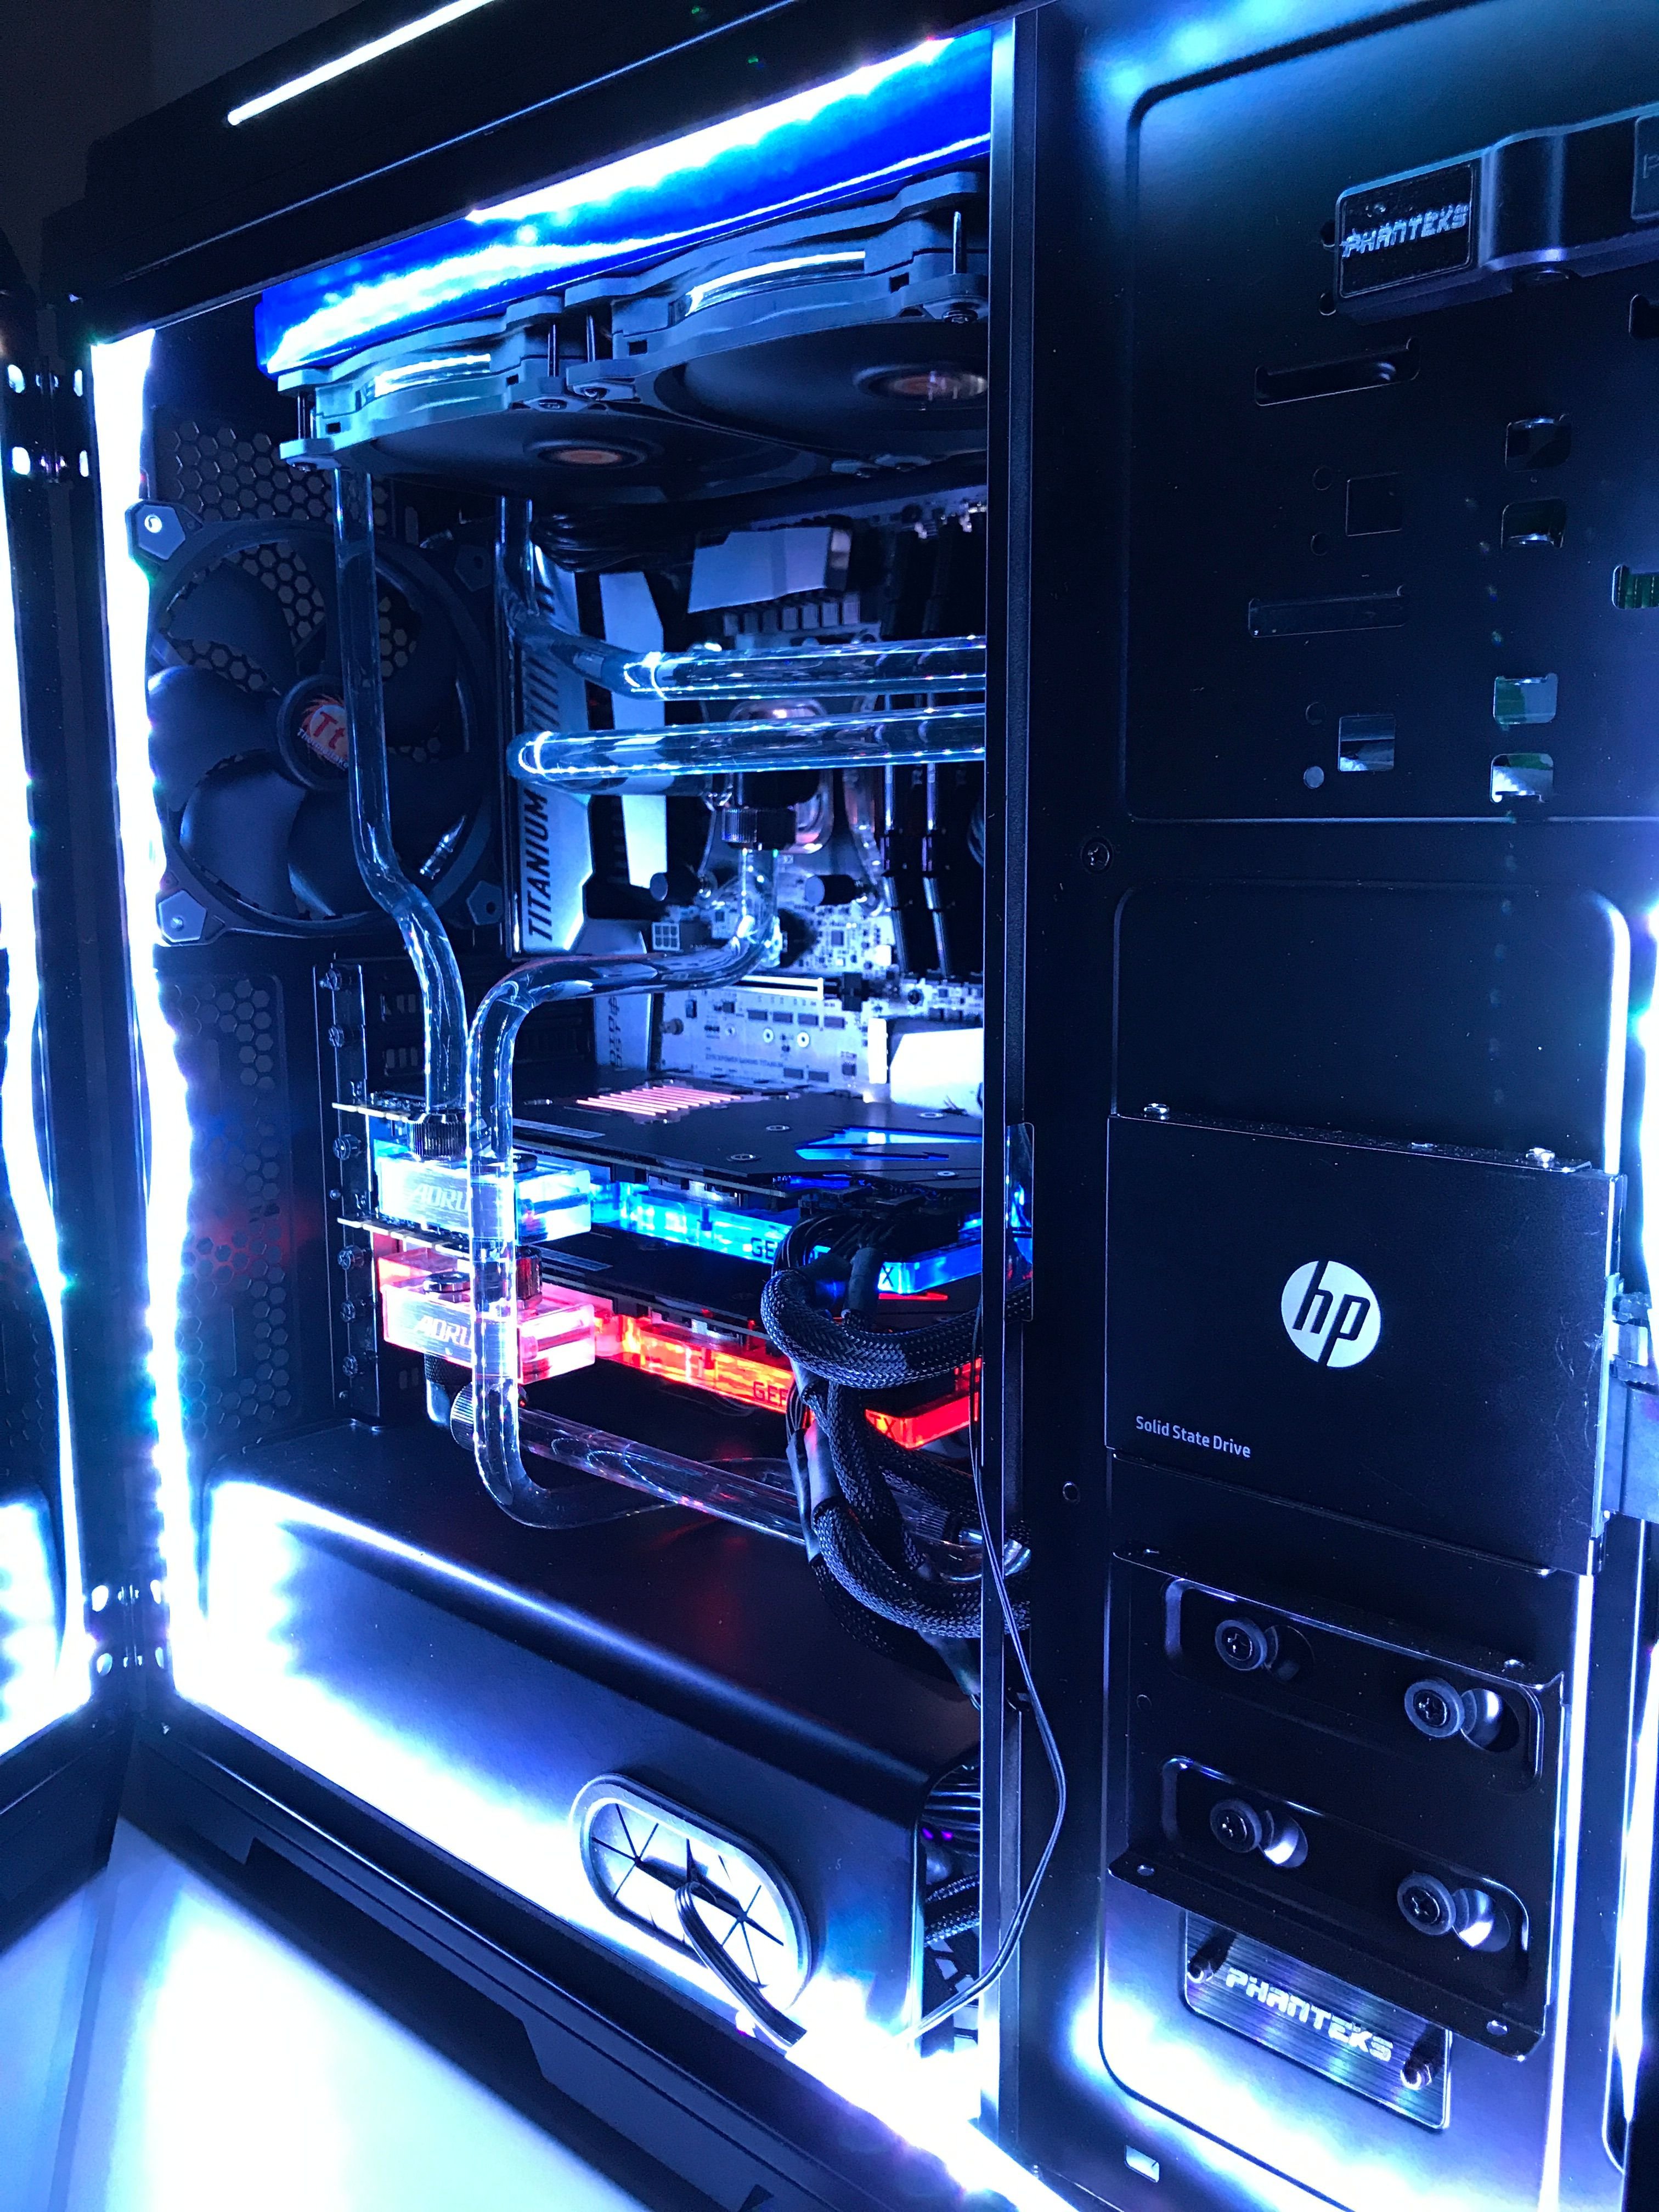
Custom Loop
I decided to go with rigid tubing, a decision that I later began to regret. I was a little short on rigid fittings so I had to make some complex (in my opinion) tube bends, which required me to make as many as 6 bends on one piece of tube.

The issue with this was that I had to bend tubes very precisely or else I had to start with a new one. I've only bent tubes once, and that was for a previous mining build. I found that the tubes I ordered for this build (from primochill) where much easier to bend, as they were more flexible and resistant to bubbles compared to the Aquatuning tubing. It took some trial and error but I finally got everything connected and was ready to test the loop.


I first used a prep solution mixed with distilled water and only had one minor leak on the CPU as the result of a loose fitting. After letting it run overnight I drained the loop and began to load the UV Blue Coolant.

Prior to loading the blue coolant, I had never tested the LEDs on the reservoir and found that they didn't work at all. So I decided to replace it with the one from my miner and send the defective one back (still under 30 days). It was such a hassle to replace, so lesson learned - ALWAYS test components before you put them into a build.
Power On
After finally getting the liquid in the loop and with most of the bubbles out, I fired up the PC. Thankfully it posted, as I hadn't tested any of the components. Everything looked good but then I realized the RGB fan lights weren't working. After some extensive research I found that it was thermaltake's shitty fan controller. I guess I really should've heeded my own advice and tested the fans. Despite this, I'm satisfied with the overall build. Looks pretty bad-ass in my opinion. What do you think?


Final Thoughts
System Temps
So initially the i7 7700k was running really hot and was spiking +20C while under minimal load. It's well known that the kaby lake processors run pretty hot, but found the spikes to be concerning. I considered delidding the processor, but didn't really want to void my warranty. After a little digging around on an Intel service forum, I found a solution was to lower the voltages on my motherboard. Since altering the voltages, I'm not seeing the temp spikes anymore and temps are nice and cool.
Using the PC to Mine
If I'm not doing any complex tasks, I sometimes have claymore's miner running in the background. For instance, while I was writing this post each card got me about 38 Mh/s for ETH and 400 Mh/s PASC. Mining is definitely not the reason I built this, but why not utilize some unused computing power. The cards don't even exceed 35C while overclocked +730 on afterburner at 65% TDP.
You just have created the real monster, an every hardcore gamer wish to have. It has a lot of computing power, and graphics. All games run so smooth... infact you can play casual game while do mining.
Nice work but there are things to critecize, first of all you spent almost 500 usd in a PSU, not very clever even with titanium effenicy...
Secondly I'm not really sure why you choose a i7 7700K CPU because Ryzen is here now and with Threadripper around the corner.
The 1700(/X) would have been the best for you as the Ryzen's sre good in Gaming and Workstationary things including heavy and many tasks, rendering and so on because of their cores and threads.
This is not a AMD vs Intel fight (-;.
Something that is weird as well is that the cases costs 179USD, I think you could've saved some cssh and could've gotten a better case in my opinion.
I really like the waterloop and of course RGB. I made a similar post where I explain every part of a computer if you don't mind looking into it here's the url:
Where did you get all the parts from? Newegg?
What a sweet rig... Envious here, as I am rocking just a 750ti :P
_Rob
Thanks man. I ordered all of the non-cooling system components from Newegg and the liquid cooling stuff from Primochill and Amazon. I got as much as a could off Newegg since they don't hit you with sales tax.
Awesome! I like that you can use BTC on Newegg :)
Enjoy the rig, I will follow you.
_Rob
be forwarned. If you buy something from newegg and they give you a free "gift" they deduct the price of your gift from your actual item. In which case, should you send it back for a refund, they will only refund you minus the value of the gift.
Sounds fair until you realize how rediculous the price of the gift is. In my case, $60 for rocket league, which literally costs $25 on steam... smh...
Wow, I didn't know that. So did they credit you $60?
I appreciate the heads up... I was adding parts to my cart already :)
_Rob
That is pretty bad ass. I remember when I had the patience to build a gming rig, now I just have my PS4pro and a gaming laptop :)
Good build- its funny to see someone take the time to make a really nice pc build, focusing on making it aesthetically pleasing. Especially after working with my friend two dump two pcs inside milk crates to mine ether- haha
Nice job! It's best when you can put bussiness and pleasure togehter!
very interested post, informative and useful for all coin miner
Nice job!
What a beast
God, damn. That is a sexy PC. Fuck, I'd be happy to have a spare $7-800 to build myself a gaming rig at this point. Just gonna have to be jelly of your set up I guess for now, haha.