Making A Complete Beehive From Scrap Pallets - How To Series; Part One - Hive Frames


Step One
We need to ensure we have a straight edge, we will do that by cutting off the rough edge of the board, leaving a smooth surface to work with.

Then we need to measure the board to 19" and cut off excess using a miter saw or table saw.

Step Two
Next, We are going to rip our board to 1" width...

followed by additional cuts of
3/4" width
1 3/8" width
Leaving you with three pieces like so;

Step Three
We then need to rip each piece to 1/2" thickness. If you have access to a planer you can simply plane the pallet board to 1/2" thickness, skipping this step altogether. We do normally use a planer instead, but wanted to show how it could be done with just a table saw for those who don't have access to a planer. So, using a table saw set your fence to 1/2" rip and run each board through. If you have extra material rip both sides of the board to leave you with a smooth clean finish. If you do not have enough material, you can sand the board down till smooth.

Step Four
We then need to cut our board with 1 3/8" width into (2) 9 1/8" Length pieces, making the sides. Then cut our board with 3/4" width to a 17 3/4" length, making the bottom piece.
Leaving you with the following (4) pieces...
(1) 19" x 1" x 1/2"
(1) 17 3/4" x 3/4" x 1/2"
(2) 9 1/8" x 1 3/8" x 1/2"

Step Five
Next we are going to switch out our table saw blade for a 1/2" Dado Blade. We originally did the following cuts on a table saw blade, making several cuts.. but recently purchased a Dado Blade to make the process easier, it can also be used for other projects down the road. Dado Blades can be found relatively inexpensive depending on what brand and model you get. If you do not have access to a Dado Blade you can make several cuts to get to the width specified below.
We have the 1/2" Dado Blade set to 1/2" up and 7/16" off the fence. Using a homemade jig we pass the two side pieces over the Dado Blade
leaving you with this...

We are going to set the side pieces aside and finish the rest of our 1/2" cuts, coming back to these at the end to finish the opposite side with the 3/4" cut.
Step Six
We will now be cutting the notches into each end of your "Bottom" 17 3/4" length board. Setting the Dado Blade to 1/8" up and using a sacrificial fence, set the spacing between the Dado Blade and the fence to zero. We will then make two cuts on each 3/4" side on both ends, making a 1/2' x 1/2" square on the end (Refer to drawings for visual).

The two pieces you have just cut should fit together making the bottom and side joint. If it doesn't fit perfectly you can use a razor blade to cut off any excess material.

Step Seven
We are now going to work on our 19" length "Top" piece. With the Dado Blade still at 1/8" depth we measure 5/8" off the fence and cut the same three sides on both ends.

Step Eight
We are now going to do the additional cuts on the side pieces from above. First, need to change out our Dado Blade to the 3/4" size blade. Measuring 3/8" up and 5/16" off the fence we will make one cut on each of our 9 1/8" "Side" pieces.

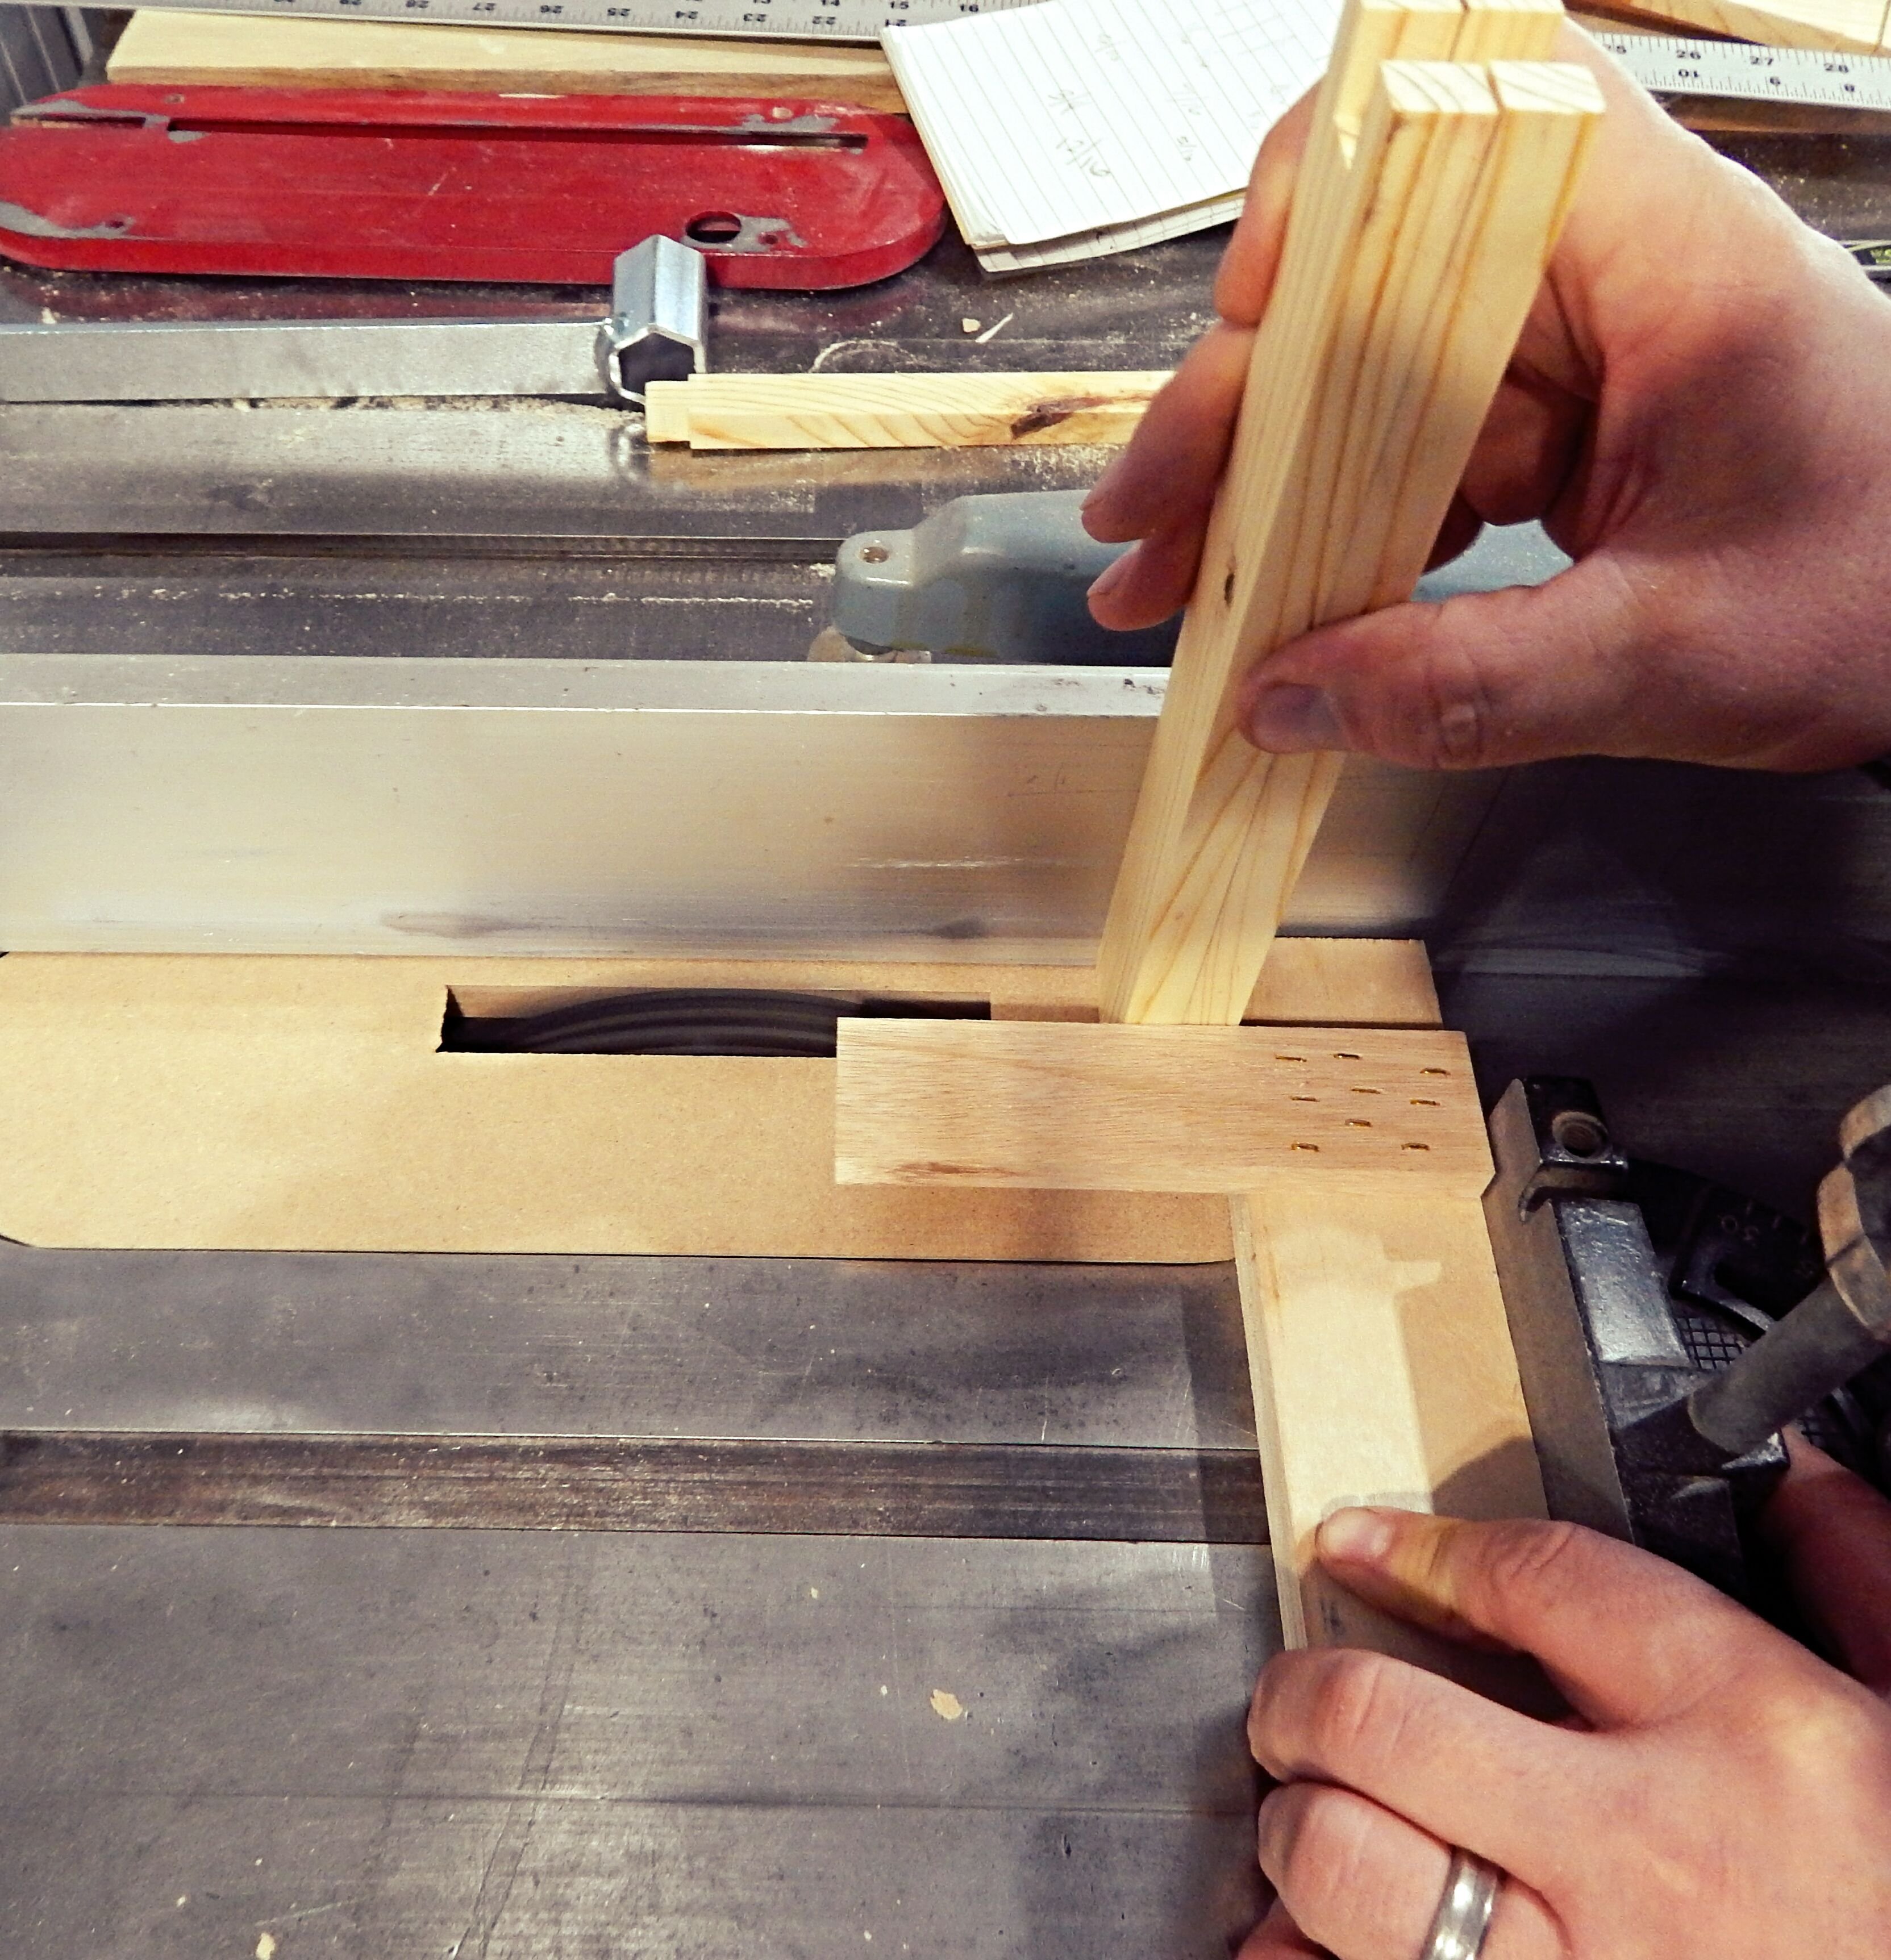
You now have your four complete pieces of the Hive Frame.
Glue each joint and use claps to secure while drying overnight. Using claps will make your frames 10x stronger than just glue alone, and we highly recommend using them.

You now have a finished Hive Frame made from scrap material... not bad huh?

Remember to save all of your hardwood scraps to make this cutting board
We hope you found this post helpful, feel free to contact us with any questions you may have along the way. We hope you will stay tuned to the rest of our Beehive building series.
Thank you for reading,
Happy Homesteading!

Excellent motivating post.
Thank you!
Resteeming, followed, and updooted. Oh wait! I'm already following you cuz your posts are amazing! You really should consider @qurator! You're perfect for them!
Thank you so much @phedizzle! You're too kind! We do need to check them out...
I'll definitely be trying this. Bees have always interested me. Apparently bees strip down to a kind of skeleton crew during the winter. They all huddle together and vibrate to maintain about 68 degrees inside their hive. Craziness.
Yes! It's so amazing...they end the summer with so many bees and they all just spend their short lives keeping the queen warm. On warmer days they then remove all of their dead and you can see them scattered all around the hive 😬...
I hope you do decide to keep bees, we really love ours and they are pretty easy the keep. Thank you for the support!!
There's a livesustainably hashtag you can use that will upvote you when you use things you already have. So much work and crafting. :) you should be proud!
Thank you so much for the tip! I never know what to tag these things, I appreciate the help. Thank you!
Very useful info. Thanks so much for sharing this!
Thank you so much!
Wow! This is pretty kewl. I could SO do this!
Thank you! Yeah it is a pretty simple process and the end result is a much higher quality than you normally find. Get on it and don't forget to let us know how it goes! 😉
I want to have bee hives someday, I'll have to remember to lookup this post when it's time. My wife's actually doing a barter today for some honey and bees wax, the bees make great stuff :D
Don't they??? We really love our bees, I promise you wont regret getting them!
I resteemed your post. I know a few people that can benefit from this, so thank you dearly for sharing your knowledge. And thank you on behalf of the bees!
Thank you so much! We really appreciate it!!! We love our bees and try to get more individuals to keep them. ❤
You can read about us here
Congratulations! This post has been upvoted from the communal account, @minnowsupport, by L & L Farms from the Minnow Support Project. It's a witness project run by aggroed, ausbitbank, teamsteem, theprophet0, someguy123, neoxian, followbtcnews, and netuoso. The goal is to help Steemit grow by supporting Minnows. Please find us at the Peace, Abundance, and Liberty Network (PALnet) Discord Channel. It's a completely public and open space to all members of the Steemit community who voluntarily choose to be there.
If you would like to delegate to the Minnow Support Project you can do so by clicking on the following links: 50SP, 100SP, 250SP, 500SP, 1000SP, 5000SP.
Be sure to leave at least 50SP undelegated on your account.