Make an Expert's Side Smoker from a $200 Char-Griller Smokin' Pro
In this article, I give a tour of my beloved side smoker that I have customized to produce expert results.
The Smoking Dimension
Cooking is as much about controlling heat as it is choosing ingredients. Smoking adds another dimension to cooking because one also needs to control air flow with precision.
Air has two activities inside a smoker. (1) It cools down and (2) it takes its journey of convection. These activities are tied together. First a cook wants to give the air plenty of room to move around and second a cook wants the air to keep an even temperature throughout the smoker. Fortunately a good smoker design greatly facilitates controlling both activities.
This article shows how to modify a $200 Char-Griller Smokin' Pro so that it the smoke travels through it perfectly. These modifications represent about 10 years of working with this particular smoker, making nuanced changes to the inner configuration to get the air flow just right. This configuration will allow even smoking of the entire cooking area with only a slight temperature gradient between the side nearest the firebox and the side furthest.
Overview of the Char-Griller Smoker
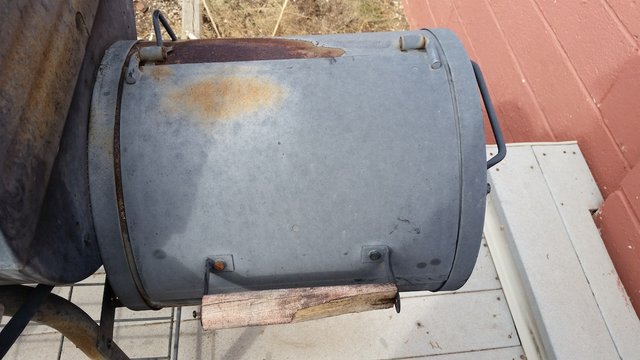
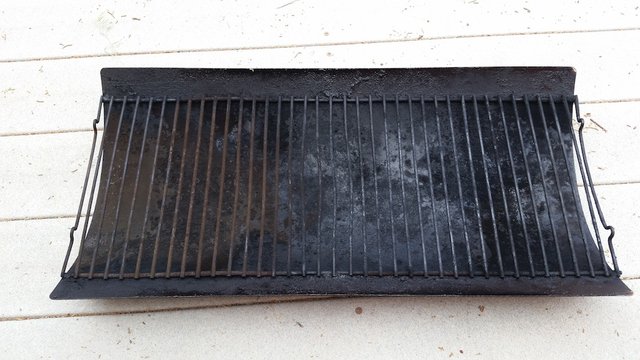
First I show my battle tested smoker in all it's glory. You can see some rust, but it hasn't yet begun to thin the walls of the cooking chamber. You'll notice that the firebox is missing its handle, which broke off recently after my kids wedged a broom between the handle and the firebox.
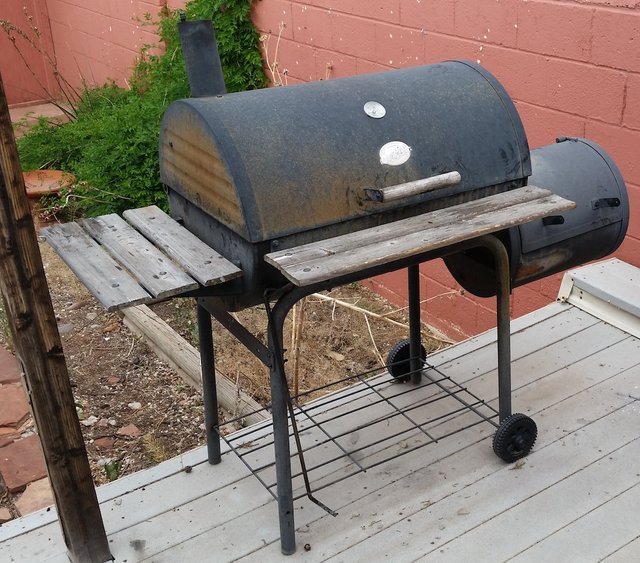
This is a genuine Char-Griller smoker.
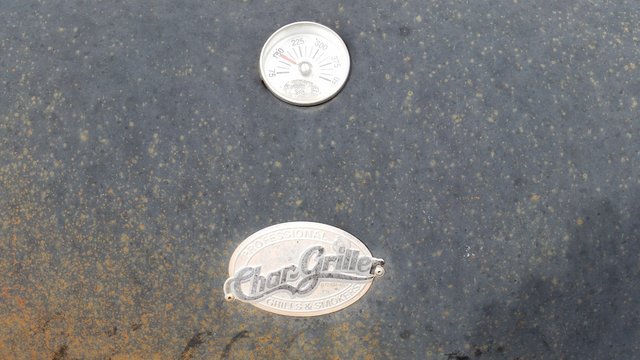
The Char-Griller makes a great smoker once modified because without any modifications it has several excellent features. The first, as seen in the image above, is a built-in thermometer that has a long working life. The second are a set of baffles, one at the top and one at the bottom.
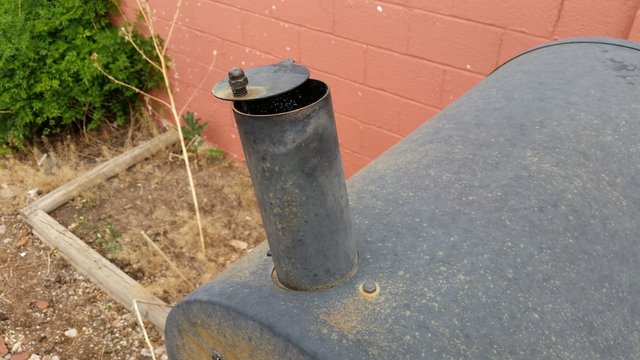
The top baffle on the chimney should usually be all the way open, but sometimes, if you have pyrolyzed your wood just right, you can close the top baffle to infuse a little more smokey flavor into your food. This technique is for experts only. If you can't tell when to choke the top baffle by looking at the color of your smoke, then don't do it.
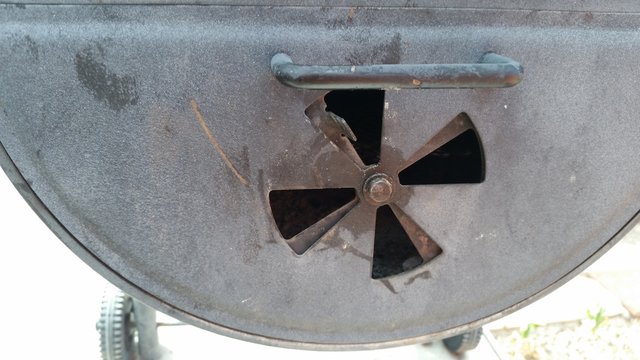
The bottom baffle on the firebox controls temperature. Close the bottom baffle to get a cooler temperature and open it to increase temperature. The Char-Griller is very responsive to adjustments to baffles, unlike egg cookers or upright smokers, which often take much too long to cool down.
Firebox Modifications
The firebox hangs off the right of the Char-Griller smoker. For side smoking, one makes a fire in the firebox then the design of the smoker guides the smoke through the cooking chamber.
Because the firebox gets very hot, it is susceptible to rust. My firebox has been exposed to the elements for well over a decade and has been used regularly season after season. It has plenty of rust, which is now causing the firebox walls to thin. Once it rusts through, I'll go down to the local hardware store and buy a replacement. I anticipate this happening in the next 5 to 10 years.
The firebox requires modification with a grate to hold the burning wood and natural lump charcoal. My grate is made from expanded metal that I cut to fit. It is supported with a steel chain link fence tension bar that can fit through the openings in the expanded metal. Weaving the tension bar through the outermost openings prevents the grate from sliding around when stirring the coals.
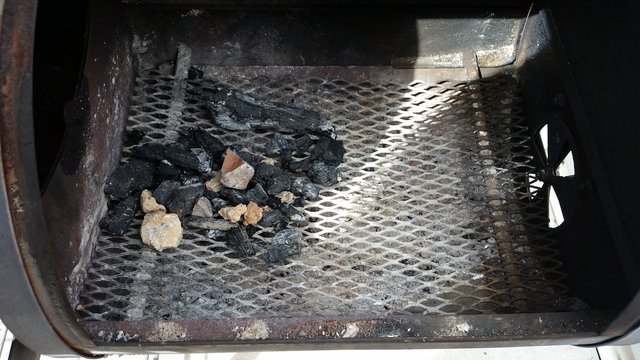
The rocks in this latter image are from the lump charcoal I use. I usually leave rocks in the firebox because they heat up and maintain an even temperature.
The Inner Baffle
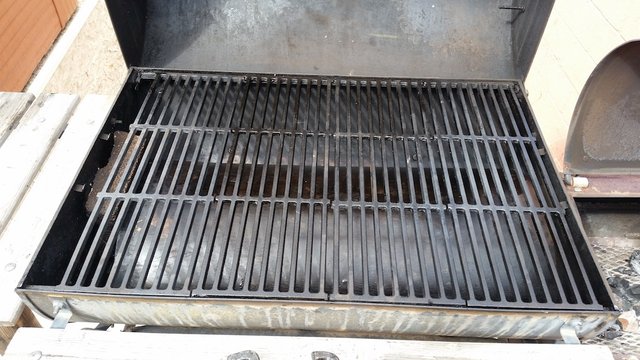
One of the great features of a Char-Griller smoker is the grate. The grate is very high quality, on par with those offered by Weber. The grate is an important part of cooking. It should be cast iron, preferably enameled. Cast iron has excellent heat retention and distribution, meaning that a good grate can help to cook food evenly.
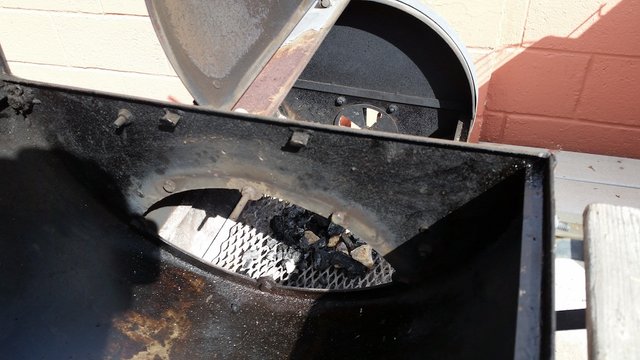
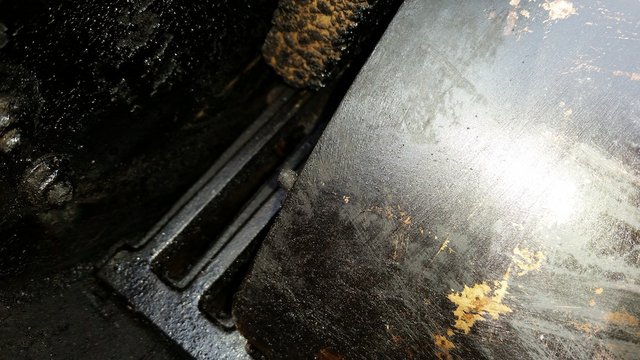
In my configuration, the inner baffle sits under the grate. The inner baffle is the component that works all the magic. It must fulfill several roles. First, it must serve as a firewall to fully prevent direct cooking from the extremely hot firebox. Second it must gently guide smoke to the right of the cooking chamber (away from the chimney side). Finally it must stall the air long enough for the smoke to mix and cool before it hits the food.
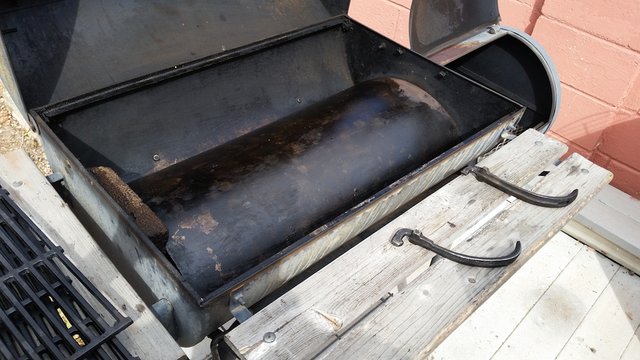
It may be hard to determine what you are looking at in the above picture, but that's the baffle. It is a curved piece of sheet metal that has the convex side up.
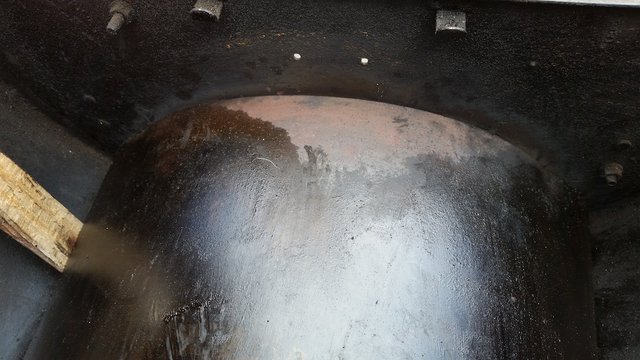
One question you may ask is where can an individual have such a piece of metal fabricated or where can this piece be acquired pre-made. Here is where the Char-Griller comes in. It ships with a baffle fully assembled. In fact, it's not a baffle but the fire tray that is usually used for direct cooking. What the previous image shows is the underside of the fire tray. The following image shows the fire tray right side up.
It is possible to hang the fire tray perfectly on the nuts that fasten the bolts holding on the firebox, making a nearly perfect seal that prevents any direct heat, and more importantly smoke, from entering the cooking chamber from the firebox.
This latter image shows the opening that connects the fire chamber to the cooking chamber. You can see the bolts sticking through. The baffle hangs easily from these bolts and is held in place using a wedge, as described below.
In this latter picture, I stuck my broken firebox handle into the gap between the inner baffle and the back of the cooking chamber, to demonstrate the size of the gap. The gap between the front side of the cooking chamber and the baffle is the same size.
Two small modifications are required to get a good seal. First, it is important to press the baffle against the firebox wall using a wedge on the chimney side. I use a piece of broken cinder block. This allows the smoker to be bumped or even moved without worrying about losing the seal.
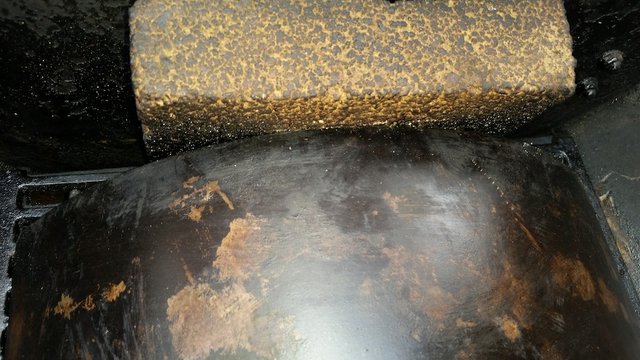
In this latter picture, you'll notice some grates. Those are simply the cooking grates that came with the firebox. I use them to rest the chimney side of the baffle on. These grates sit atop two bricks. I chose the bricks so that the chimney side of the baffle is just slightly lower than the firebox side, as judged using a level. Without bricks, the grates would sit just a little to low and force too much smoke to the firebox side of the chamber, reducing mixing and cooling time under the inner baffle.
The second modification to improve the gap between the inner baffle and the firebox wall is to file the knobs on the grate that is welded to the fire tray. A closeup of one of these knobs that still exist on the chimney side is shown in the following picture. I never filed the knobs on the chimney side because they are inconsequential. This grate is made with hard steel, making the knobs a good amount of work to file if you aren't using a power tool.
The Flue
Finally, one of the most critical modifications for air flow is to extend the chimney opening down to the level of the food using a flue of corrugated steel duct tubing.
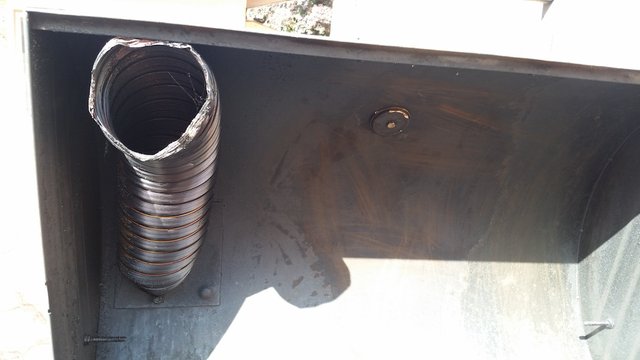
This tubing is bendable and malleable so that it is easy to get a perfect fit. Start by cutting it too long then simply take up the extra length not by cutting it but by bending it to a path. It only needs to provide a way for smoke to get from the cooking surface to the top of the chimney.
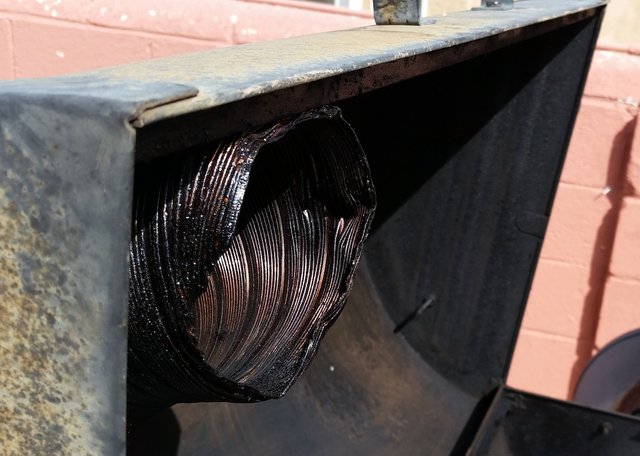
You can see in this latter picture that I've wedged the tube under the lip of the cooking chamber cover to keep the tube in place. No fasteners are needed except for a clamp that attaches the tube to the flange made by the chimney on the underside of the cover.
Conclusion
Expert smoking requires has several elements. These elements include selection of the food to smoke, seasoning the food, controlling temperature, selecting the wood, pyrolyzing the wood, and controlling the path of the smoke through the smoker. This article is meant to address this latter element, providing readers with an inexpensive route to a smoker that any expert would be happy to use.
Congratulations! Your blog post is featured in the Steemit Blog Spotlight, Issue 3 (link below). The newsletter is dedicated to highlighting new and original blog content on Steemit, helping emerging bloggers get more exposure, upvotes, and payments. The newsletter's own upvote dollars are used to promote Steemit to other bloggers on the web. If you know any other good bloggers who might want to be featured, please click the link below and post a reply comment. And please keep posting more blog content!
Link: https://steemit.com/blogspotlight/@donkeypong/steemit-blog-spotlight-newsletter-issue-3
Great #bbq hack and writeup! Makes me want to start drilling holes in my old barbecue to add a firebox.
If anyone is wondering why I voted against my own post, it's because of a mis-click and is purely accidental.
Edit: Yay, I was able to change my vote!
"If you learn how to make money FOR your self, BY yourself only then will you be truly free"--truer words have never been spoken. I worked very hard when I was in my 20's to get an engineering degree. I worked full time while I was in college.
I've now worked in corporate America for 8 years and I hate it. Every day I go into work I feel like I die a little bit inside. There's no windows and only fluorescent lights and computer screens that strain my eyes on a daily basis. The facility I work in is dusty and dirty. The management has only their self-interest in mind...I could go on and on but it would take several pages of text to fully describe all the things I hate about it. I've thought about going to another job but it's like trading the devil I know for the devil I don't know which is not a very smart thing to do. It's a gamble at best.
It's a paycheck and a pretty good one at that but the amount of time I spend there being miserable and feeling trapped on a daily basis has crushed me the past year or so. I've been working really hard to get a few different businesses of my own off the ground but it's very slow because I spend so much time at my regular job.
I think all of us here have the thought in the back of our minds that in several years steemit could be huge and be our ticket to financial independence. I'm not counting on it and I'm working on other things outside my normal job as well. But that's the dream for those of us who missed out on the early days of bitcoin.
Best of luck to you in whatever your own businesses are. I wouldn't wish a life of corporate slavery on my worst enemy. This was an excellent post and you deserve every bit of rewards you get for it. You've got my upvote, for what it's worth.