SPECIAL TYPES OF COMPOSITIONS: "RADIAL" WHAT IS IT ABOUT? #STEPBYSTEP #ART
Welcome once more steemit community
The composition that we will deal with today is called:
RADIAL
To begin I will explain what a radio composition is about
It consists in choosing an element of the composition as the main object, while this is located in the center of the space of the composition, without leaving aside the other elements that form it. It is important to always maintain harmony in the composition.
The radial symmetry takes into account a point that is the center of one or several circles. The points will be at opposite ends on the same diameter.
A radial composition combines linear and centralized elements. It consists in that in a space of the center several linear elements will split. A radial composition is extroverted that goes beyond its context.
MATERIALS
For the elaboration of this drawing we need the following materials:
ELABORATION PROCESS
Then I will show you through pictures the elaboration of this drawing.
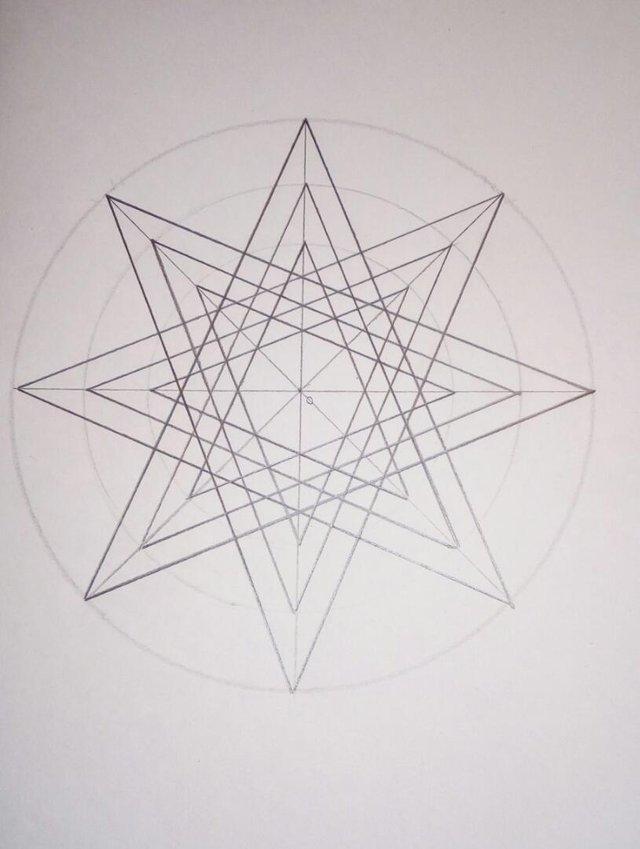
Step 1
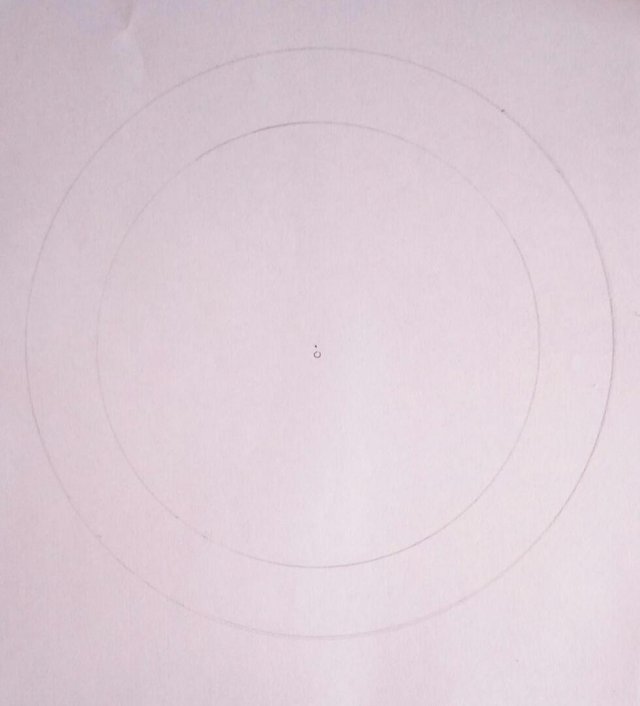
Take the sheet and with the compass make two circles, one larger than the other, starting from the same point 0.
Step 2
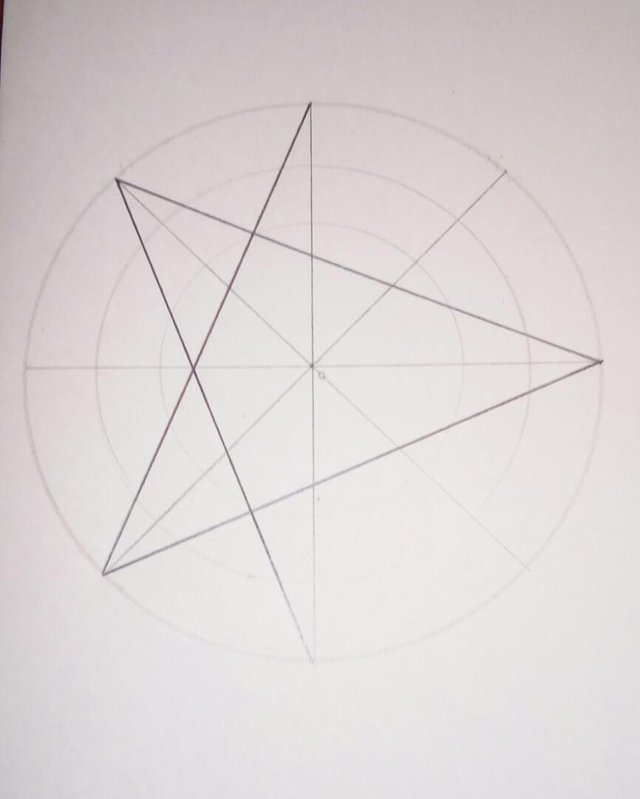
Make the "x" axis and the "y" axis and divide the circumference into 8 equal parts with the help of the compass and make a third circle smaller than the other 2.

Step 3
Begin to join the points leaving space two points.
Step 4
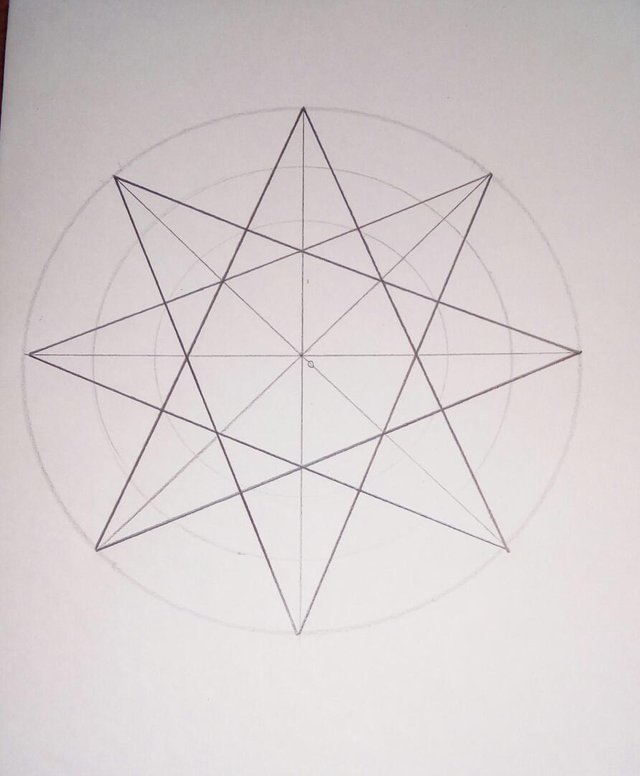
Continue this process until the lines join again.
Step 5
Do the same from the tips of the second circle and then the third.
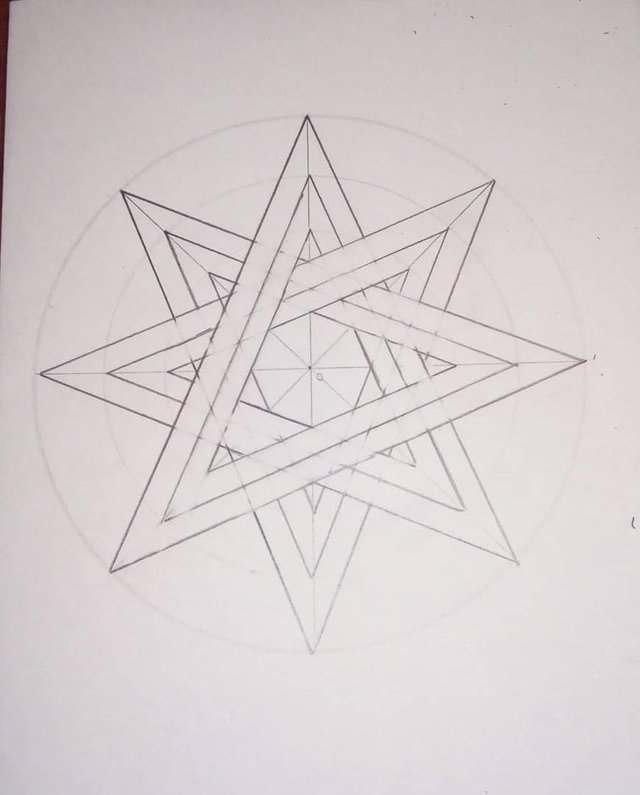
Step 6
Use the eraser to remove streaks with pencil that are not needed.
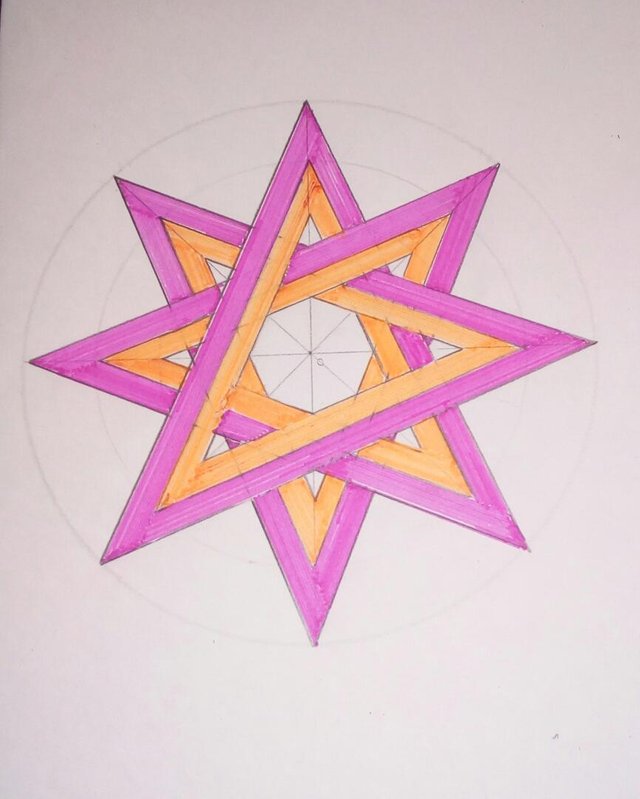
Step 7
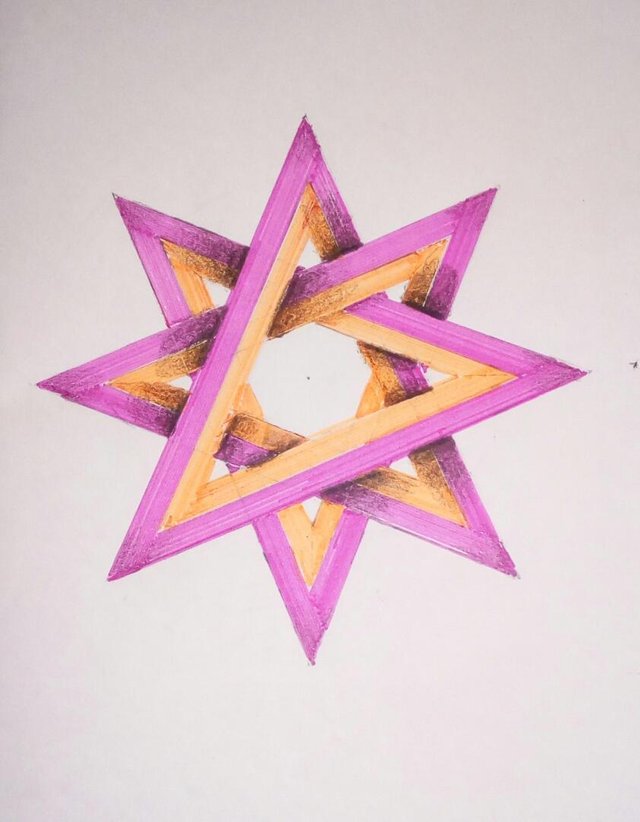
Start decorating the star with colored markers.
Step 8
Give depth to the star by adding shadows with the color black.
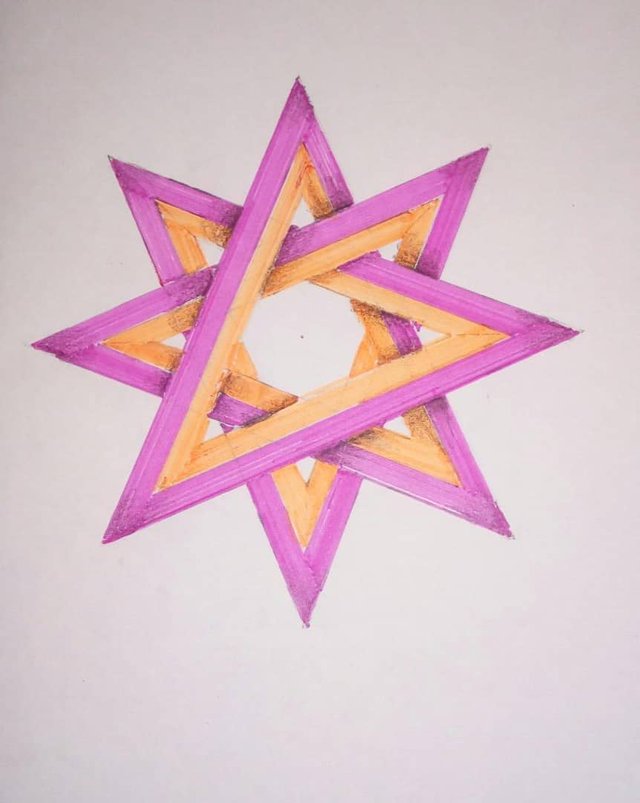
Final score
Post Previous

Dear Artzonian, thanks for using the #ArtzOne hashtag. Your work is valuable to the @ArtzOne community. Quote of the week: Art, freedom and creativity will change society faster than politics. -Victor Pinchuk