How to Paint Trees and Foliage - Final Part - Building up Detail in the Painting and Final Details
Hello Steemers
Here is Part 3, the final part of this painting tutorial on 'How to Paint Trees and Foliage'. In the blog post I will show you how to build up the detail to make the trees look three dimensional and also adding the final details to complete the painting.
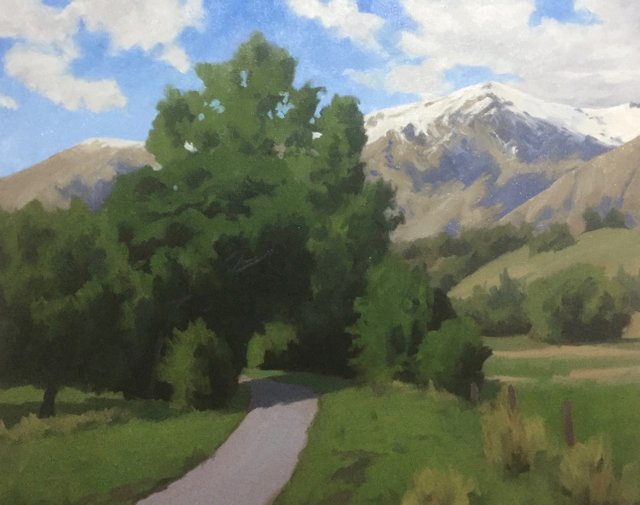
Check out Parts 1 and 2 of my previous posts (if you haven't already) which shows the painting design, composition and blocking-in of the painting.
Building Up The Detail
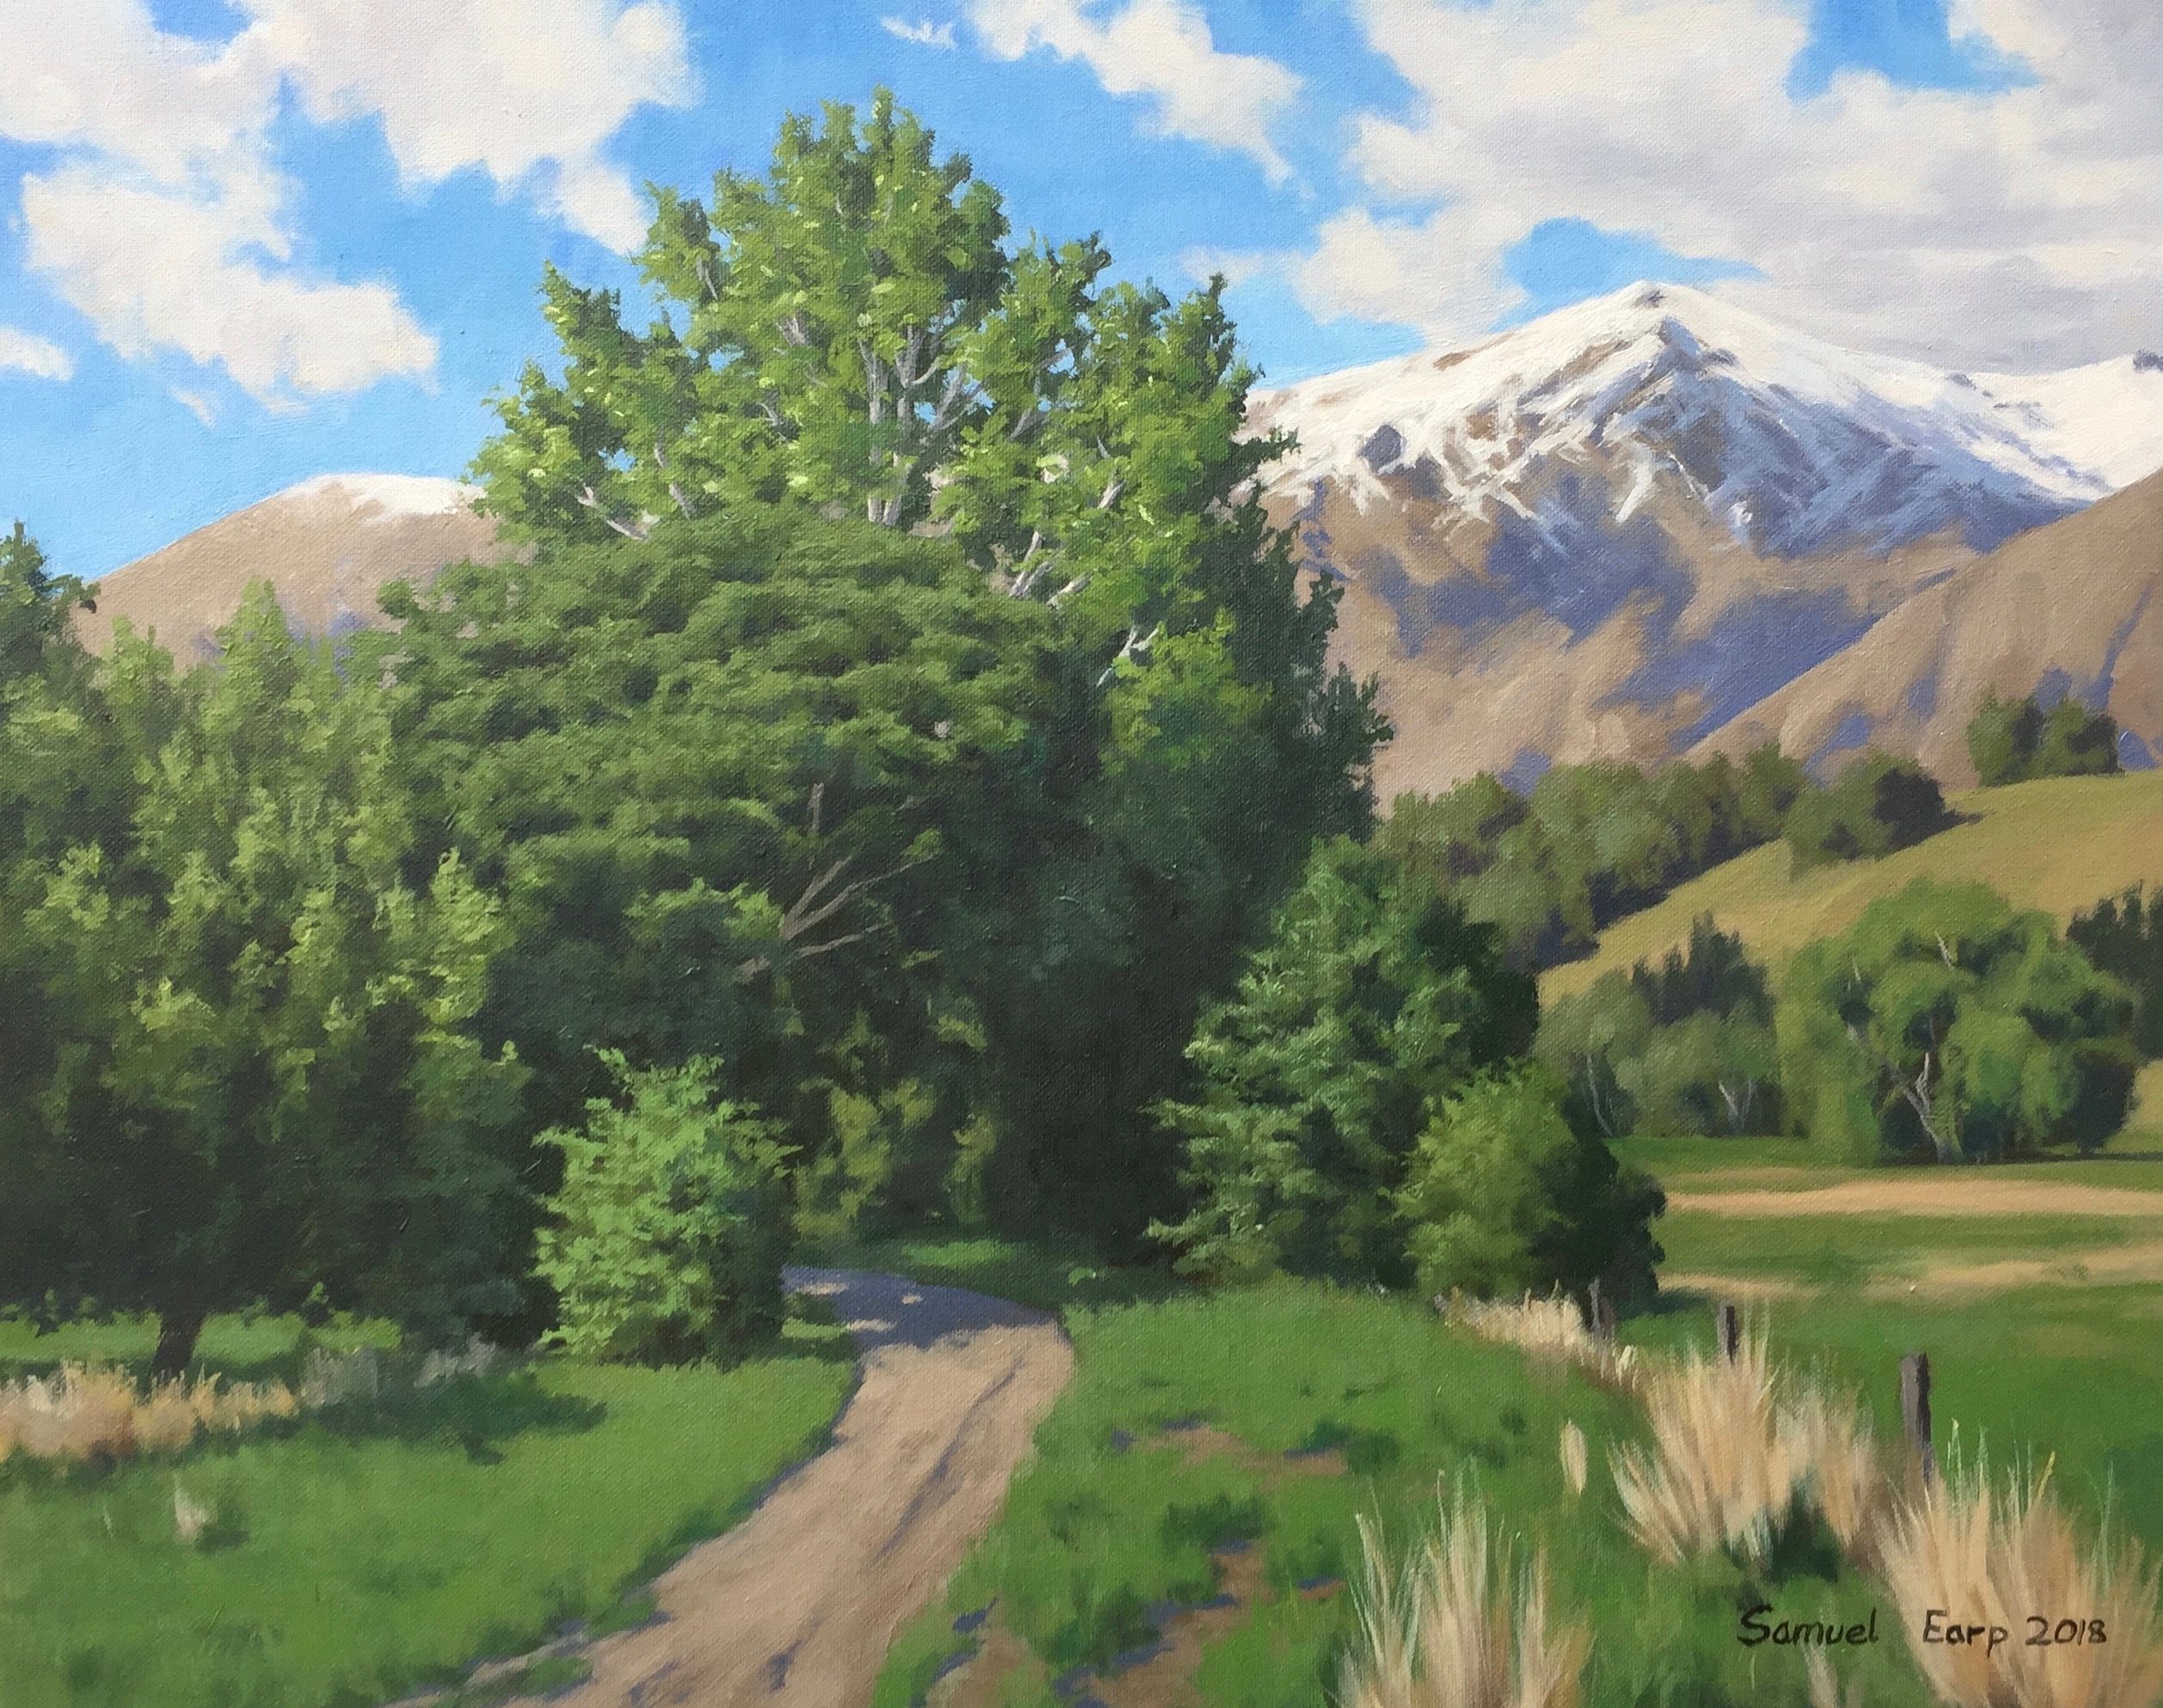
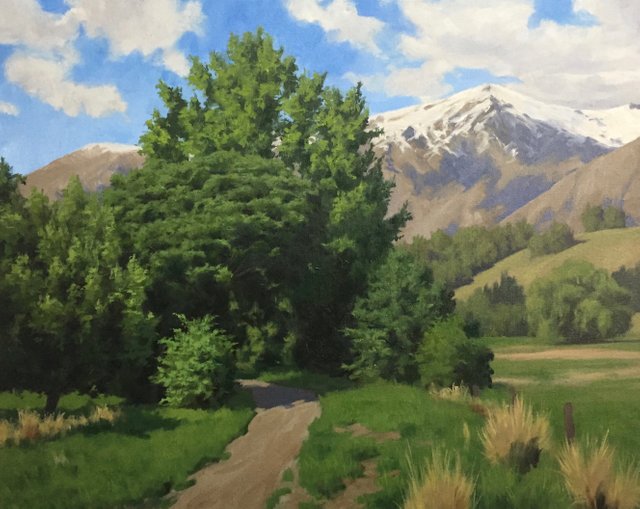
So now that the blocking in process is complete and I have allowed the painting to dry I can start building up the detail. I start by refining the clouds and I am using the same colours that I used in the blocking in phase which include ultramarine blue, burnt umber, quinacridone magenta and titanium white.
I do want the clouds to be tonally too light as they will jump forward in the painting and distract the viewer from the main focal area so I darken the tone a little. I also refine the sky and using a No.6 flat I also refine the form of the clouds.
Next I start working on the mountains and again I am using the same colours as I used in the blocking in phase but I am adding lighter tone in places to refine the shape of the mountains. I don't want to add loads of fine detail to the mountains as this will be confusing to the eye and will zap some of the life out of the painting.
Now for the main part of the painting which is adding the detail of the foliage in the stand of trees. I start with the sycamore tree and I am using a filbert brush to paint the foliage. I am still using the same colours to mix the greens as I did with the blocking in phase which include cadmium yellow deep, ultramarine blue, phthalo green to increase the chroma and titanium white. I am also adding in places yellow oxide, burnt sienna and quinacridone magenta in order to make the greens look more organic.
For the poplar tree behind the sycamore and the other smaller trees I use a 3/8" dagger brush to give the illusion of different shape leaves. I also vary the colour of the foliage between the trees. I'm building up lighter tone each time to give the illusion of solid forms within the trees.
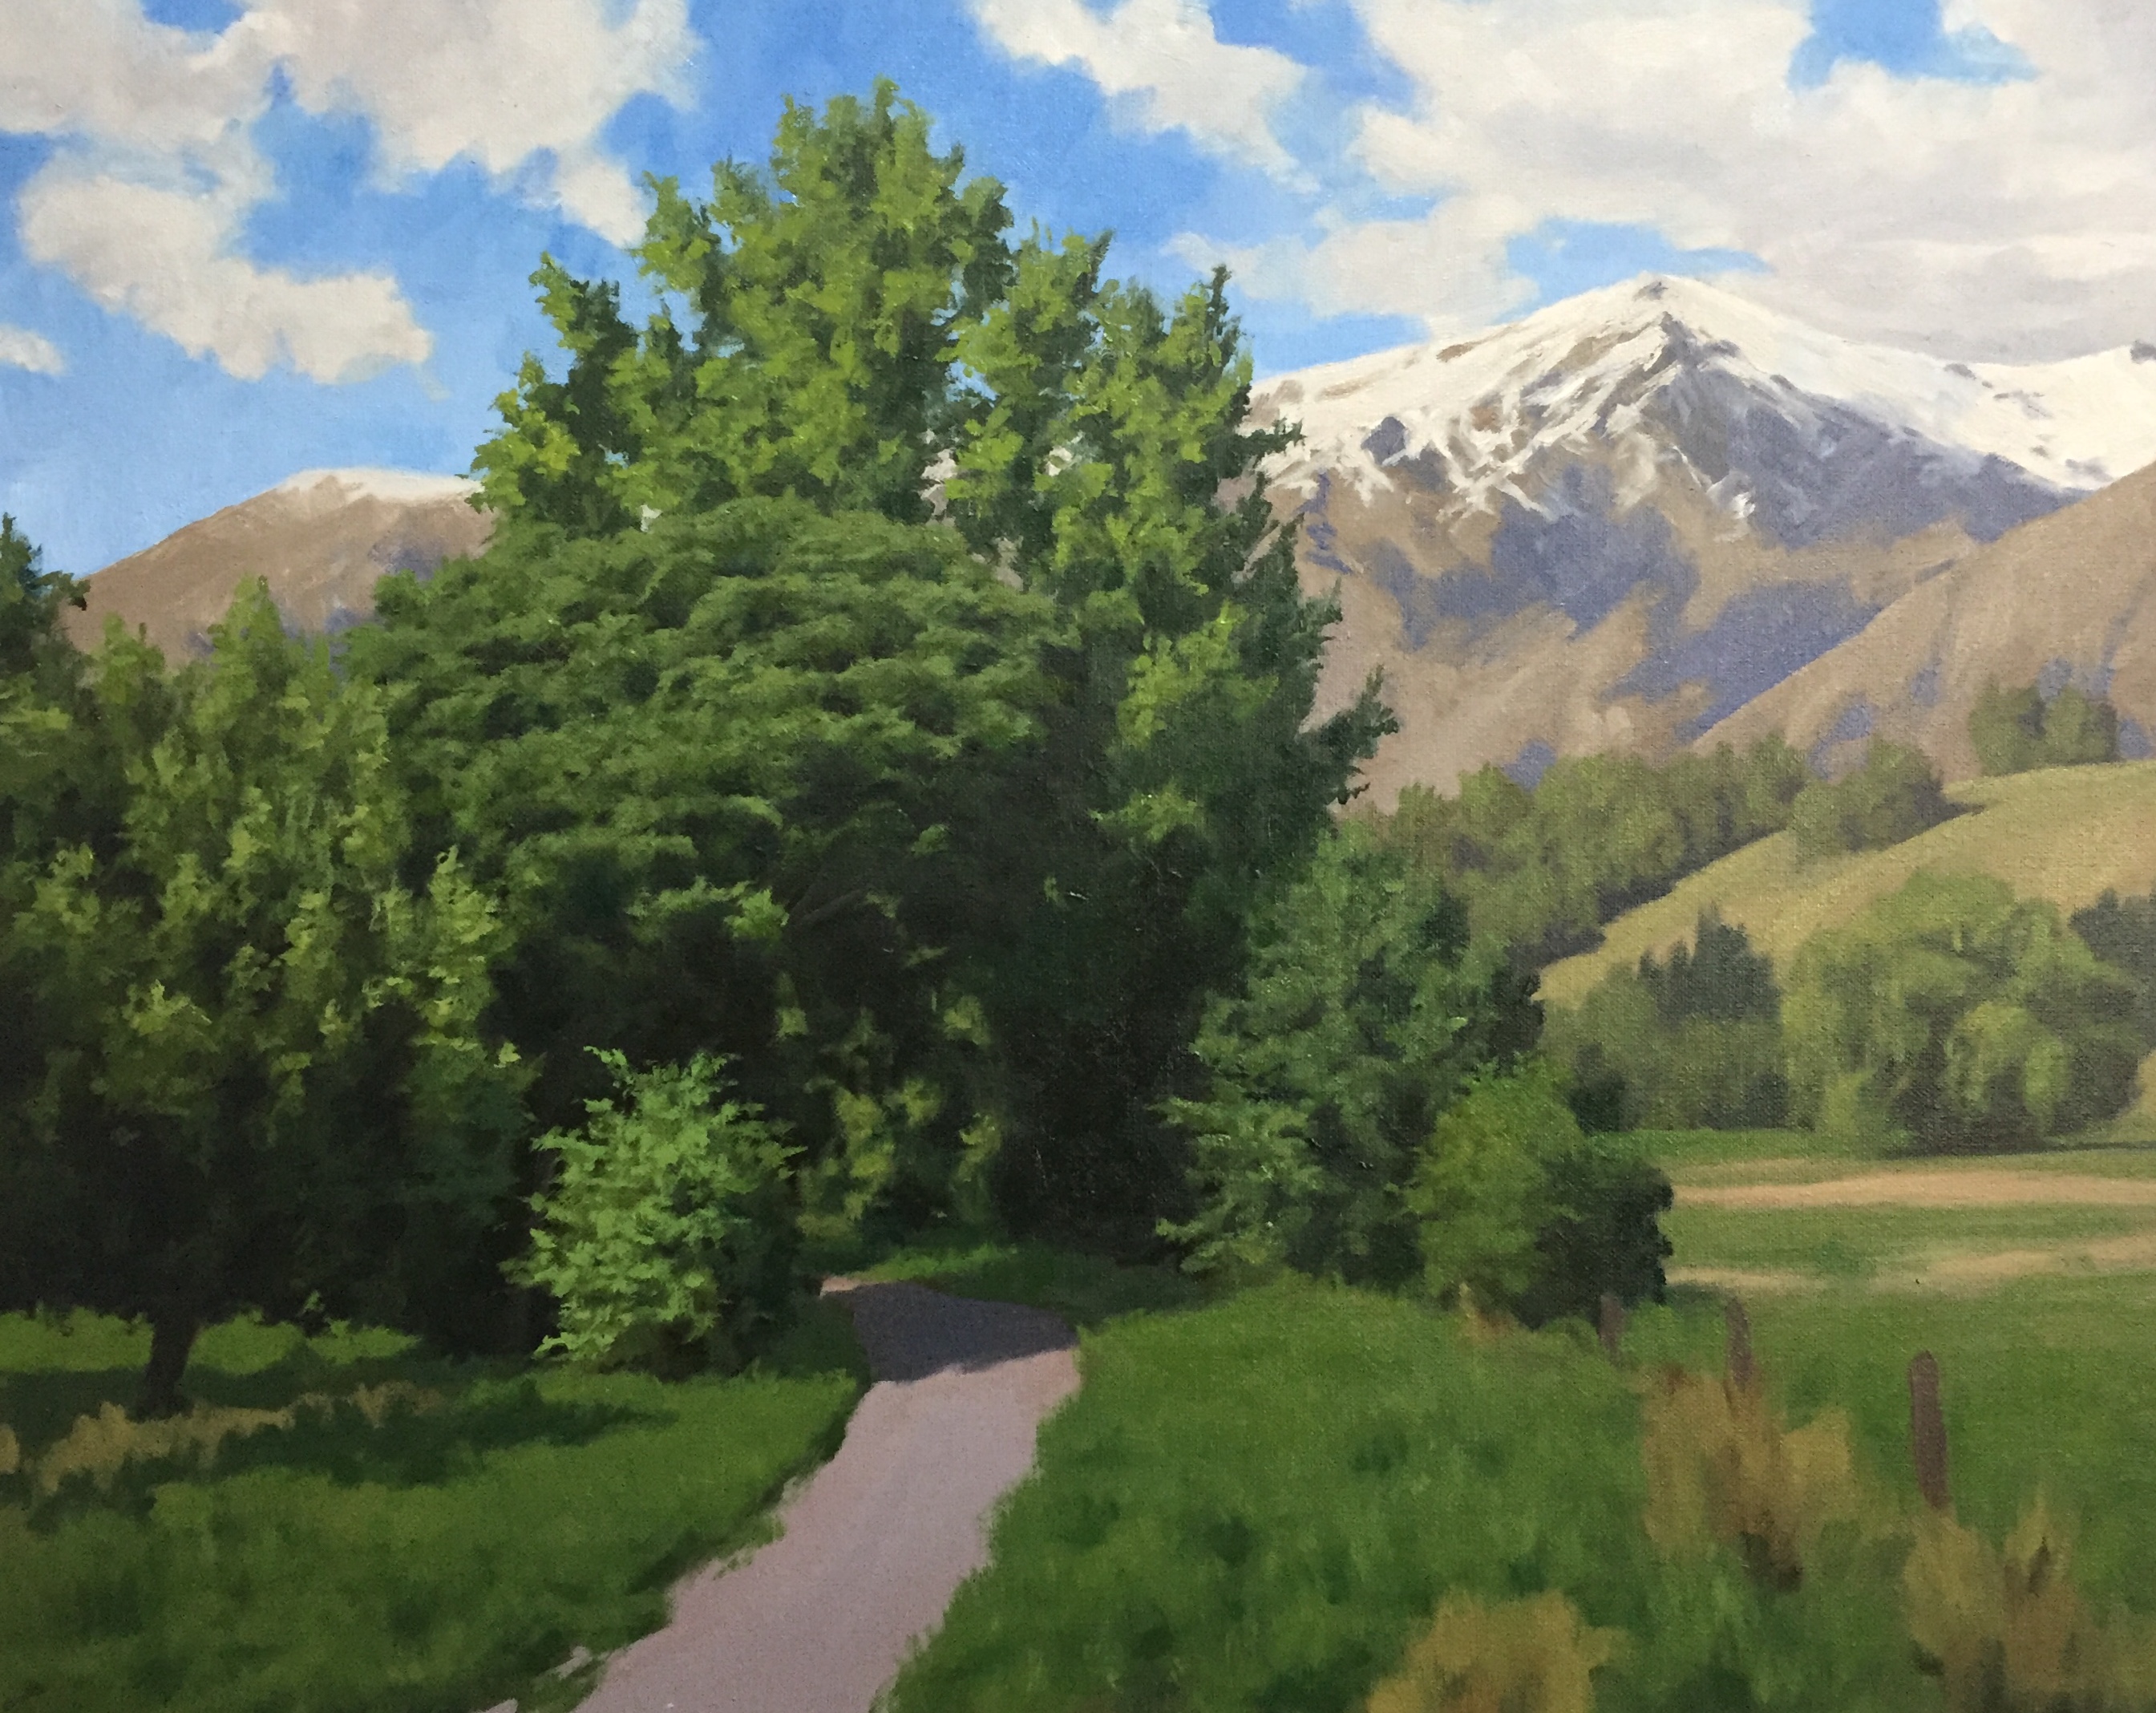
I refine the trees in the mid ground but I desaturate my greens so the recede in the painting, I'm still using the same green colour combinations but adding more yellow oxide and burnt sienna in order to reduce the saturation of these colours.
I work on the grass in the foreground using a No.6 flat brush. The grass is tonally lighter than the foliage in the trees even though I am still using the same colour combinations, but also adding a little cobalt teal to the mix here and there. I need to add more titanium white to my green mixes but not so much that the colour becomes chalky. If you find you greens becoming chalky, add more cadmium yellow deep, phthalo green and burnt sienna to the mix. You may have to play around with colour mixture until you get it right.
I add more detail to the foliage in the stand of trees and again applying lighter to than the previous layer.
Next I work on the detail of the dirt track and I am using mostly burnt umber, burnt sienna, ultramarine blue, a tiny amount of quinacridone magenta and titanium white. I wanted to break the line of the path so I've add clumps of grass to the path edge and mud patches in grass.
Final Details
I complete the painting by adding some more spots of lighter green in the foliage of the stand of trees. I then add the branches in the poplar and sycamore trees which I mix using a combination of burnt umber, ultramarine blue, a tiny amount of quinacridone magenta and titanium white. For the highlights in the branches I mix titanium white with a little burnt umber and yellow oxide.
I paint some suggestions of branches in the willow trees in the mid ground.
Overall I refine the stand of trees and the grass in the foreground, it's always quite difficult to know when a painting is finished!
I hope you enjoyed the final part of this step by step painting tutorial.
.Check out my website for more painting demos and my art: samuelearp.com
Subscribe to my mailing list for news, new paintings and art tips and receive a FREE digital art print download of one of my seascape paintings suitable for printing an image of any size: https://www.samuelearp.com/subscribe/
Click on the links to read Parts 1 and 2
this is art!!
Thanks @vanessazune2 :)
oh, wow. this looks great
Thanks @ritzzard :)
Beautiful work Sam!
Thanks mate :)
Very good artwork! Thank you very much for showing the process.
Thanks again for these tutorials @samuel-earp-art
Your tips have come in handy even though I haven't painted a proper landscape yet, they've I've used the basics for backgrounds and indeed look better than before 🙂
BTW this is a really fine landscape painting and I included it my weekly curation post 😃
Check out our Discord Channel