Install Your Fountain Pen Ink Cartridge in 5 Easy Steps
Hi lovely readers! Last time, I reviewed the Artmaker Calligraphy Masterclass Kit. I wanted to show you how to install your ink cartridge in that post but I thought it would be unusual to include it in my review so I decided to make a separate post about it instead. Worry not, the process is very easy and you can achieve it with no sweat at all!
1. Disassemble your pen

Make sure you cleaned your pen before installing ink cartridges. After cleaning, twist the pen and as you can observe, it will be divided into the barrel, the grip with the nib and the cap.
During the ink cartridge installation process, I don't like to separate the feed and nib because it is not necessary. The pen I used as a sample is pretty much basic so the ink cartridge installation was relatively easy.
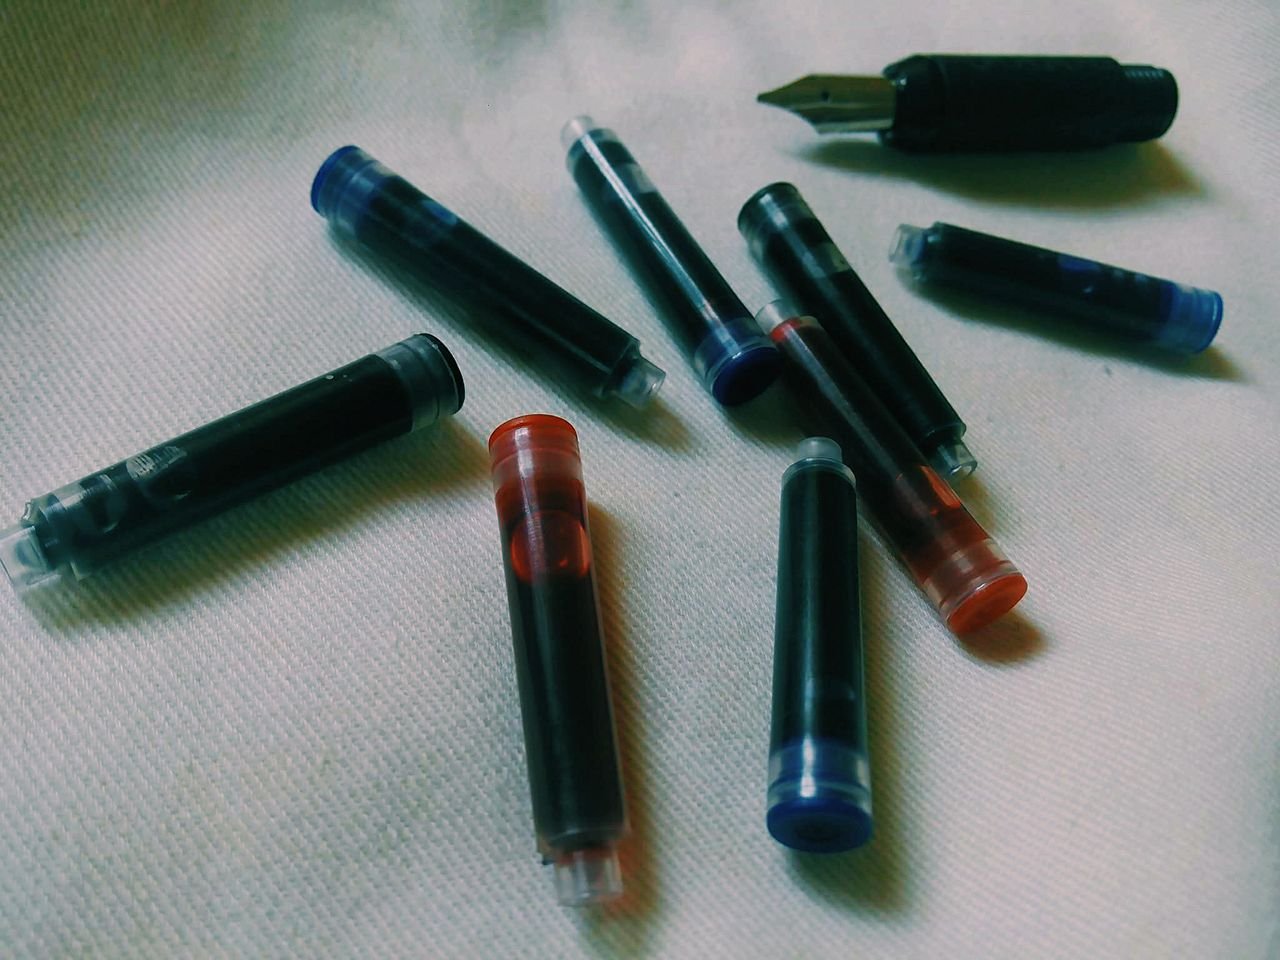
2. Get your ink cartridge ready

Select which ink cartridge you want to install. As you might have noticed, both ends of the ink cartridge are different.
It is very important to identify which end will be punctured.The other end is somewhat open, this end is the part where you puncture the ink cartridge. On the other side,the end is a bit harder, it is used for support and it is where the color of the ink is displayed.
3. Press the ink cartridge firmly

If you try to look what’s inside, the feed will be able to puncture your ink cartridge. Orient the ink cartridge in such a way that the opening of the cartridge faces the feed.
Give enough pressure and don't be afraid to press firmly until you hear a slight popping sound that indicates the cartridge is already punctured. The ink cartridge will not be wobbly and it will stay in place.
4. Reassemble your pen and wait for ink to flow

Twist the barrel into the grip. Now you have your ink cartridge inside your fountain pen. You may need to point your pen tip down in order to allow the ink inside the pen to flow.
Getting the ink to flow may take several minutes. Wait patiently before writing. Don't rush it through because if the ink has not been flowing properly, there will be no writing produced.
5. Test the pen

Let the ink flow through the nib by leaving it pointed downwards. Check and try writing. If your pen produces the desired and expected result, you are now ready to create your masterpiece!
On the other hand, if the pen is not yet able to produce ink, wait for few minutes more or you may also shake the pen but make sure to do it gently.
Bonus Tips and Tricks
• Clean the nib before cartridge replacement
Cleaning the nib is very important because there are times that the ink color you will be using is different from the previous ones you used. Hence, when you try writing, the colors are mixed and the result will be of poor quality. Another advantage of cleaning the nib is that it will avoid the damaging of nib because if you don’t clean it, the ink will dry on the parts of the nib and it will affect the quality of your writing.
• Double check the ink color
Looking at the color on the other end is very important because sometimes, colors can be interchanged especially if you have poor eyesight (just like me). I was planning on choosing the color blue ink but to my surprise, when I tested the pen after the installation process, the color came out black. Lesson learned!
• Press firmly
I have tried a couple of times pressing the ink cartridge and failed because I did not apply too much pressure. Don’t be afraid that the ink cartridge will be destroyed during pressing. The right amount of pressure is needed so press firmly.
Easy right? Now, I hope you learned something from this short tutorial and if you may, you can check my previous posts related to calligraphy below:

Some References about the process: 1 2
The products used in the demo are from the Artmaker Calligraphy Masterclass Kit.
Steady inspiration how to deal with a problem that I think is very annoyed. Any constraints with the printer that must be willingly dirty about the ink Thanks for the advice and the solution.
hmm. actually, this cartridge is for fountain pens.
😅
Congratulations! This post has been upvoted by the communal account, @steemph.cebu by reewritesthings being run at Teenvestors Cebu (Road to Financial Freedom Channel). This service is exclusive to Steemians following the Steemph.cebu trail at Steemauto. Thank you for following Steemph.cebu curation trail!
Don't forget to join Steem PH Discord Server, our Discord Server for Philippines.