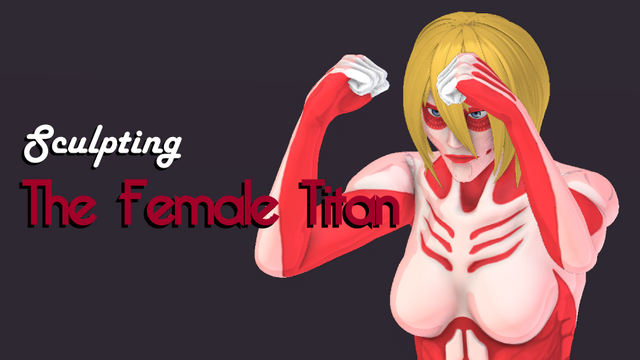
Blender Sculpting: 女型の巨人 / The Female Titan
こんにちは!
It's Rain here. Me, not the weather!
This. Is. It. I have finished my biggest sculpture so far. I didn't know it was tiring until I finished this and rest my head back staring at my model. After Mr. Braun, I wanted to be able to sculpt a full body character as fast as possible simply because I'm getting more and more excited with Blender, all the while learning anatomy and perfecting my sculpting skill. I can't really remember why, of anything else, I decided to sculpt the Female Titan.
In case some of you aren't into anime, the Female Titan is a character from the anime series Attack on Titan. Her real name is Annie Leonhart, a resting bitch faced girl who has the power to turn into a giant form known as the Female Titan.
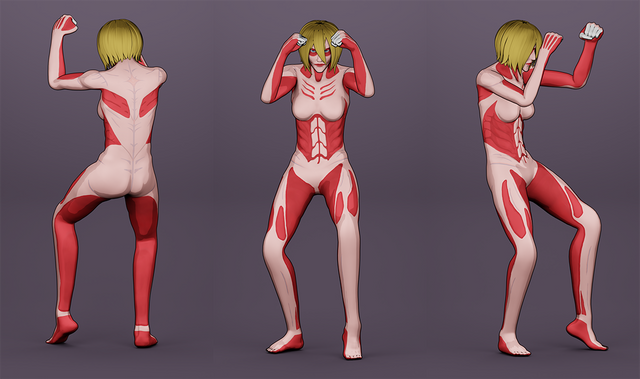
And here it is, the Female Titan with Annie's iconic fighting pose that was shown as a big bold hint of the Female Titan true identity in the first season of the anime series.
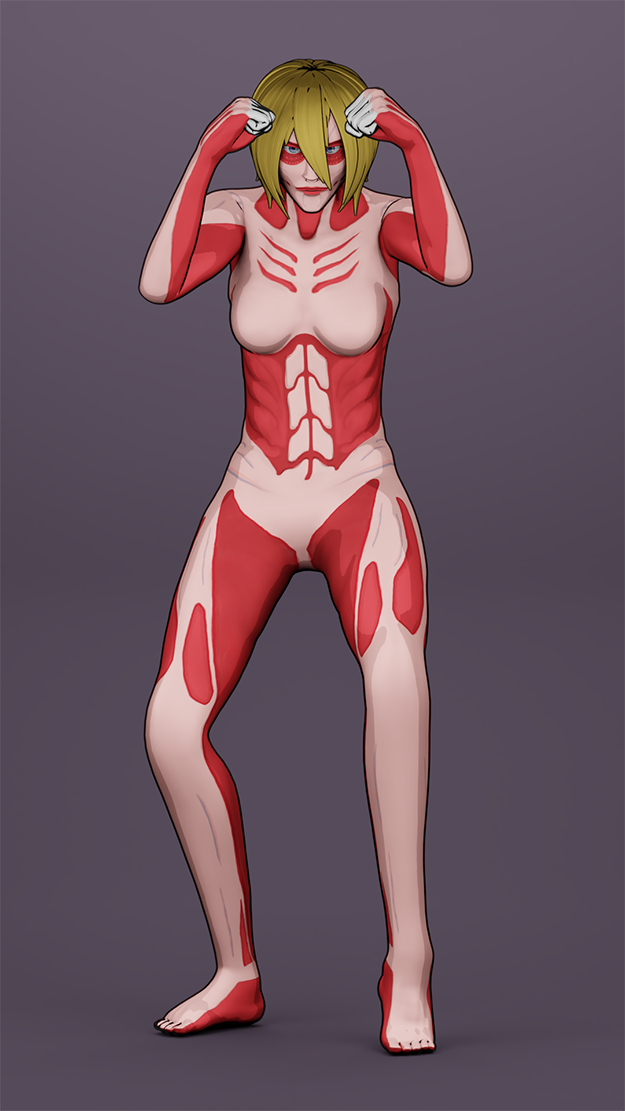
The Female Titan

Things learnt from making this; Making a full body, now I get the idea of how to create a full humanoid body character. Now I know how to create a simple cel-shading, similar style you’d see on the game Borderlands. Not as great as that, but still cel-shading. I also figured out that rigging is harder than I thought. Salute to you, riggers and animators! Let's see how this was made, shall we?
Sculpting
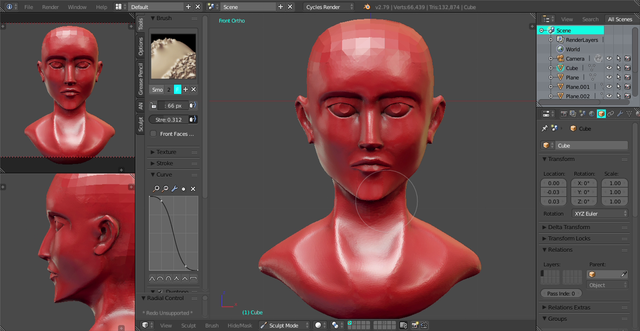
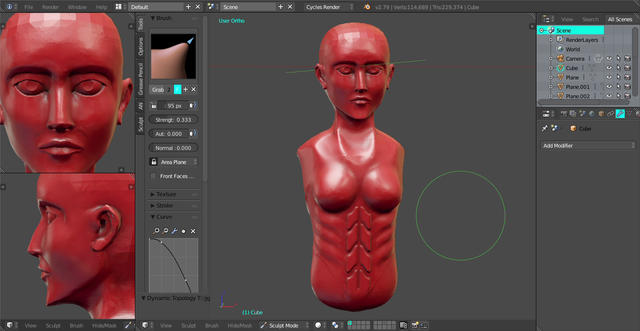
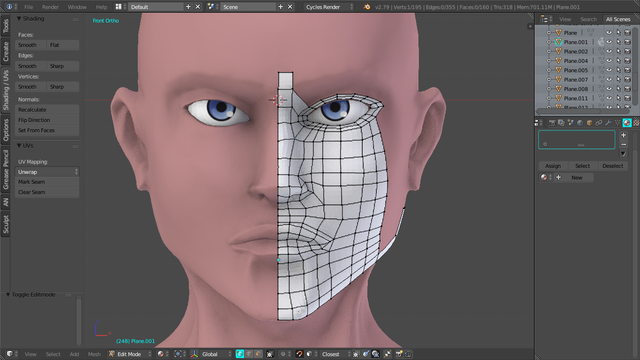
My sculpting process is a little bit different now. Before this, I modelled the base shape of the head first, but now I’m skipping that part and straight up sculpting after turning the cube into a sphere. Here I’m adding the rough detail to determine the placing and spacing of the facial features before slowly working on the smaller details.
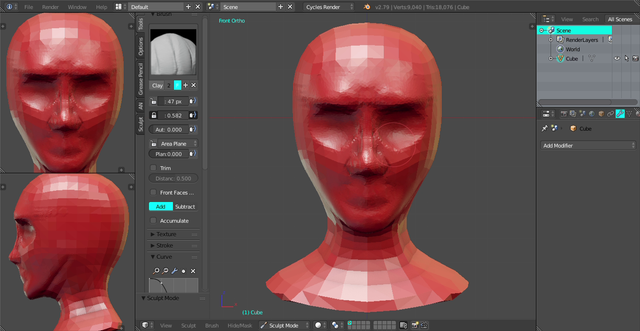
Then I sculpt the smaller details starting by placing the eyeballs. To me personally the part that helps to determine the facial features placing the most is the eyeballs. The eyeballs is the start for me to begin sculpting the details.
Initially, I only planned to sculpt the head and the bust, pretty much like Mr. Braun. I wasn’t sure if I wanted to create a full body model, as this is only my second humanoid character sculpting. But I decided to go full body because there’s no reason not to, right? I’ll never move forward if I don’t start moving.
A tips from an artist I followed in making a full body character is that it is recommended not to sculpt the limbs by pulling them out of the torso, but by making them separately, then merge them later on.
That way, you won’t have to pull your hair off for having a hard time sculpting the difficult spots such as the armpit, the fingers, the crotch area, etc.
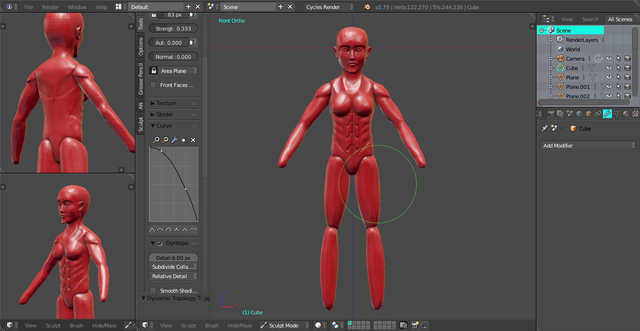
By repeating Attack on Titan OST Vogel im Käfig (because yeah) and the sculpting workflow—rough detail > smaller detail > smallest detail—I managed to create the body, which honestly, is unexpected. The grab brush set to low strength and wide radius is good to carefully re-adjust the proportions, to make the hips wider or the torso longer for example.
Retopology
Done with the sculpting, comes the not-so-fun part, which is retopology. It is a process of recreating a high-poly model by 'wrapping' it with another layer of polygon in order to reduce the number of polygons without losing too much detail. As tiring as it is, this stage is a must if the model is going to be rigged, animated, painted, exported to game engine, etc.
Texturing
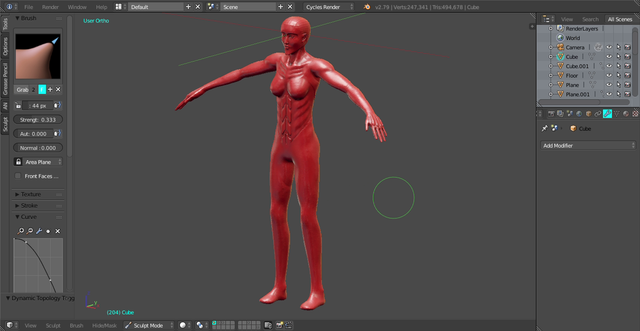
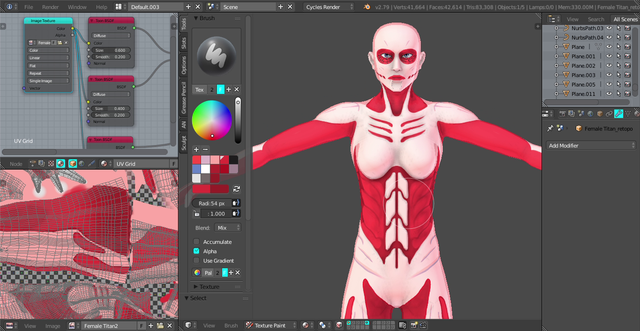
After I finished with the shape (including the fingers, which is not shown in the screenshots), I proceed with the colours, the second fun part of 3D modelling after sculpting. Below is the texture painting process, with the node editor (top left) and the UV map (bottom left) to help me paint certain spots. A quick explanation; UV map is the 3D model that’s being cut in a way that it could be flattened into flat 2D form to work with the texturing.
Rigging & Posing
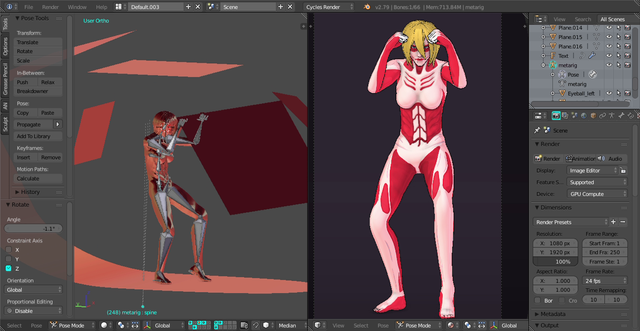
I found a new method to create the hair. Instead of sculpting it, this time I used bevelled curve technique, which rather fun to do as well. It looks nice for anime-styled character hair as well. This is also the first time I rig a character. I tried placing the bones manually, but everything went completely wrong, so I used the Riggify addon then adjust the bones from there.
Note for Blender users: In case you don’t know the addon, go to User Preferences > Add-ons > enable “Rigging: Riggify”. You’ll have additional bones for humanoid and animals in the Armature menu.
Final Render
One process I skipped here is the weight painting, because the weight is automatically painted when I parent the armature to the model. So just waiting for a minute the model is ready to be rigged, or you could say posed. And here it is, the Female Titan.
When I look back to the early process I thought “Wow, this was how I started?” because it’s hard to imagine how to create the final model from that shape, it looked wrong in every angle. Well, because it's not done yet! I yelled to myself. It’s even harder to imagine how I managed to create this because I’m kinda dense. Heh.
This may not look exactly like the anime character, with some flaws here and there, especially the paint job because it’s a bit difficult to colour using mouse. But still, I think this was another good start and of course, a good practice for me. One thing I don't get it right is the rigging, and I'll certainly learn on how to do it better.
Thank you for visiting!

Click the icons below to join some of the best Steemit community on Discord where you can meet and hang out with awesome fellow gamers and artists, and help each other grow.


©2018 Adam Rainite Lawsone
Hi rainite!
I am (currently @quekery) a curator for AkibaSteem and this is just to let you know that I upvoted your post:
Also, feel free to join our community on Discord!
https://discord.gg/7JQruwmOooh thank you @akibasteem (and @quekery), I really appreciate it!
Amazing, Adam :) I love this so much, you nailed her really well !!! Good job \o/
Thanks, spider. There's still some flaws on her but I'm glad you still love it!
Aahhh what a beautiful post. I really enjoy reading and looking at your artwork. 3d Annie looks so good and convincing! :D
Thank you, scrawly. It's good that someone enjoys the hard work. I hope it's not too long for your liking, though :D
This post was shared in the Curation Collective Discord community for curators, and upvoted and resteemed by the @c-squared community account after manual review.
@c-squared runs a community witness. Please consider using one of your witness votes on us here
Her pose is perfect.
Thanks, that's the hardest part of the process.
Omg here it is! I almost miss this post but it's really useful I favorited you so I can check your blog anytime.
Great job on the Annie, my dude. I don't know how much hours you spent into it but they were totally worth it and I absolutely love what you managed to create here <3
Keep it up my dude I'll keep on loving your work!
Ooo thank you very much!
It took me two days to finish this, but not exactly 48 hours. I'll see if I can do it faster and make it better on the next one.
Practice makes perfect! Keep us updated on what you do next!
This is great!
What a beautiful work. I enjoyed looking at all the details of it!
The texture detail is the part that I wish I could do better, really. But I'm glad you enjoyed it!
What a great creation! You did a beautiful job with the 3D!
Thank you!