Catching the sun- creating my cyanotype prints
In this post I'm going to take you through the process I use to make cyanotypes from paper set up to exposure and the development of the prints.
Now this isn't a 'how to' post, the cyanotype prints may look cute but the chemicals I use are not. I have been doing dark room photography and alternative processes for almost 20 years and I have had training in using the materials and how to handle things safely. If you fancy having a go at a technique like this you could find a workshop class or use something like sun print paper or sunography fabric which is pre-coated. Now that's the safety bit out of the way, let me tell you what I get up to after dark...
Stay out of the light!
So the first rule of making cyanotypes is that unless you are deliberately exposing the paper you need to be out of UV light- so basically no sunlight. So I do all my chemical preparation and coating of paper at night. Ideally if the paper is dry in time I will also prep my pictures ready for exposure in the morning. The more I can get done at night away from UV daylight the better, unlike a lot of dark room photography though I can do the preparation in artificial light (light bulb) so there's no working in the dark.
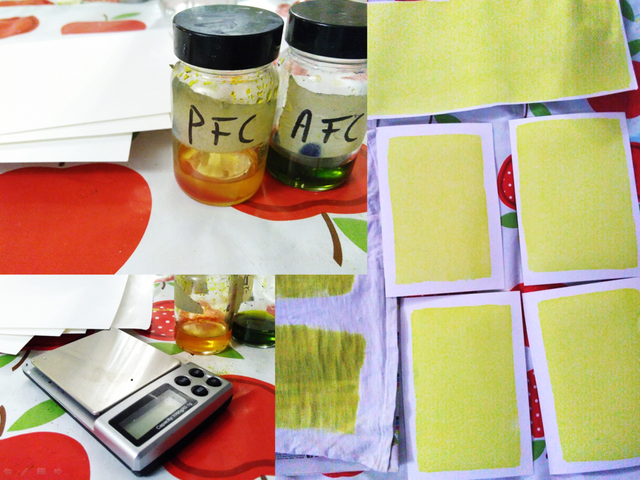
The chemicals and amounts that I use are:
2.5 grams Ferric ammonium citrate and 10 ml. water.
1.0 grams Potassium ferricyanide and 10 ml. water.
Wearing safety equipment I mix equal quantities together to form my light sensitive solution.
What to print?
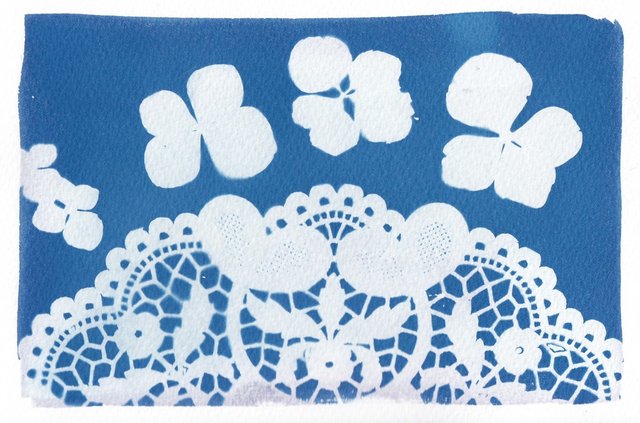
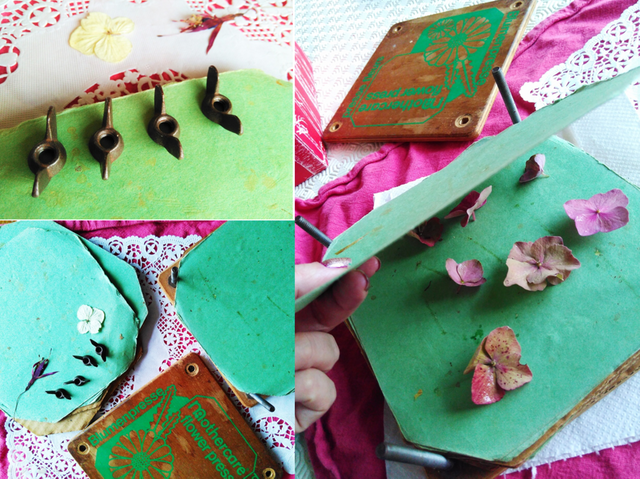
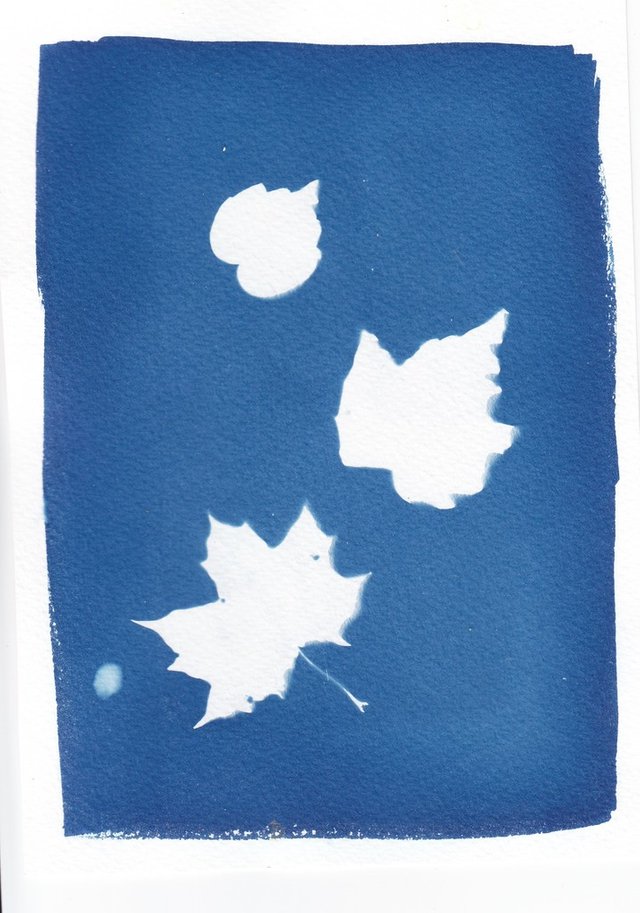
So I always have a box of 'stuff', things that will make nice silhouettes or slightly transparent images on my paper. It's full of flowers, leaves, feathers, little bits of flat jewellery, small pieces of sea glass and sequins. I also have a vintage flower press that is in constant use all year, pressed flowers and leaves give a sharp silhouette. Paper doilies and old lace also give a delicate and feminine feel to a cyanotype.

Setting up the paper to print
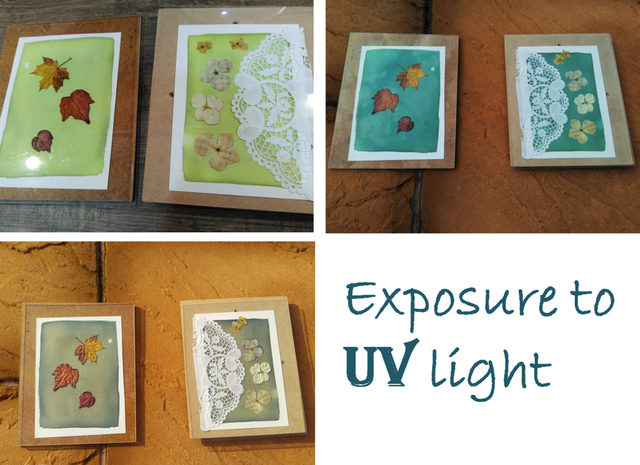
This is where I get to put my lovely collections onto paper, I use old clip picture frames for this. I lay out my paper on the picture frame backing then build up my composition. When I'm happy with the results I will add the glass over the top to keep it in place. They are now ready for the sun!
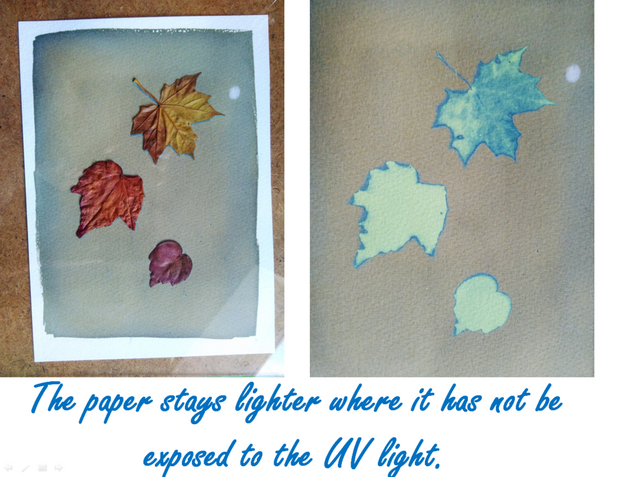
The amount of exposure time will depend on the sun, so a bit of guess work is needed. I have become a bit of an expert at gauging the colour change of the paper to know when the print is ready. It can take minutes or hours depending on the solution and strength of UV exposure. You can see in the pictures below the colour change of the paper over time
Developing the print
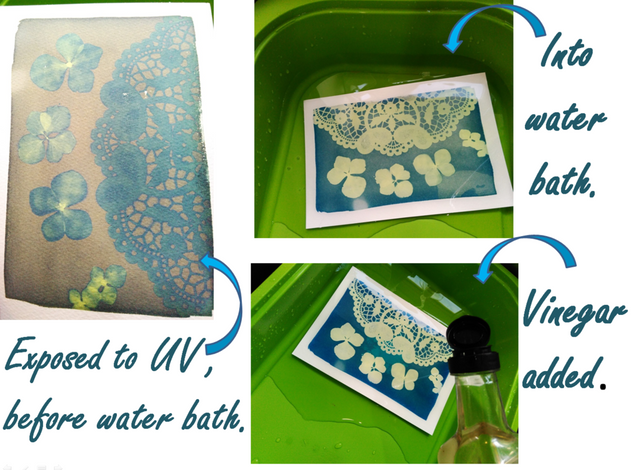
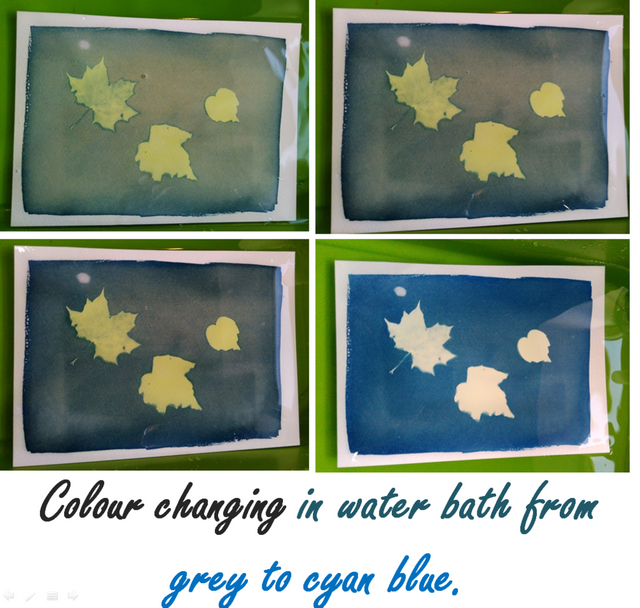
I wash my prints in a water bath and add a splash of vinegar to bring out the cyan. You can see how the colour of the print changes gradually in the water bath.
Prints hung up to dry

If you fancy winning one of these prints I will be giving one away tonight as part of my SteemFest Art giveway!
Your greatest piece x
I'm really proud of this post.
it is so great, such an interesting and complex work @opheliafu
Thank you, I am glad you found it interesting.
Wow this looks really complicated,yet beautiful!
It can be challenging at times, it's taken me 4 years of trial and error to find the right paper type.
Wow I'm going to try this out - thanks for sharing!
Try the sun paper or go to a class first as the chemicals can be hazardous.
Got it, thanks :-)
Ahh...I see what you did there!!! lol..Beautiful as ever @opheliafu:)
Thank you, glad you enjoyed the post!