Mermaid Mosaic Part 2
Henry Wordsworth Longfellow:
Excerpts from The Secret of the Sea
Ah! what pleasant visions haunt me
As I gaze upon the sea!
All the old romantic legends,
All my dreams, come back to me.
Till my soul is full of longing
For the secret of the sea,
And the heart of the great ocean
Sends a thrilling pulse through me.

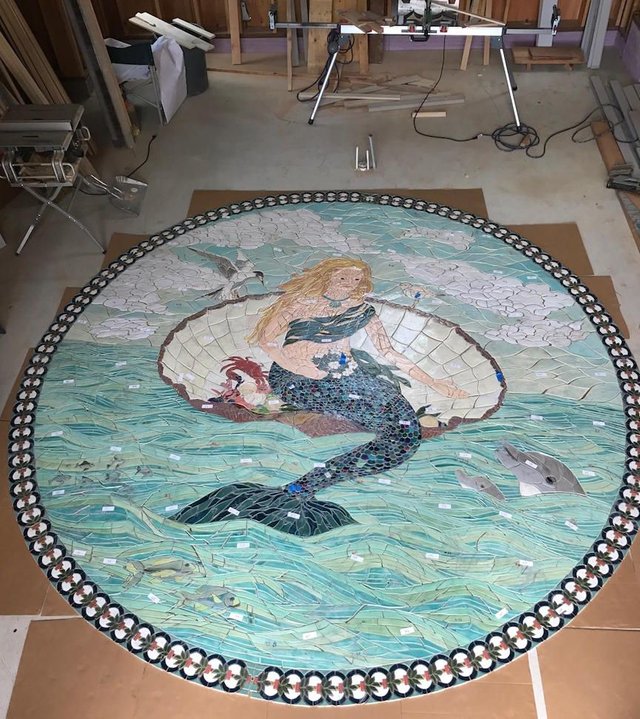
mosaic on-site, awaiting installation with each numbered section in place
MERMAID MOSAIC PROCESS PART 2
Once the client and designer approved my drawn-up concept, palette and samples, they decided on a 13-1/2” diameter piece. This is quite large as you can see above.
Did you miss Part 1? Even just a quick scan of the images will give you a better understanding of what you see here.
Rob and I set to work enlarging my 12” x 18” sketch to 1/3 of drawing life-size which took about 25 hours over a period of 2 weeks. You may wonder why take the extra step of drawing at 1/3 rather than full size? The reason is that we didn't have a large enough wall space to draw the whole 13' diameter piece!(
One of the most defining steps we take when enlarging the scale from a desktop sketch to life-size or in this case, 1/3 of life-size) is to create the tile shapes. I always want my tile shapes themselves to be beautiful as well as to express the larger form. For instance the mermaid’s face and body are both given dimension through the tile shapes.
You can see this idea below with the mermaid’s hand and the shell around it.
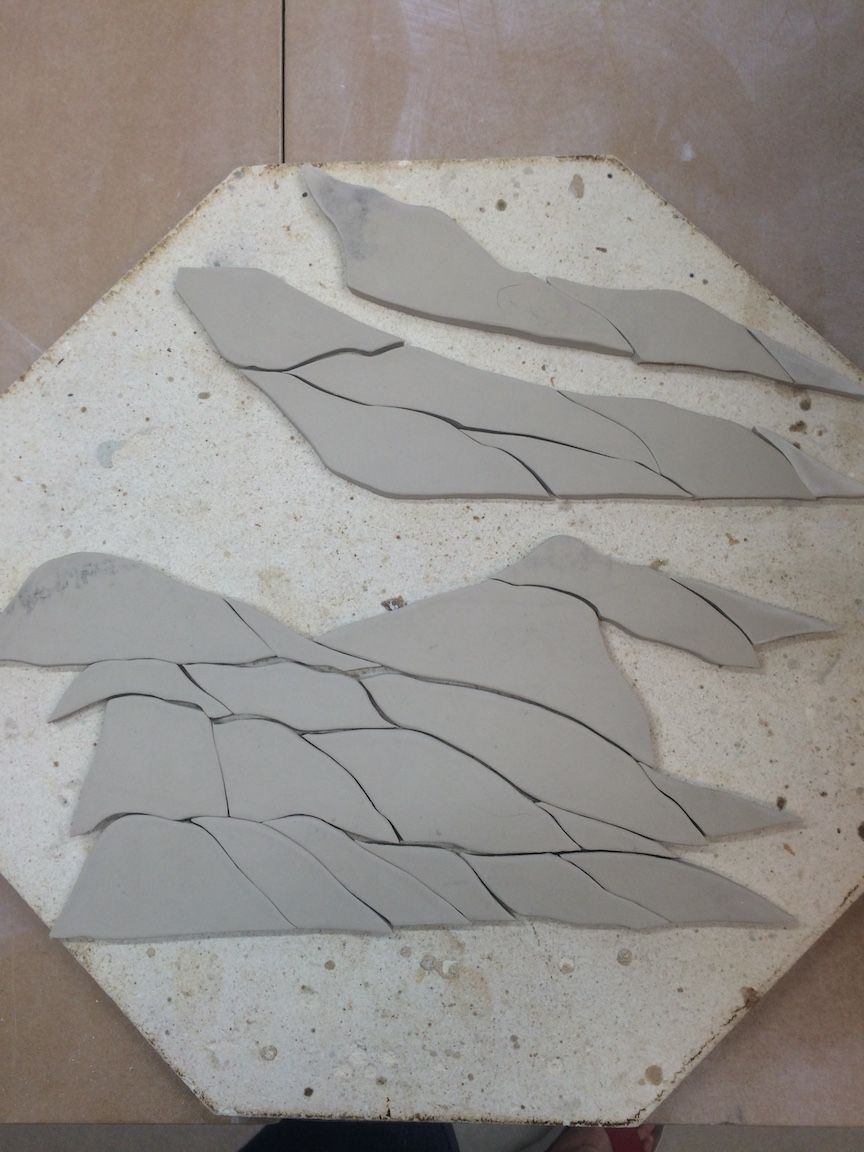
I’ve always loved the cutting stage of a mosaic and the gorgeous pieces created from our drawing-cutting from the slabs of wet clay. We cut when the clay slab has sat overnight pressed between 2 pieces of drywall and stiffens to “leather hard”. This state offers the perfect amount of give and stiffness in the clay.
cuts of the mermaid's hair and sea-life within the "half-shell"
To go from drawing to clay, we take the 1/3 drawing and divide it up into small sections. Each section is then enlarged to full size at our local copy shop, drawn onto a wet slab of clay and cut with a scalpel.
below looks like a collage but is all of those enlarged sections pieced back together. We used this for assembling the whole piece at the end
Because this is an exterior installation, we used a porcelain clay body that I had previously tested and found to be frostproof and water-proof. Porcelain can have a clean kind of beauty but is also the most ultra-fussy and high-maintenance material. This particular porcelain presented challenges of illogical shrinkage patterns and sometimes in the firing would warp and contort in ways that made no sense and lead to many pieces having to be cut again. As the project went on, I vowed that this would be the last time I used it!
One of my favorite part of this mosaic is the border. It was the first clear idea I had for the piece and is inspired by seaweed.
More process for this mermaid mosaic to come. I post every 4 days or and I hope you will check my blog again later in the week for part 3!
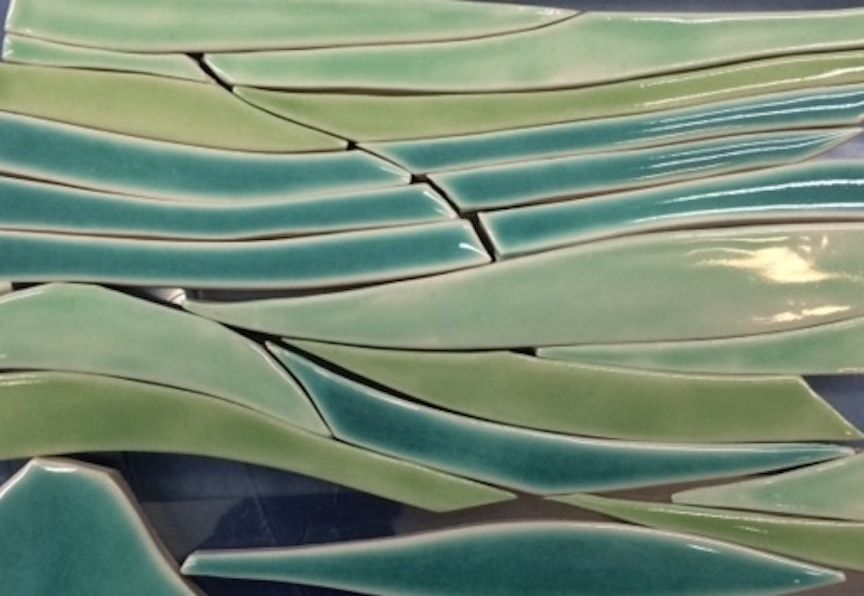
testing how I would use tile shapes and colors to create motion and dimension in the water


Fascinating process. I especially like the way you get dimension and perspective out of the mosaic. Just in its raw form I can see the depth in the photo of the hand. Very nice work.
thank you, really appreciate your insightful and kind compliment!
Very nice work. Having worked designing amazing pools and outdoor spaces I can appreciate the amount of time, detail, and creativity that goes into working with tile, stone, and concrete. Creating porcelain from scratch can't be fun...
thanks @maconic, so true!
Amazing work. Thank you for sharing your process. Upvoted and followed!
You guys are doing amazing work!
Love the inside look at how you do your thing. I knew nothing about this beautiful art. I've learned so much about so many different things since joining steemit. I'm glad I can learn mosaics along with a beautiful poem as well. Thanks for sharing and hope you are having a great day! -Dan
Thanks Dan, this is so great to hear. And I too have learned so much on steemit! it's such a great resource! hope you're having a great day as well.
That is awsome work. I imagine it is very time consuming but i would like to try this technique some day.
Thank you @mitchhunter, it's very satisfying even if time-consuming and I hope you do try it! I'm happy to offer support if you do give it a try.
Thank you. Good to know. I just need to clear my commission list and find bigger space
wow, so beautiful work!!! Really big and well done! Thanks for share ^_^
thank you so much @silviabeneforti!
Woww! Had been so busy in the past week that didn't get time to check out many of the posts from my favorite Steemians which is why you didn't see me on my blog. Got some time on my hands now and instantly landed at your blog and came here to see this beauty. It is gorgeous! and I love the border the most. Looks like something I would love to have screen printed on my shirt :)
thank you @sharoonyasir :-))
Art amazing my friend. Good post @natureofbeing
thank you @rizasukma, I appreciate it!
You are welcome my friend :-)
pretty awesome!
thank you @hikinghut!