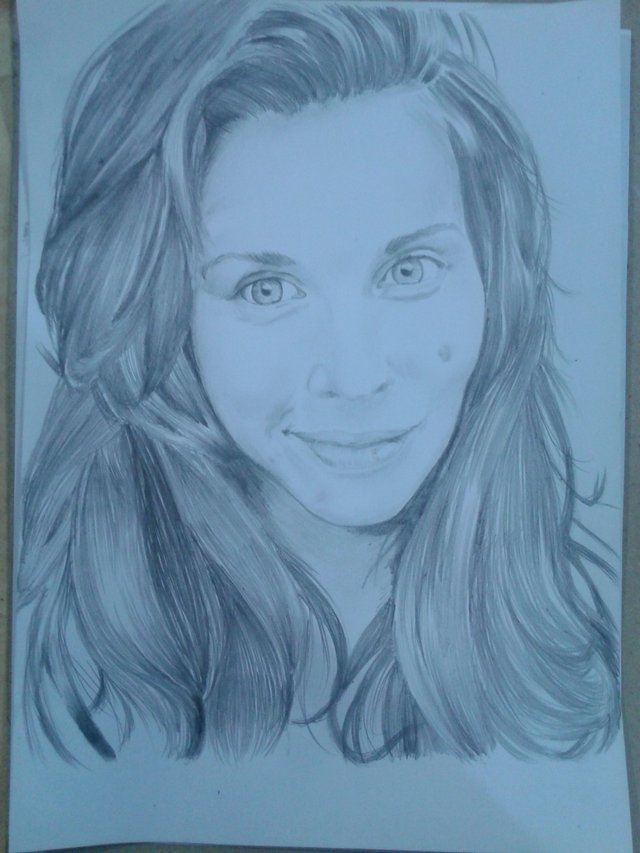
I explain to you step by step how I did the portrait of this woman

Hello friends, this time I will explain step by step how I do my drawings in general. I hope you like it and that the post is helpful.
Hola amigos, en esta oportunidad les voy a explicar paso a paso como realizo la mayoria de mis dibujos. Espero que les guste y les sirva de ayuda!
Step by Step
Paso a Paso
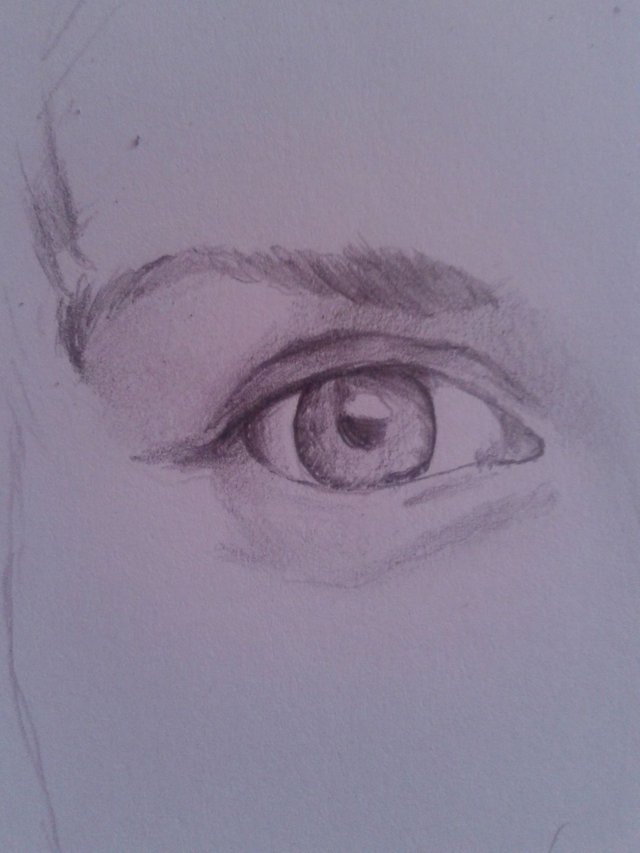
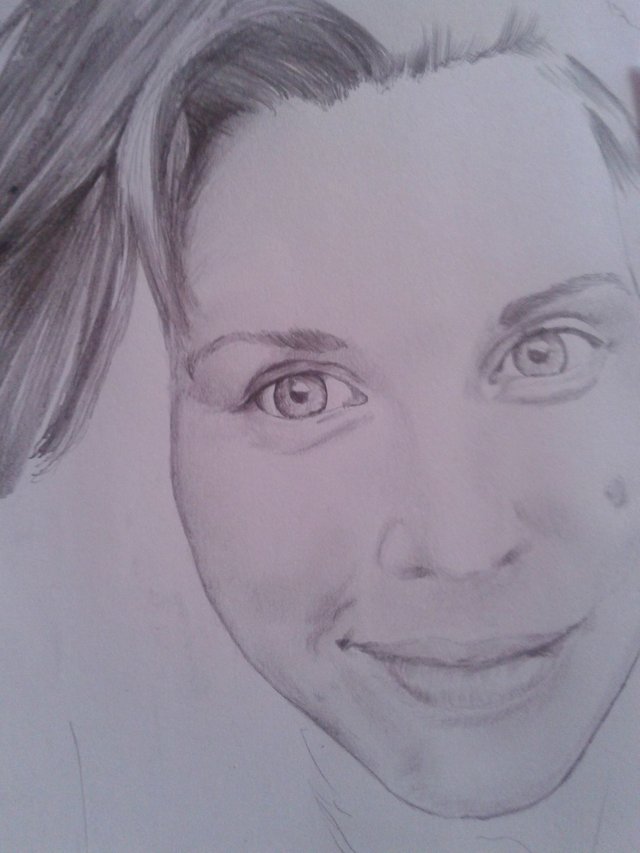
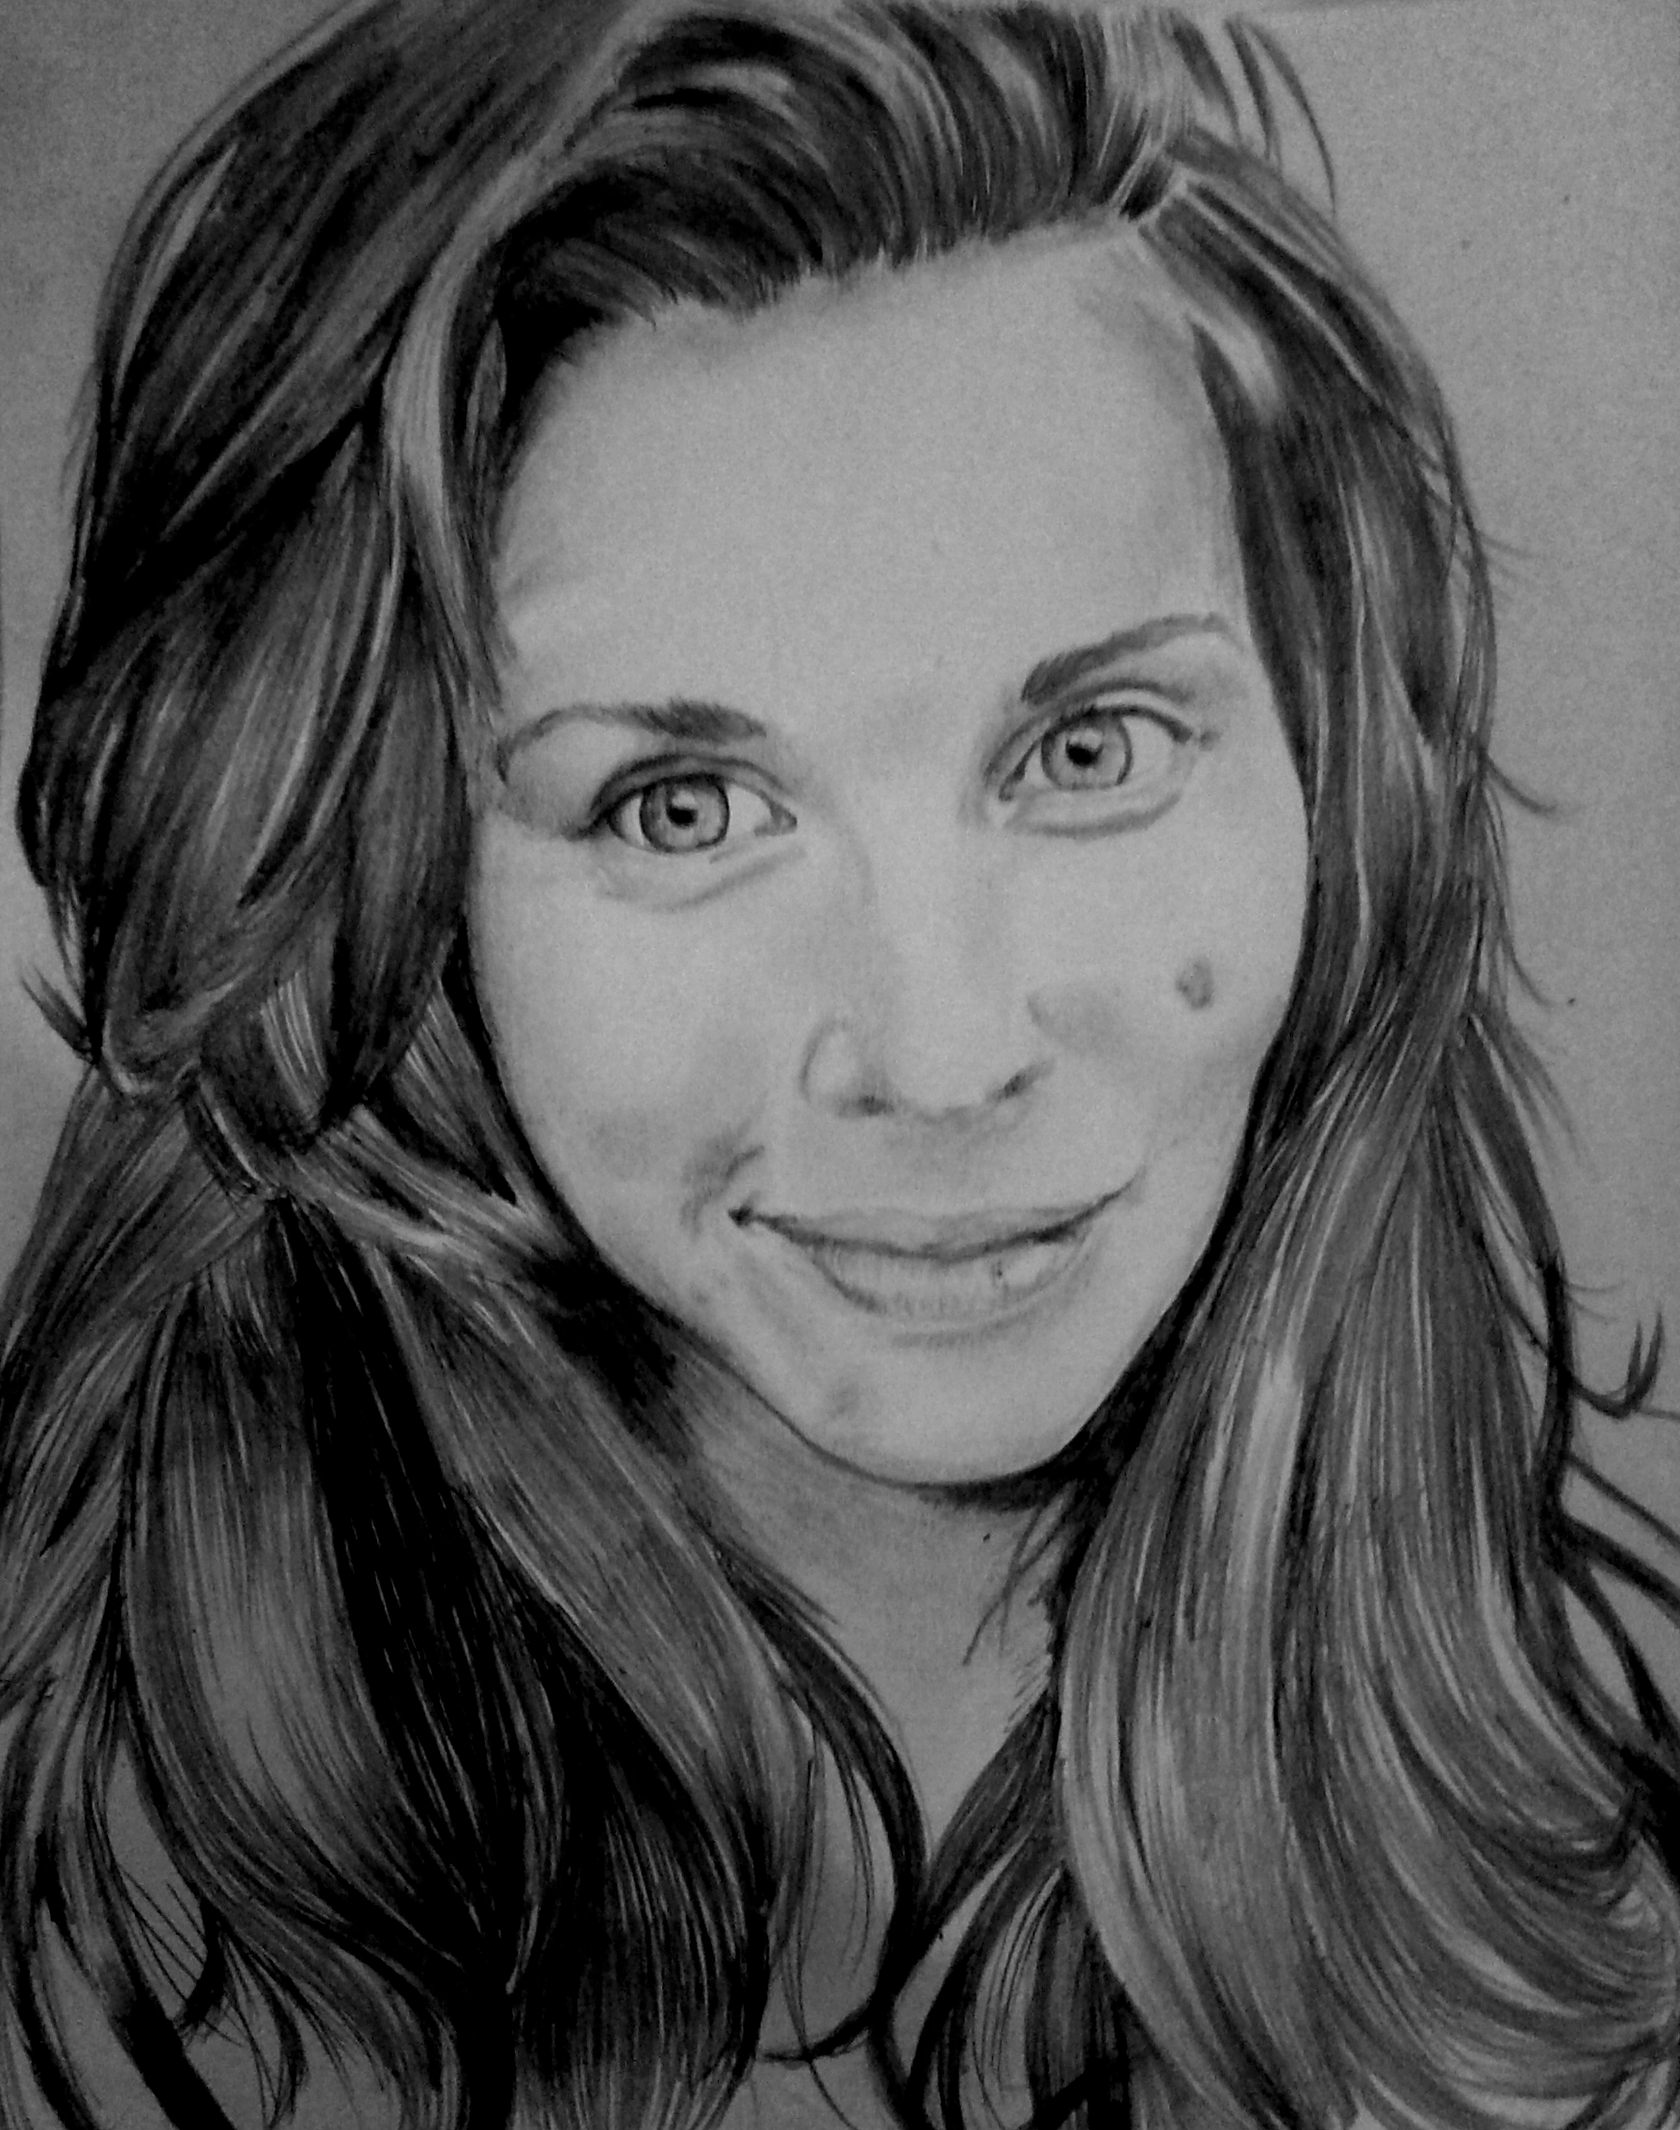
It is generally recommended to start from the left side (if you are right) to avoid running with your hand or arm, the graphite of the pencil, staining the blade.
I always start with the left eye, why the eye? because I think it's what's gonna bring my drawing to life. If I start with an eye I don't like, it's a good idea to start over. The eyes say it all.
Por lo general se recomienda empezar desde el lado izquierdo (Si sos derecho) para no ir corriendo con la mano o el brazo, el grafito del lapiz, manchando así la hoja.
Yo siempre comienzo por el ojo izquierdo, ¿por que el ojo? porque considero que es lo que le va a dar vida a mi dibujo. Si comienzo con un ojo que no me agrada, es recomendable volver a empezar. Los ojos lo dicen todo.
The reality is that I don't use a previous sketch. I just try to mark the fundamentals first and start shaping it with the umbrellas and lights.
If the left eye goes well, I know I have a 90% chance the rest of it will go well.
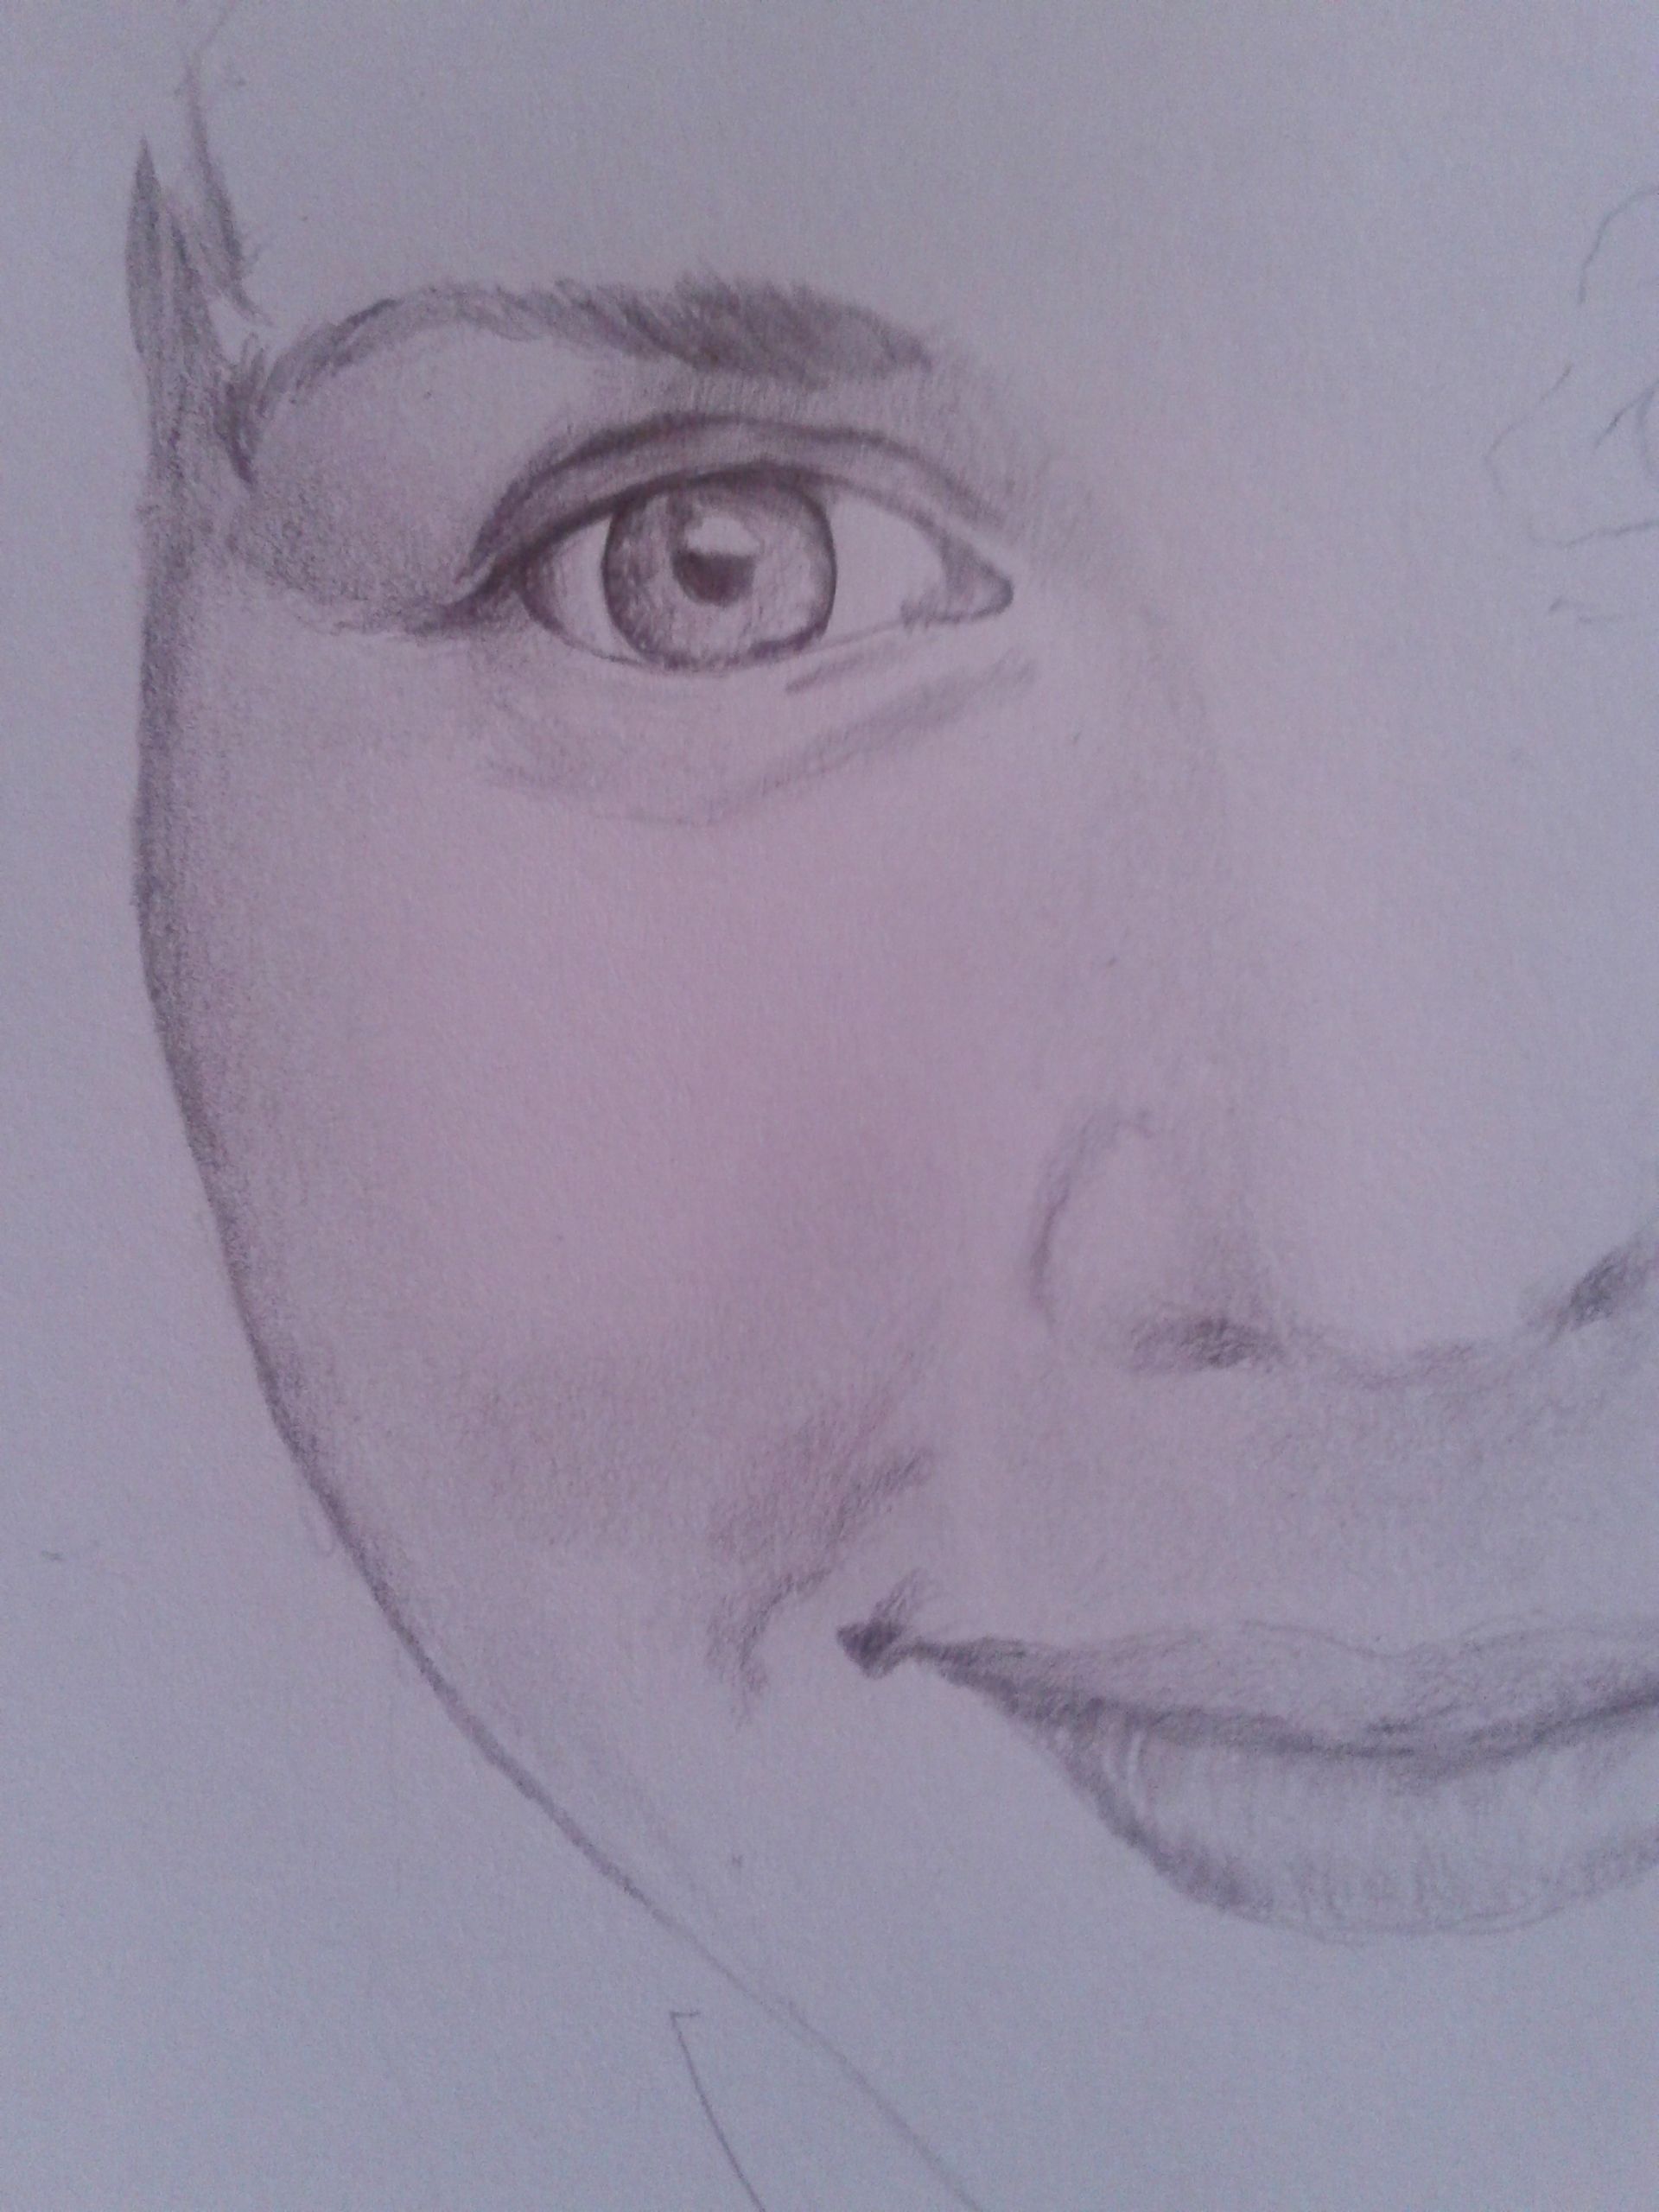
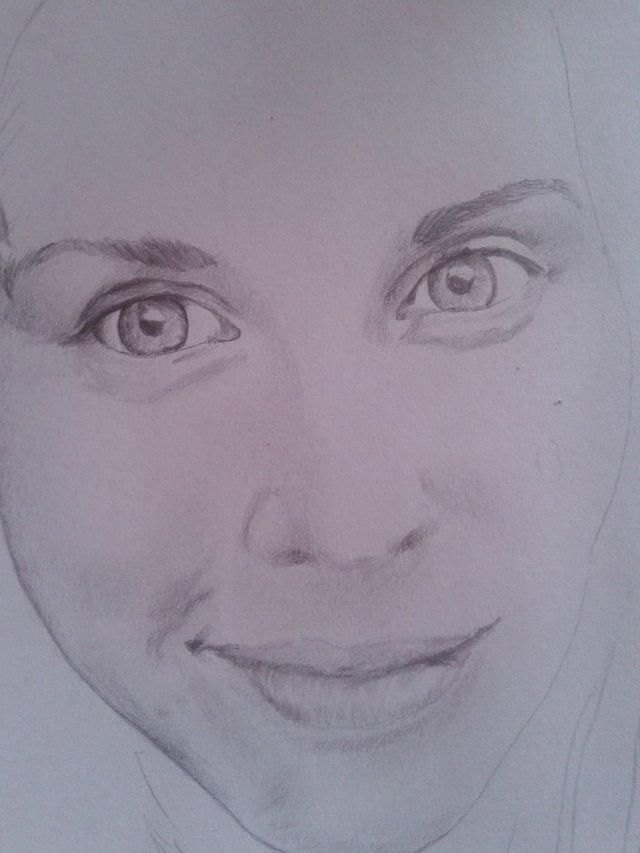
It is very important to maintain the proportions, I do not use guides, simply observe well before continuing with another part. If I am going to draw the right eye, for example, I first see the separation between each of them and the width of the nose. Or I just draw the nose and then continue with the other eye.
La realidad es que no uso un boceto previo. Solo trato de marcar primero los razgos fundamentales y empiezo a darle formas con las sombrs y luces.
Si el ojo izquierdo sale bien, se que tengo un 90% de probabilidades de que el resto salga bien.
Es muy importante mantener las proporciones, yo no uso guías, simplemento observo bien antes de continuar con otra parte. Si voy a dibujar el ojo derecho, por ejemplo, primero veo la separación entre cada uno de ellos y el ancho de la nariz. O simplemente dibujo la nariz y luego continuo con el otro ojo.
As far as the nose and mouth are concerned, I try not to press the pencil too hard, especially on the nose, I just frame the shadows and that is what gives it shape. S
If we push the pencil too hard, the nose will be forced and unrealistic. Like something that's forcibly placed and just has to look natural.
In the same way the mouth. It is only necessary to notice the change of shade between the color of the skin and that of the mouth, without forcing it. Make it as natural as possible.
En lo que respecta a la nariz y la boca, trato de no presionar muy fuerte el lapiz, sobre todo en la nariz, solo marco las sombras y eso es lo que le va dando forma. S
Si nosotros presionamos mucho el lapiz, la nariz se verá forzada y poco realista. Como algo que está colocado a la fuerza y solo tiene que parecer natural.
Del mismo modo la boca. Solo se tiene que notar el cambio de matiz entre el color de la piel y el de la boca, sin forzarlo. Que sea lo mas natural posible.
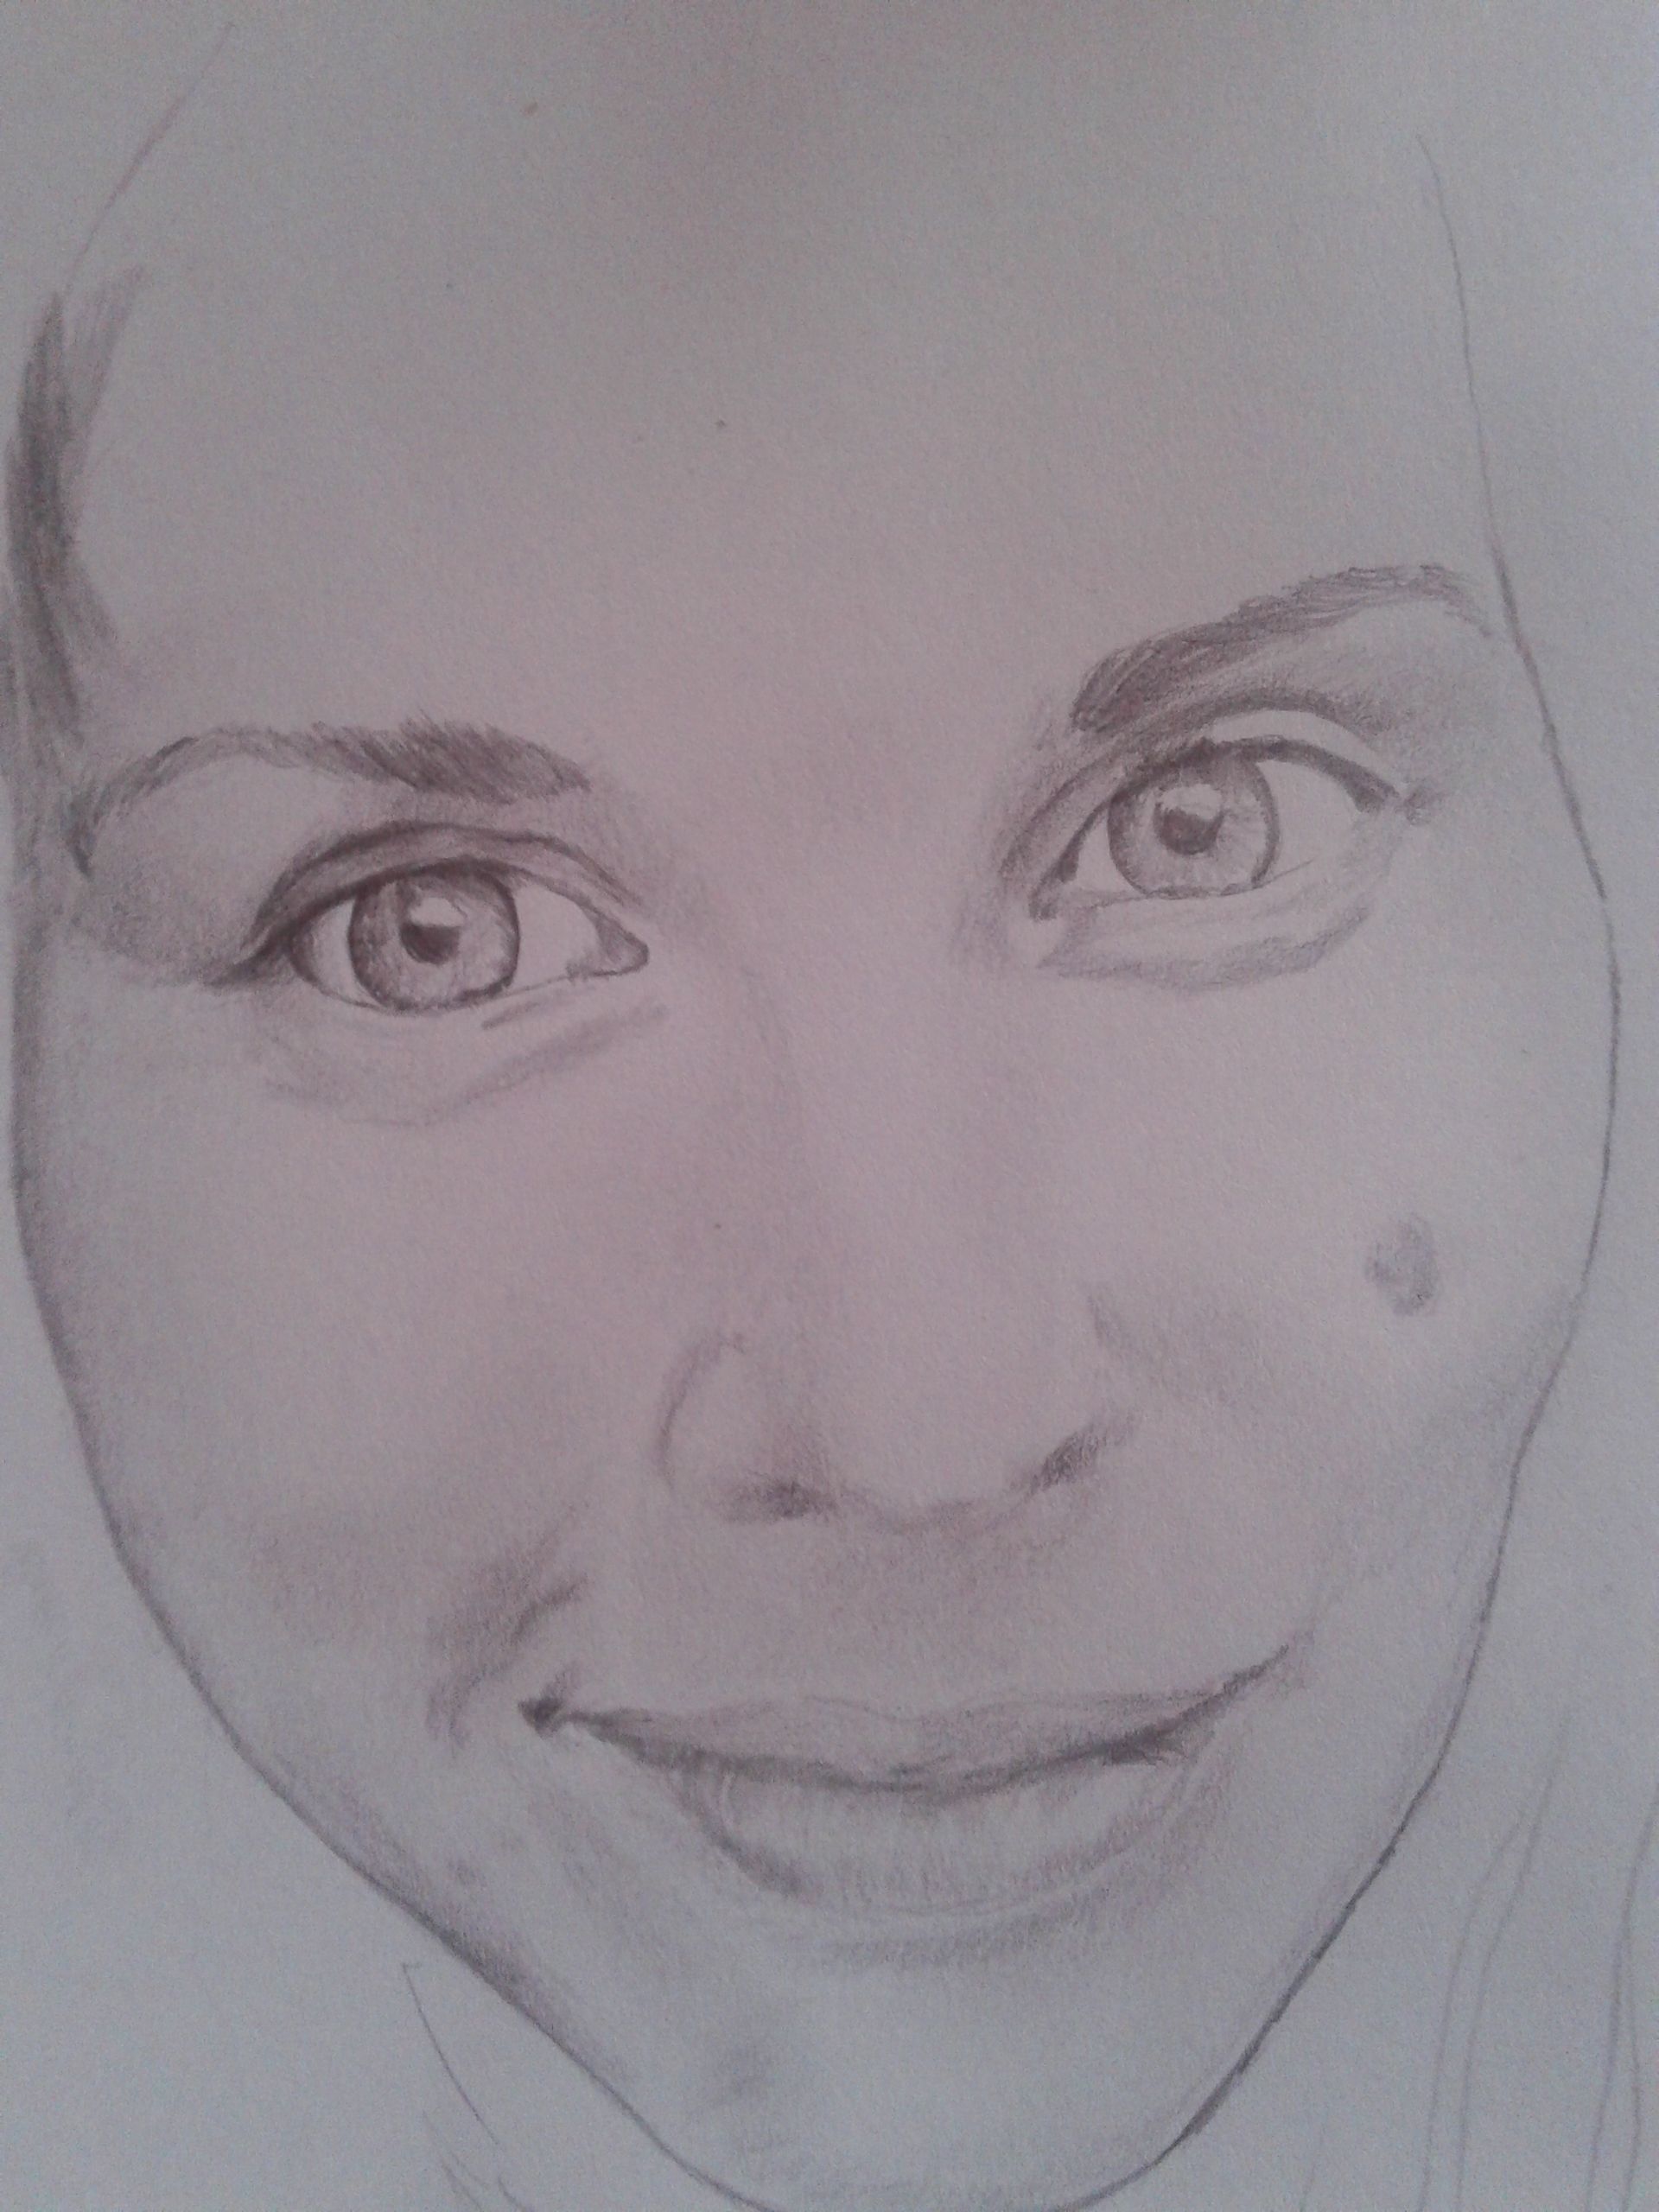
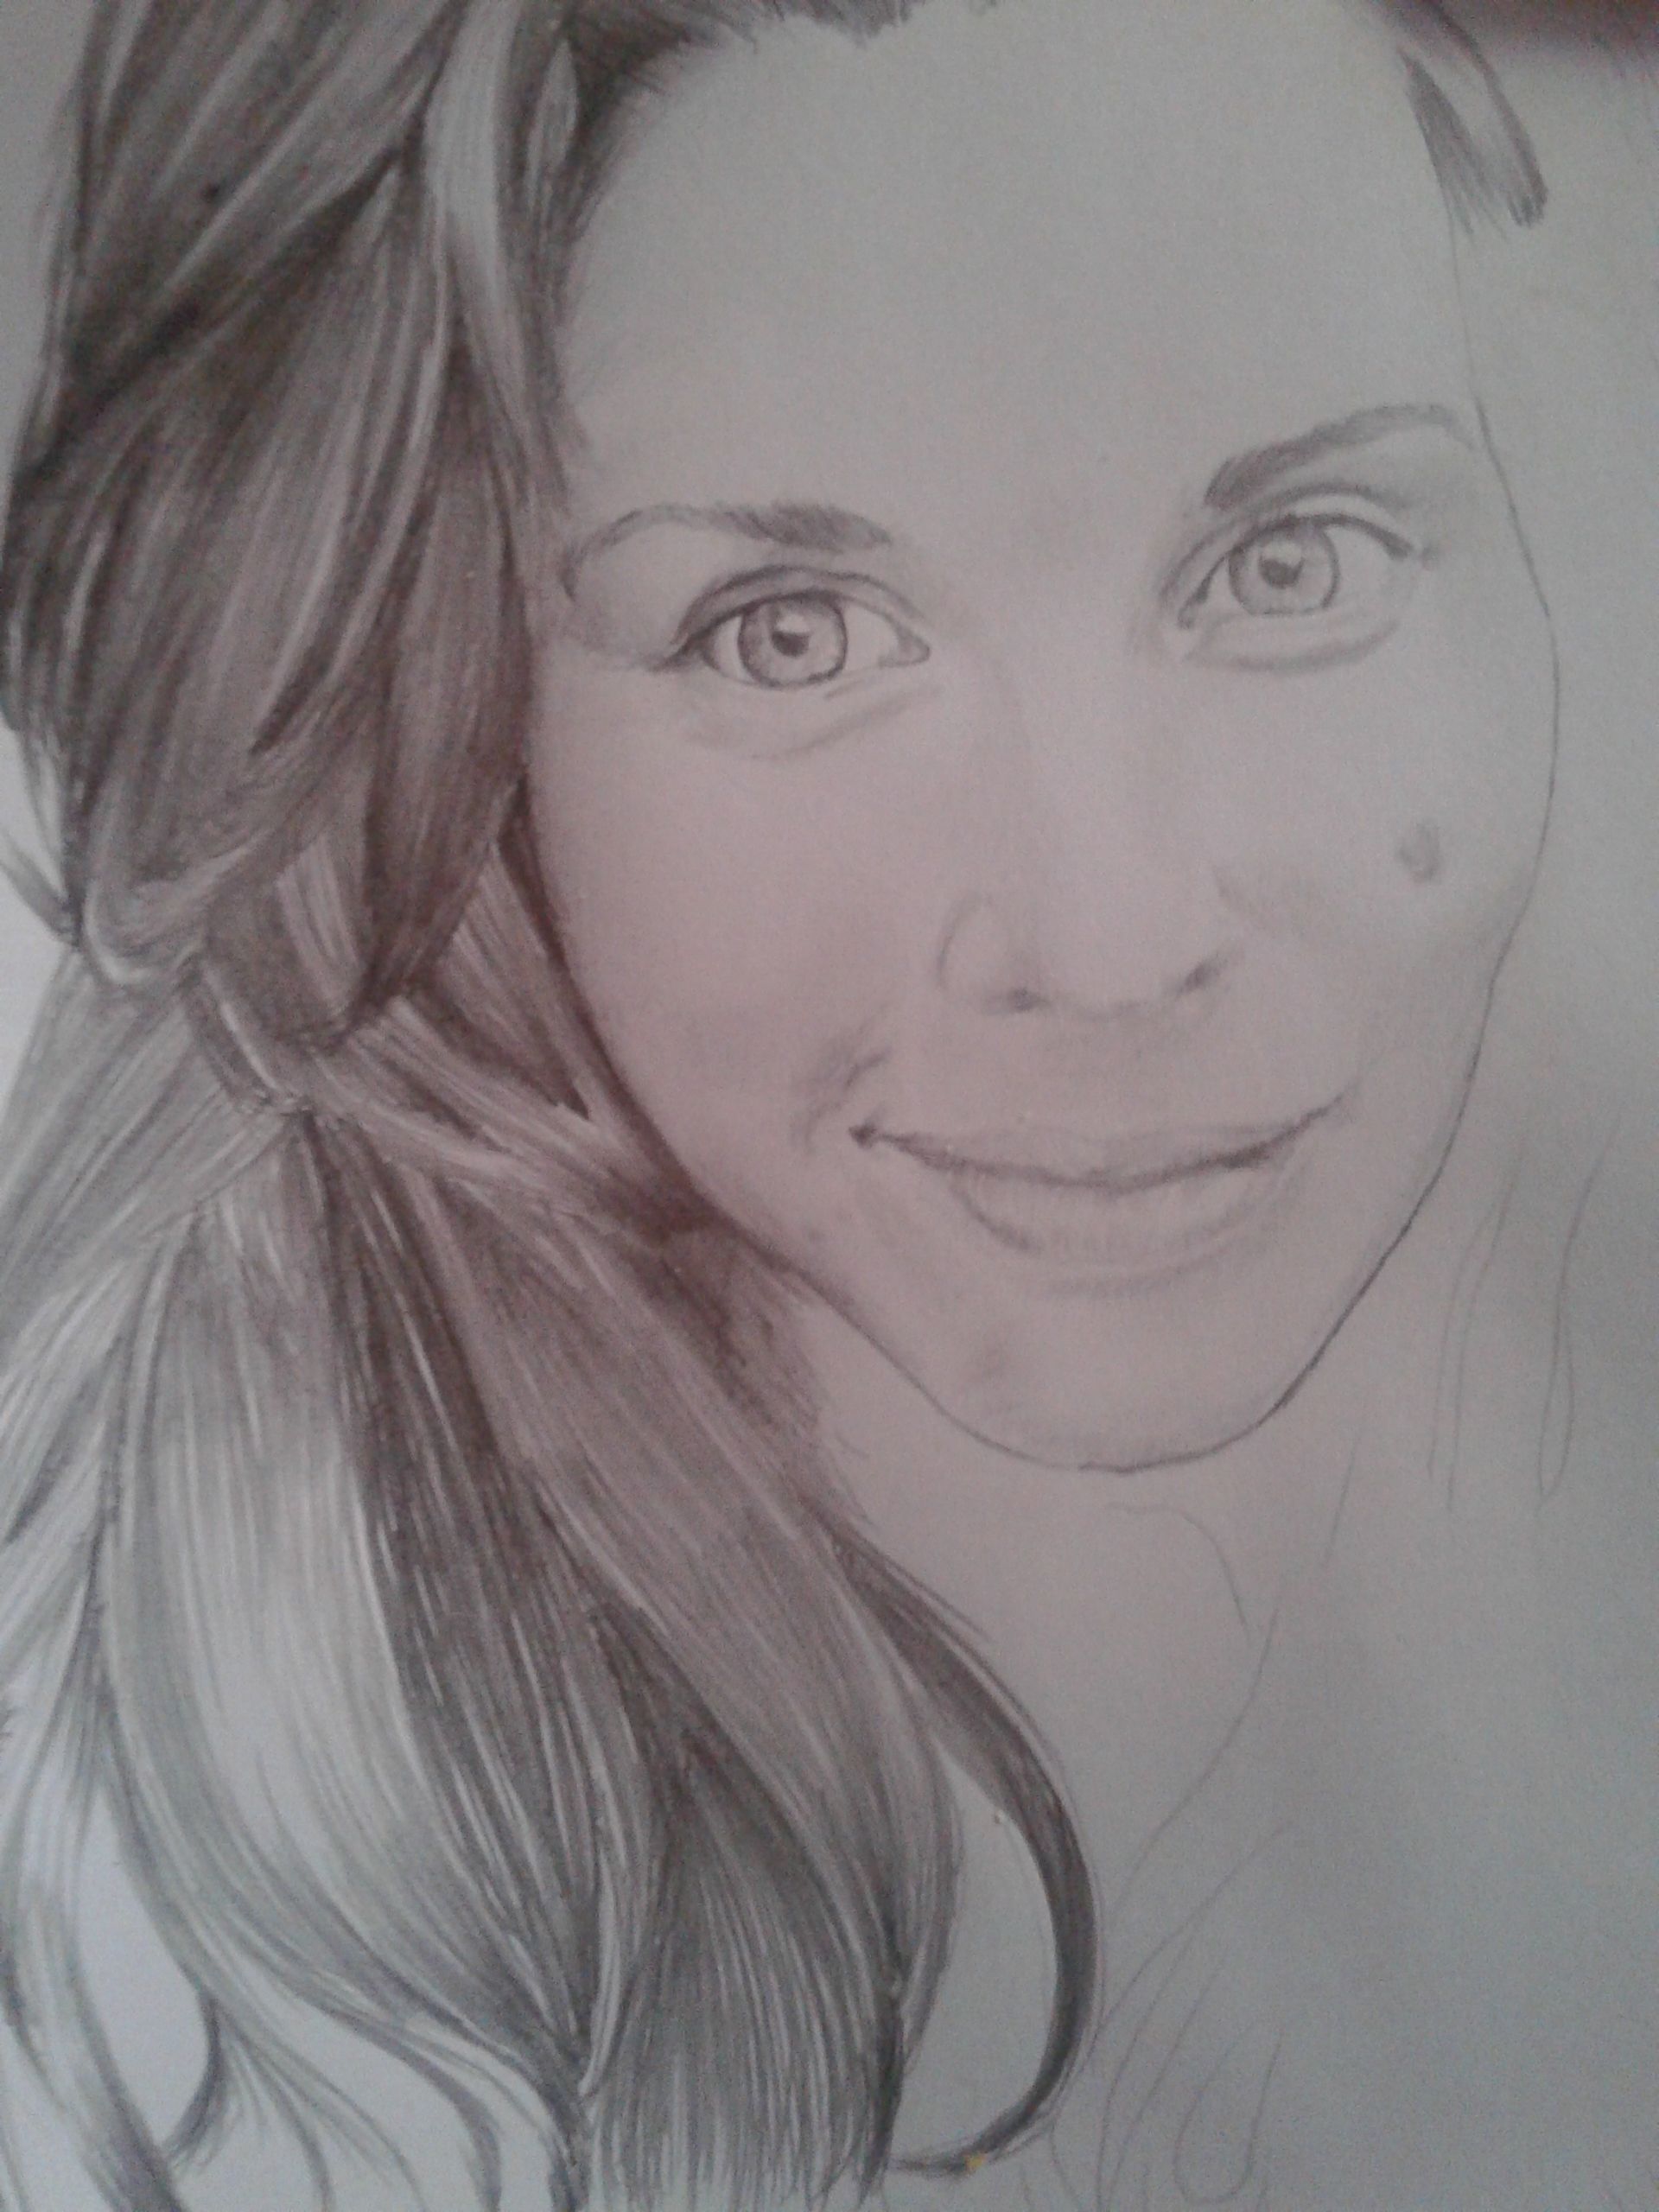
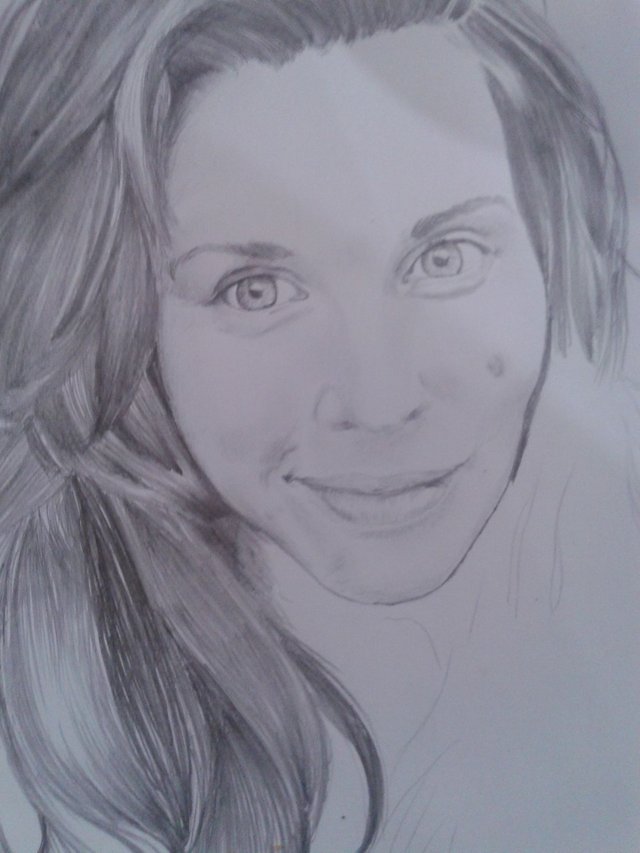
The hair will give more life to our drawing. Logically, it's impossible to do hair by hair.
In my case I try to make several repetitive strokes as far as there is a light. I don't cut the stroke there, but let each one flow, some longer, some shorter, that gives the feeling of a natural hair movement.
El cabello le va a dar mas vida a nuestro dibujo. Logicamente, es imposible hacer pelo por pelo.
En mi caso trato de hacer varios trazos repetidos hasta donde haya una luz. Ahi no corto el trazo de golpe, mas bien dejo que cada uno fluya, algunos mas largos, otros mas cortos, eso da la sensación de un movimiento natural del cabello.
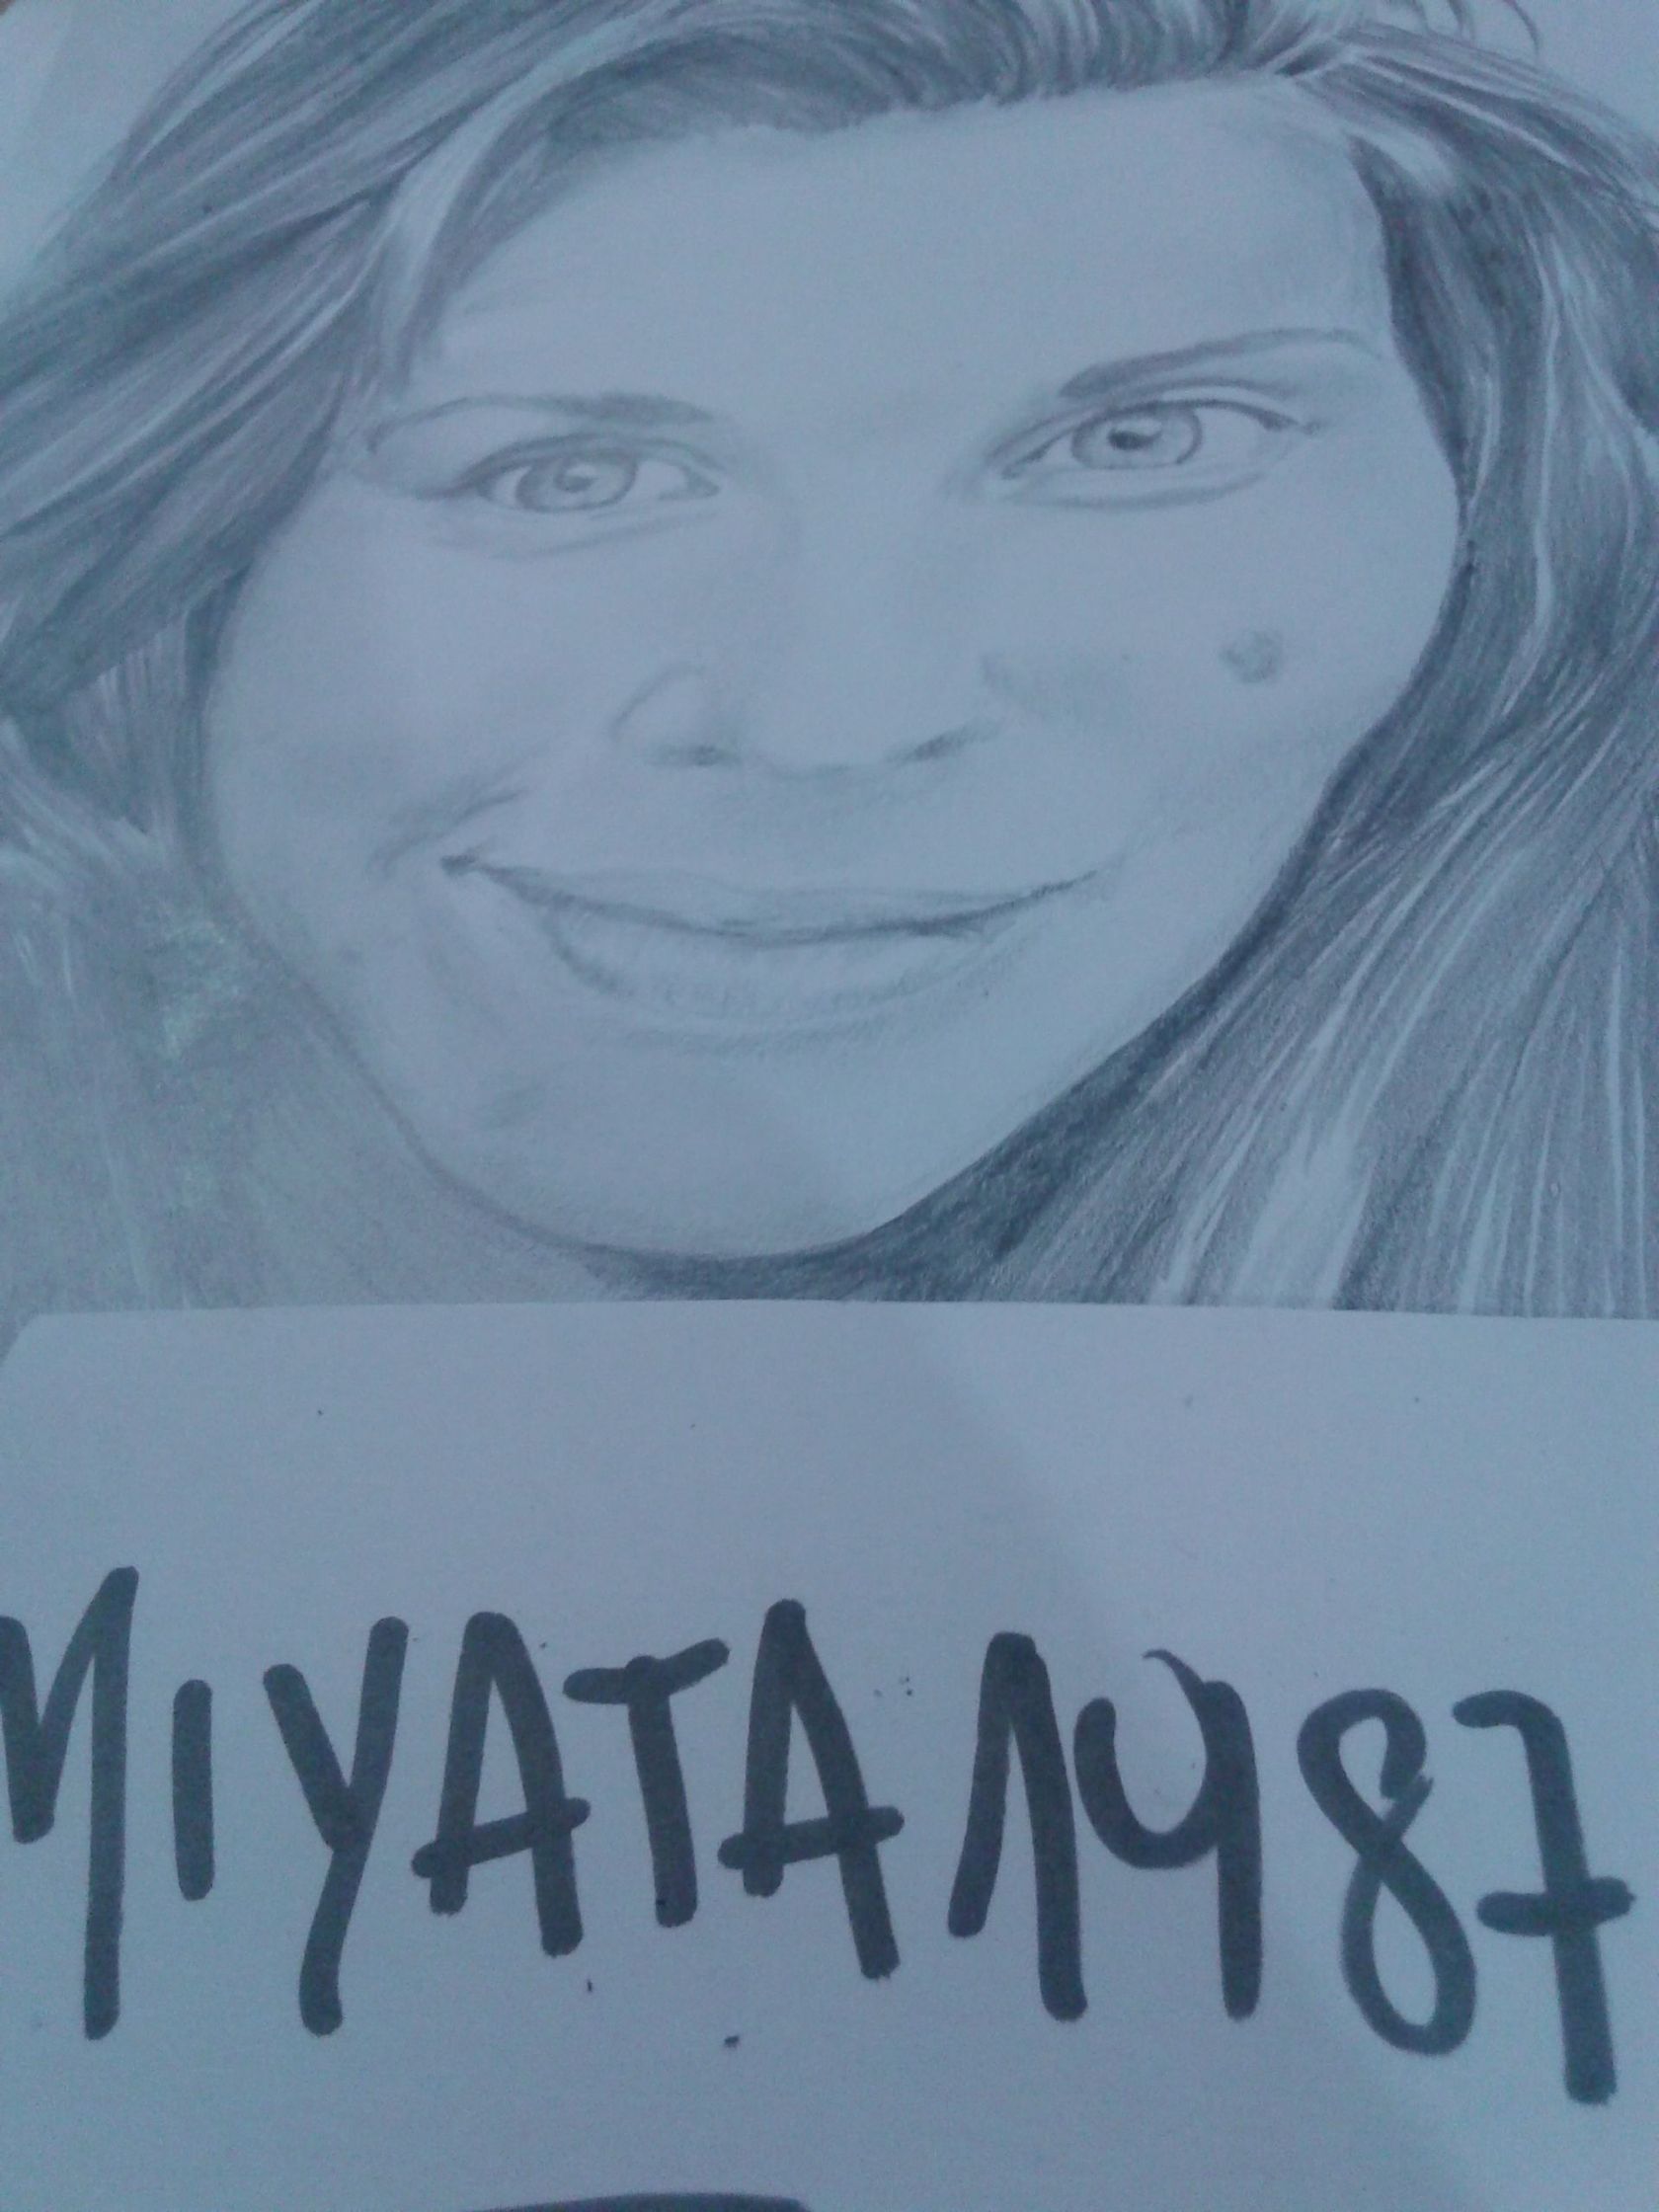
Images certified with my nickname
Imagenes certificadas con mi nick
Enhancing shadows
Realzar las sombras
In any editing program, I particularly use Photoshop, we can enhance the shadows. Increasing the image exposure, intensity, levels.
What are we doing this for? For subsequent colouring.
En cualquier programa de edición, yo particularmente uso Photoshop, podemos realzar las sombras. Aumentando la exposición de la imagen, la intensidad, los niveles.
Para que hacemos esto? Para el coloreado posterior.

The idea when coloring is to do it with strong colors. Suppose our lips are pink, well, in that case we will paint that part with a very intense red. Then we will reduce the opacity of the color. Therefore, the background of the drawing, the lines, the lines, the strokes and the shadow determined by the pencil begin to be seen.
To give more life to the eyes we use the same method. Only that the light, we leave it with a 100% opacity.
La idea al colorear es hacerlo con colores fuertes. Supongamos que nuestros labios son color rosa, bueno, en ese caso vamos a pintar esa parte con un rojo muy intenso. Luego vamos a reducir la opacidad del color. Por consiguiente, empieza a verse el fondo del dibujo, las lineas, los trazos y la sombra determinada por el lapiz.
Para darle mas vida a los ojos utilizamos el mismo metodo. Solo que la luz, la dejamos con una opacidad del 100%
°°°°°°°°°°°°°°°°°°°°°°°°°°°°°°°°°°°°°°°°°°°°°°°°°°°°°°°°°°°°°°°°°°°°°°°°°°°°°°°°°°°°°°°°°°°°°°°°°°°°°°°°°°°°°°°°°°°°°°°°°°°°°°°°°°°°°°°°°°°°°°°°°°°°°°°°°°°
That was it, in short. If you have any questions, leave them in the comment box. If you liked the post please share it with your followers. Thank you!!
Eso fue todo, resumidamente. Si tienen alguna duda dejenla en la caja de comentarios. Si les gusto el post por favor compartanlo con sus seguidores. Gracias!!
Miyata1987
This gem of a post was discovered by the OCD Team!
Reply to this comment if you accept, and are willing to let us share your gem of a post! By accepting this, you have a chance to receive extra rewards and one of your photos in this article may be used in our compilation post!
You can follow @ocd – learn more about the project and see other Gems! We strive for transparency.
Of course, I agree. Fallowed @ocd
Thank you @gmuxx
Very nice work !
Thanks @woodywood143 follow you!
@OriginalWorks
The @OriginalWorks bot has determined this post by @miyata1987 to be original material and upvoted it!
To call @OriginalWorks, simply reply to any post with @originalworks or !originalworks in your message!
To enter this post into the daily RESTEEM contest, upvote this comment! The user with the most upvotes on their @OriginalWorks comment will win!
For more information, Click Here!
Special thanks to @reggaemuffin for being a supporter! Vote him as a witness to help make Steemit a better place!
wow sounds really interesting , share more
thanks!
Fantastic drawing! Always cool to see the process and the simple coloring adds a lot, especially those green eyes.
thanks cizzo, followed
#ArtistOfSteemit
Fantastic job on this very in depth tutorial! Really appreciated the detailed explanation of your techniques as well as, your personal habits! ❤️