🔷EYE DRAWING tutorial - step by step + tweaks ( easy for about 15 minutes)
This is my second tutorial here on Steemit for all of you who are learning to draw portraits, or just want to start.
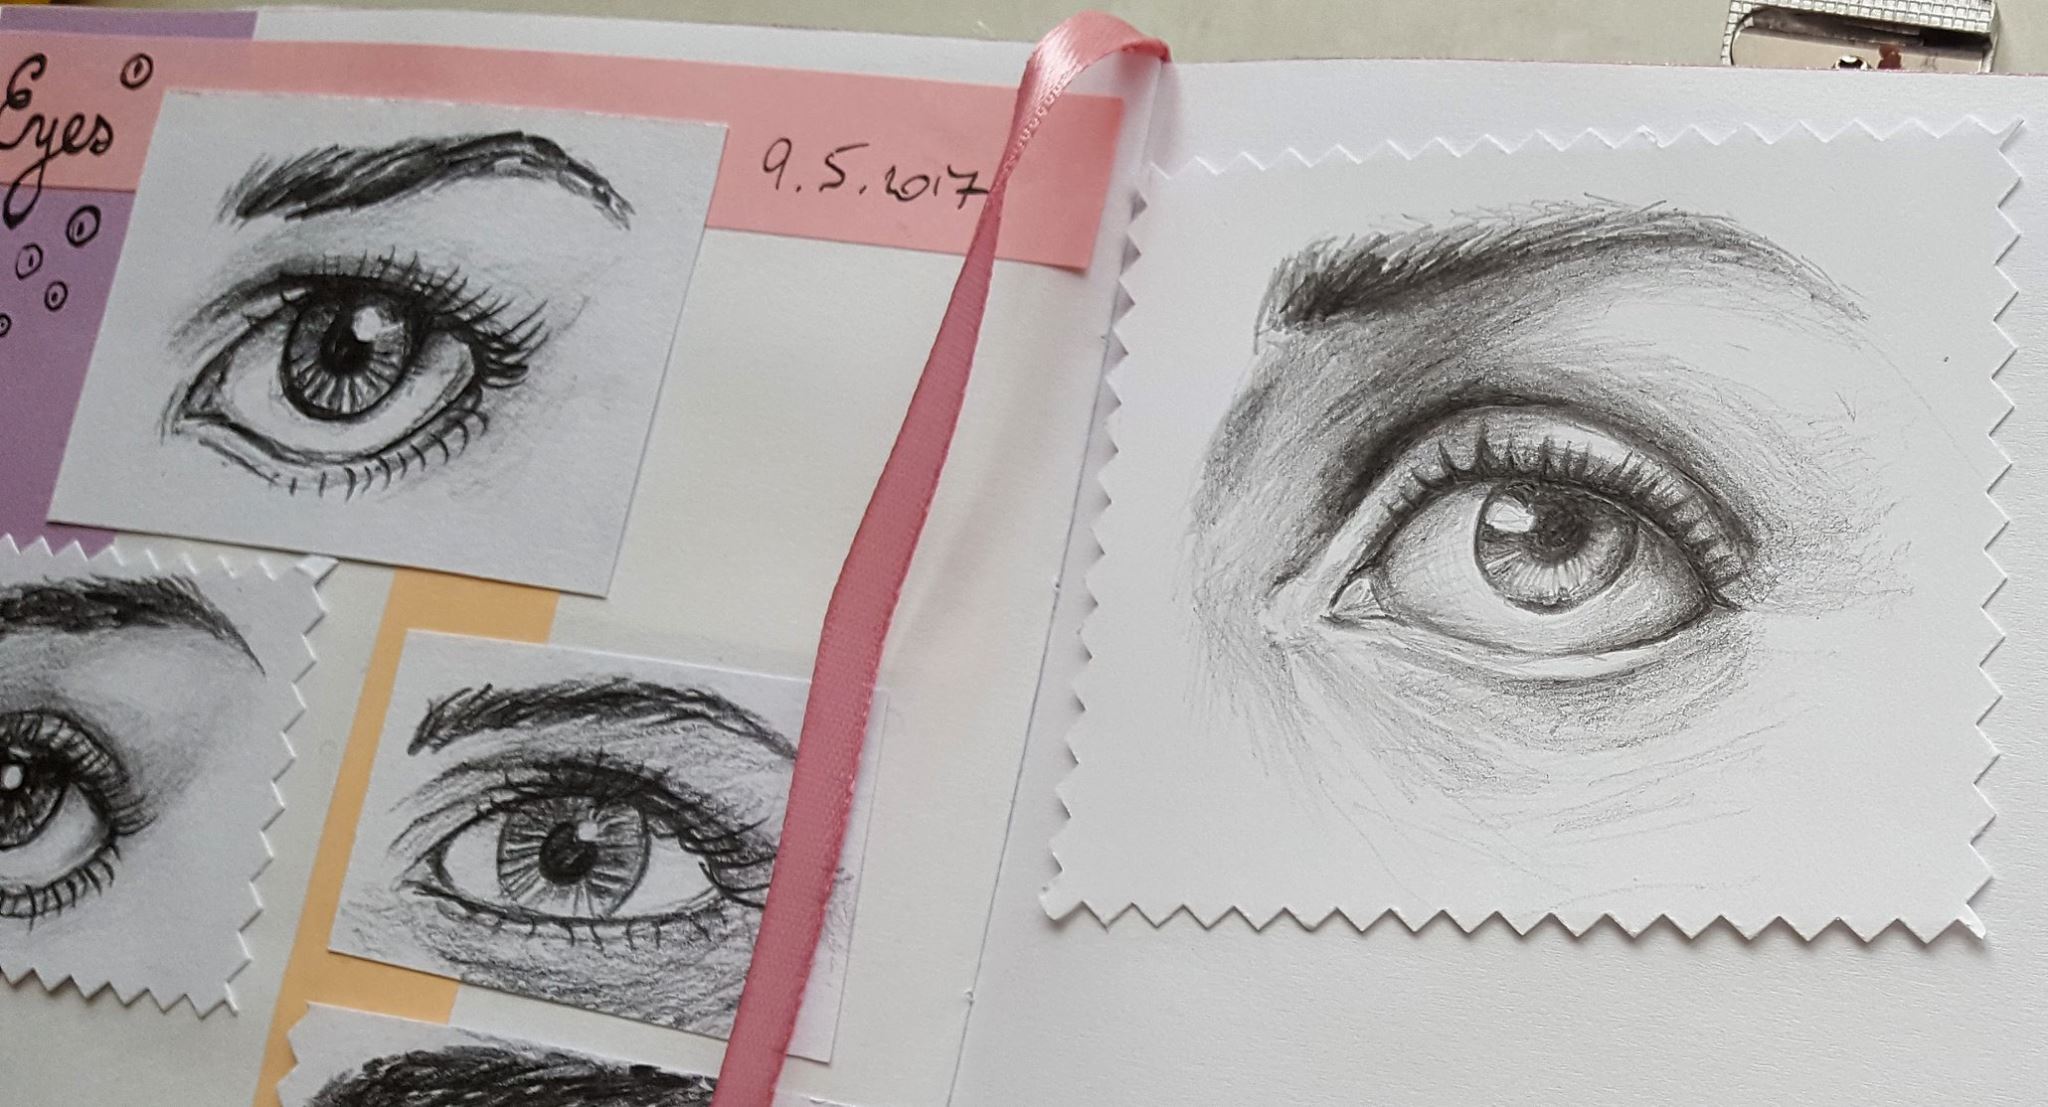
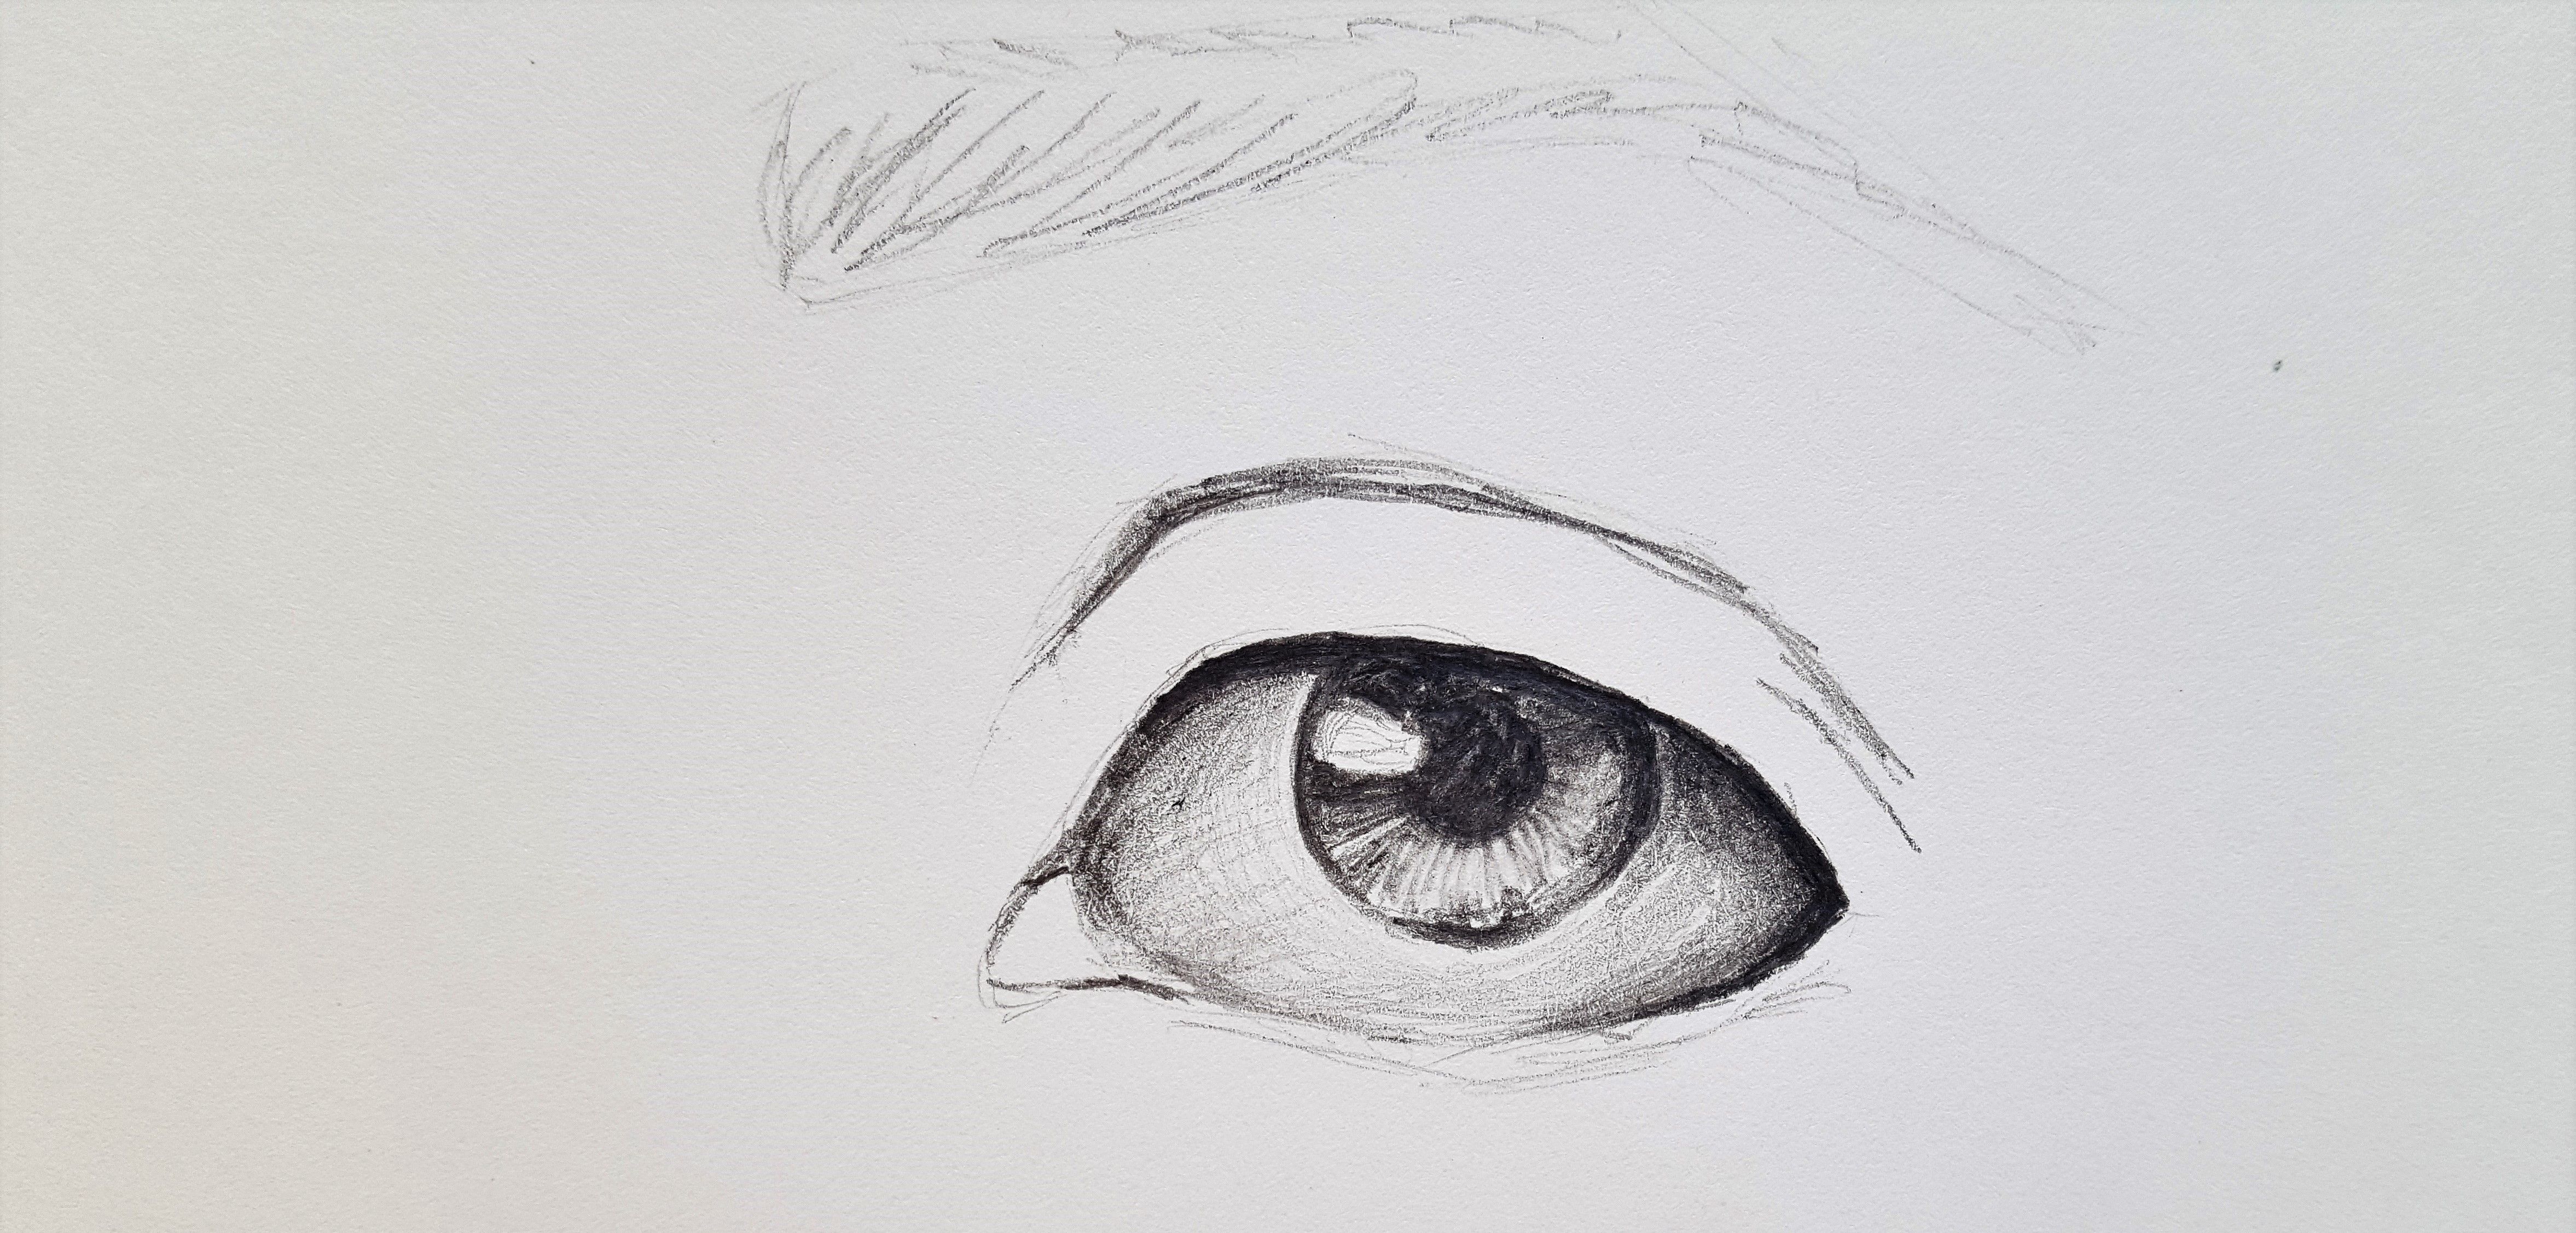
On this picture you can see a few eyes. They are slightly different. The eyes on the left are drawn with soft pencil. The line is rougher and darker. It was 4B pencil.
The eye on the right is smoother and has more details, because it was drawn with HB pencil. This eye we are going to draw now.
So we will need a paper (the important thing is it has to be smooth), a pencil HB, a sharpener and a rubber.
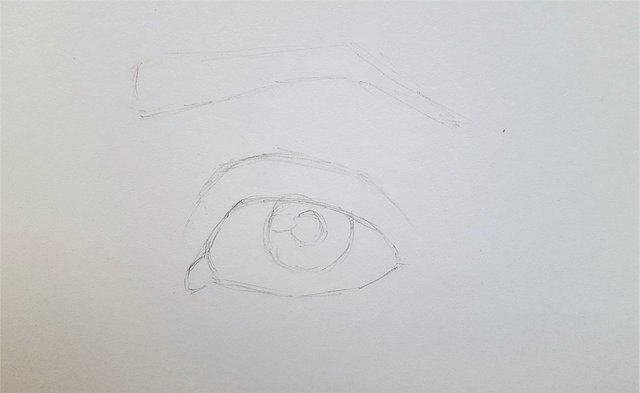
🔷 STEP 1
First we need to draw the basic outlines. It can be realy fast if you have a skill, but no need to hurry. We need it to be right, because the result depends on it. It is good if you don´t draw the whole line in one piece. You can draw smaller and connect them.
This lines should be lighter for easier erase. If you make a mistake, don´t erase it immeditately. The wrong line can help you to fix it, because you can see the mistake. First draw the right line and than erase the wrong one.
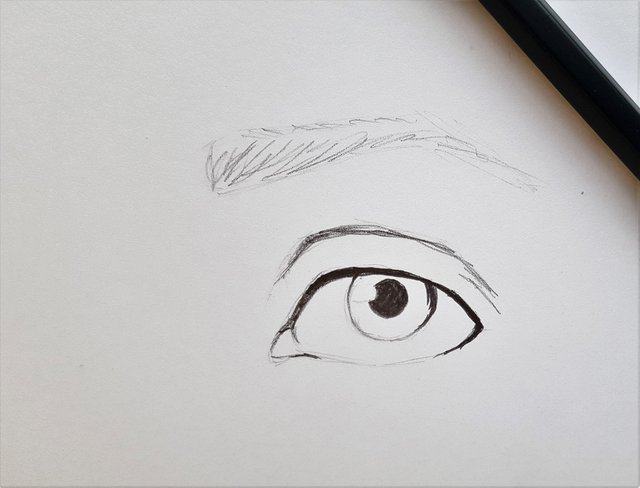
🔷 STEP 2
Now we can daw the darkest parts. Fill the pupil and highlight the line where eyelashes will be. You can see the lower line is not whole dark. Avoid drawing hard solid edges. We need it to look realistic.
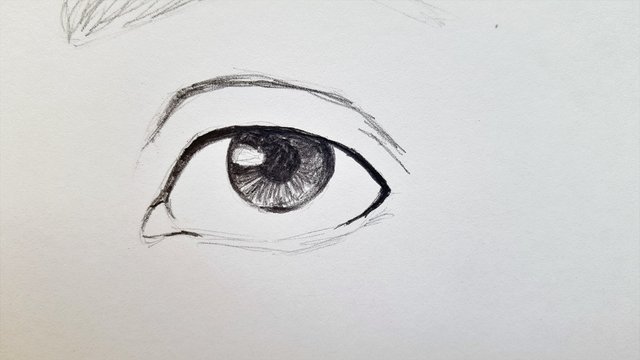
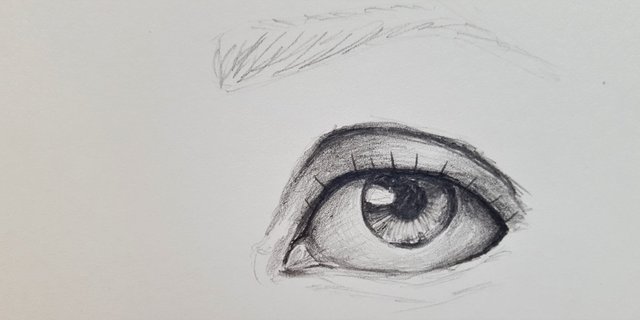
🔷 STEP 3
Fill the iris. Use short lines which leads to the center of the pupil. Make it darker around the lid and lighter down.
🔷 STEP 4
The iris is full of shadows and highlights, so we need to feel it. Erase it slightly below the pupil. You can start to shade the whole eye. Use round and smooth lines. It should be bright around the iris and darker at the edges.
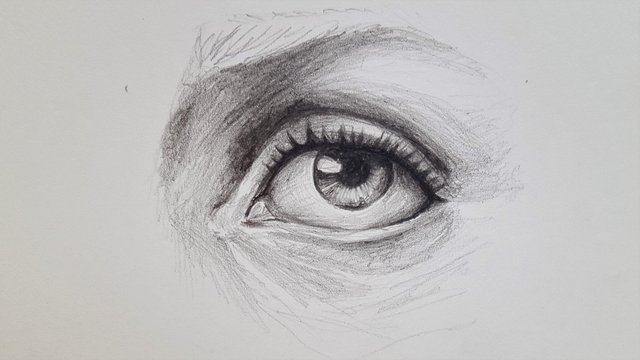
🔷 STEP 5
Now we can shadow the lid. Start with the darker parts. Slightly move to brighter. Than draw eyelashes. The centre of the lines should be under the pupil. The top of the lashes is pointy. You should sharp your pencil to achieve it. At the end of the line use lower preasure.
🔷 STEP 6
Wide the lashes and make its edges smooth. Some of them can be connected with the U or V shape.
Shadows around the eye are quite solid, so we can tilt the pencil. The lines will be wider and gentle. Try to do round lines so they imitate the surface. You can draw darker first.
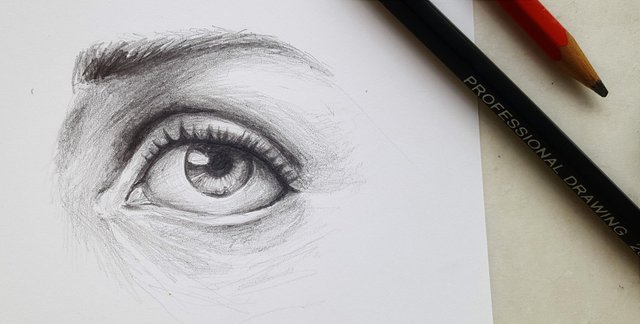
🔷 STEP 7
The eyebrows should look quite wild. Try to hold the pencil in your fingers like on the picture. The lower part is darker and slightly disappears.

When you draw according to the picture at the end stand up or look at the pictures from a distance so you could see the differences. Move your sight from the picture to your drawing fast and repeatedly and draw what should be fixed.
I hope it was useful and thanks for watching! :)
Follow me on Steemit
Good job Marty, keep it up :))
thank you :)
thanks :) i think the way that you show us your drawing
Thank you for this drawing tutorial! Fun to see the process from start to finish!
thanks a lot, I also started to do PS drawing tutorials. This one is the newest, maybe you would be interested :)
https://steemit.com/art/@marty-arts/my-art-human-eye-drawing-in-photoshop-process-tutorial-6-hours-of-work
you make it look so easy. lol - Much like my mom... she teaches art and she makes EVERYTHING look so simple haha! So hats off to you for that! I am an artist of a slightly different kind ;)
Congrats on your spot in the #upvotable 12 - as no. 12 I am showing my support to another awesome creative xxx
Much love to you! Looking forward to seeing more from you. Upvoted and followed!
yeah, when you learn how to do it, it is simple :D
thanks a lot :) hope you will enjoy my next posts .. also following ;)
No doubt I will :)