Quick Lightning: A Photoshop Tutorial
Hey everyone, I'm back!
I haven't posted in a while. I've been busy with school, the holidays, and life in general. One of the ideas I've been playing with as of late has been to create simple tutorials for Adobe Photoshop, After Effects, maybe Premiere and Maya, and hopefully Blender if the latest update stops crashing.
Getting Started
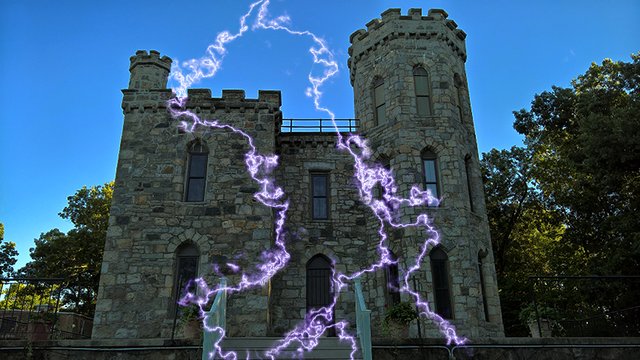
So you have an image you think would look great with some lightning in the background or maybe you want to start a new composition with a nice bolt of lightning. This tutorial will take you through the steps to produce lightning in any image or even without one. So first things first, open Photoshop and either load an image or start a new composition. This technique works best at 72ppi, it will work at 300ppi but you're better off converting the image to 300ppi after you create your lightning. I also find a darker background works best for this.
Here is what I will be starting with.

7x5 @ 72ppi, filled with a black to blue gradient.
Step 1
Once you have your image or background create a new layer, press "D" on your keyboard in order to set the foreground/background color back to black and white respectively.
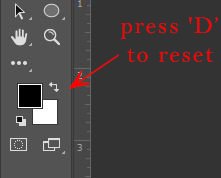
Then create a new blank layer.
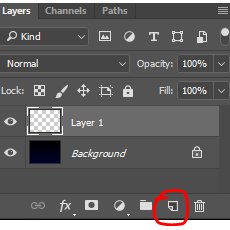
Step 2
Use the Gradient tool to fill this new layer by clicking and dragging from left to right.
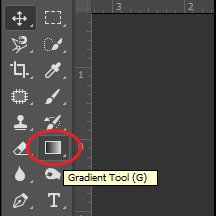
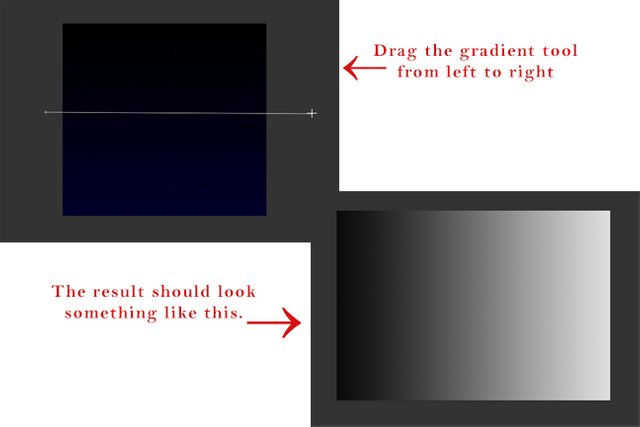
Step 3
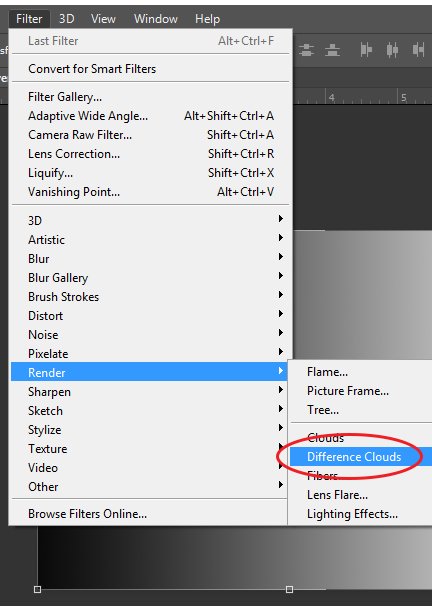
Go to the Filter menu, go down to Render, and click Difference Clouds.
The black lines in your rendered image will be the lightning.
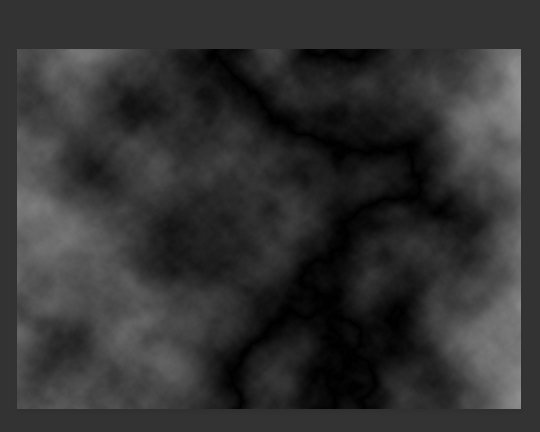
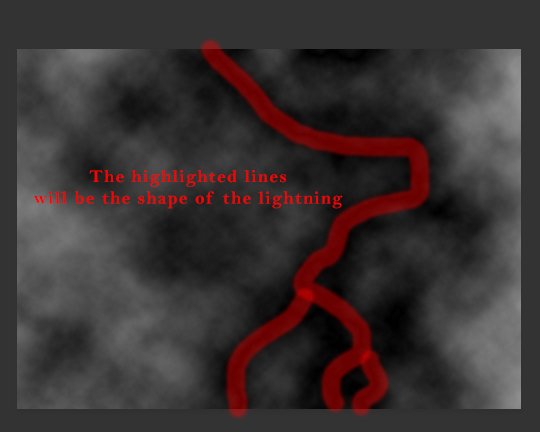
If you don't like the first image produced you can hit "ALT+CTRL+F" to re-render the clouds until your happy with the results.
Step 4
Press "CTRL+I" to invert the colors of the layer
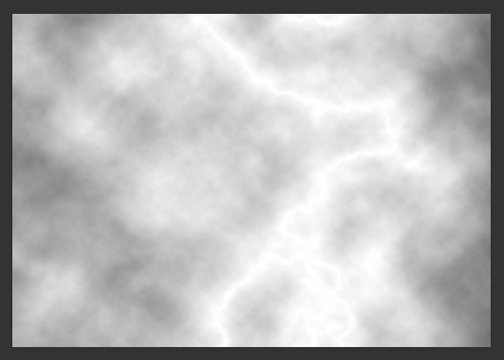
Step 5
Press "CTRL+L" to open the levels dialog box. By using the hot-keys this ensures your adjustments will only effect the selected layer.
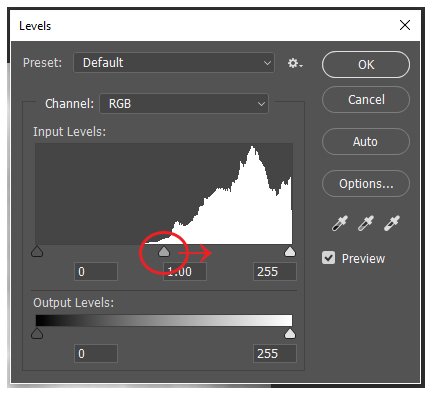
Slide the middle slider to the right until your lightning appears and your happy with how it looks and click "OK".
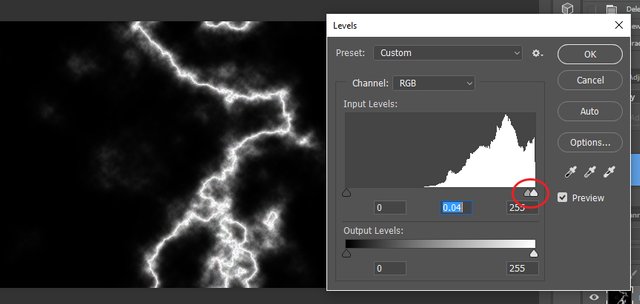
Step 6
Change the "Blend Mode" of the layer to "Screen"
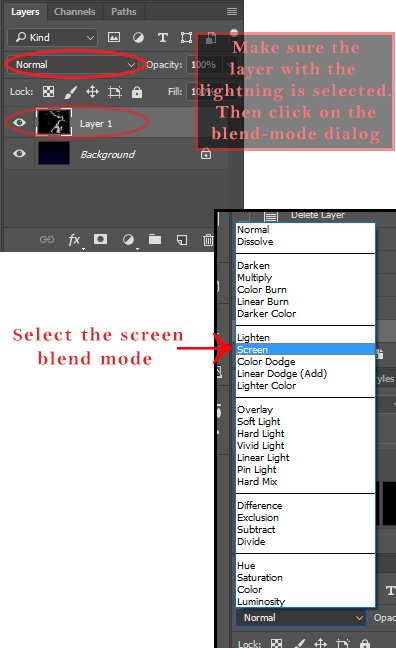
viola! You've created lightning!
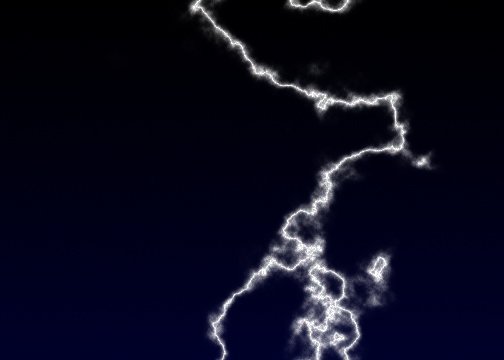
After Thoughts
If you only want some of the lightning that this produced you can add a layer mask to the lightning layer and use a black brush to cover up the excess lightning.
You may also change the color of the lightning. Change the "Blend Mode" of the lightning layer back to normal and press "CRTL+U" which will open the "Hue/Saturation" dialog. Click the "Colorize" box then bring down the saturation a bit, around 30. Use the "Hue" slider to change the color of the lightning to whatever you want and click "Ok".
~~~~~~~~~~~~~~~~~~~~~
Thanks for reading and I hope you found this useful or at least enjoyable. If you have any questions or issues I'd be happy to help, just leave a comment and I'll get back to you as soon as possible. If you have any suggestions for future tutorials I'd be happy to hear them. Take it easy.
Justin
CREDITS
All photos were taken and/or produced by me (JBaker585). The castle seen in the first photo is Winnekenni Castle in Haverhill MA, U.S. and I used the Windows Snip tool to capture all other images. Adobe Photoshop is referenced and depicted in these photos.
A special thanks to my professor Annette Cohen at Great Bay CC for teaching me this technique.
Nice post
Thank you.
Congratulations @jbaker585! You have received a personal award!
Click on the badge to view your own Board of Honor on SteemitBoard.
For more information about this award, click here