How to Scan or Rebuild an Image in Illustrator
As the title of this post cites, take the initiative to share a brief, but detailed tutorial, which may interest many and others not so much, but I certainly know that for the most enthusiastic they will get out of trouble.

My original design was only to communicate a brief story accompanied by illustrations of my authorship, or a digital work done in the past. "As it is in this case" and it is there where fleeting as a comet; I get this idea, which is better and much more beneficial to you, than if only an old project of mine was revealed.

Many or rather all of us, have had the following difficulty, wanting to use an analog image, and try a logo, sketch or drawing printed on any paper, to apply it in our internet projects and not be able to get it by any shelter throughout the web, or failing to find it in such a pitiful quality that makes its use in our purpose inadmissible.
Before continuing to waste valuable time trying to get a favorable image in better condition, in the extensive limits of the web, most likely this will be a futile effort.
It is this point of no return that presents TWO unique solutions. "To completely suppress the application of the image or to redo it with some Graphic design program". When it comes to an image you must apply vector design programs, the two dominant suitors for this work are Corel Draw and Illustrator each with its strengths and discrepancies, although similar handling. The program with which I will explain is the Illustrator for being more complete in tools, however if Corel Draw was used, the procedure would be the same and of the same result.
To start, you must scan or photograph the image to be remade and use it in a base layer, obviously blocking it to obtain a better performance.


The utensils used in the restoration of the image are located on the left, in the window named "Toolbar". For the adventurous in the learning I leave it like work to experiment with each of them, after having downloaded the program, of course, at the moment only the tools will be used: Selection (V), Direct Selection (A), Feather (P) , Rectangle (M), Ellipse (L) and Gradient (G) others would be more.
We start with the Head of the character, creating a shape with the Ellipse Tool (L) and editing it with Direct Selection (A) by means of the editing of the nodes (those tiny squares that determine the trajectory of the shape). < /p>

It should be noted that the line is very important in the image, each shape is composed of a plot and a predominated fill, and depending on the reference image, we will locate where the line will be thicker or thicker.
< /div>
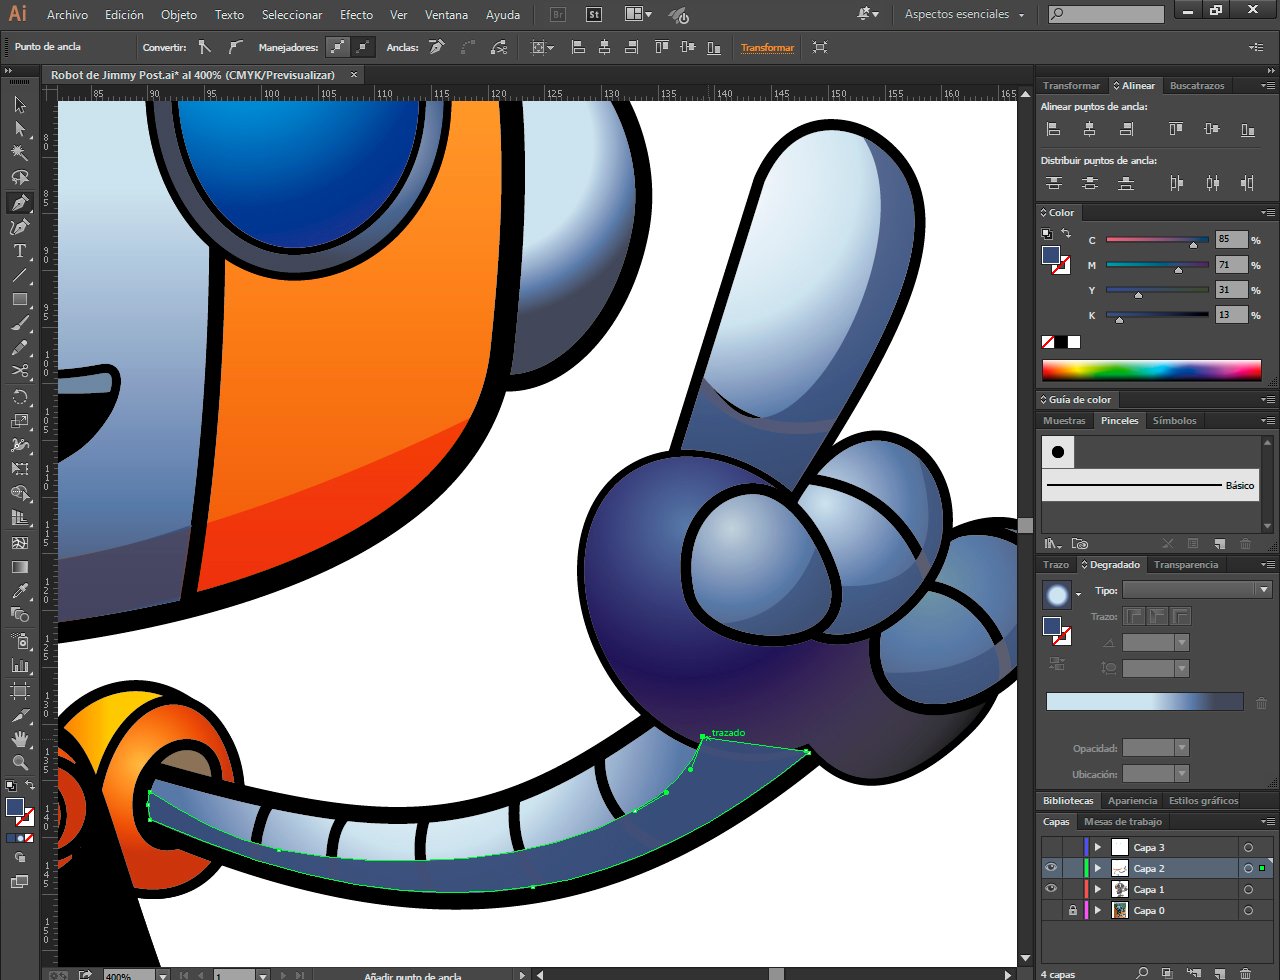
In some parts of the image, it will be useless to apply the tools Rectangle (M) and Ellipse (L), that is where the Pen Tool (P) will be used with which we will trace the contour of the form to be elaborated until closing it. (I recommend watching some video tutorials so you can better understand their usage, at some future time I will make a video explaining them ... when I learn how to edit videos at the moment the static images are my domain)

Repeat the same procedure you have completed the primordial structure of the reconstructed image. Everything must be made as extreme care in the details and above all patience and dedication and especially Faith in your abilities, remember that you are capable of much only that you have not tried yet.

Once the image is obtained, we are halfway through. It is time to apply color. Using the Selection tool (V) we will select each form individually without modifying its structure, we will click on the box that shows the current color of the form (it is located in TWO places, in the upper part below the Editing and Objects or near the end of the toolbar) is where we can edit the color of the trace and the filling of the shape by the desired colors in our order.

Once the definitive colors have been selected, it is time to use the Gradient tool (G), a new window will automatically open on your right, where we will be able to edit the tones in our gradients.

It is already a matter of being extremely demanding with ourselves and do not confórmanos with a mere approximation, if we do not propose them we can recreate impressive replicas that will not envy the original. In some cases they even surpass it by giving them our own personal touch. But we still have not finished.

Being Quibbler with the details. It is time to apply lights and shadows, the Pen Tool (P) will be used to complete this task, using shapes with darker colors and without strokes.
This new form will be superimposed on the others, which takes aesthetics away from our work, to solve it we select this form and with the right mouse click a small window appears, where we choose the option to organize where we will send it back from the other forms. You can also use these commands Ctrl +9 to go back to the others and Ctrl +0 to bring to the front in case we have passed.


The same procedure that was used in the shadows is done, only that the "no stroke again" shapes will not be filled with a darker shade, otherwise it will be applied with a white, to the right side of the gradient tab there will be a call transparencies where we can reduce the opacity of the form to give that magnificent illusion of a flash.


And Finished we have reconstructed an image from an analogical photo. Congratulations you have acquired a new skill in graphic design.

Thank you very much for reading my post
All images, banners and stripes used in this publication are my property.
See you in a future publication
Inu-Jim

All images, banners and stripes used in this publication are my property.
See you in a future publication
Inu-Jim

cool! thanks for sharing :) this is super useful! I already forgot the last time i used illustrator, but with your tutorial i might just restart using it again.
it's good that you are motivated to take up this very useful program
A nice tutorial on how to import and renew something through illustrator, @inu-jim :D Good article <3
Illustrator is a great tool and the most useful
This post was shared in the Curation Collective Discord community for curators, and upvoted and resteemed by the @c-squared community account after manual review.
@c-squared runs a community witness. Please consider using one of your witness votes on us here
Hello @inu-jim, thank you for sharing this creative work! We just stopped by to say that you've been upvoted by the @creativecrypto magazine. The Creative Crypto is all about art on the blockchain and learning from creatives like you. Looking forward to crossing paths again soon. Steem on!
that I would like my work, we continue to share more creative content, I hope that our paths will cross again soon,
Congratulations! This post has been upvoted from the communal account, @minnowsupport, by Inu-Jim from the Minnow Support Project. It's a witness project run by aggroed, ausbitbank, teamsteem, someguy123, neoxian, followbtcnews, and netuoso. The goal is to help Steemit grow by supporting Minnows. Please find us at the Peace, Abundance, and Liberty Network (PALnet) Discord Channel. It's a completely public and open space to all members of the Steemit community who voluntarily choose to be there.
If you would like to delegate to the Minnow Support Project you can do so by clicking on the following links: 50SP, 100SP, 250SP, 500SP, 1000SP, 5000SP.
Be sure to leave at least 50SP undelegated on your account.