Building a Costume: Ice the Dewsquilli Head Construction
Hey again, everyone! For those of you who don't know, I LOVE making costumes! Recently, I remade the head of a costume I had created back in 2013 of my character, Ice. Today, I am going to show you all some of the process behind creating my Ice head!
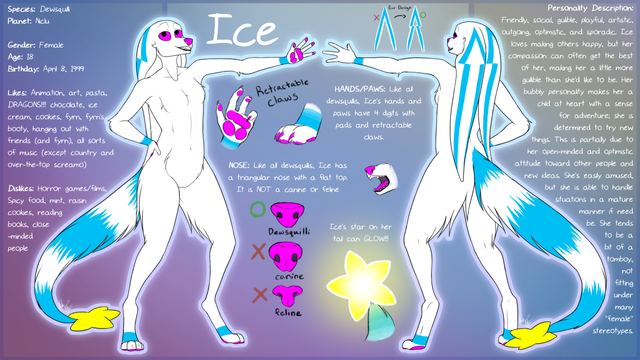
"Ice the Dewsquilli" Reference Sheet (2017)
Let's begin!
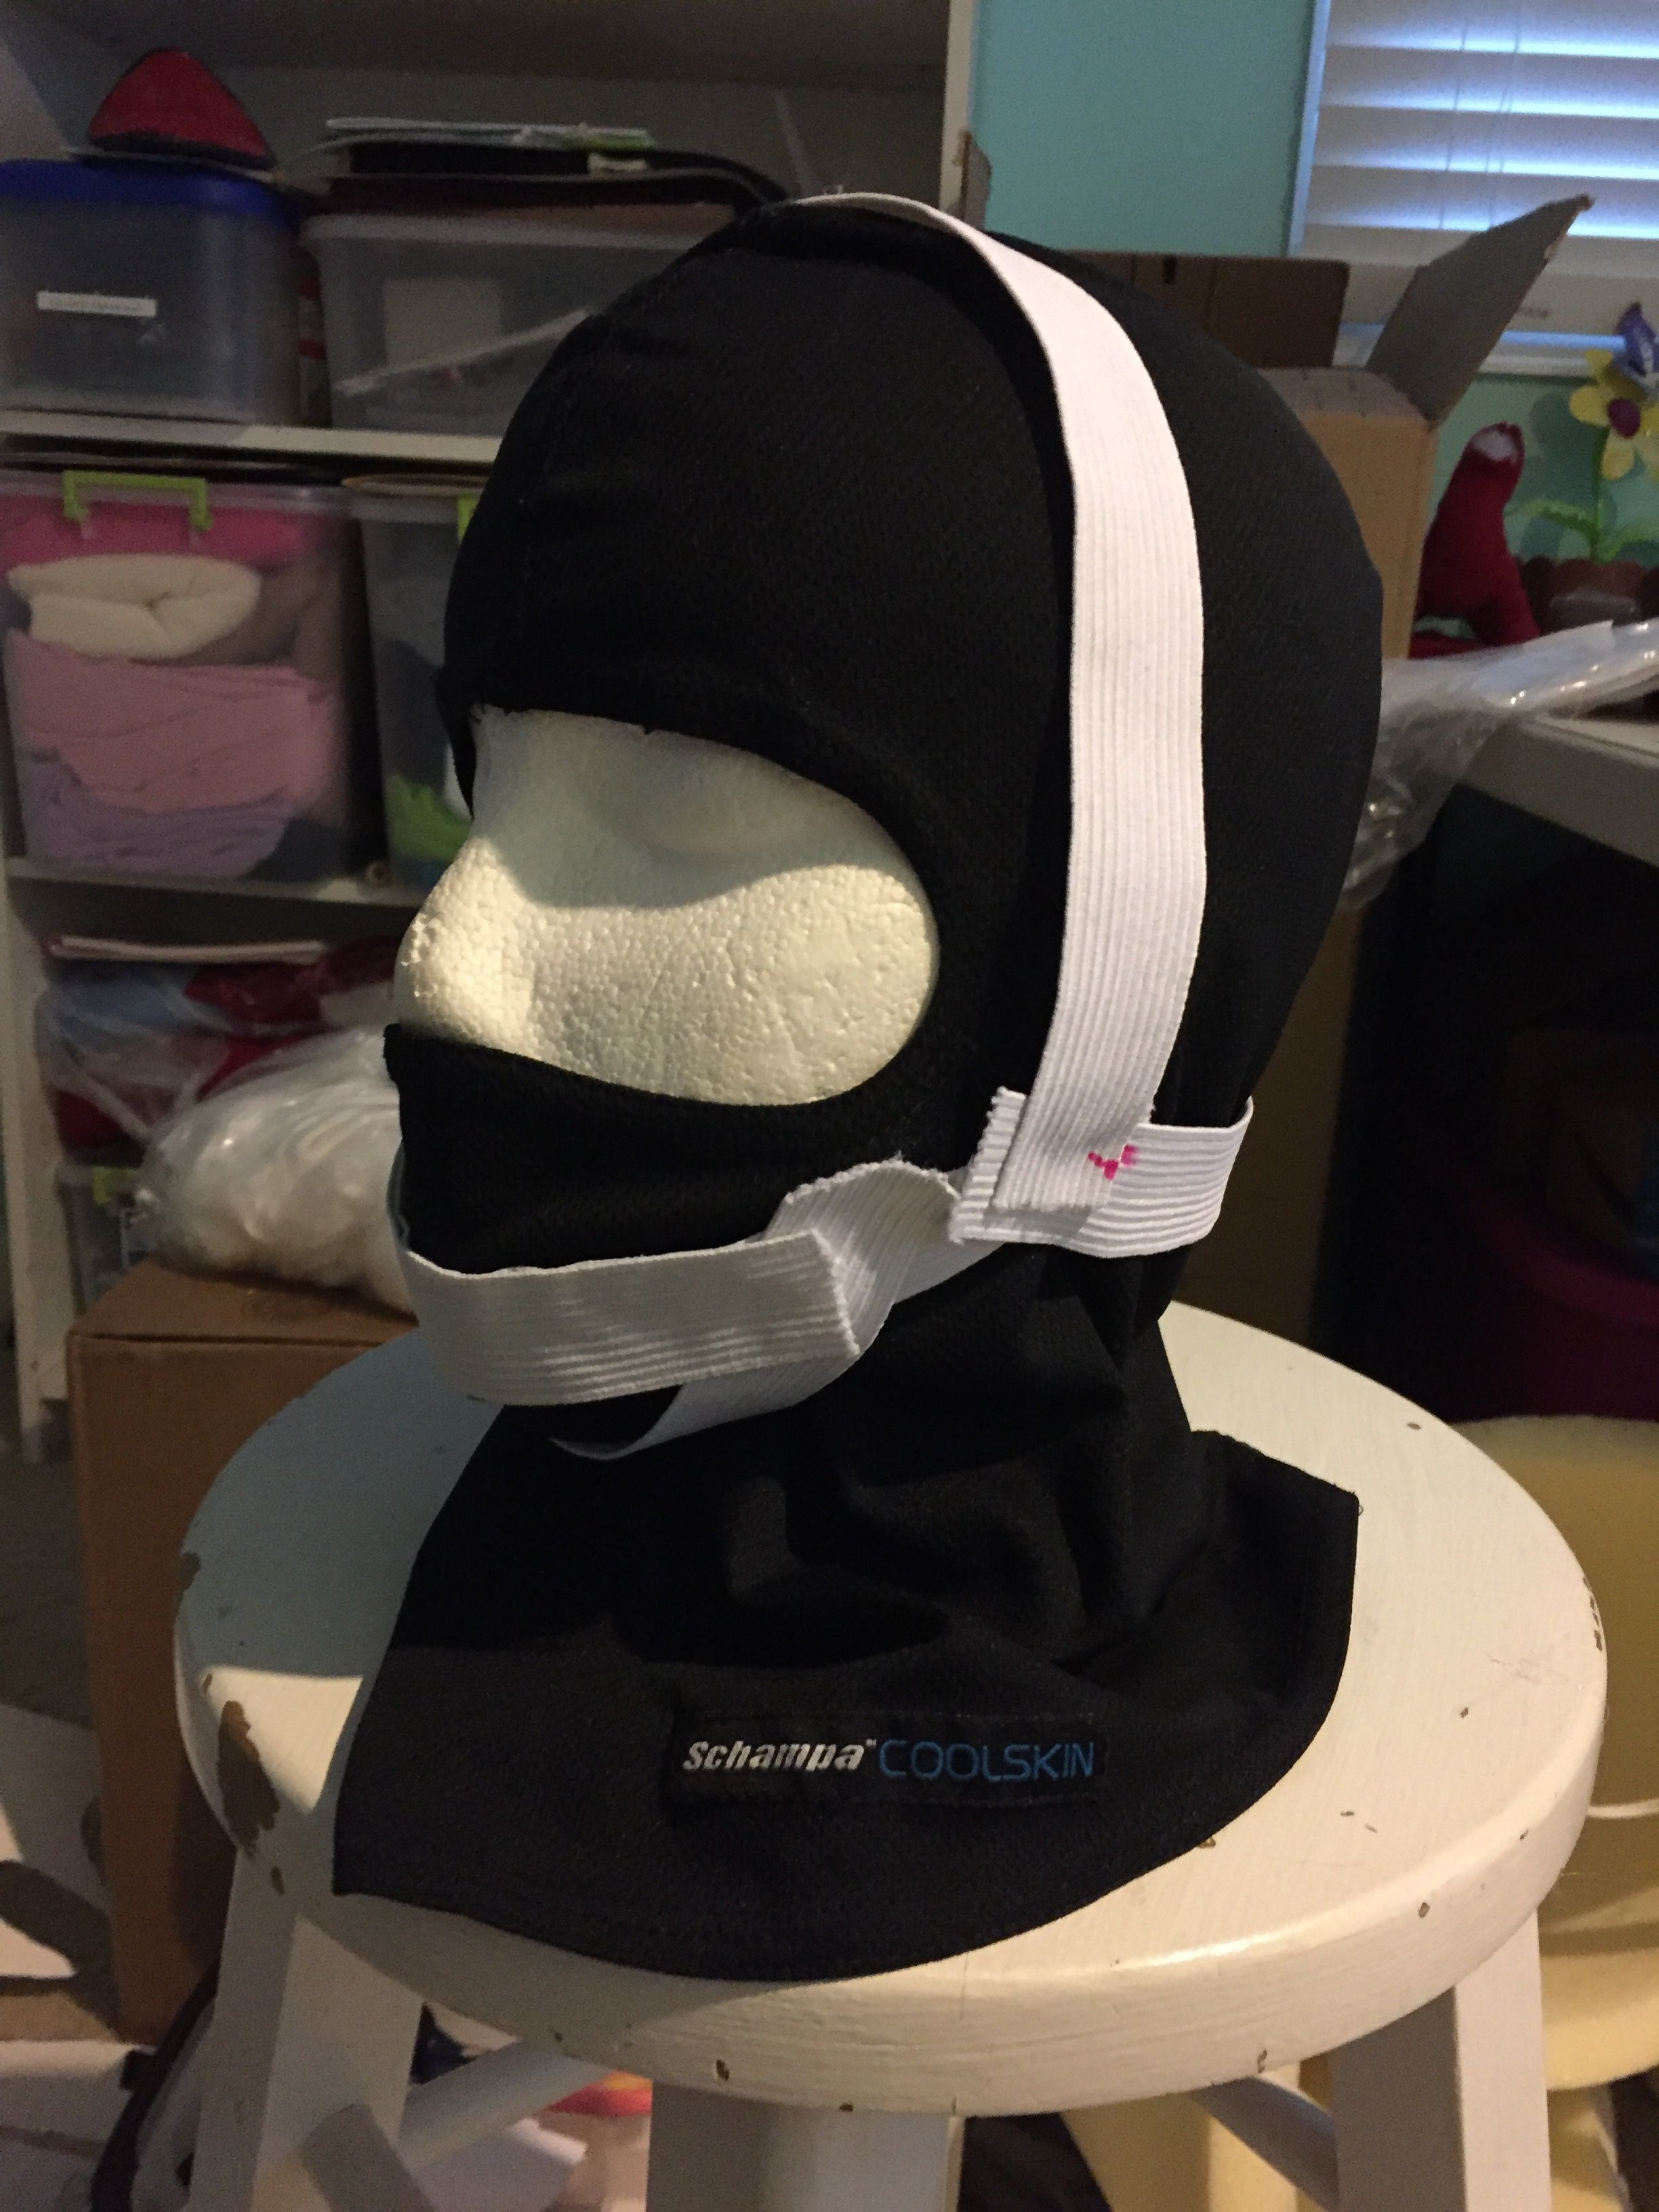
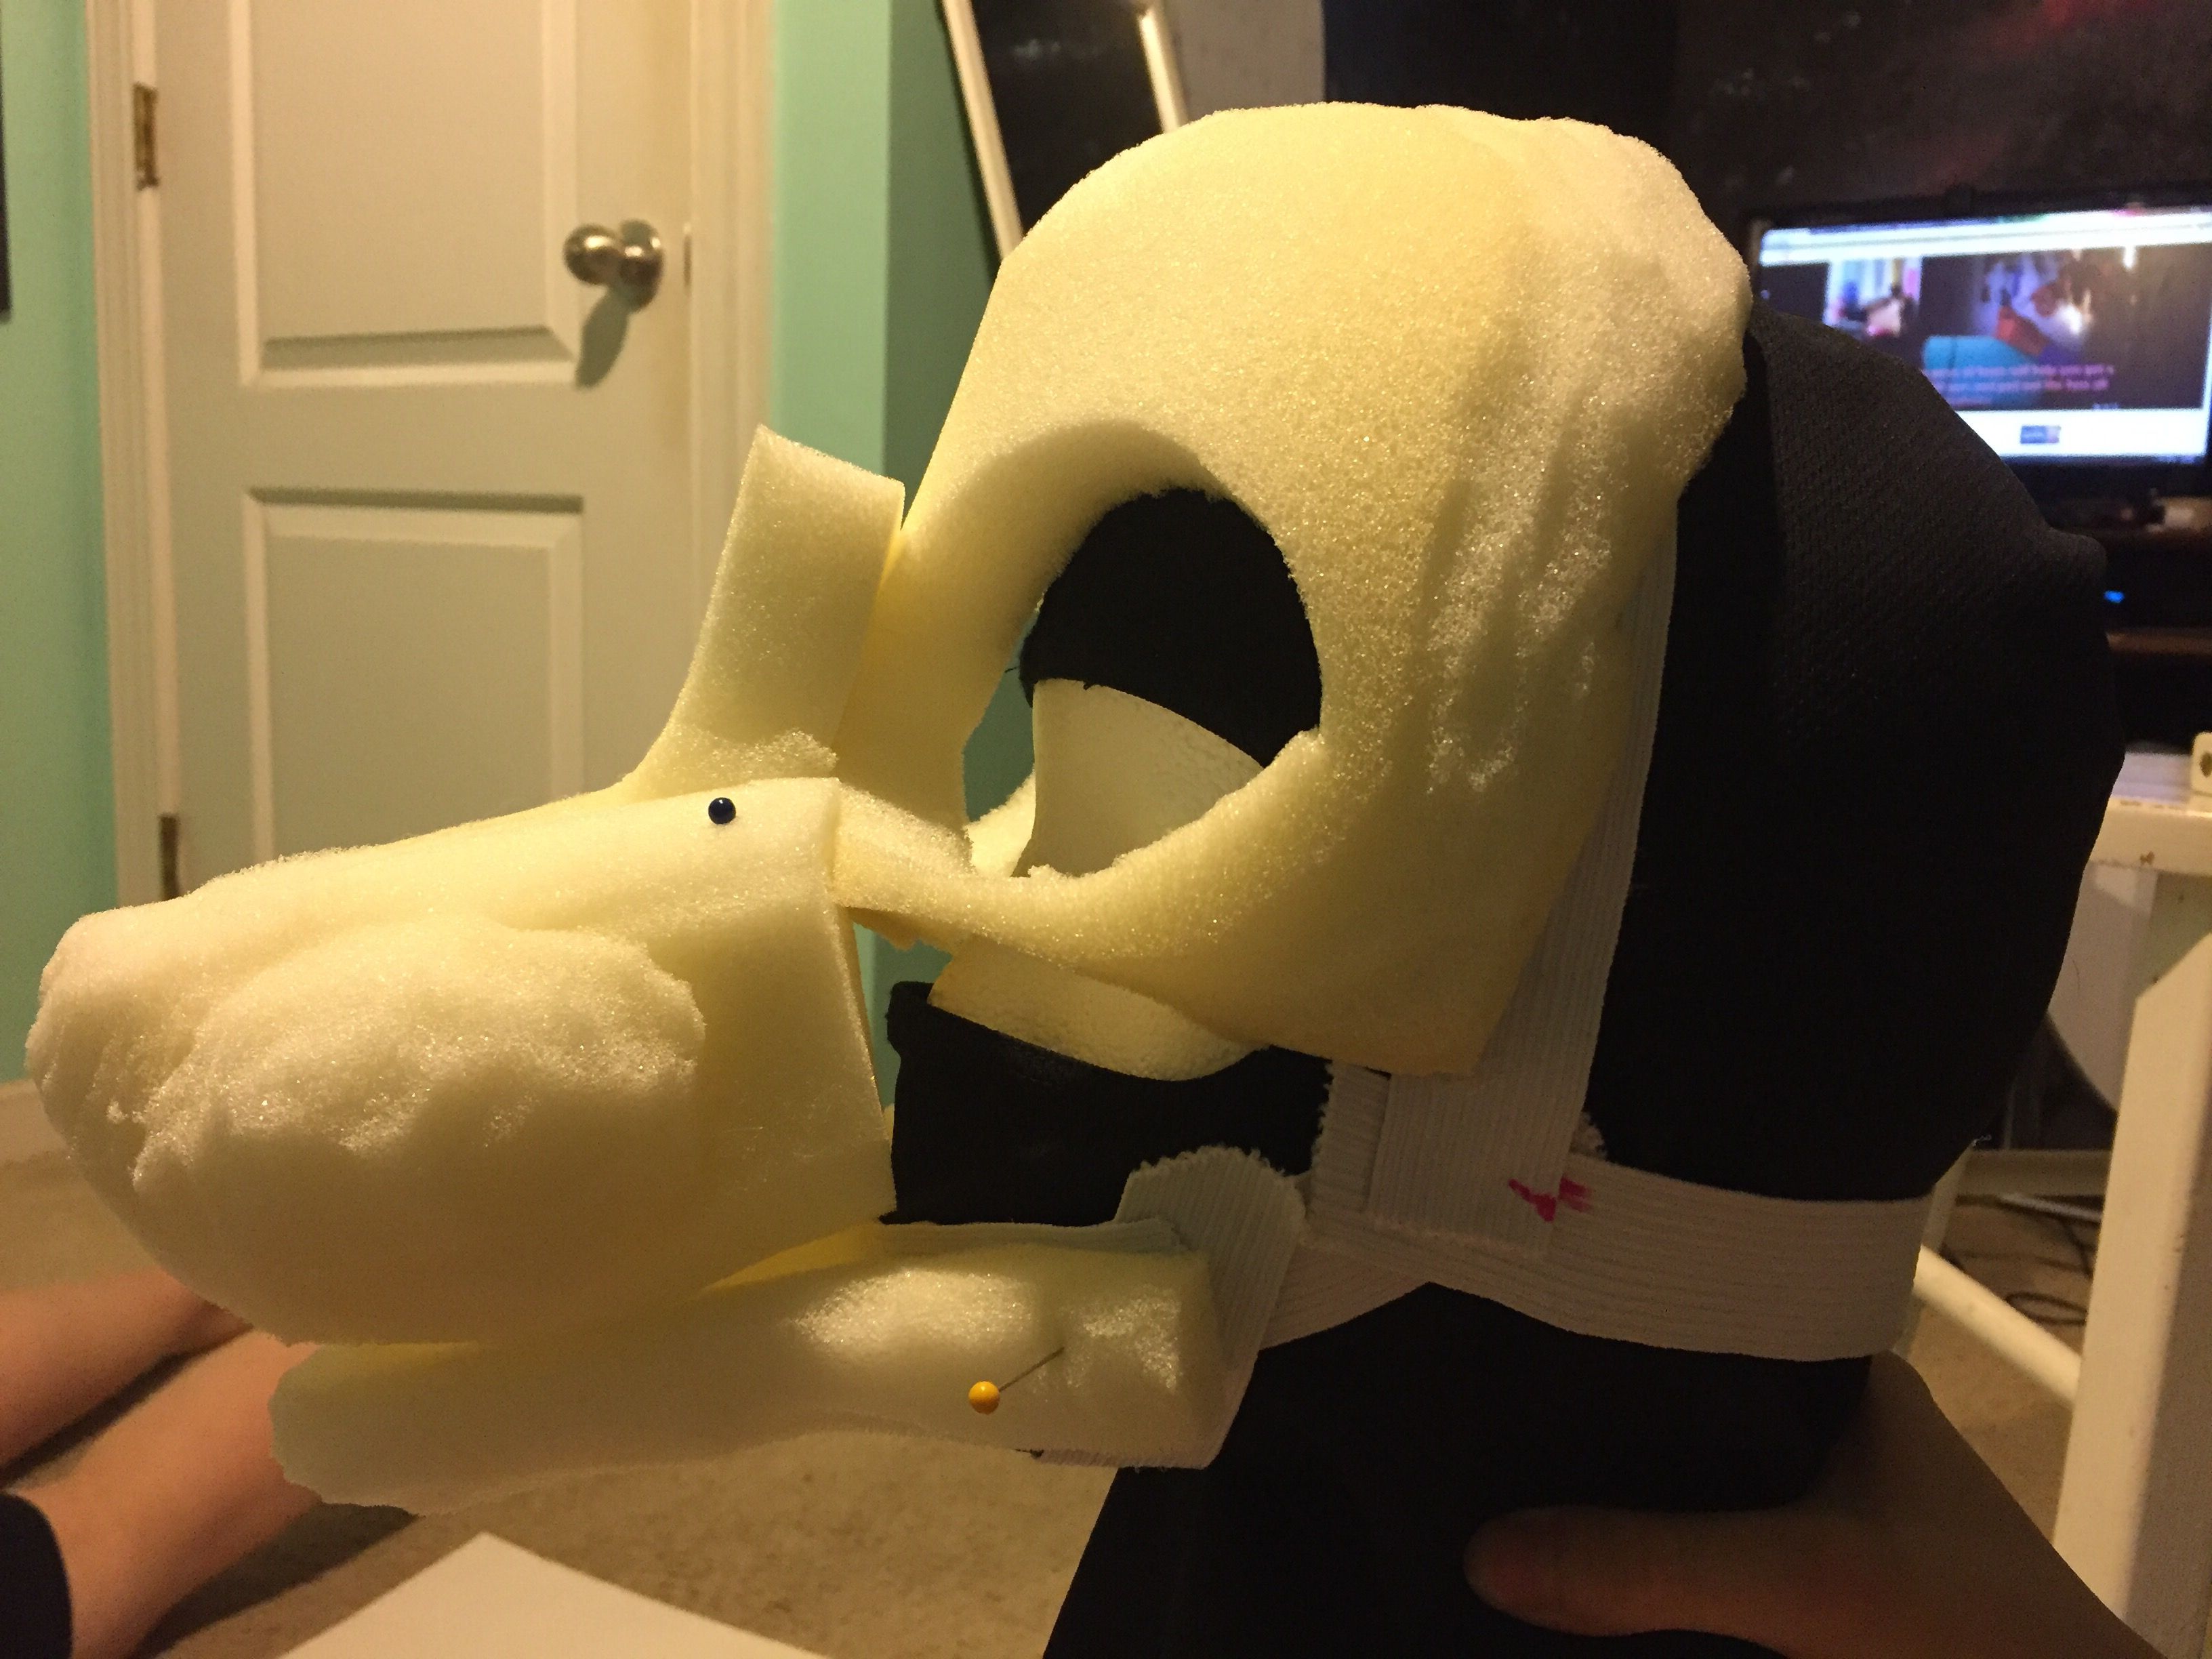
I started out with a coolskin balaclava mask and some elastic. We will be using my manikin head as a model (however, this manikin head is slightly smaller than the average human head so it will look a little baggy at first in this beginning images). I wanted to give this head a moving jaw, so I attached elastic in a way where it all meets up at the jaw hinge to get the best range of motion whenever I open or close my mouth. In addition, one of these pieces goes in front of the jaw while the other goes underneath. This elastic would later have foam attached to it to sculpt the actual head.
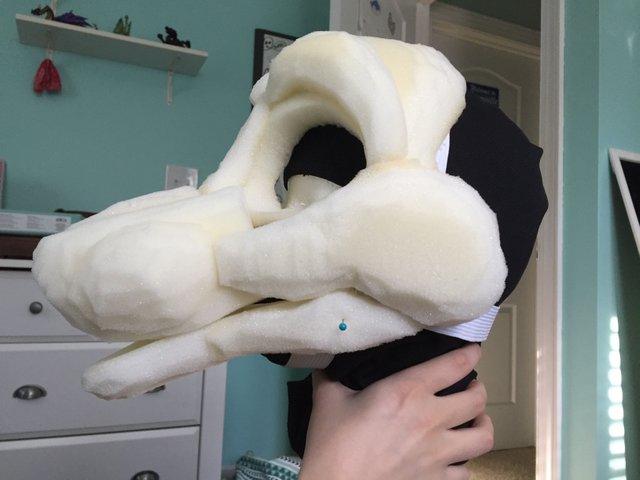
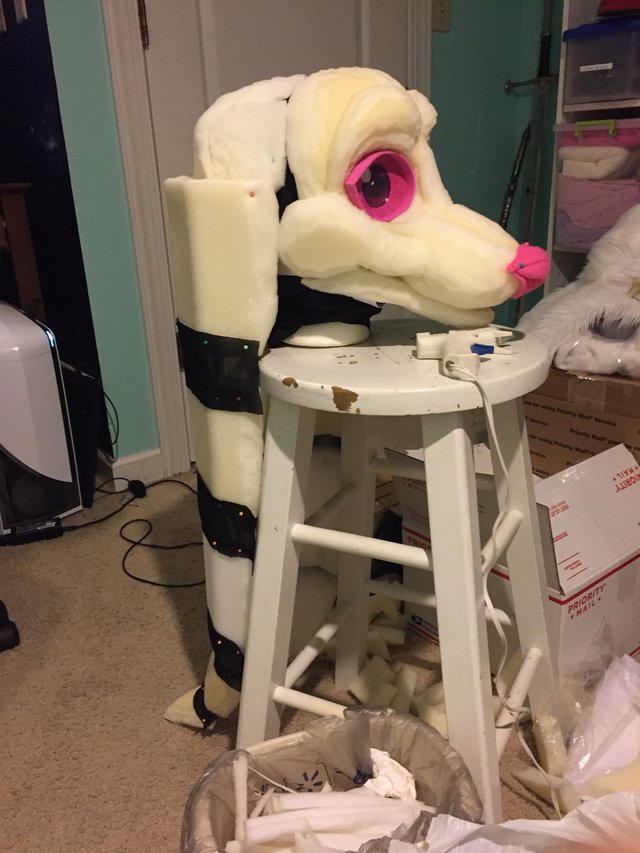
After attaching the elastic, I started hot gluing foam pieces to sculpt the head, making sure whatever I did on one side I did on the other so the mask would be as symmetrical as possible. I started with some basic shapes and continued adding on from there, making sure the bottom jaw and the rest of the head remain separate so the jaw can move. Here are some images from the sculpting stage:
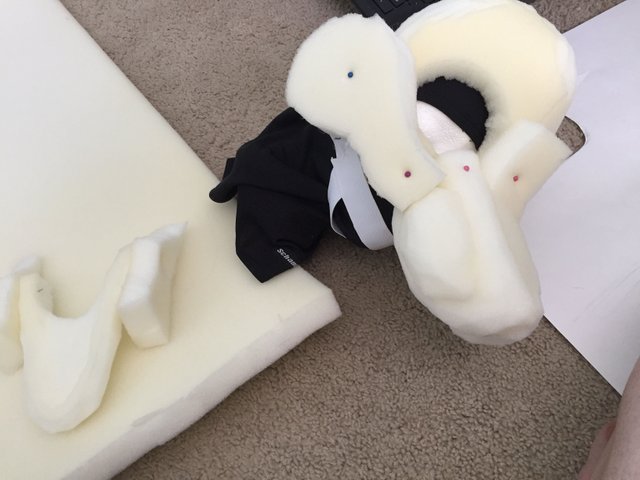
I continued filling in gaps and smoothing out the shape after getting the base structure down.
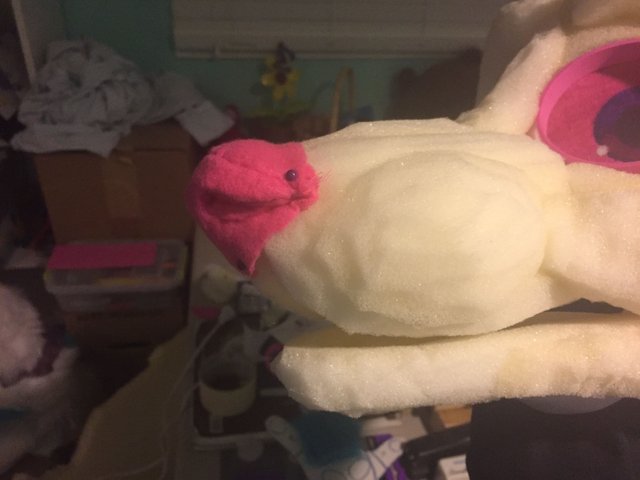
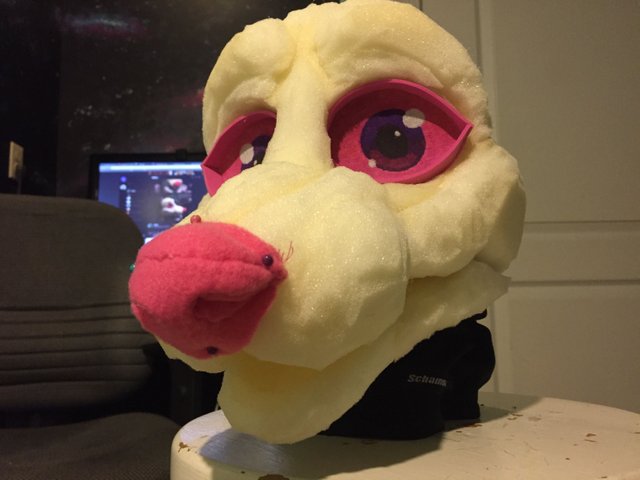
After getting the head shaped out in a way I like it, I started making the eyes and nose. For these eyes, I used a material called buckram, colored it with markers, and sprayed it with matte finish so the colors don't run if the eyes get wet. I lined them with hot pink silly foam so they have a bit of depth in order to give them a follow-me effect, as shown in this gif:
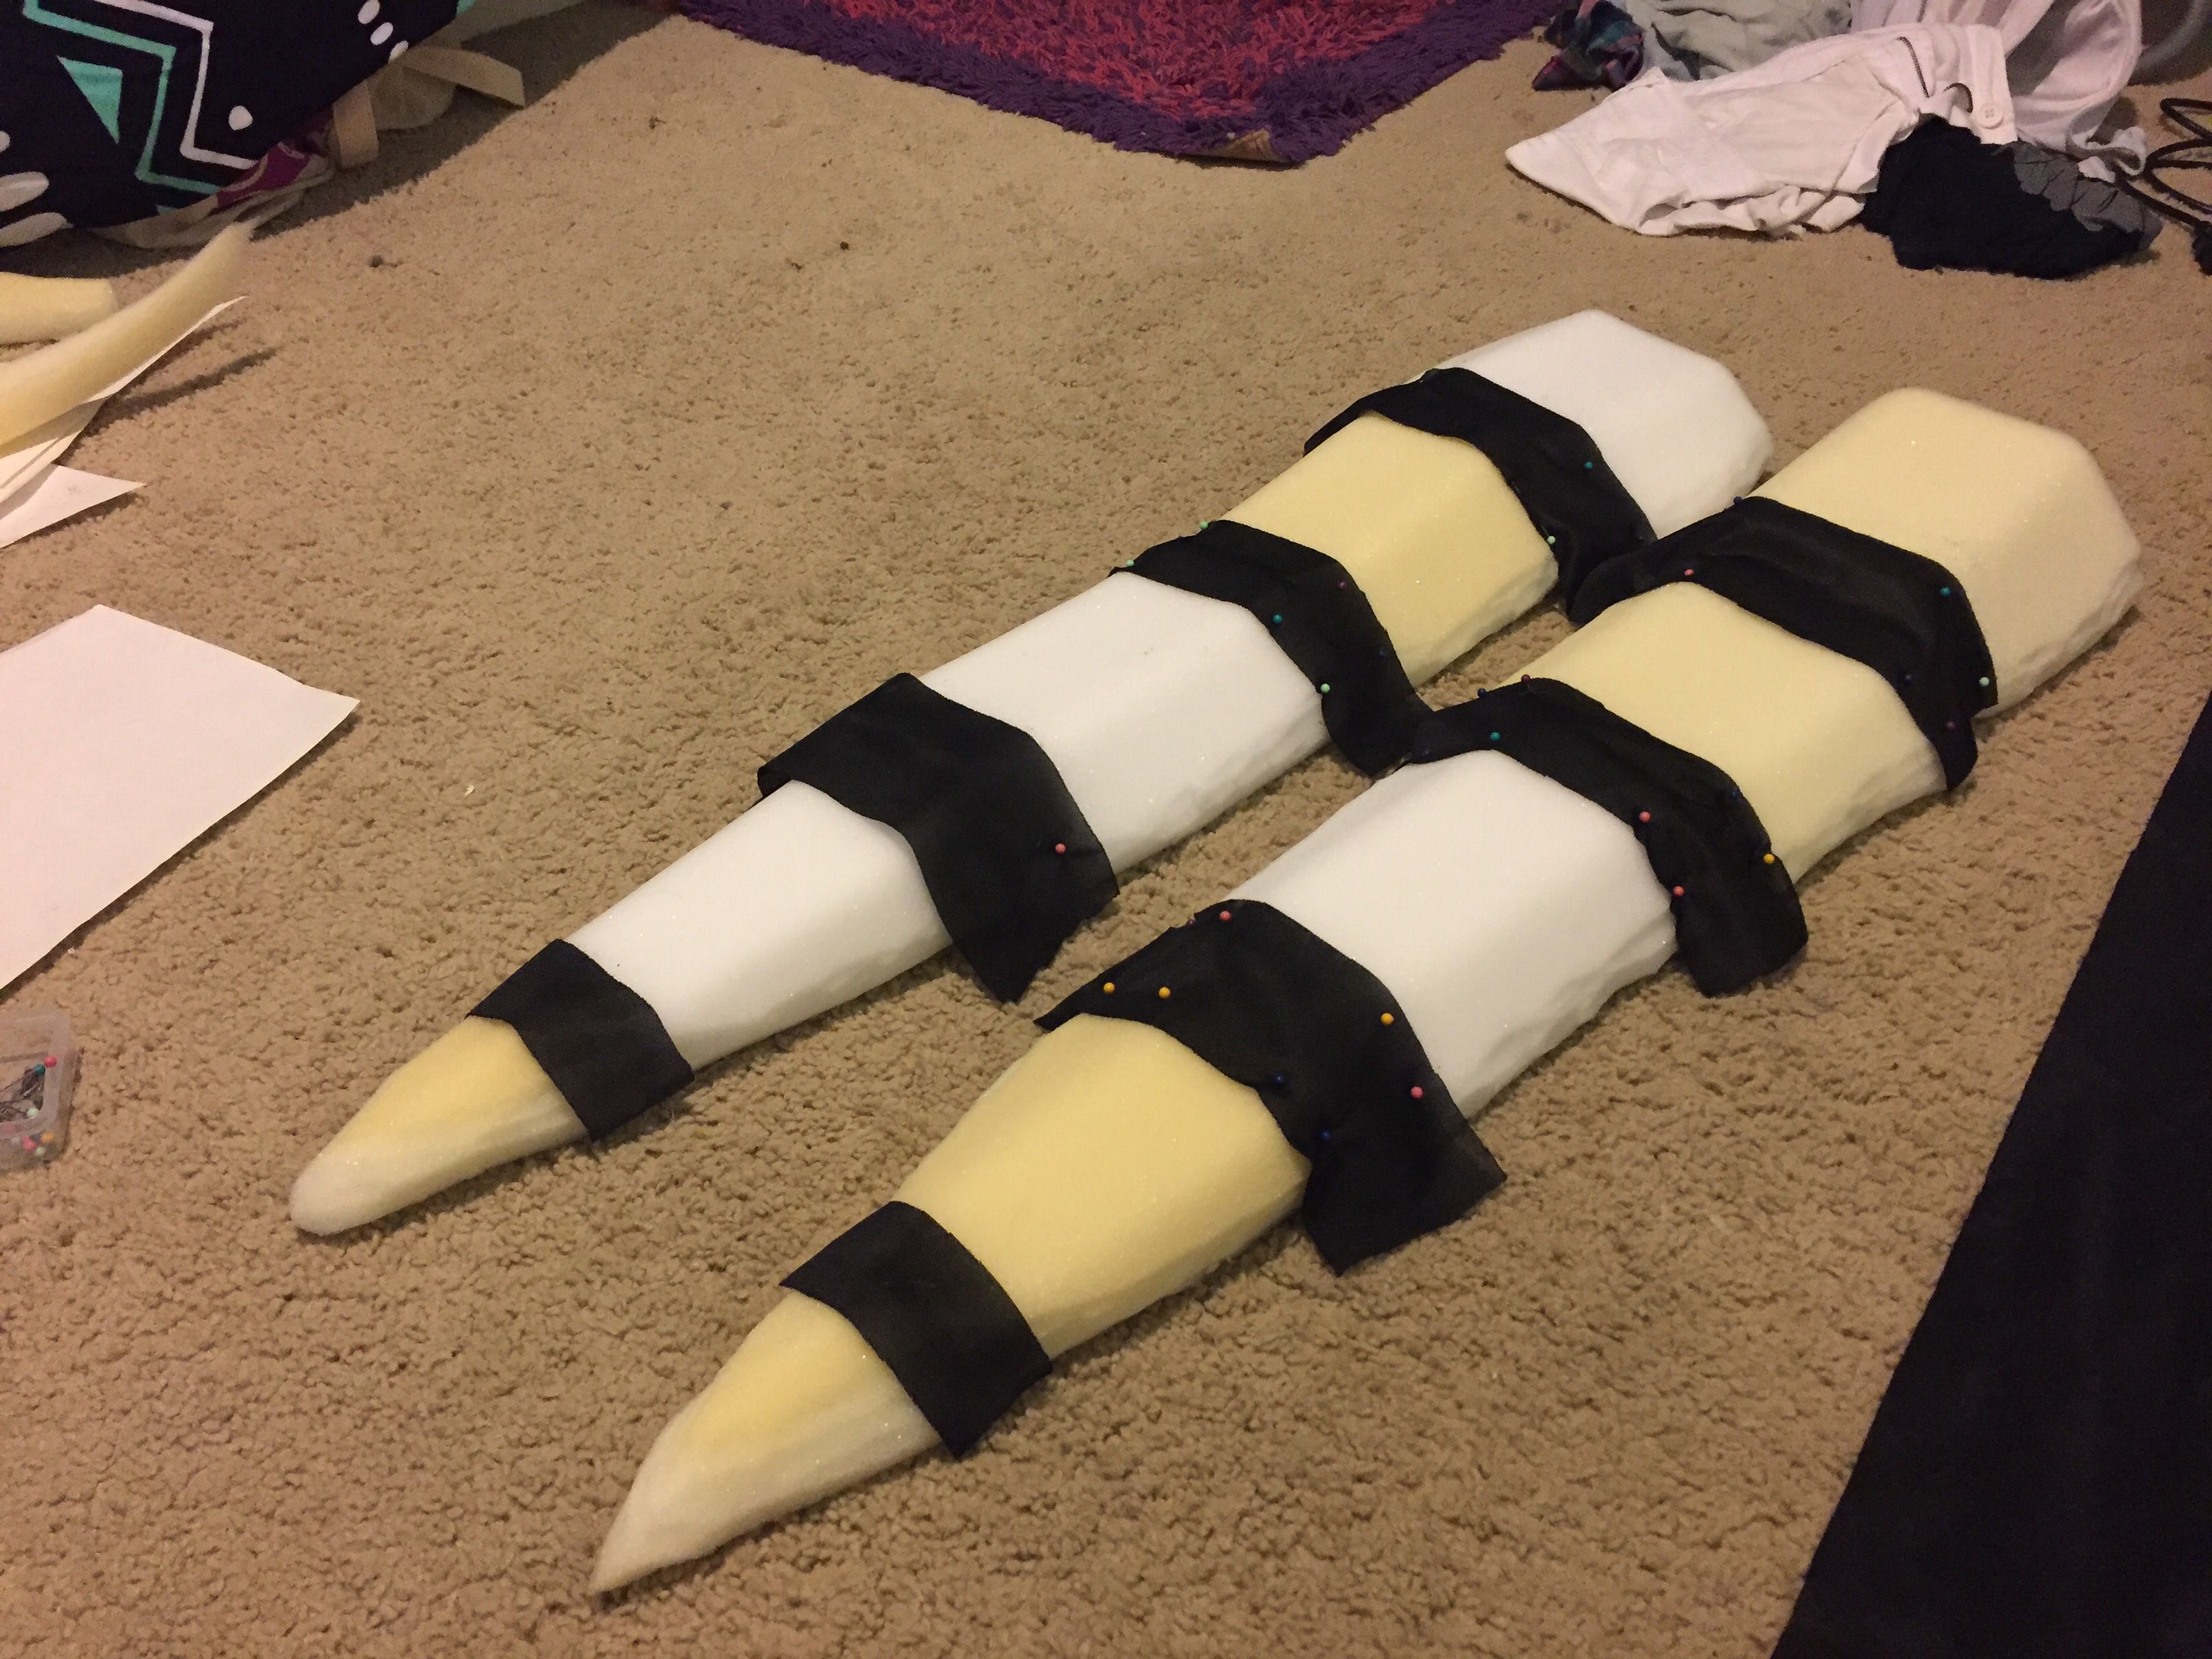
Now the ears were probably the most difficult and tedious part of the process, ugh. I basically made yard-long articulated ears that hang down the back of the head. I cut out foam sections and shaped them to be dome-like. Then I connected them by hot gluing fabric between them to act as "joints" so the ears keep their shape but react with gravity. These ears would then be covered and fur and sewn to the head after the head is furred.

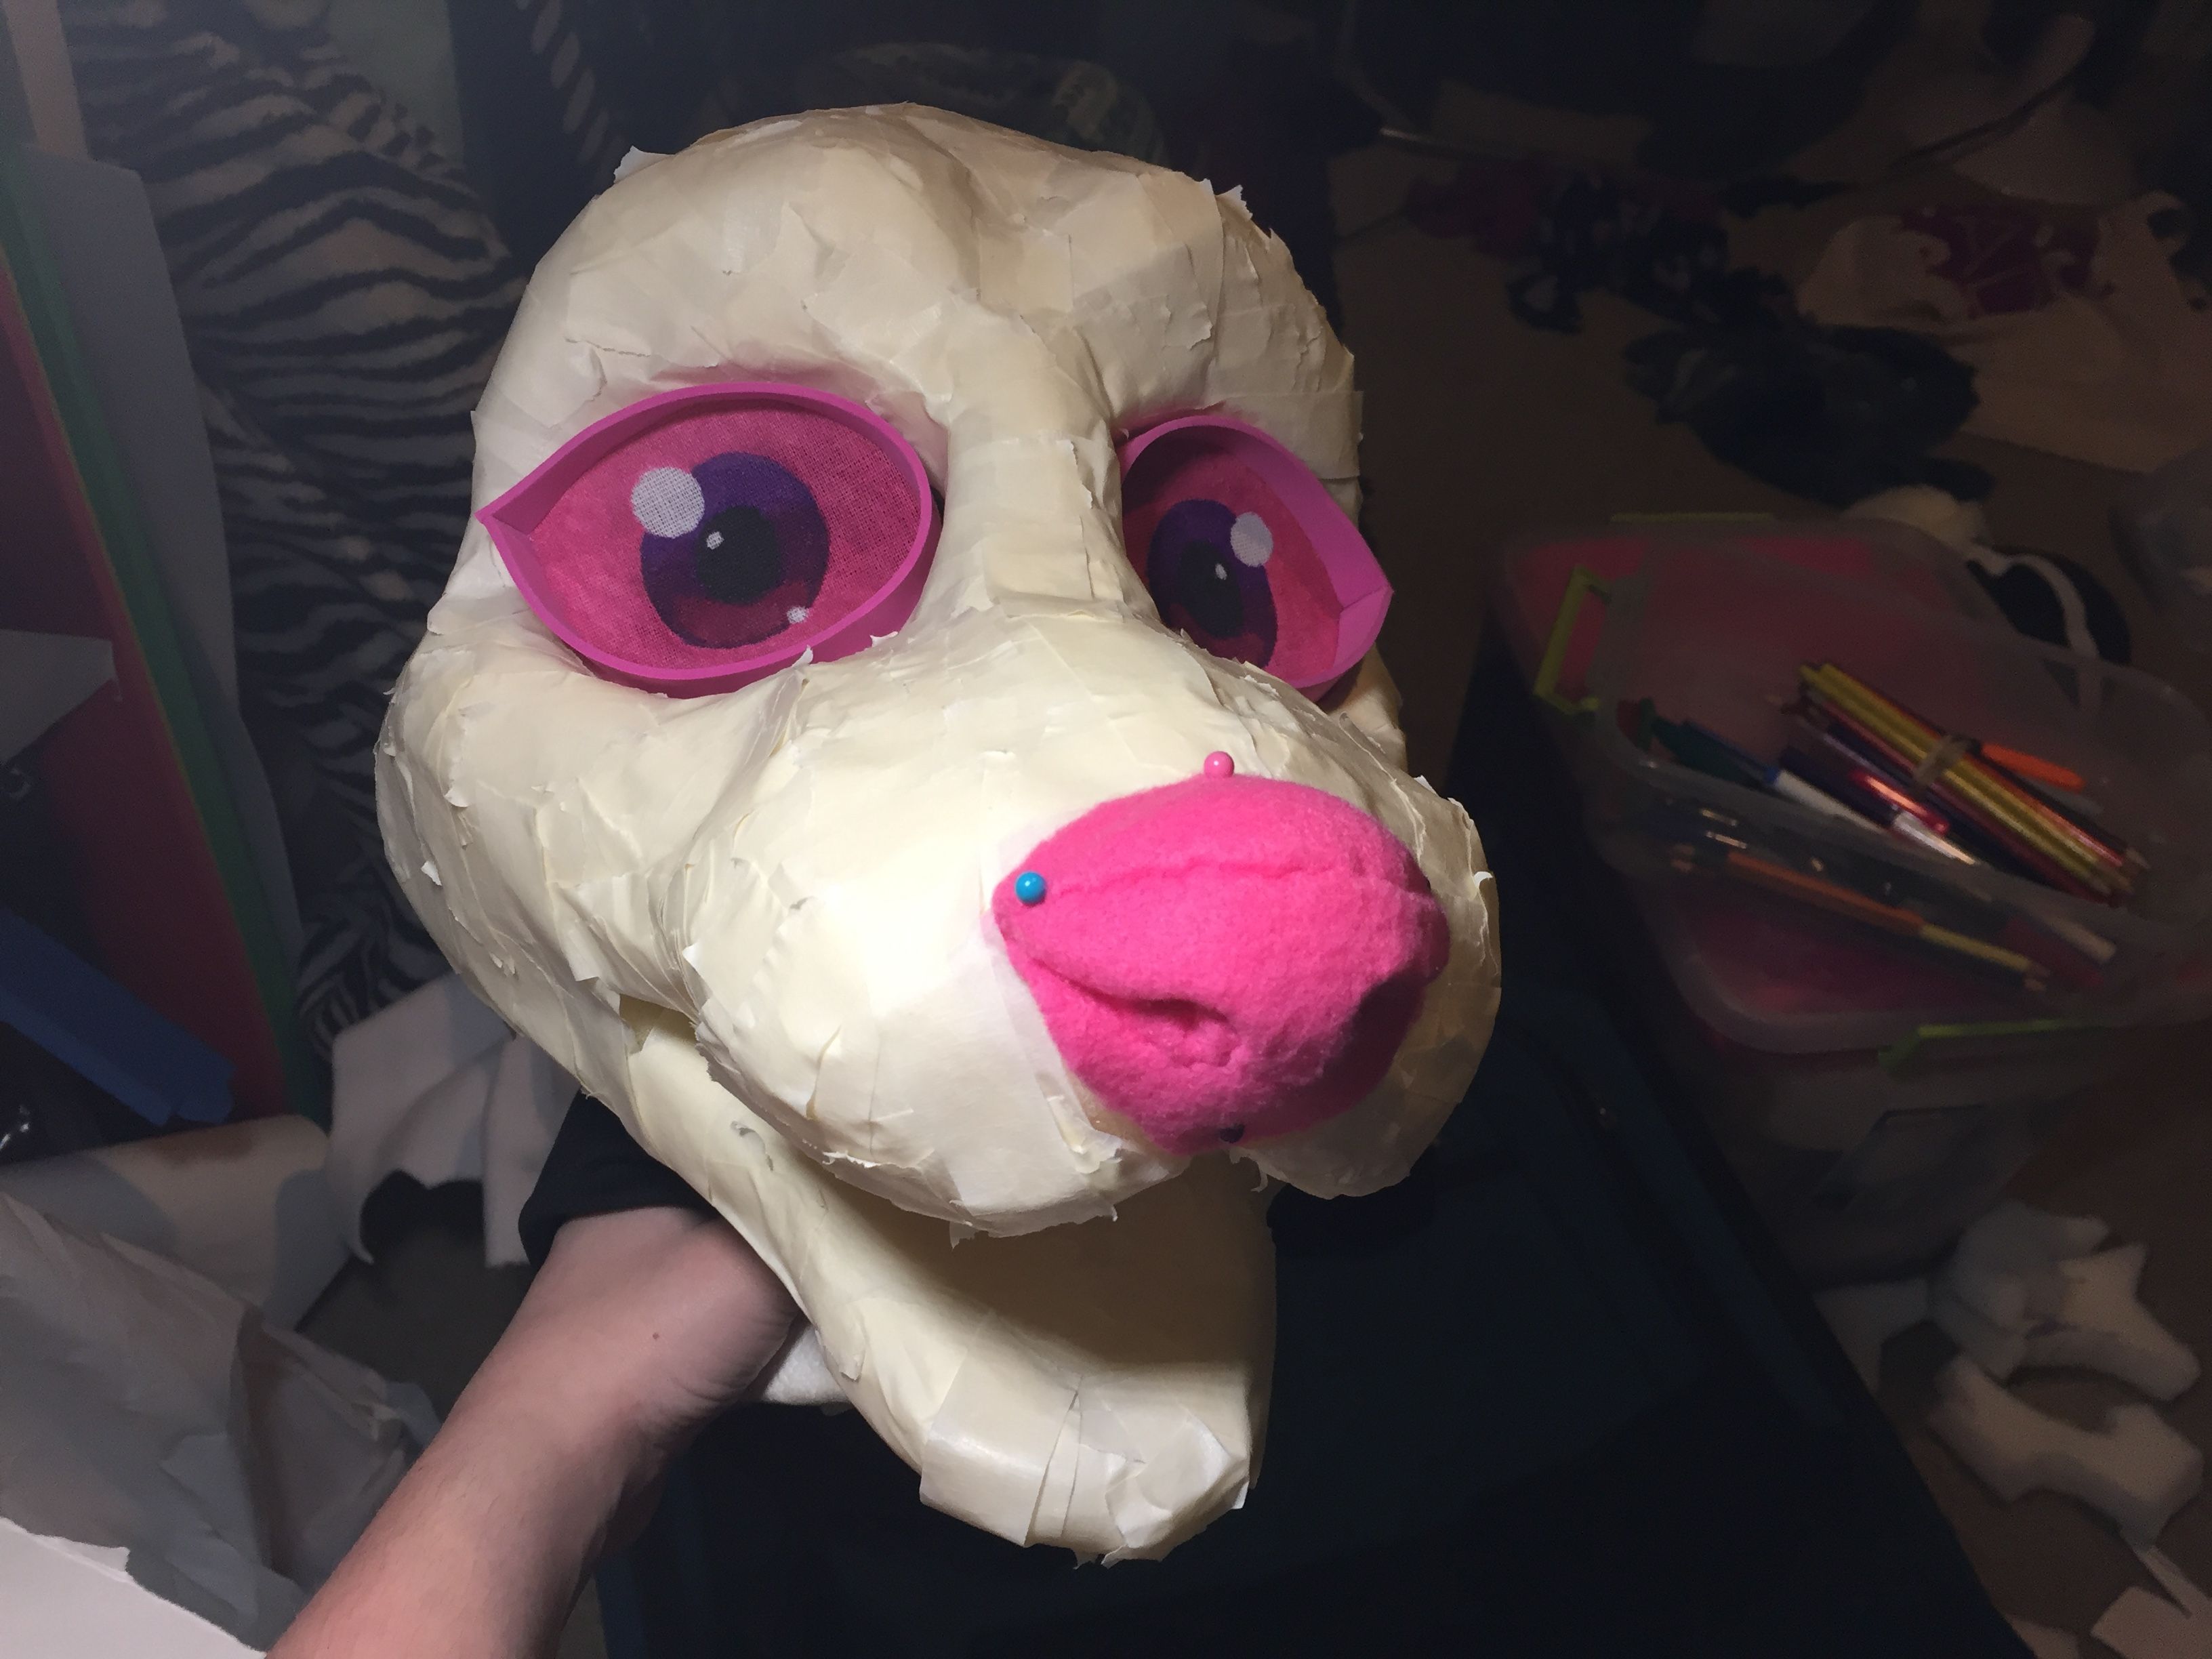
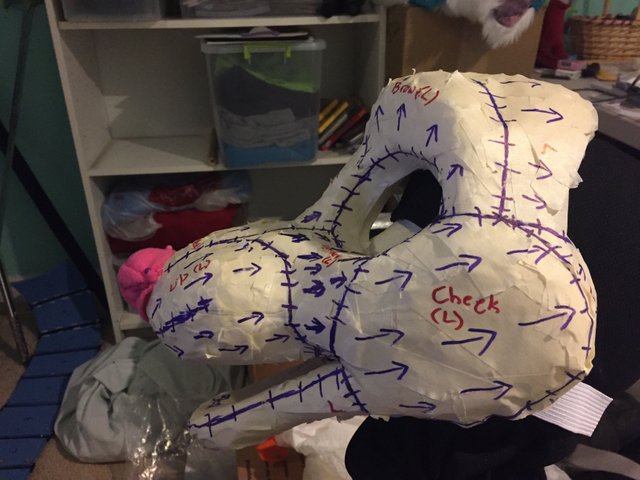
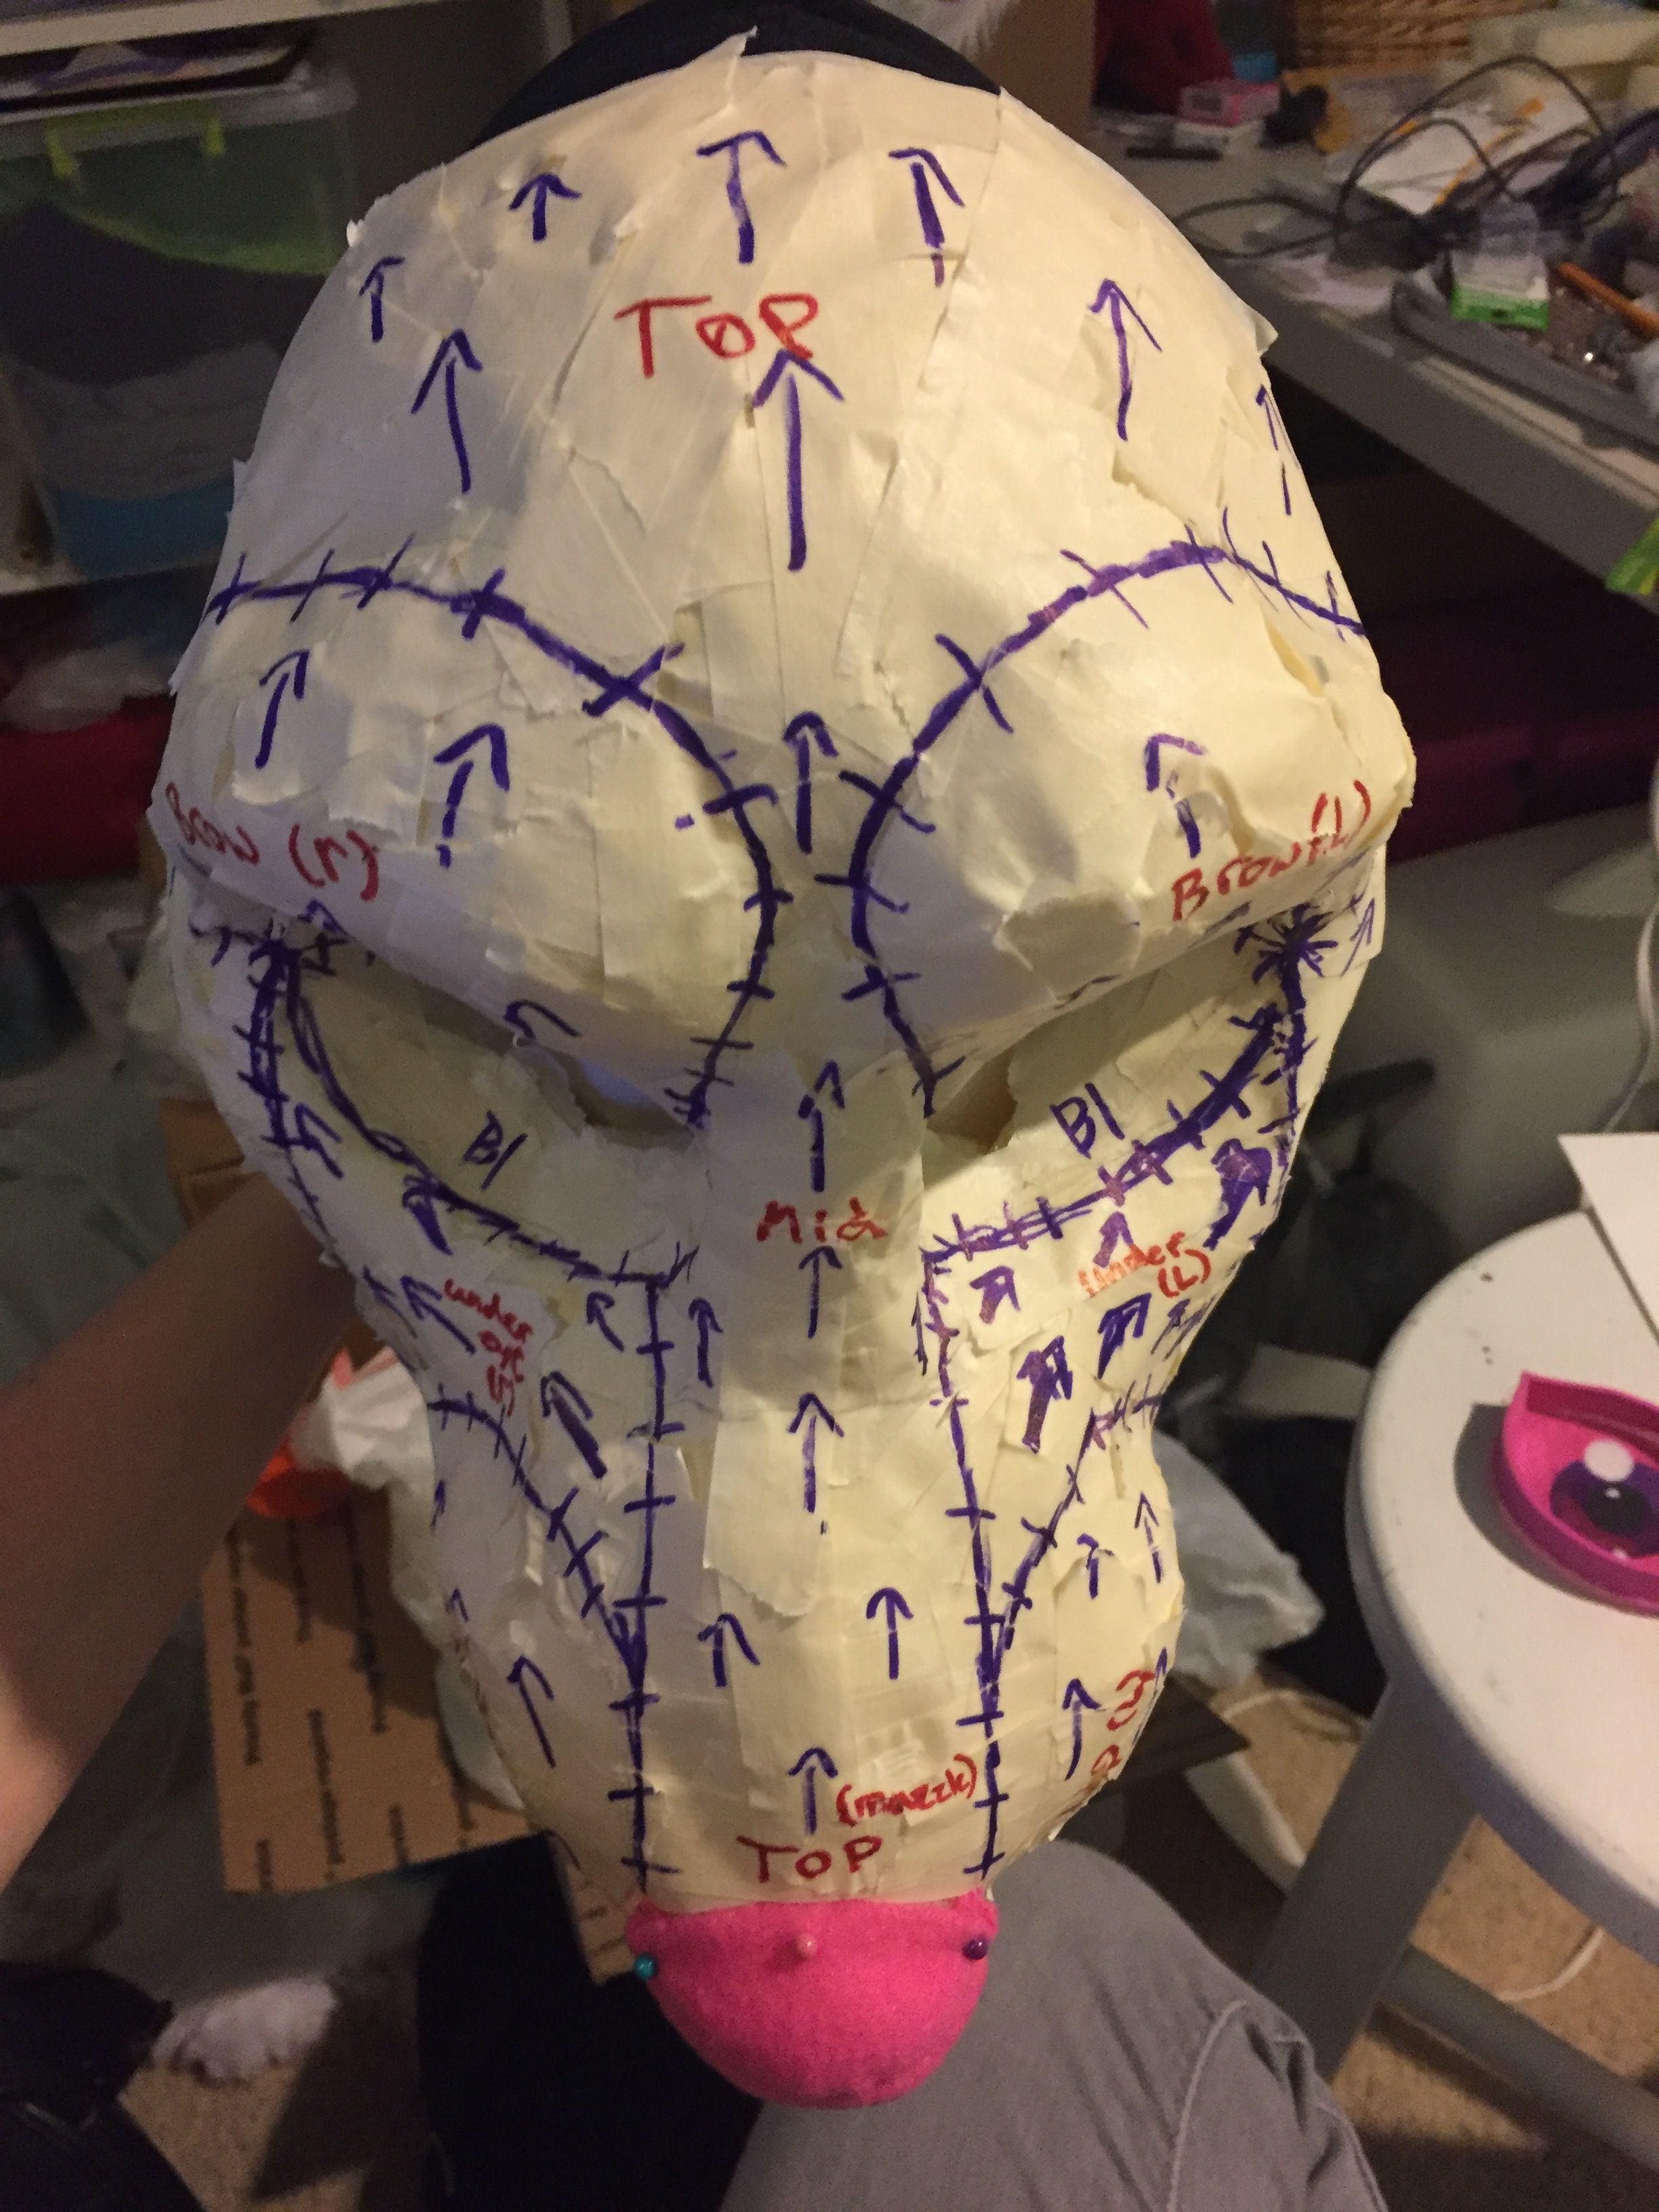
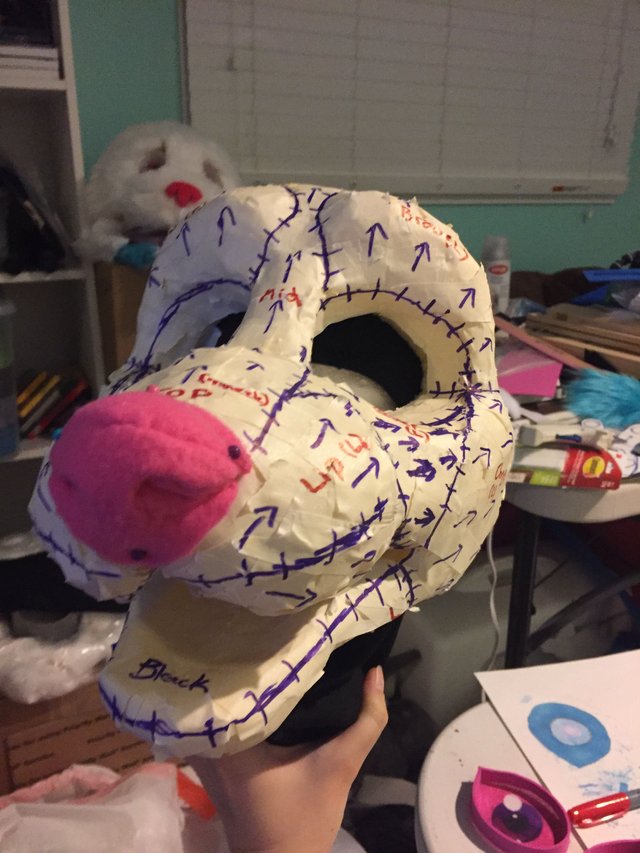
After some final adjustments on the head, it was time to make a pattern and start adding fur! I did this by covering the head in tape and drawing out the pattern. These patterns would be later used to cut out and sew the fur and fleece together.
I cut out the fleece pieces first (eye lining, mouth lining, tongue, and later on teeth).
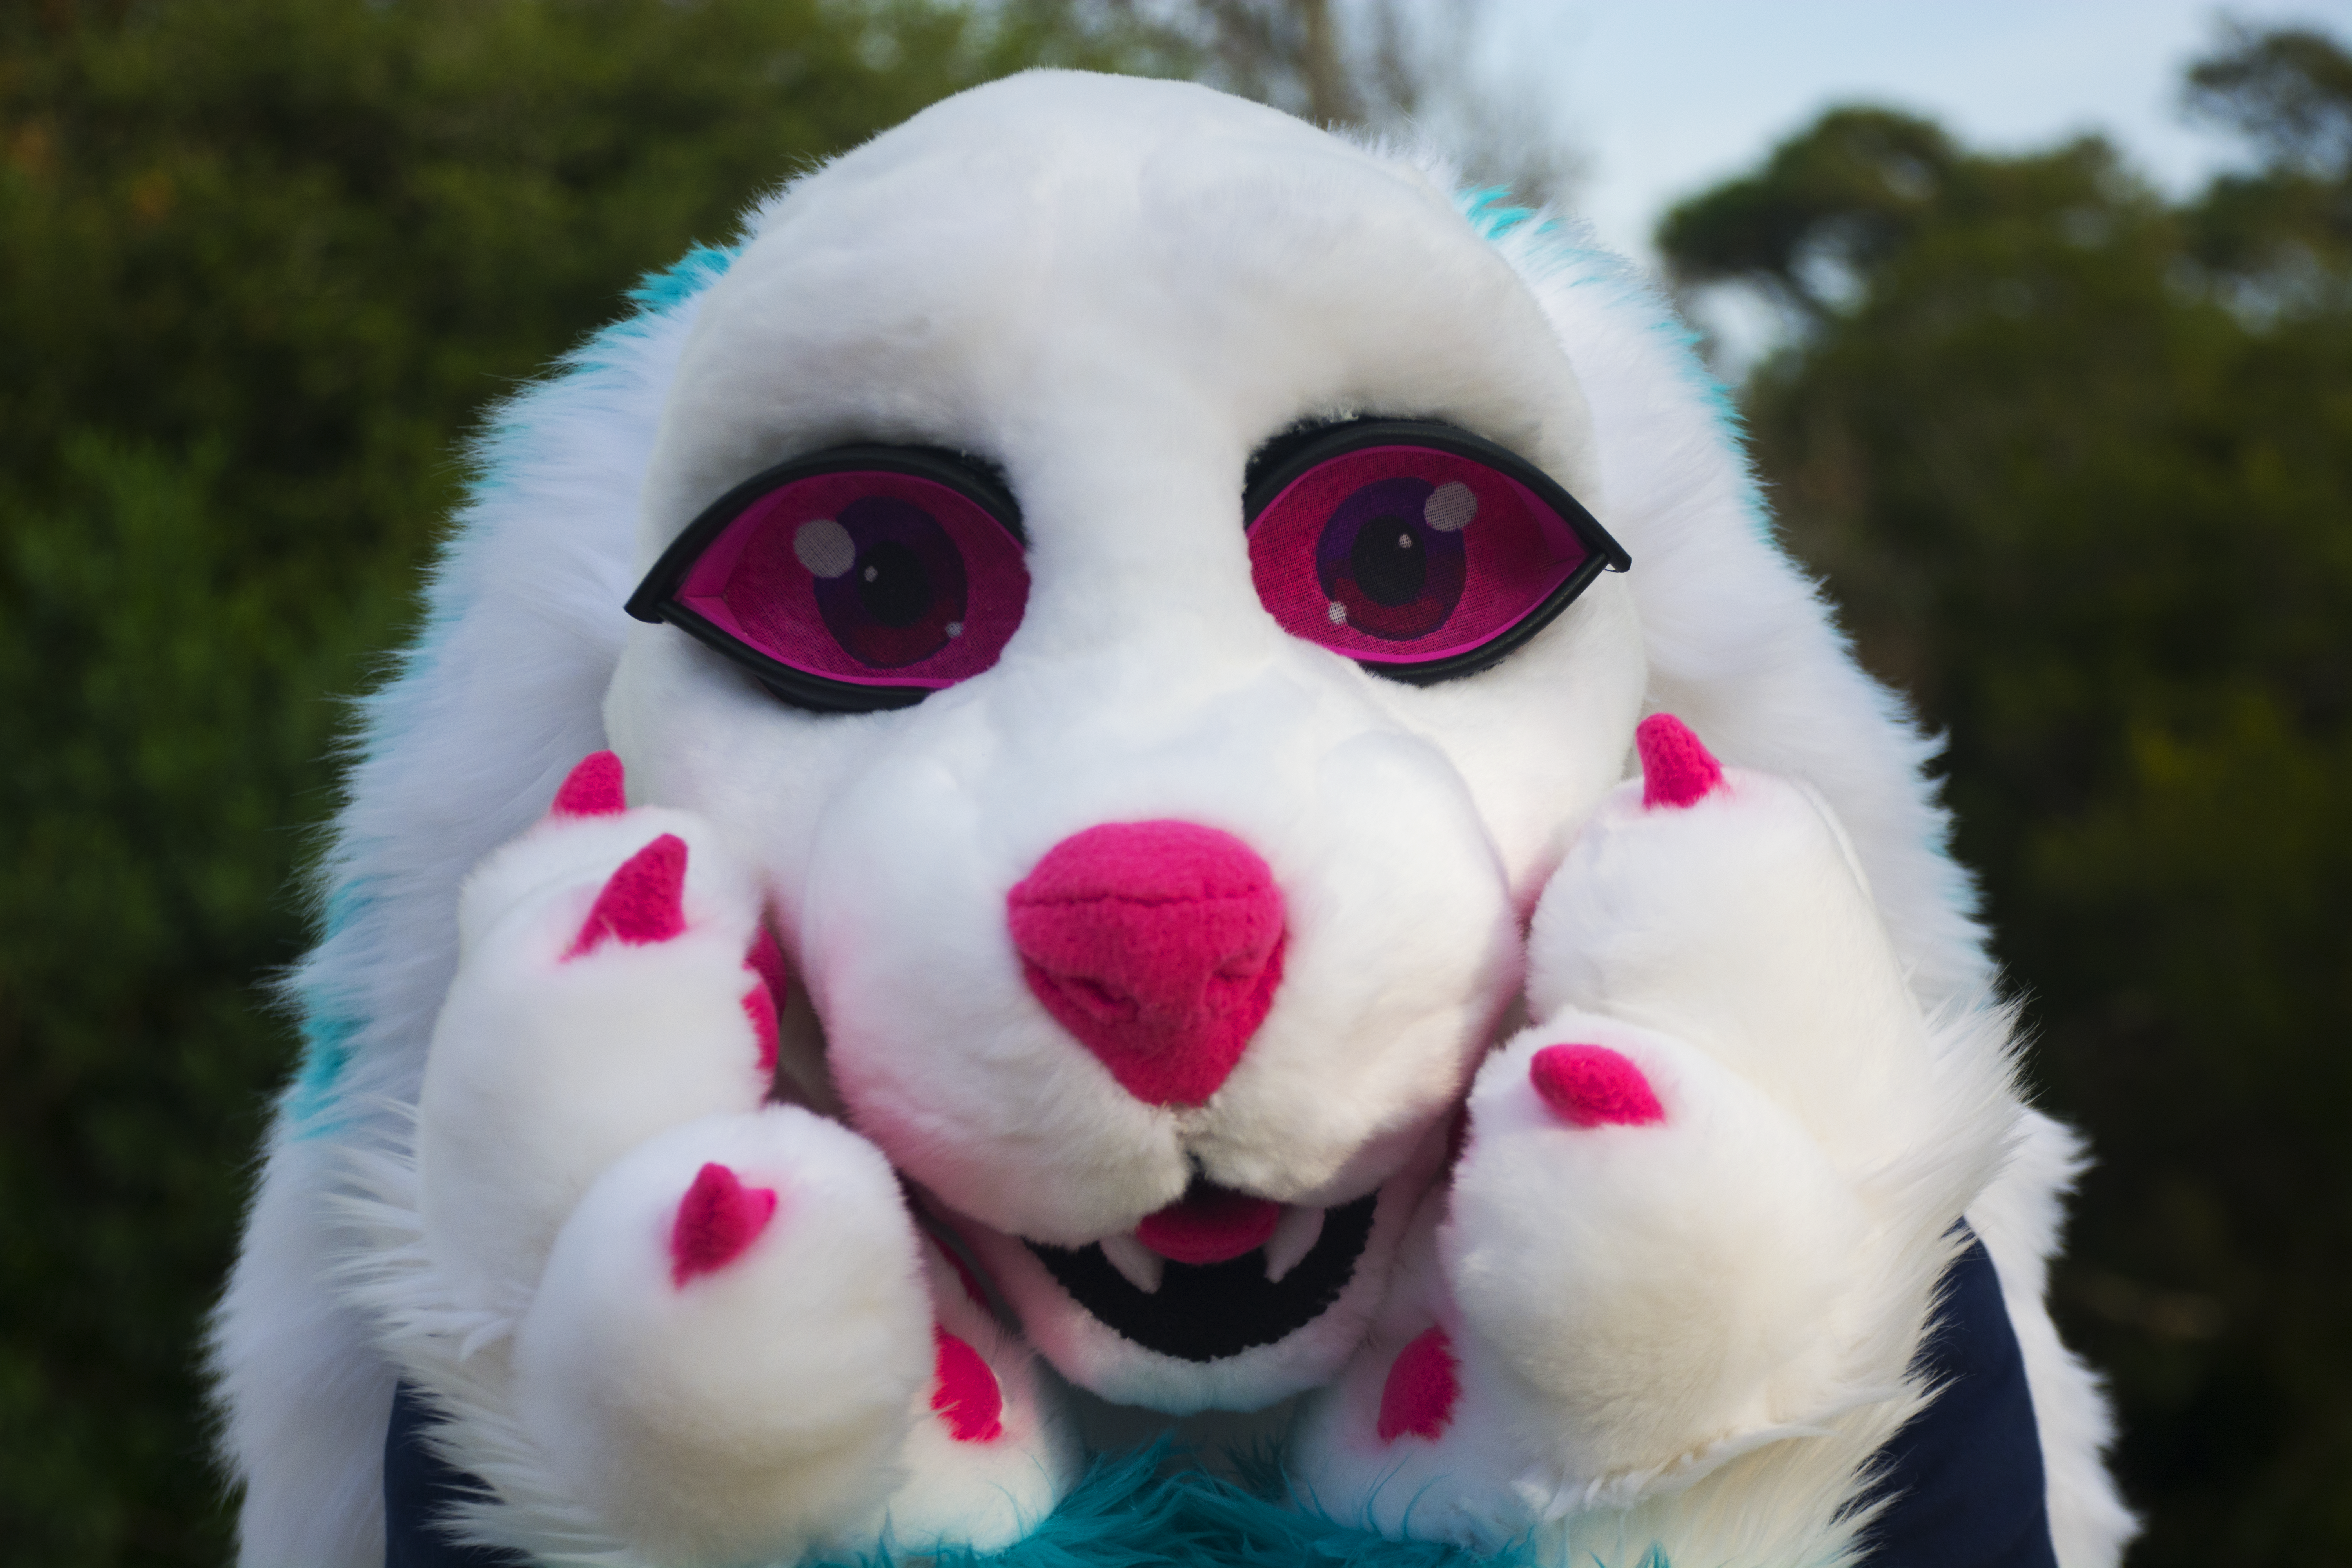
Then I cut the fur out, sewed it together, glued it on the head with hot glue, sewed the ears on, and touched everything up with shaving. Finally I glued the eyes in place and lined them with vinyl and tadaaaa!!! A fresh new costume head!

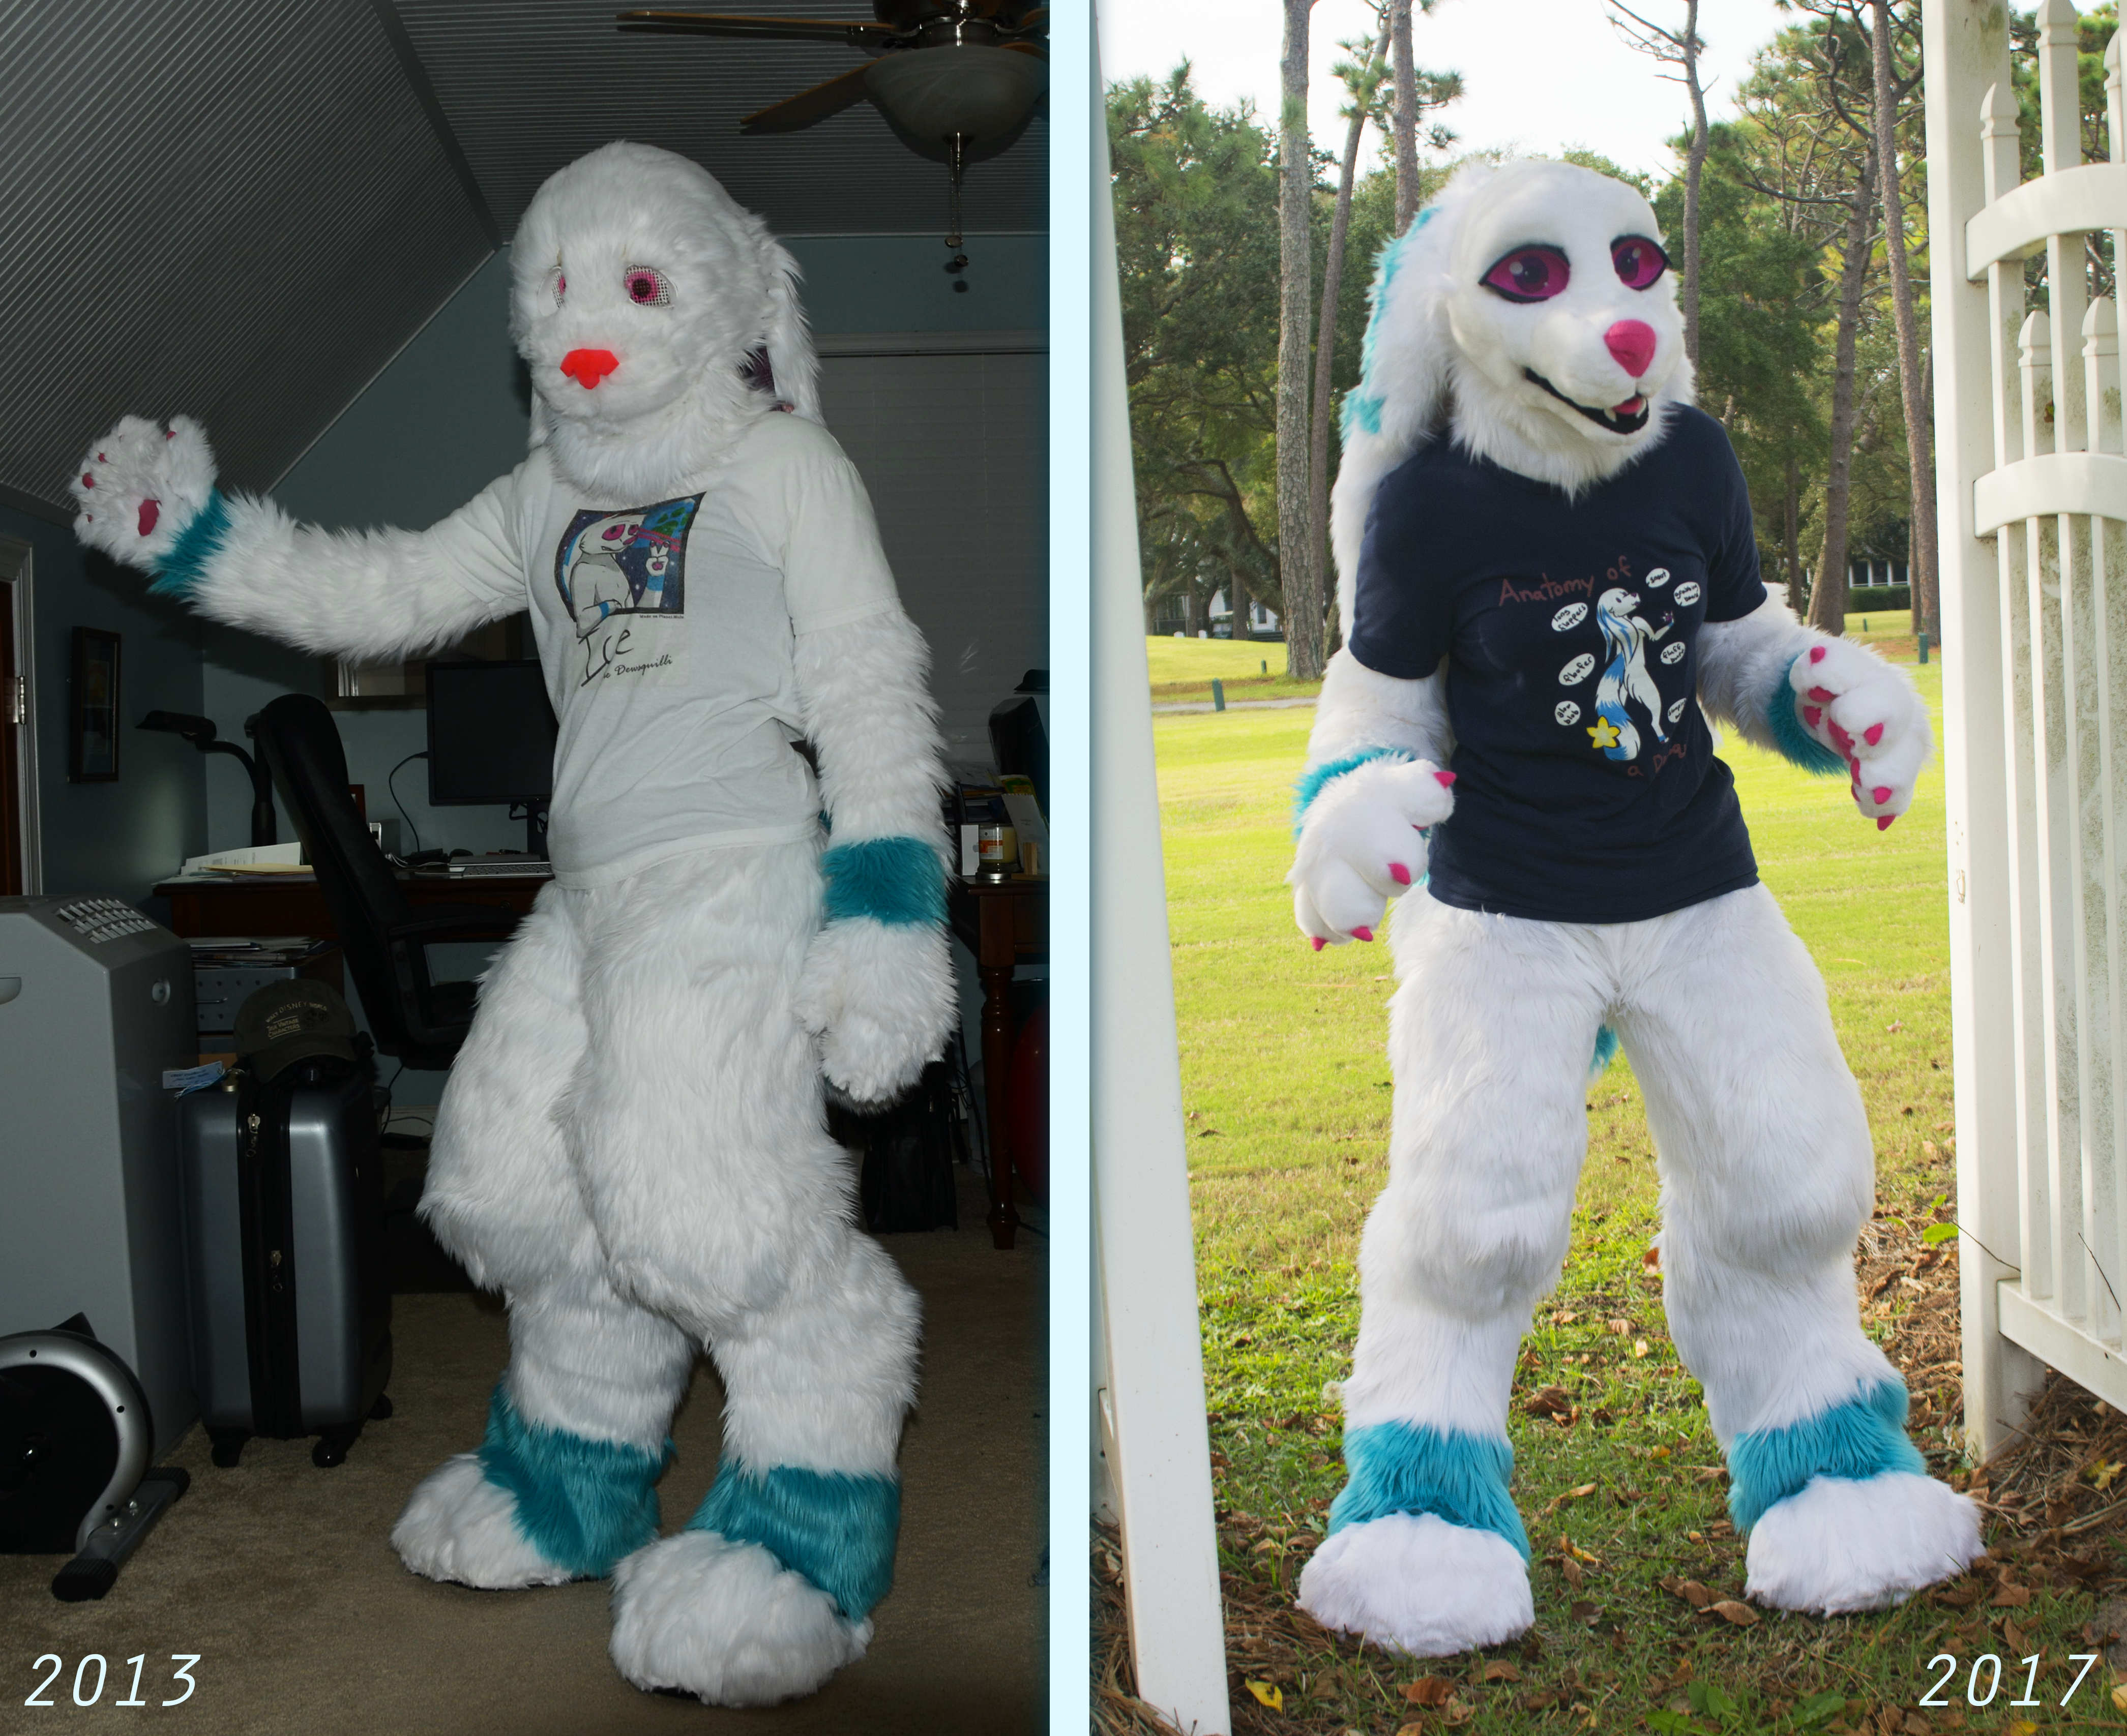
I also made some new hand paws for the costume as well, but I unfortunately didn't take any in-progress photos of those. I do however, plan on remaking the entire costume at some point! Here is a comparison between what I made in 2013 and what I have now with the new head and hand paws!
I am currently working on a yard-long articulated tail with LED lights installed in a star at the tip of it, so look forward to a post on that in the future when it's completed! c:<
Until then, I hope you enjoyed! Don't forget to toss me an upvote if you like this post, and follow for more posts like this one!
If you have any questions, feel free to ask me in the comments. I'll reply as soon as I can. Have a nice day!
Upvote back please really appreciated. Thank you 😉☺😊
Thank you for sharing @iceartz, now I know how costumes are made :))
You're very welcome! I'm glad you enjoyed it :p
Awesome. Love that you’ve got the lower jaw moving:)
Thanks! Yeah, I'm glad I got the moving jaw worked out. I was somewhat worried the fur might cause it to be too stiff but even after adding the fur it moves very well!
Super! :)
Congratulations @iceartz! You have completed some achievement on Steemit and have been rewarded with new badge(s) :
Click on any badge to view your own Board of Honor on SteemitBoard.
For more information about SteemitBoard, click here
If you no longer want to receive notifications, reply to this comment with the word
STOPThis gem of a post was discovered by the OCD Team!
Reply to this comment if you accept, and are willing to let us promote your gem of a post! By accepting this, you have a chance to receive extra rewards and one of your photos in this article will be used on our compilation post!
You can follow @ocd – learn more about the project and see other Gems! We strive for transparency.
If you would like your posts to be resteemed by @ocd to reach a bigger audience, use the tag #ocd-resteem. You can read about it here.
I accept!
heh other ppl missing out on free crypto! honestly dont get why so many ppl even still use illumanti crap like facebook!
hope ur gunna put a fan or 2 in there u gunna need it! id imagine a liqiuid cooled system attached to fans would work better though. have pipes that run threw the suit like a mesh. honestly im shocked ive never heard of or seen that . theres 0 reason u cant be 100% comfortable 1 in any costume or whatever.