A whale passed by, the making of #2
Yesterdays whale post was about the modelling. Today is going to be about the texturing.
I usually start of with a gridtexture. This helps with getting the UV layout nice (UV layout is the mapping from the 3d mesh to a 2d image.)
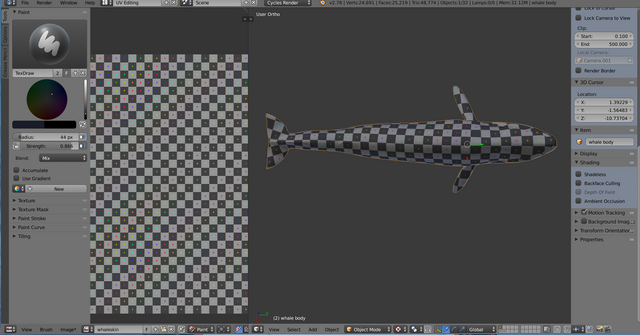
Here you can se the two side by side. Each triangle in the mesh has a counterpart in the image and thus it is possible to map from one to the other. Its called UV because instead of x and y (which are usually used for 2d images) we use U and V , thats because in a 3d setting the x , y (and z) are used for the 3d, so as not to confuse them, U and V are used.
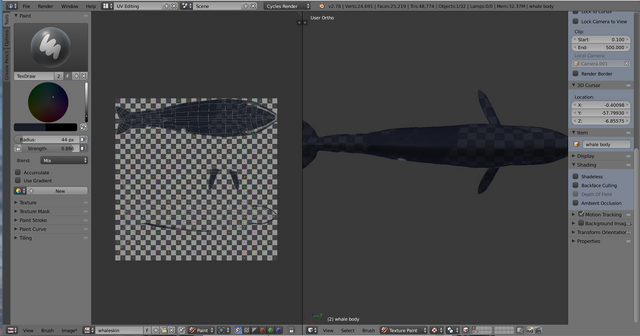
Now I can paint the colours that I want unto the mesh, either in the 3d view (on the right) or in the 2d view on the left. its important to make sure that the layout of the mesh in 2d is to your satisfaction because as soon as you start painting you either need to stick to it , or accept that you have to redo your work.
Both views are updated in realtime, so I can switch between them and choose the one that is best suited. e.g. the borders between 2 parts of the mesh is best handled in the 3d window, while the small details is best handled in 2d.
You can even use external editors such as Gimp or Krita, if you want and then just reload the texture after saving.
For this mesh I chose a rather simple texture simce it is not goin to be very visible in the finished clip. I also only did the colours but you can also paint on closs or bump maps using the same technique.
NOtice also how the mesh is visible in the 2d view. This makes it easier to see where your painting will affect the mesh
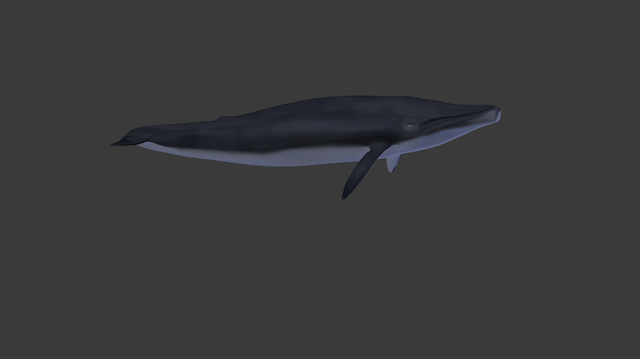
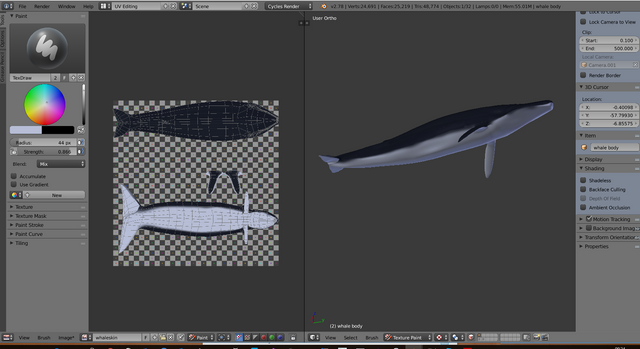
the finished textured whale is now ready for rigging and animation.

Im EvilHippie, a compulsive creative and jack o' trades. if you want to know more about me check out my introduction post here
If you like what you see, feel free to upvote, follow and resteem