Tutorial: How To Create Clock Face Numbers For Redbubble
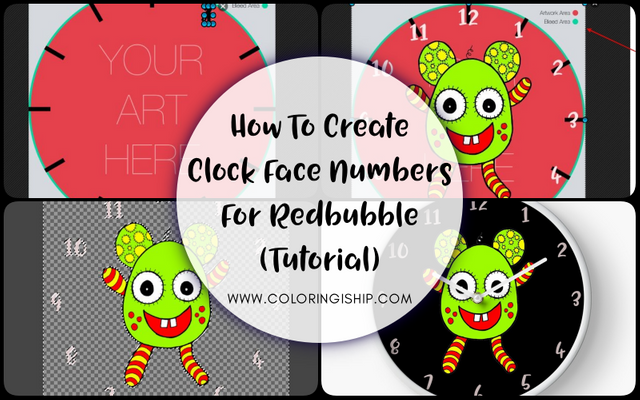
I have been wanting to learn how to create clock face numbers for my Redbubble clocks for quite some time but since I don't have access to Photoshop I refrained from exploring it further. I regretted not doing it sooner because apparently my free image editing software GIMP is able to open PSD files which I didn't know about until very recently (duh).
This tutorial is specifically for newbies who have no access to Photoshop or any other fancy paid software. I use free software/editors for all of my designs and for this tutorial I am using GIMP, an open-source image editing software and the free version of Photoscape. You can download Photoscape from Microsoft Store if you are using Windows.
Disclaimer: I try to be as detail as possible but some times it's not possible to list all of the steps. You still need to explore things on your own. Now, you probably can do the entire steps in GIMP but I can't use GIMP extensively in my laptop due to the heavy load. Also, this is just one way of doing this. You can use different software or editor to achieve similar results.
Step 1:
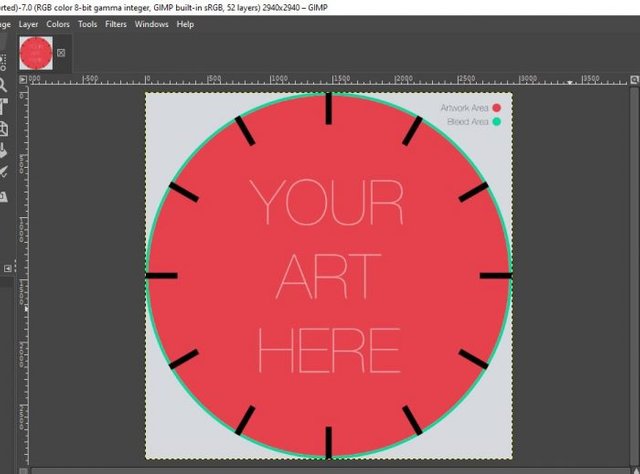
Download the clock face numbers template from Redbubble and open the PSD file using GIMP.
Step 2:
Go to File -> Export As. Make sure to export it as a PNG image. Close the image file but keep GIMP open.
Step 3:
In GIMP, create a background template for your design with a white background. Go to File -> New. Follow exactly this setting. Next, go to File -> Export As to save the image. Make sure to save it in PNG format.

Step 4:
Open Photoscape and navigate to Editor tab. Browse the Folders pane to where you saved the image you created in Step 3 and open the image file.

Step 5:
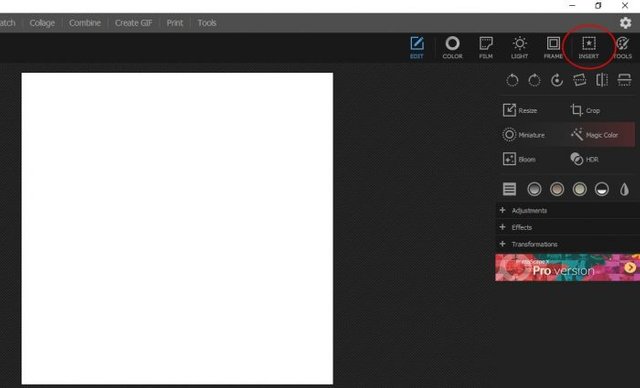
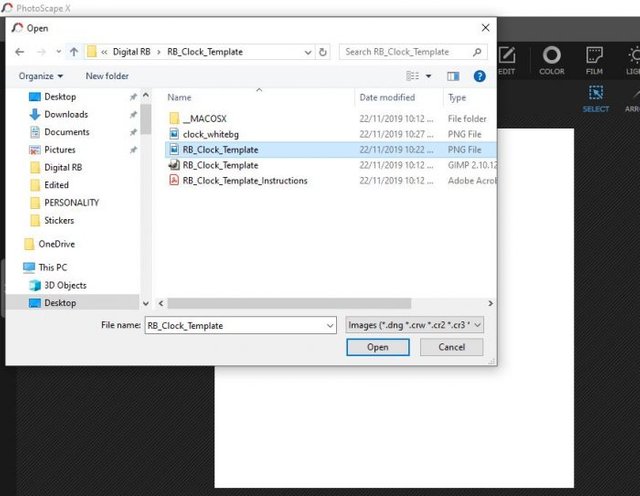
Go to Insert tab -> Image and open the image you saved in Step 2.
Step 6:
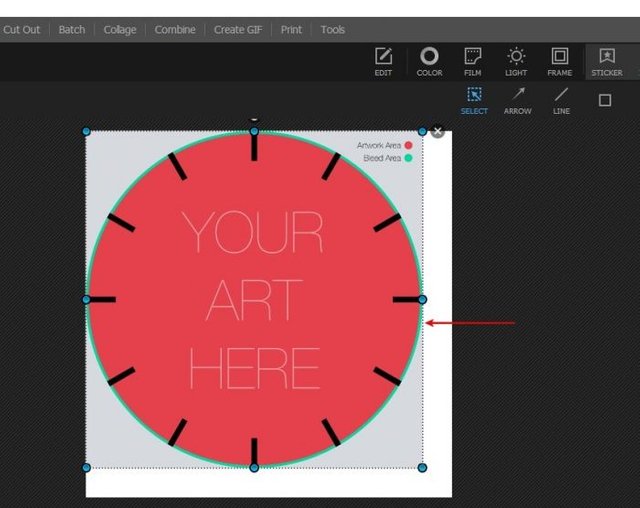
Resize the clock template on top of the white background image.
Step 7:
Go to Text tab to create the clock face numbers. Choose your desired font and font size. For this example, the font size is 400.


Step 8:
Type number 1 for 1 o'clock and position the text accordingly on the clock template.

Step 9:
Repeat step 8 eleven times until 12 o'clock. You can leave the font color black or change it to suit your design. I changed it to white because my design will have a black background.

Step 10:
Go to Image tab and open the image of your design.

Step 11:
Position the image on top of the clock face template. Make sure it doesn't cover the numbers.

Step 12:
Click on the Redbubble clock template layer and make sure it is highlighted. Delete this layer.

Once it is deleted it should look like this, the white background and your design.

Step 13:
Now I want to remove the white background and make it transparent. If you like the white background just leave it as it is but I want to show you how to create a transparent background (that you can use with Redbubble background colors). However, I need to do this is GIMP because the free version of Photoscape doesn't support this function.
Step 14:
Click on Save and make sure to save it in high resolution (300 dpi) and in PNG format.


Step 15:
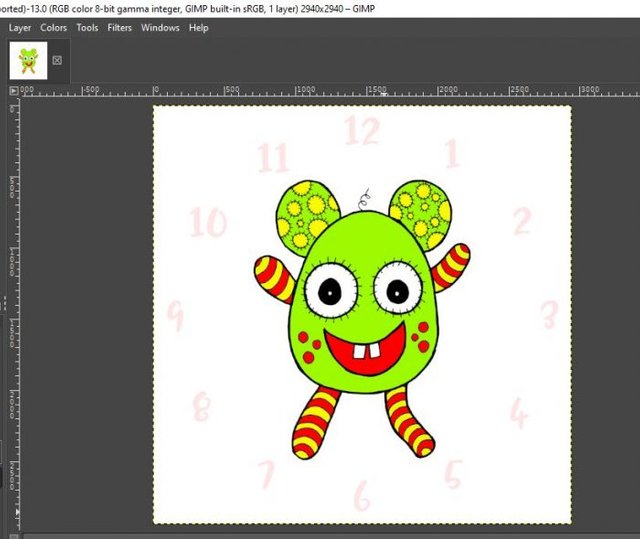
In GIMP, open the image file from step 14.
Step 16:
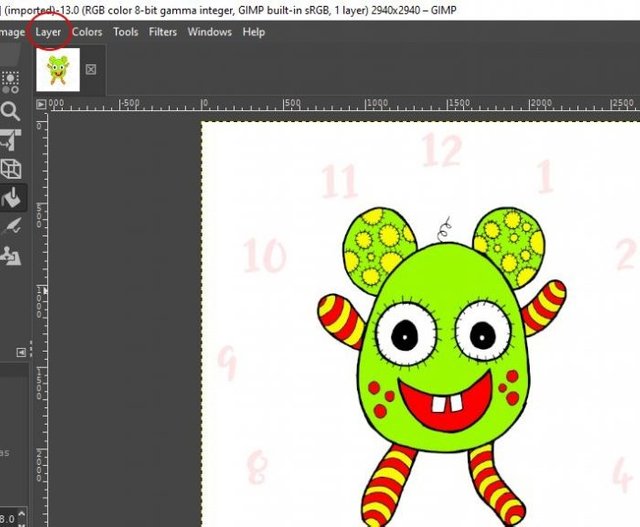
Go to Layer -> Transparency -> Add Alpha Channel
Step 17:
Choose the Fuzzy Select tool from the toolbox.

Step 18:
Using the Fuzzy Select tool, click on the white area on the image and it will be highlighted.

Step 19:
Press the Delete button on your keyboard to delete the white background. Once deleted it will reveal the transparent background.

Step 20:
Now save the image file. Go to File -> Export As. Make sure to save it in PNG format to preserve the transparent background.
Step 21:
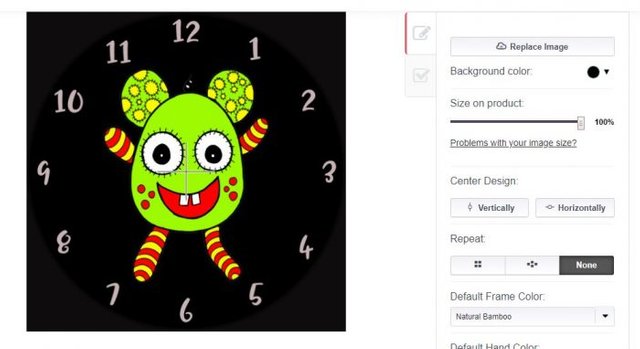
Go to your Redbubble clock editor and upload the image you saved in step 20. Since the image size is accurate you don't have to do any position adjustments.
Step 22:
And it's completed!
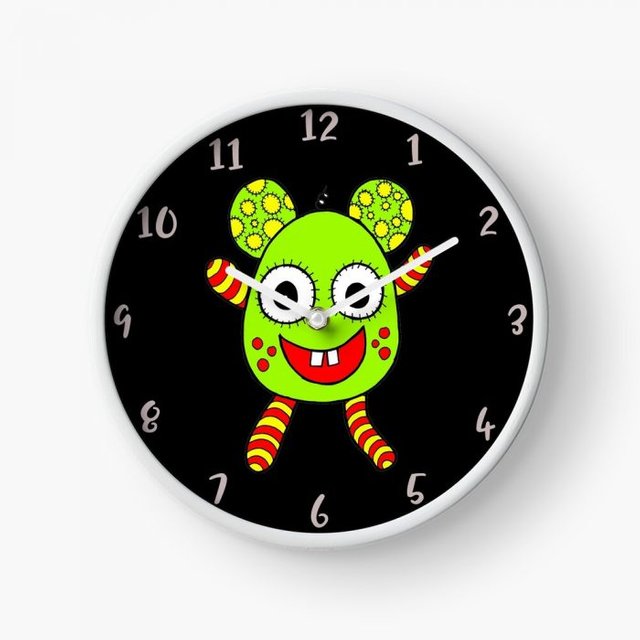
What do you think of How To Create Clock Face Numbers For Redbubble tutorial? Is it helpful? This tutorial is great if you want to learn to create your own custom templates suitable for your designs. However, if you think it is too complicated you can use my templates for FREE! Yes, I created a couple of simple templates in black and white fonts with a transparent background. All you need to do is to edit it in your image editing software and put your design on top, save it and you are good to go! Sign up to my mailing list and I will send the download link to you ASAP. I will email the link to you within 24 hours. I will not spam you and you can unsubscribe anytime.

Related posts:
- Tutorial: Tiger Stencil Painting
- Doodle Tutorial For Complete Beginners | Sample Doodle Patterns and FREE Downloadable Templates Are Included
- Best Drawing Books: My 6 Favorite Drawing & Painting Books
- Hand Drawn Flower | Flower Doodle Tutorial
- Review of Pentel Aquash Waterbrush
Posted from my blog with SteemPress : http://coloringiship.com/2019/11/26/tutorial-how-to-create-clock-face-numbers-for-redbubble/
This post was shared in the Curation Collective Discord community for curators, and upvoted and resteemed by the @c-squared community account.
If you are a community leader and/or contest organizer, please join the Discord and let us know you if you would like to promote the posting of your community or contest.
@c-squared runs a community witness. Please consider using one of your witness votes on us here
Thank you!
You have been curated by @rem-steem on behalf of Inner Blocks: a community encouraging first hand content, with each individual living their best life, and being responsible for their own well being. #innerblocks Check it out at @innerblocks for the latest information and community updates, or to show your support via delegation.
Thank you!
I'm totally clueless about image manipulation... but the few things I do, I do them with GIMP. 👍
Thanks for sharing this great article, I'm sure it will be useful to many people!
I use GIMP but the software is clunky and slows down my laptop greatly hence I only use it for basic things. I like Photoscape though but not as powerful as GIMP.