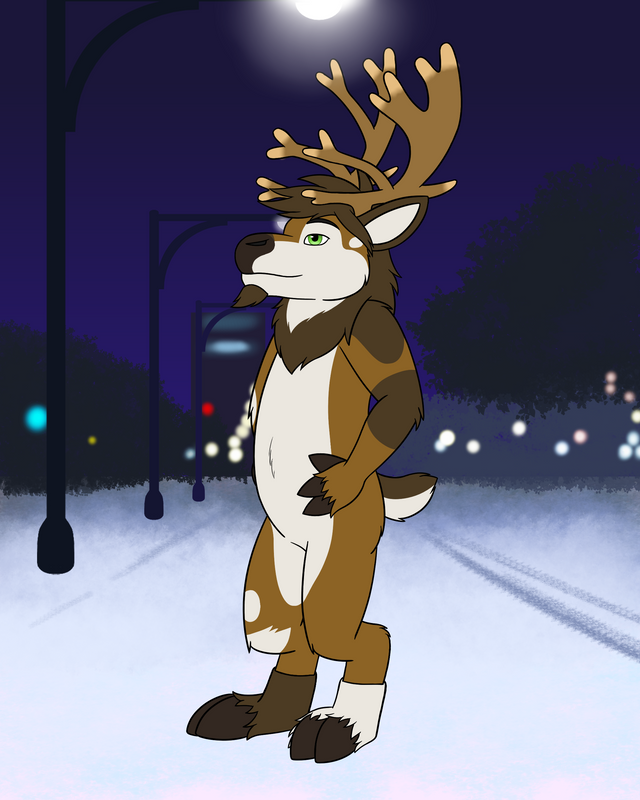
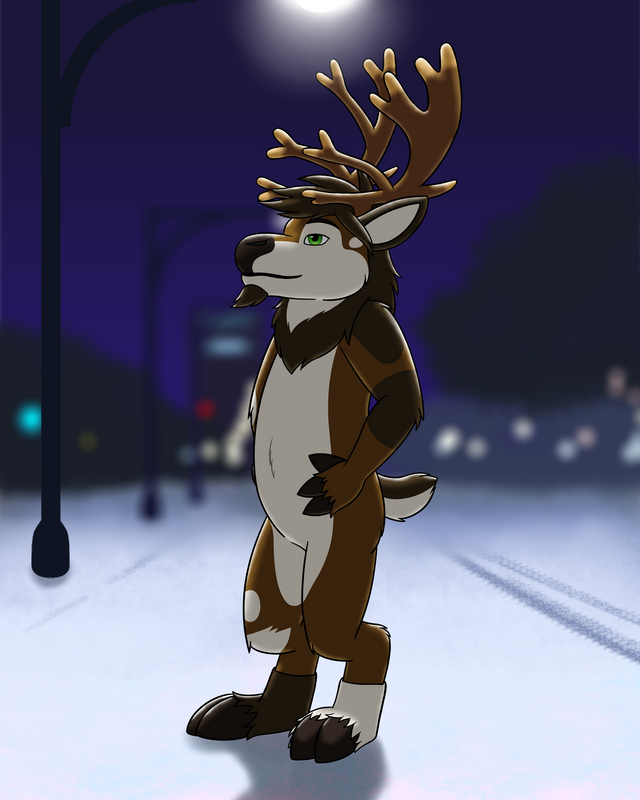
Majestic Winter Caribou | And Drawing Tutorial Steps
Nothing more elegant and majestic than a buck in its element.
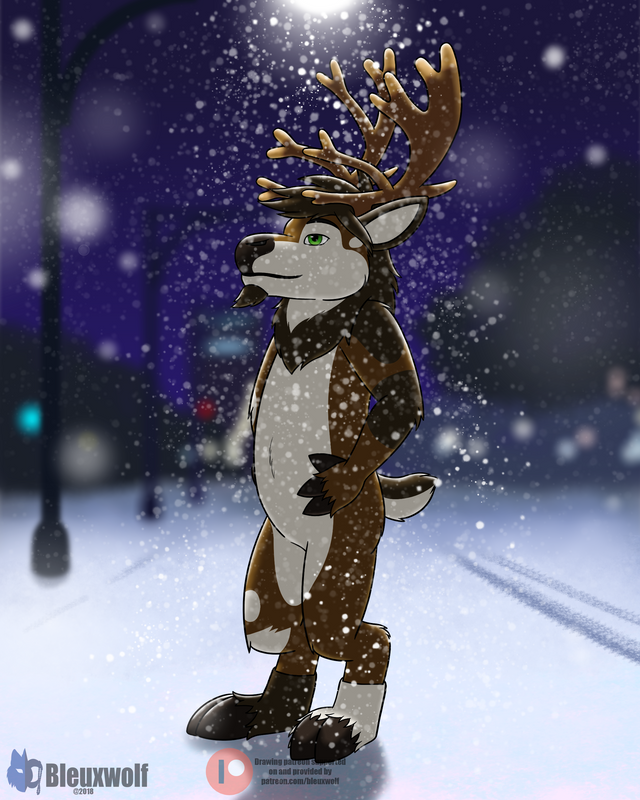
This is a full detail semi-realistic with full detail background that was an upgrade from a non-colored sketch for Mixley (Mixracc on Twitter) featuring Remington (CalicoKRBU on Twitter). This drawing request was to recreate this photo here. This was a fun one to do and I think its one of the drawings that really showcased my drawing capabilities at its best. This tutorial might be a bit complex to show fully since the background was a little complex to work on, but I can do my best to show how I did them.
Drawing Details
| ART PARAMETER | DETAIL |
|---|---|
| Art Medium | Digital: Krita |
| Art Tool | Wacom Cintiq 13 HD |
| Art Style | Semi-Realistic |
| Level of Detail | Full Detail |
| Background Detail | Full Detail |
| Size | Full Body |
| Dimensions | Portrait: 2048 x 2560 |
| Date Completed | 2019-03-09 |
My Layer Layout
- 1st Snow layer
- 2nd Snow layer
- Light layer
- Foregroud Folder
- Lineart layer
- Highlights layer
- Backligthts layer
- Shadows layer
- Color Folder
- Quaternary Color layer
- Tertiary Color layer
- Secndary Color layer
- Base/Primary Color layer
- Copy of Background Folder (Most layers are merged together to do secondary edits and blurring.)
- Light Pole layer (slighter blurred)
- Shadows layer
- Background layer (merged layers from 2nd Light Pole layer to Sky layer; heavier blurred)
- Background Folder (To be turned off after primary editing.)
- 1st Light Pole layer
- 2nd Light Pole Folder
- Color Filter layer
- Light Pole layer
- 3rd Light Pole Folder
- Color Filter layer
- Light Pole layer
- City Lights layer
- Trees layer
- Ground layer
- Building layer
- Sky layer
- Extra Sketch layer
- Fine Sketch layer
- Rough Sketch layer
- Canvas Background layer (neutral color like grey)
Phase 1: Foregound Part 1
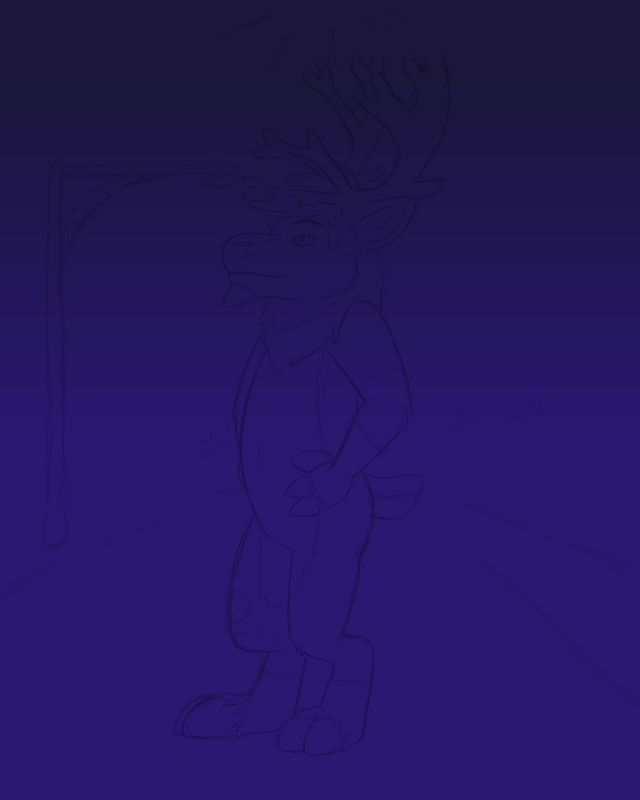
Canvas Prep/Rough Sketch/Fine Sketch
Layers Used:
Canvas Background layer
Rough Sketch layer
Fine Sketch layer
This was a sketch done already for the Patreon reward for December 2018, so I just posted the sketch again here but a little edited. But if this wasn't already made, I would have a neutral colored background and rought sketch in the character and such. Then fine sketch over the roughs.
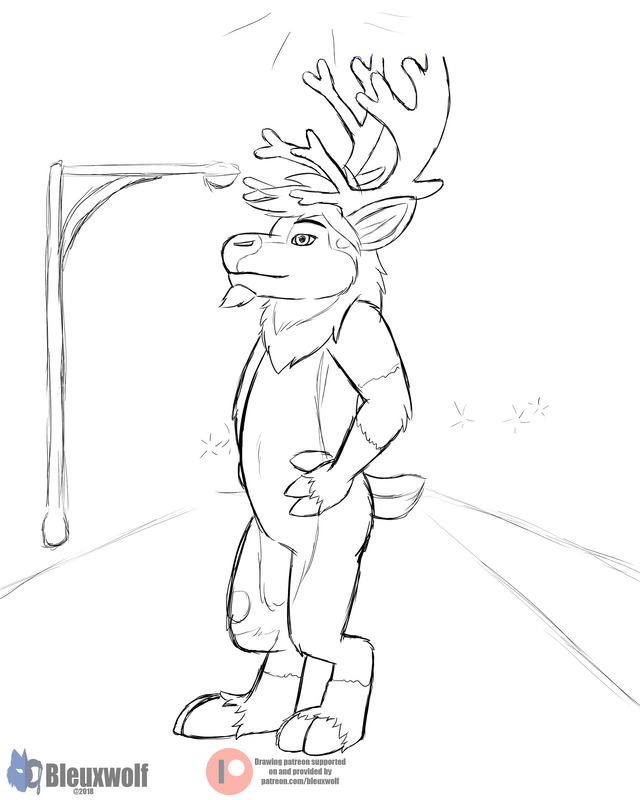
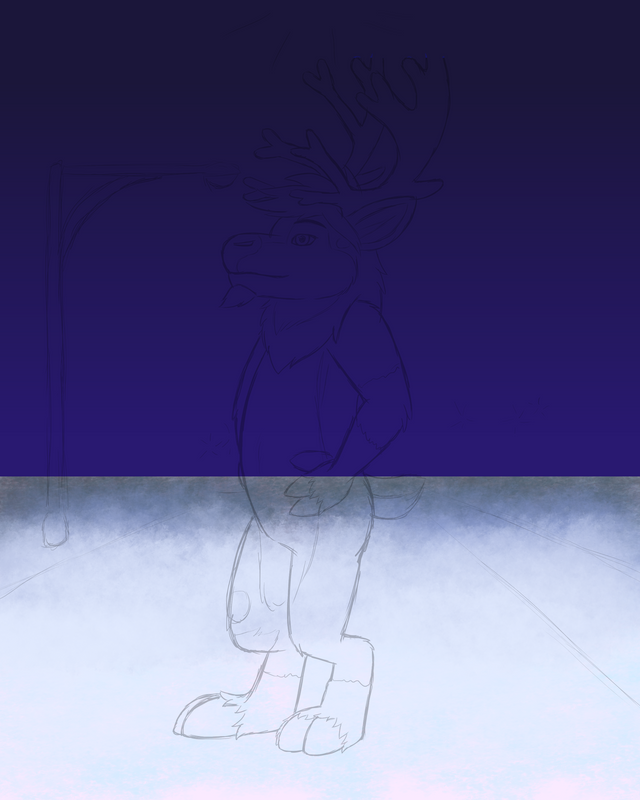
Lineart
Layers Used:
Foreground Folder -> Lineart layer
After then sketches are good, I lineart over the sketches.

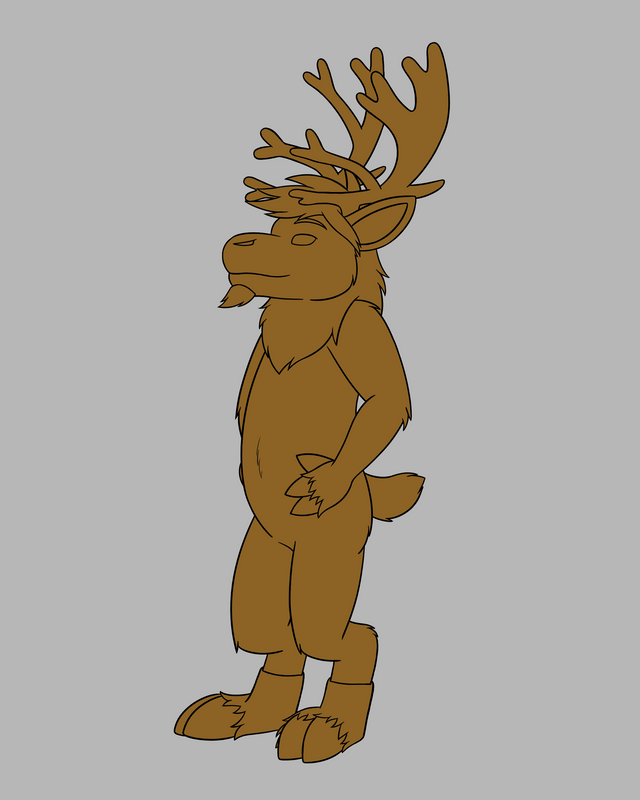
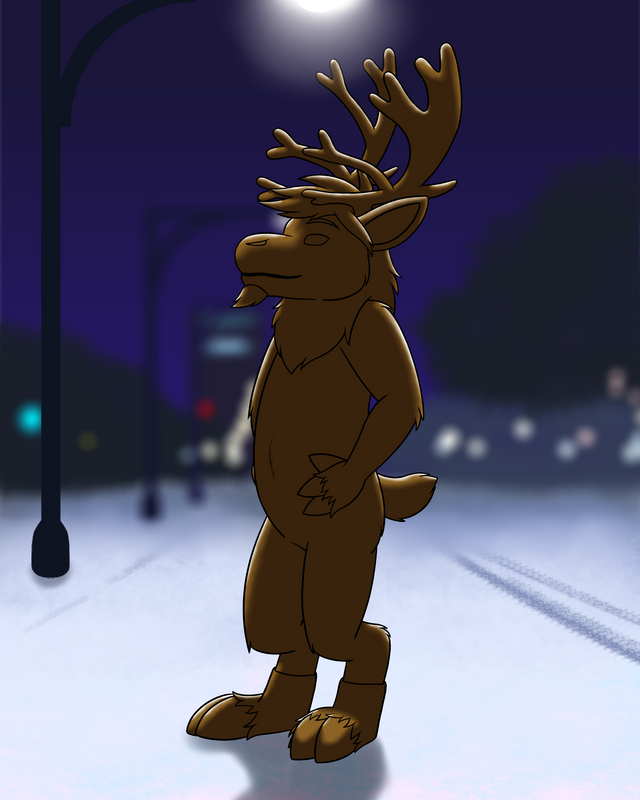
Base/Primary Color
Layers Used:
Foreground Folder -> Base/Primary Color layer
I select all areas outside the character's parameters with the contiguous "wizard" tool, invert the selection, then fill in the areas with the character's primary color. I do this method to avoid tiny gaps in the base color.
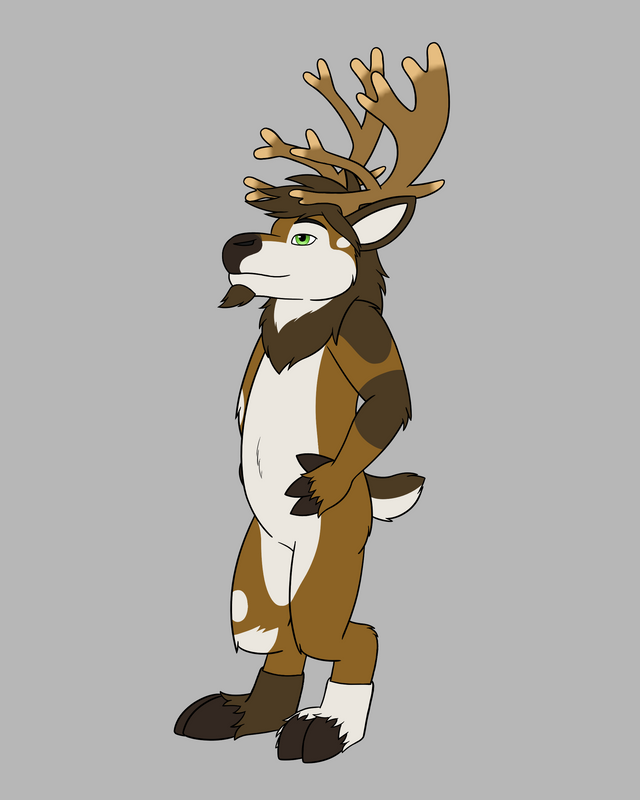
Detail Color
Layers Used:
Foreground Folder -> Color Folder -> (Folder's color layers.)
Then just add in the other color details.
Phase 2: Background
Sky Layer
Layers Used:
Background Folder -> Sky layer
Here's where I begin to work on the background. I temporarily turn back on the sketch again for reference.

I add in a gradient blue sky using the gradient tool.
Background Details
Background Folder -> Ground layer
Background Folder -> Trees layer
Background Folder -> 1st Light Pole layer
Background Folder -> City Lights layer
Background Folder -> Building layer
I draw in a snowy ground. I temporarily turn on alpha lock and use a unique to brush in some rough details in the ground. Then turn off alpha lock.
Brush in some trees.
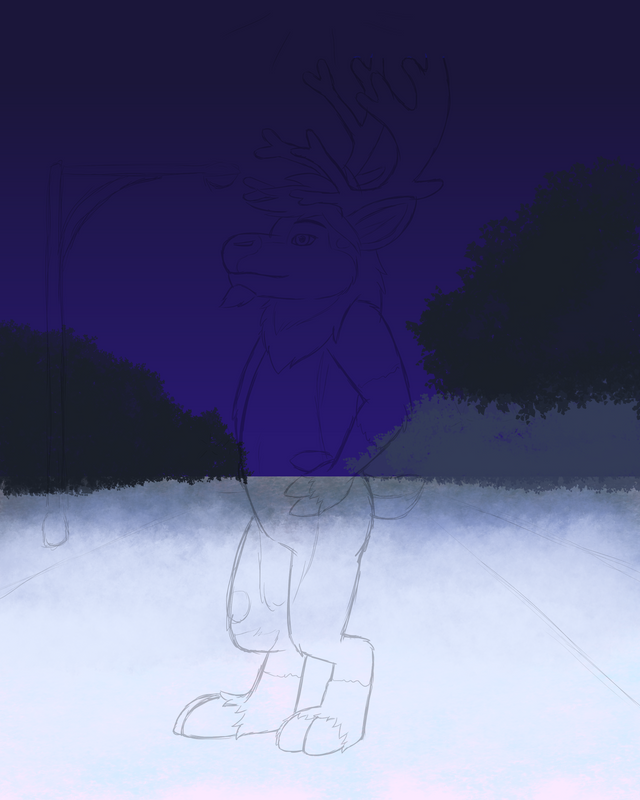
Draw in a light pole. Use the line tool and circle tool to help draw it. This street light will be a template for the other street lights later in this.
Here, I just adjusted the position of the street light to line up better with the others you'll see soon.
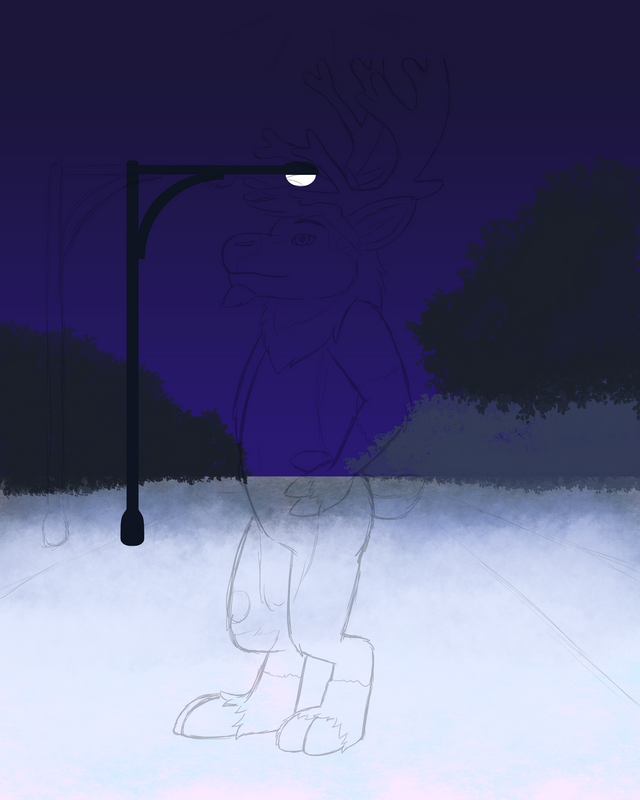
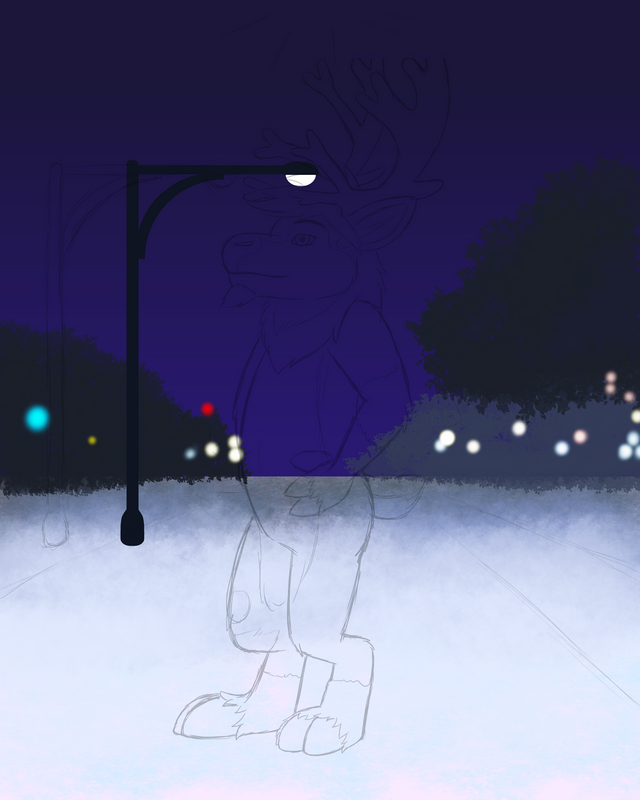
I add in some city lights.
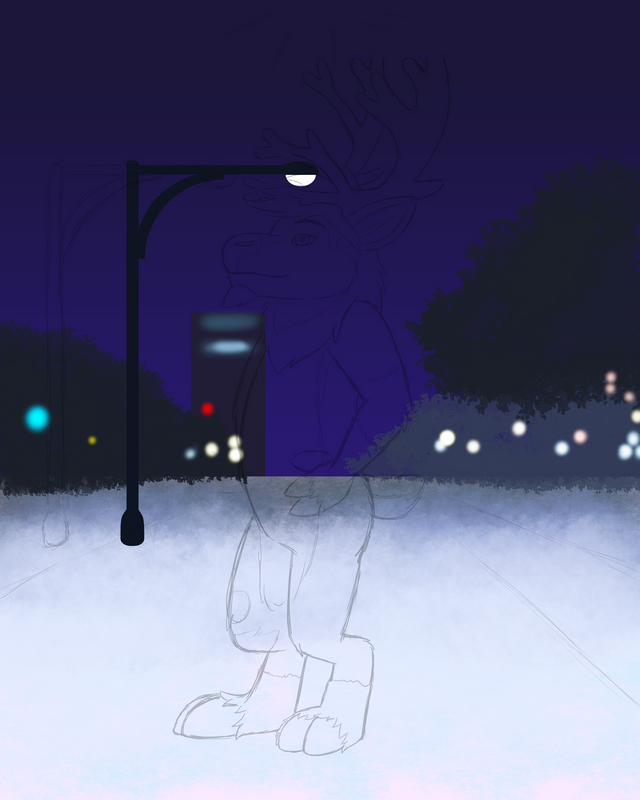
Then I draw in the building in the distance.
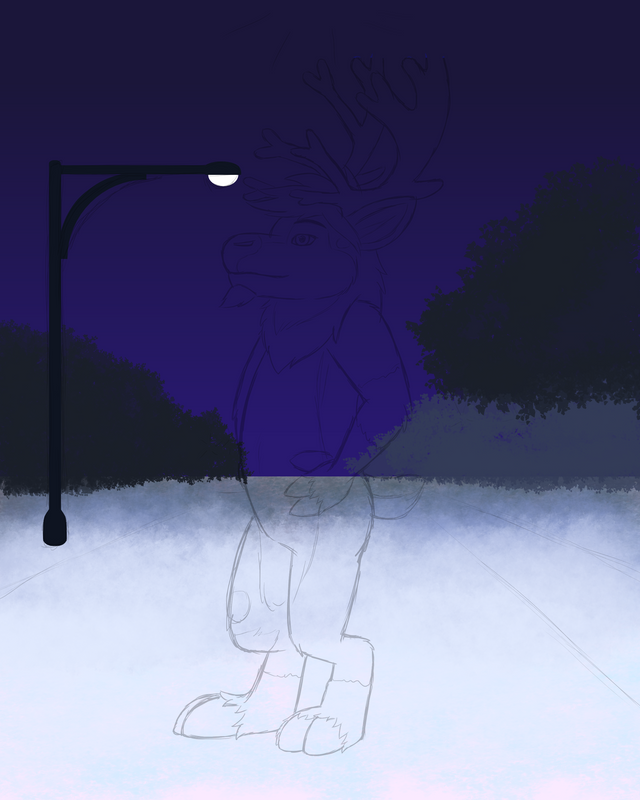
Light Poles
Layers Used:
Background Folder -> 2nd Light Pole Folder
Background Folder -> 3nd Light Pole Folder
Light layer
I take the one light pole I created and duplicate the layer twice. Scale down the other two layers and position them in a way to line them up for the distance effect.
Now you see how the background blends with the foregound character.
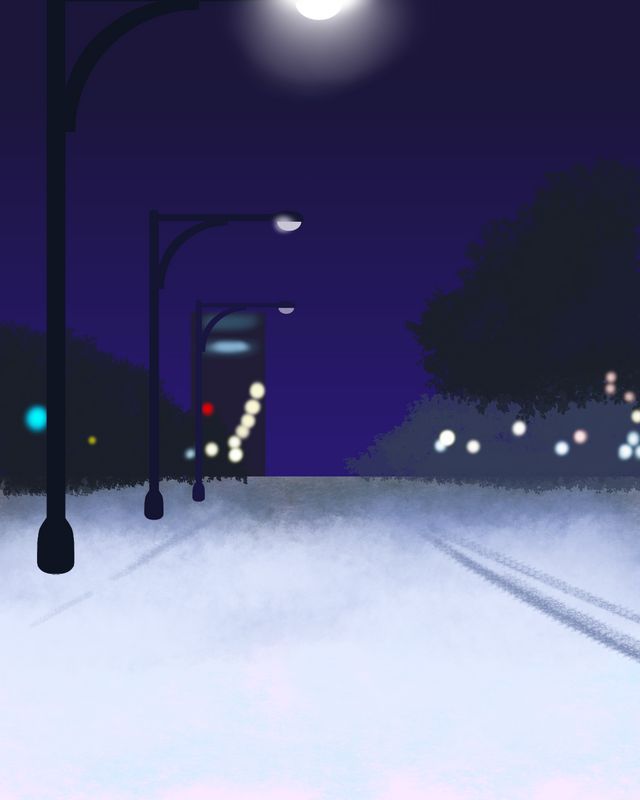
Copy of Background Folder
Layers Used:
Background Folder
Copy of Background Folder (Created from duplicating Background Folder.)
Copy of Background Folder -> Background layer (From merged layers. Heavily blurred.)
Copy of Background Folder -> Light Pole layer (Slightly blurred.)
Copy of Background Folder -> Shadows layer
Here is where it's probably the most complex part of the whole drawing but it's not hard to understand what I did here. Basically duplicate the whole Background Folder. (Rather than continue with edits to the original one just in case I need to edit the background again. That way I can always go back to the original folder, do the edits, then do this tutorial step again.) Then with the newly copied background folder, merge the following layers together: 2nd Light Pole (merge that folder together to form a single layer), 3rd Light Pole (ditto), City Lights, Trees, Ground, Building, and Sky layers. Keep the 1st Light Pole layer separate. With the newly merged layer, blur the layer with a blur filter. Make this one a heavy blur. For the 1st Light Pole layer, blur this layer too but not as strong as the other blurred layer. And finally, add in some shadows underneath the character and 1st Light Pole.
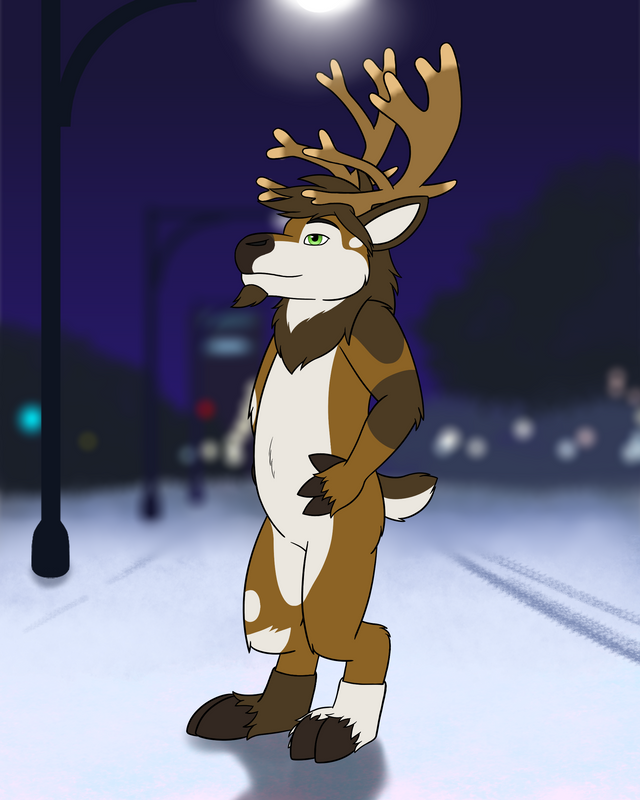
Then the background is complete.
Phase 3: Foregound Part 2
Shadows
Layers Used:
Foreground Folder -> Shadows layer
Now back to the foreground. I temporarily turn off the Detail Colors layer to add in the shadows to the character.

Highlights
Layers Used:
Foreground Folder -> Highlights layer
Add in the highlights.
Backlights
Layers Used:
Foreground Folder -> Backlights layer
And add in the backlights.
Then I turn back on the Detail Color layer.
Misc. Details/Final Check/Final Result
Layers Used:
1st Snow layer
2nd Snow layer
(Various layers)
Finally, I draw in the snow in the foreground. For me, I drew smaller snowflakes that's closer to the character in the 2nd Snow layer and the larger closer snowflakes in the 1st Snow layer. I did this for easier editing.
Then, I check over the drawing for any details I missed or need to change.
And then the drawing is complete!
Phew! That's all. And I hope you enjoy the pic!
Remington © Tw: CalicoKRBU
Artwork by @bleuxwolf

Thanks for using eSteem!
Your post has been voted as a part of eSteem encouragement program. Keep up the good work! Install Android, iOS Mobile app or Windows, Mac, Linux Surfer app, if you haven't already!
Learn more: https://esteem.app
Join our discord: https://discord.gg/8eHupPq
Thanks for sharing this beautiful drawing, @bleuxwolf. Lovely Character! Nicely done!
Thank you as always Trin. :)
Hi @bleuxwolf!
Your post was upvoted by @steem-ua, new Steem dApp, using UserAuthority for algorithmic post curation!
Your UA account score is currently 1.711 which ranks you at #32841 across all Steem accounts.
Your rank has improved 98 places in the last three days (old rank 32939).
In our last Algorithmic Curation Round, consisting of 214 contributions, your post is ranked at #188.
Evaluation of your UA score:
Feel free to join our @steem-ua Discord server