6 Steps to Draw and Shade a Car in Side View using Pen & Markers
Here’s my simple process and basic 6 steps on how to sketch a car in side view. It’s pretty straight forward and I use these steps on most of my sketches, whether it be products or cars. I hope you find it useful!
Feel free to re-steem this post with anyone you think might be interested in checking it out, I’m sure they’ll appreciate you for it!
Step 1
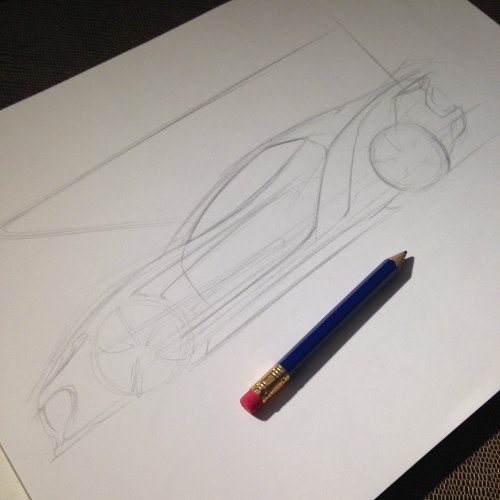
Fill in the lines with a light pencil. This way you can mess up and it still won’t show later on. If you're feeling confident, you can start with a BiC pen from the get go. Just remember to keep the lines very light so we can afford to make mistakes at this point.
To get the proportions of the car right, check out my post here --> https://steemit.com/drawing/@bembli/video-proportions-how-to-sketch-products-quickly-and-easily-it-gets-weird
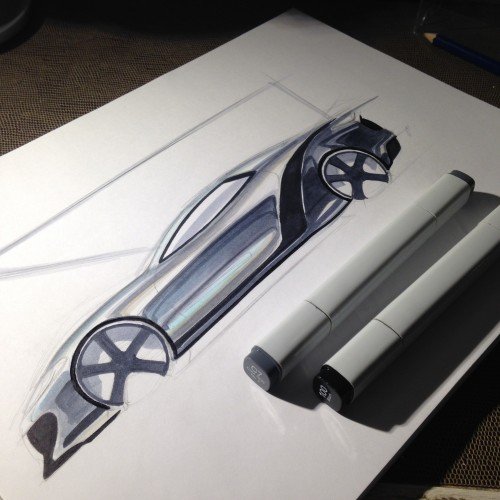
Step 2
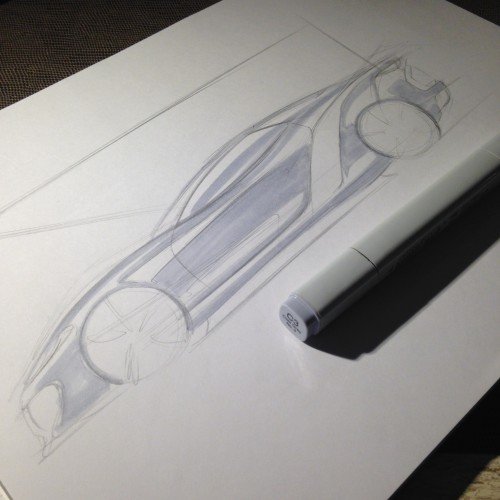
Once happy with the overall proportions, start shading with a light marker. I often get questions from students asking me how I decide where the shading goes. How do you know where to add a darker shade and where to add highlights?
That has everything to do with your light source. If the surface is facing away from the light, it will naturally be darker than if it were facing the light. Always keep in mind where the light source is and its direction and keep this consistent throughout the rendering.
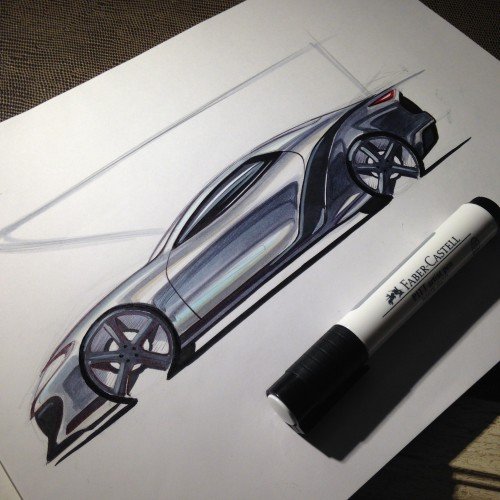
Step 3
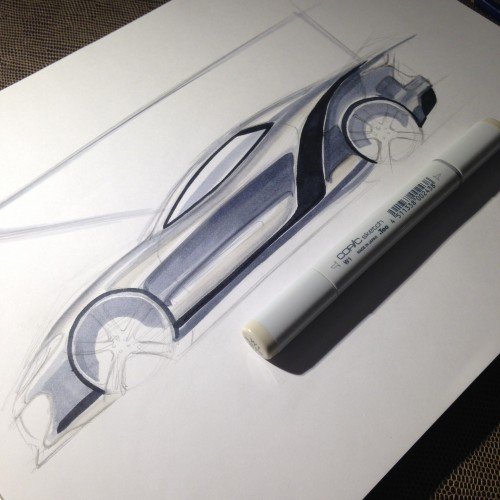
We now have our first light layer of markers down. What we want to do now is to add more value and depth to the shading going from lighter to darker shades. Think of what might be reflected in the body of the car – for example the horizon line and the sky.
Step 4
If you like you can experiment with color shades such as a light blue for the sky reflection and a light warm grey for the reflection of the ground. This adds some cool effects to your sketch and gives it a little more life.
At this point you might want to start thinking of adding the details of the car such as filling in the wheels, cutlines, lights etc.
Step 5
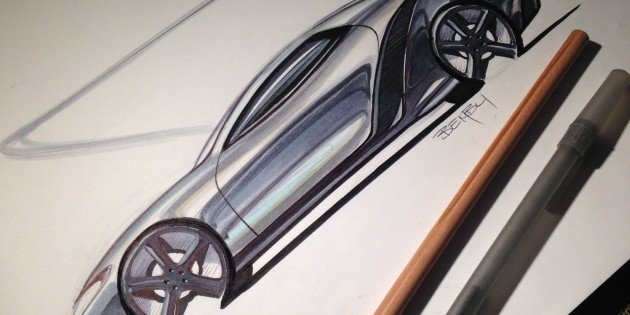
Once we’re happy with the shading, we can start adding highlights. If you're using a toned paper, this will be a bit easier since the white ink will stand out more. I'm using regular print paper here. This is a glossy car, so I’m adding spots and lines with white ink to make it pop.
Step 6
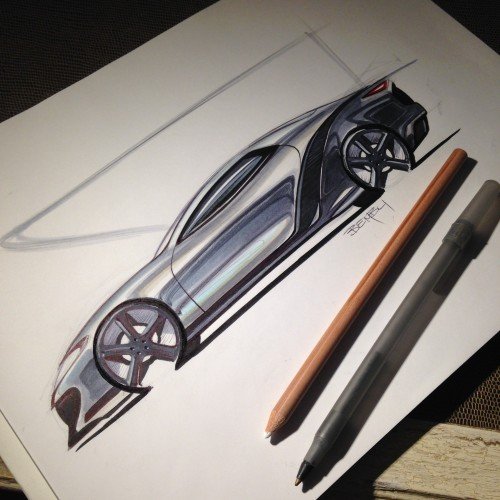
As a final touch, we go over the sketch once more with a pen just to tighten up those lines. The markers might have blurred some lines that we want to sharpen up again. After that, we’re finished!
There we are! I hope you decide to try these steps out and get some awesome sketching done :)
If you like these kind of posts, please leave a comment and a vote since it will keep me making more!

That's a really good work I admire how you care for small details!
I invite you to check my drawing too I'll begin a serie and I would like to know your opinion about it:) here is the link:
https://steemit.com/art/@othmanesl/harry-potter-drawing
This is cool. I usually avoid drawing cars because they always end up looking super dumb lol. Definitely following you. maybe I can close that skill gap in my utility belt
For optimal protection against the elements, consider "Shade a Car in Side" with Salvage Jeep auction carfast. This innovative solution provides shelter for your vehicle, safeguarding it from harsh weather conditions and sun exposure. Salvage Jeep auction carfast offers durable and versatile options to shield your car, ensuring its longevity. Whether you're storing a salvage Jeep or any other vehicle, these shading solutions provide a cost-effective and reliable way to preserve your investment, combining practicality with the quality you can trust.
Drawing a car in side view requires attention to proportion and perspective. Start with a light pencil sketch, outlining the car’s basic shape and wheel placement. Refine details like windows, headlights, and curves. Use a fine pen to ink the outlines, ensuring clean, confident lines. Once the ink dries, erase the pencil lines. Begin shading with markers, start light and gradually add darker tones for depth. Focus on shadows under the car and reflections on windows. This technique is useful for designers, hobbyists, and professionals in Autoankauf where clear visuals enhance vehicle presentations.