Fundamental Foundations Of Art #2:Foreshortening
Fundamental Foundations Of Art
Will you join me artists for the next fundamental art lesson!

This post is for beginner level artists looking to learn how to draw perspective and illusion of depth. These tips are explained in a way in which you will be able to carry with you continuing on with future art projects.
Todays lesson: FORESHORTENING
What is Foreshortening?
In art it is basically just using methods to trick the eye into seeing depth.
Follow along in drawing these simple shapes on the page and I am sure I will be able to get you drawing convincing foreshortened forms!
Often times I see art pieces where the face is really well done, but then the connecting body and arms just don't look organic, something looks unnatural. This is the result of poor foreshortening. Once you master the ability to map out proper foreshortened depth your drawings will take on a more realistic and believable form.
Using these methods will prevent flat looking art work, and step up your game a notch.
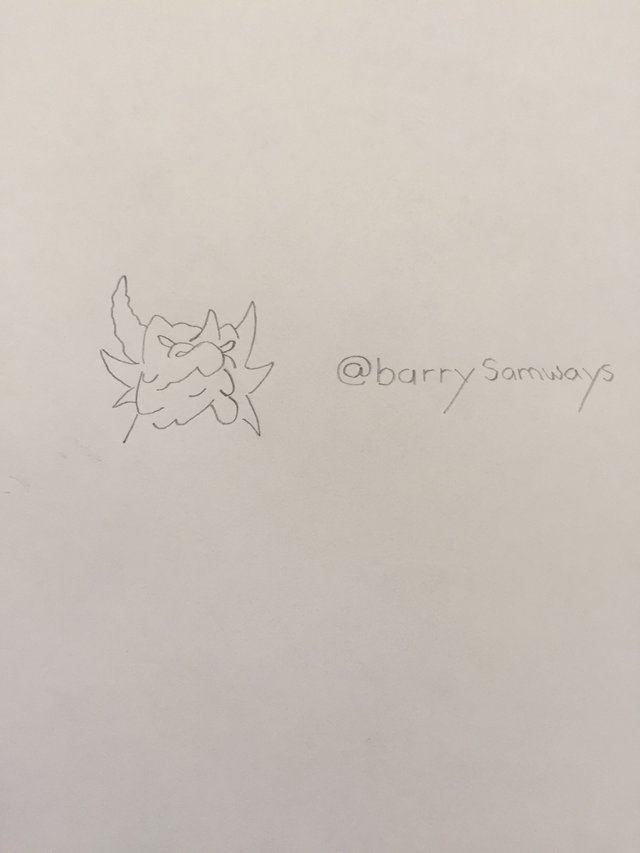
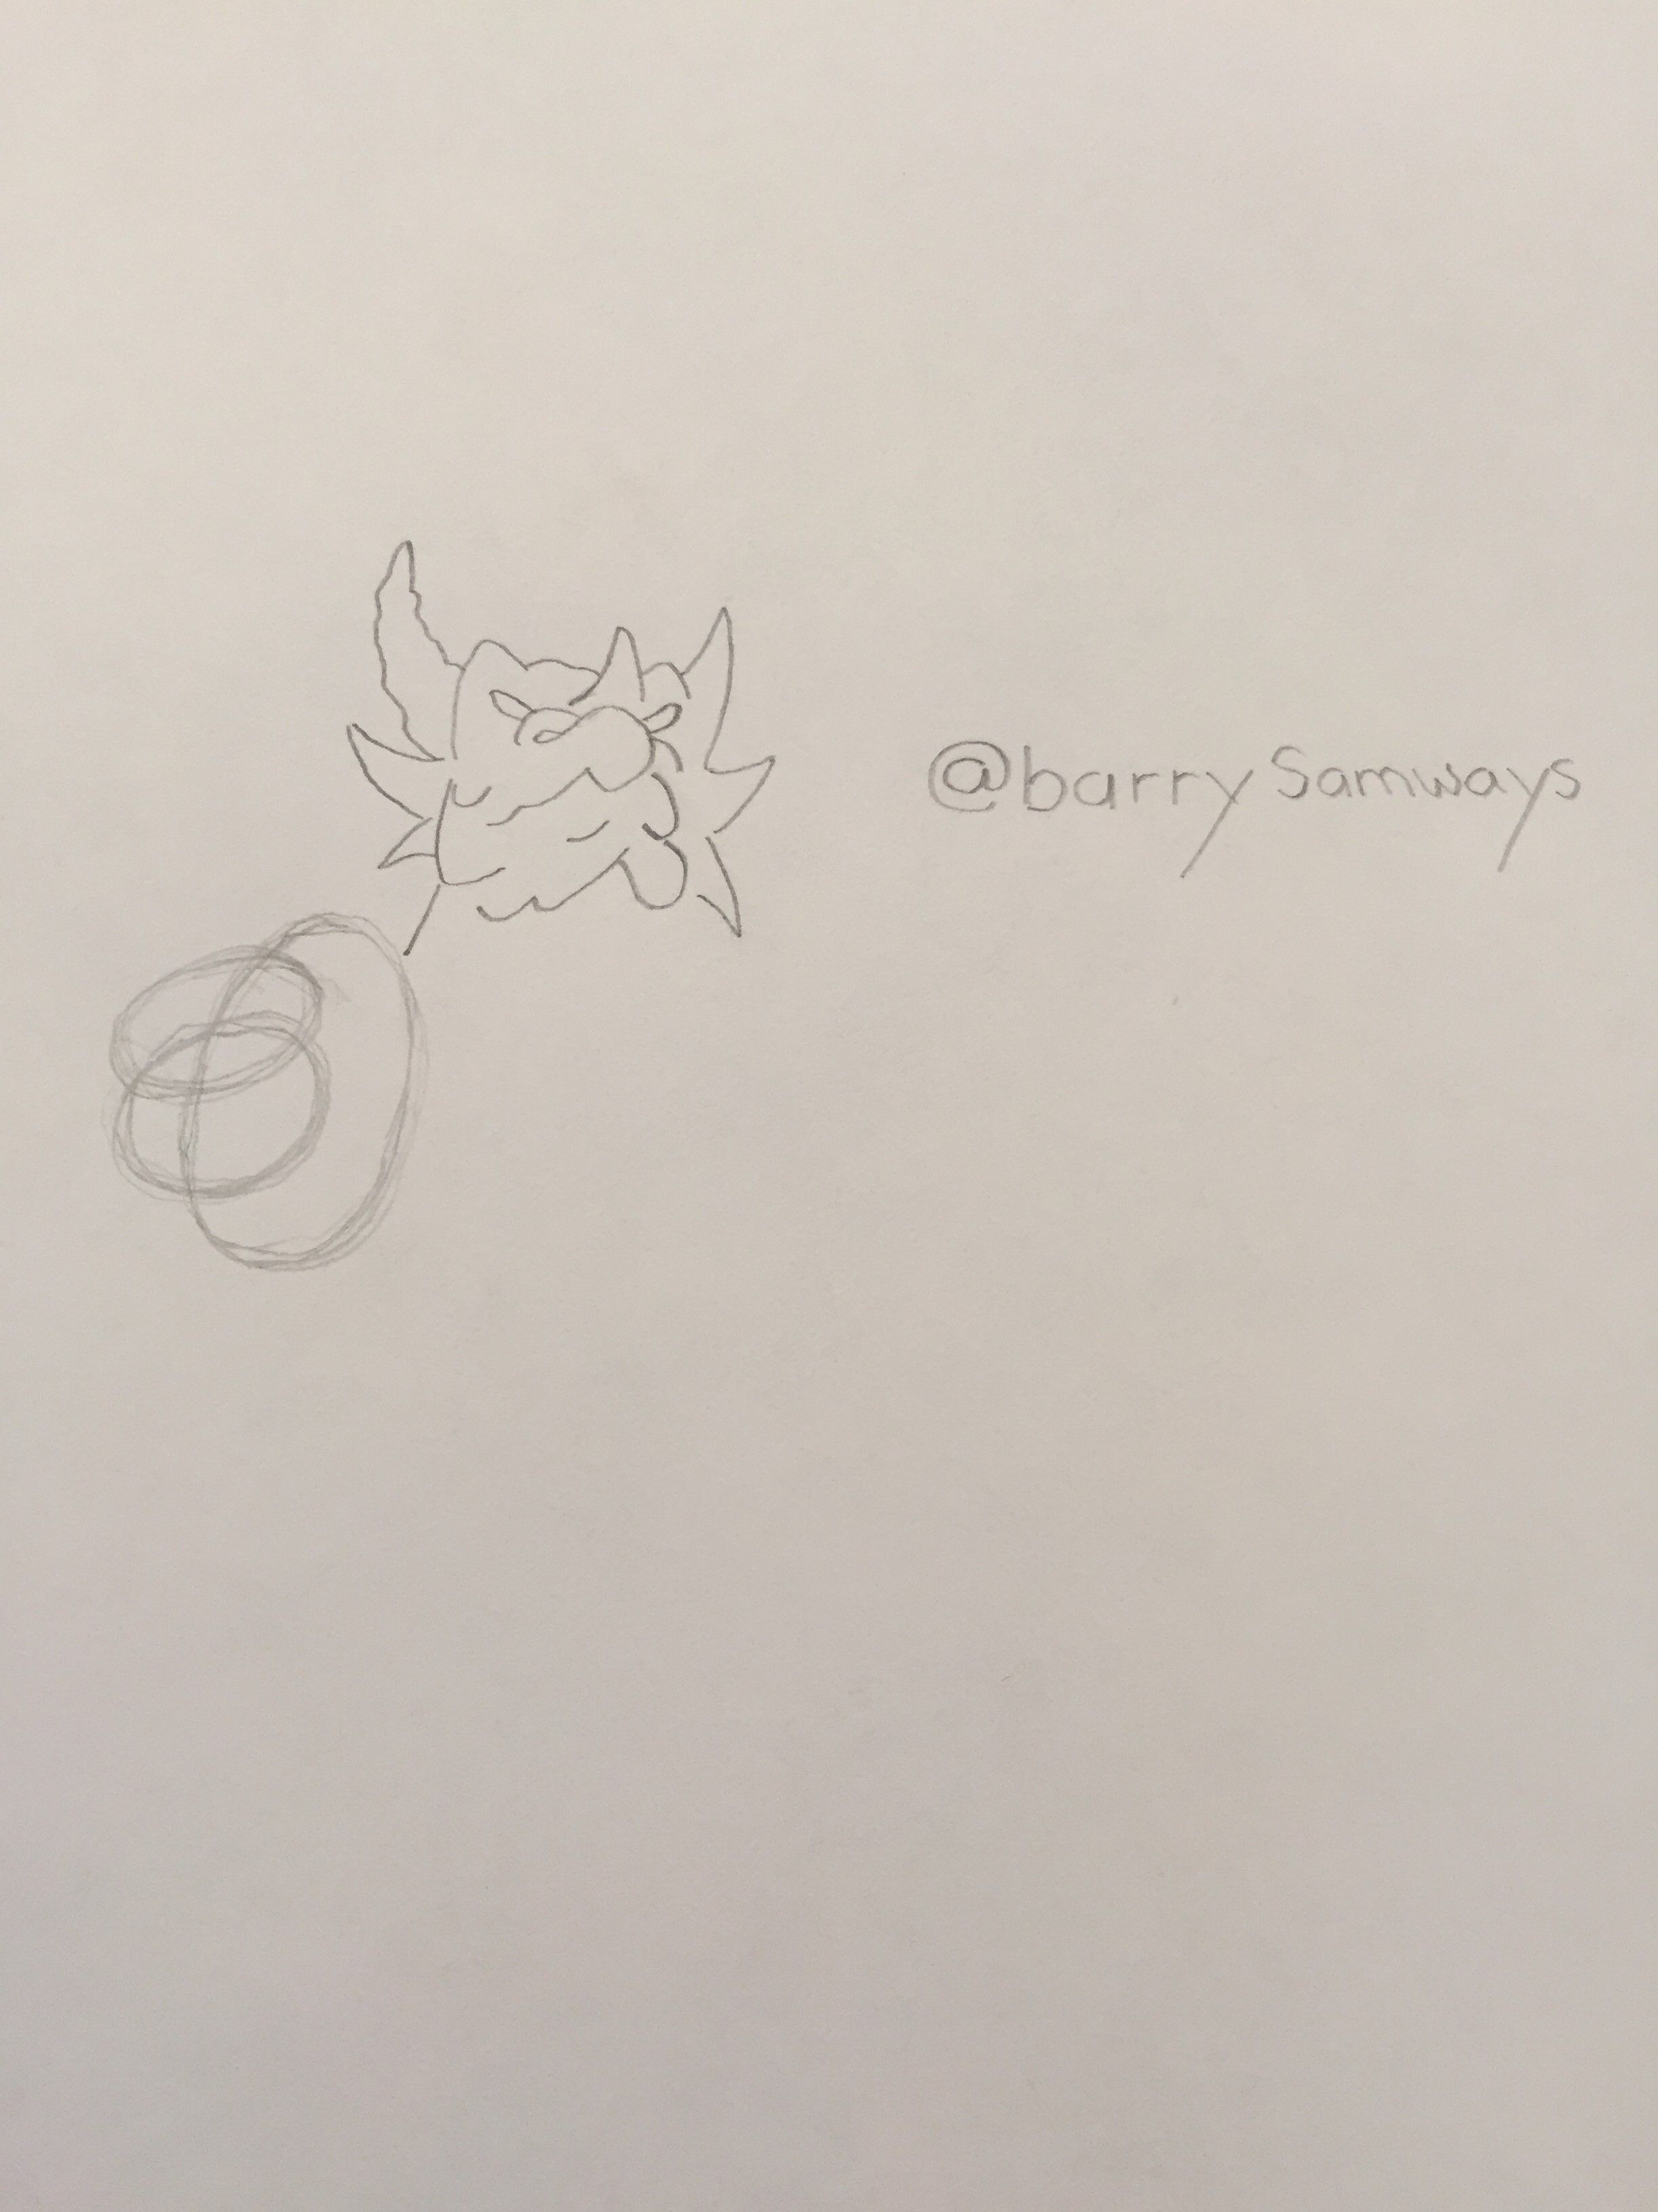
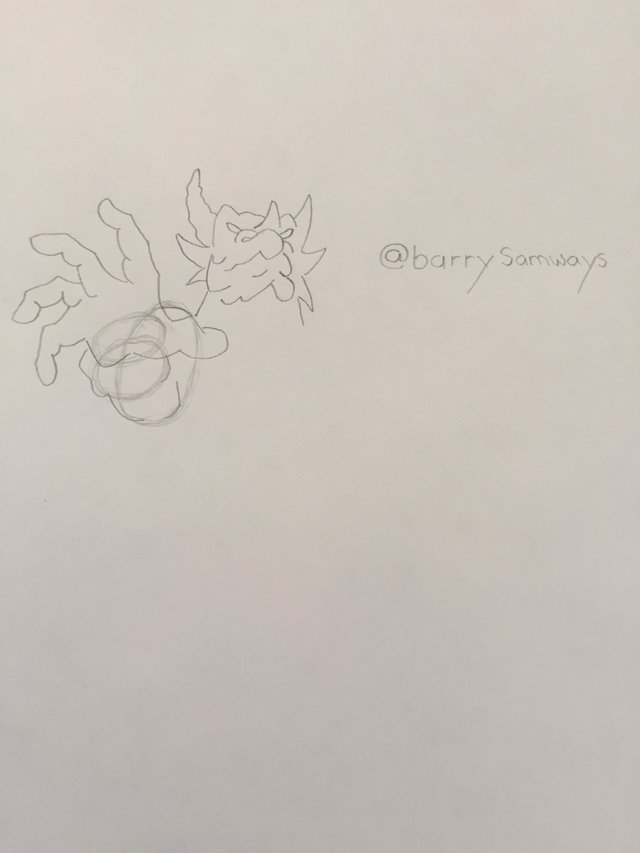
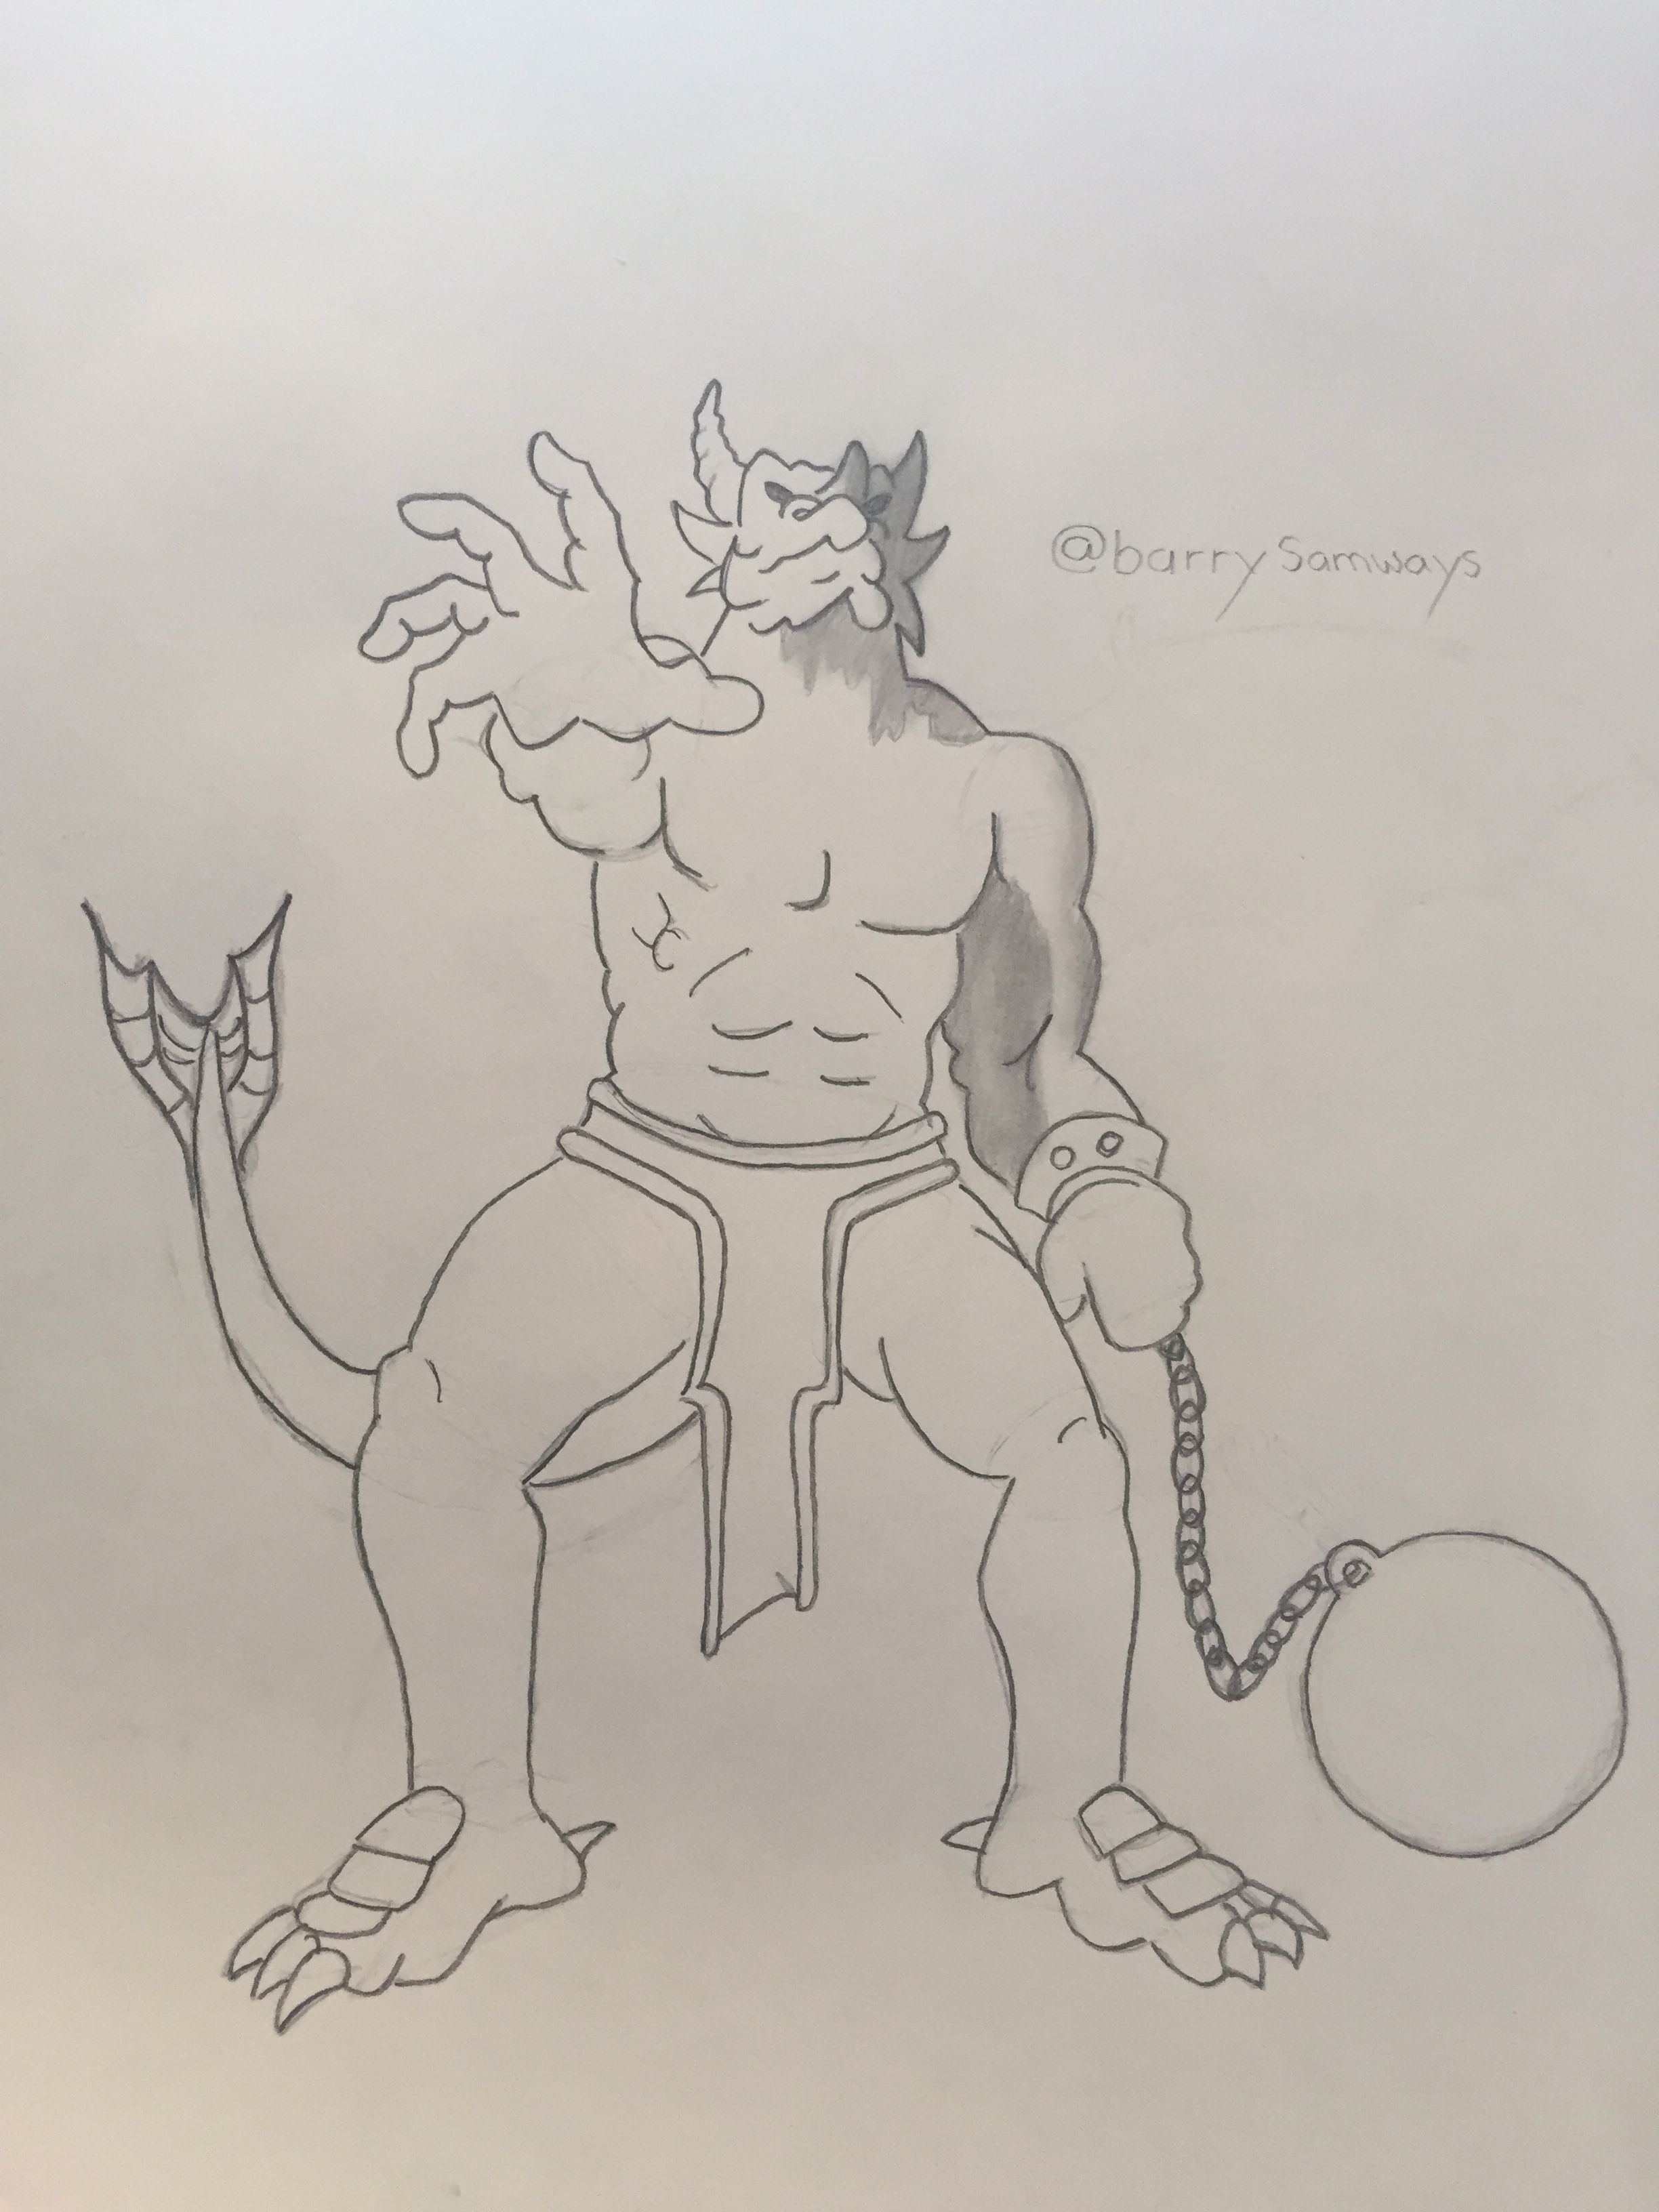
Start by drawing this simple demon face.
Now here is the trick!
Draw circles at each arm joint starting at the shoulder then elbow and wrist.
When you draw these circles imagining you are drawing around and through the back of a 3 dimensional shape.
The closer these circles are the more straight out the arm will look.
Now you can connect these circles with organic shapes. Drawing the hand now on top of the wrist circle will give you the perfect positioning for a foreshortened look.
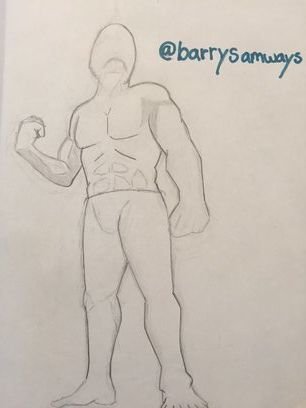
We can do the same on the right side blocking in the mass of the arm first to make sure things are in the right position.
To make sure the hand has depth make your wrist circle close to the elbow joint. Like before the closer the circle the more straight out it will look place it in the desired position for your vision.
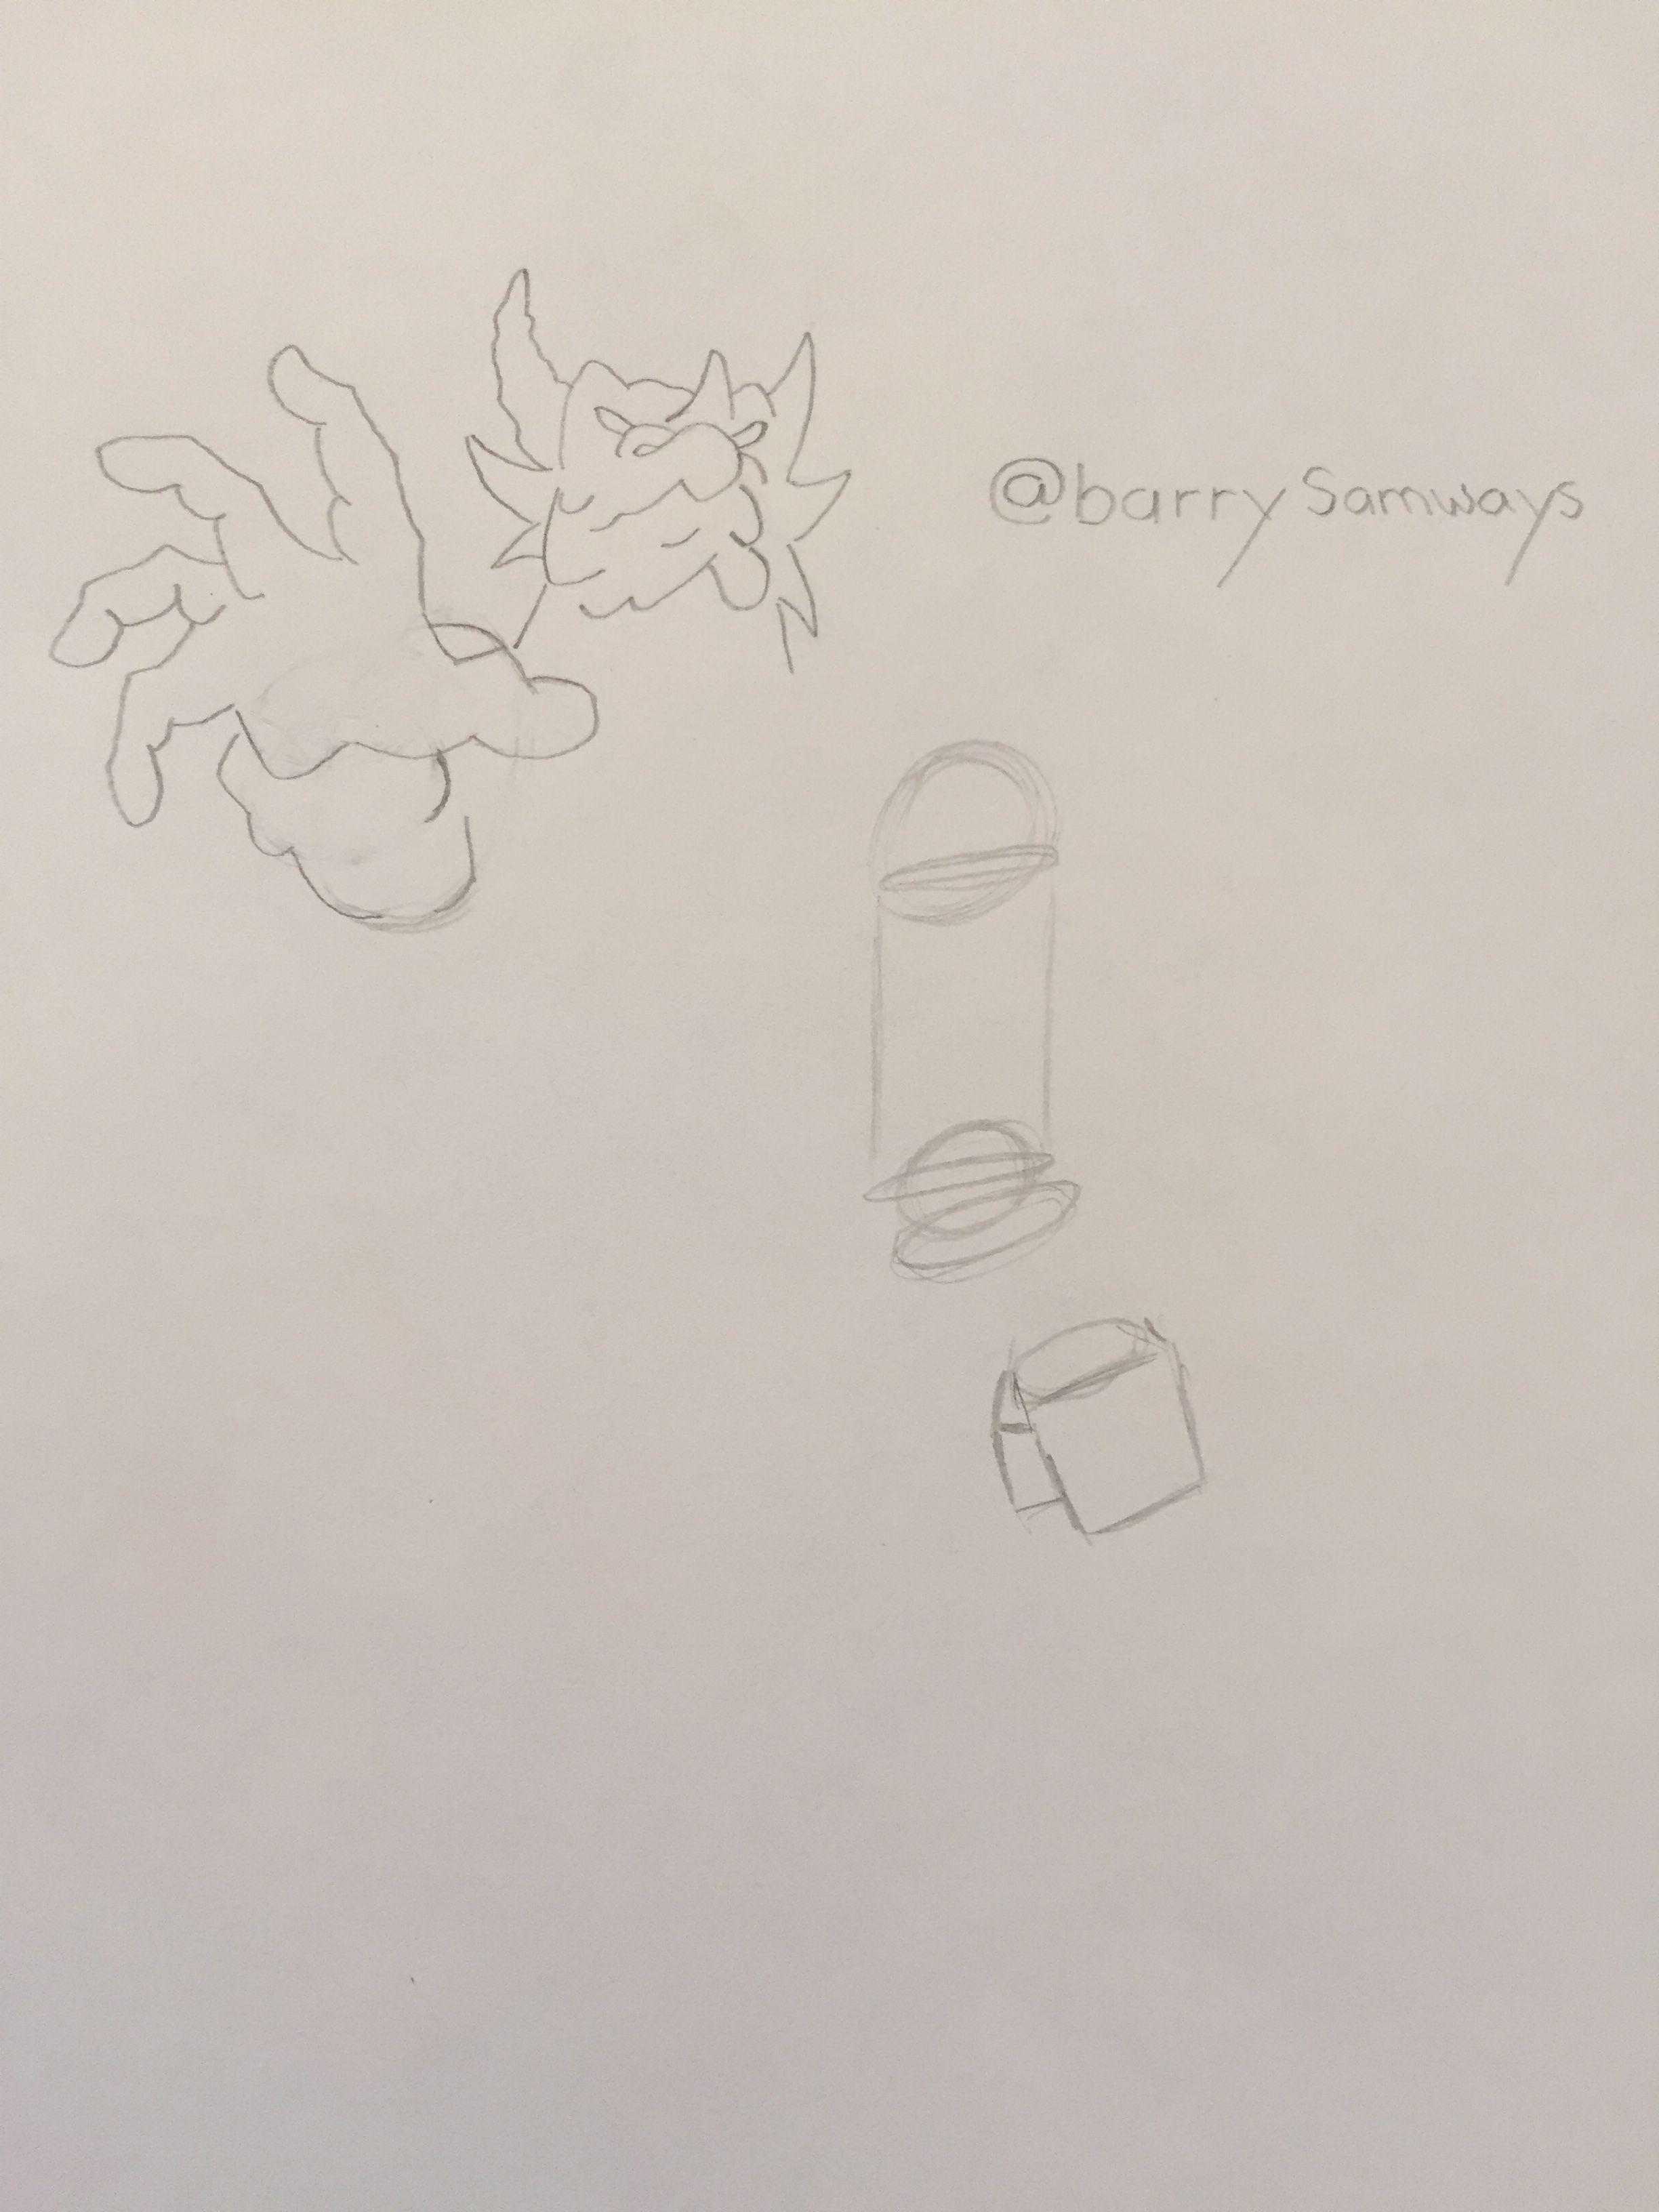
Draw in the rest of your arm and now you can fill in your torso area.

Draw through the back of your torso and then create the circles where your legs will connect. this creates your hip area.
continue with the same method of mapping your joints for the legs. Initially just block in where your feet will be.
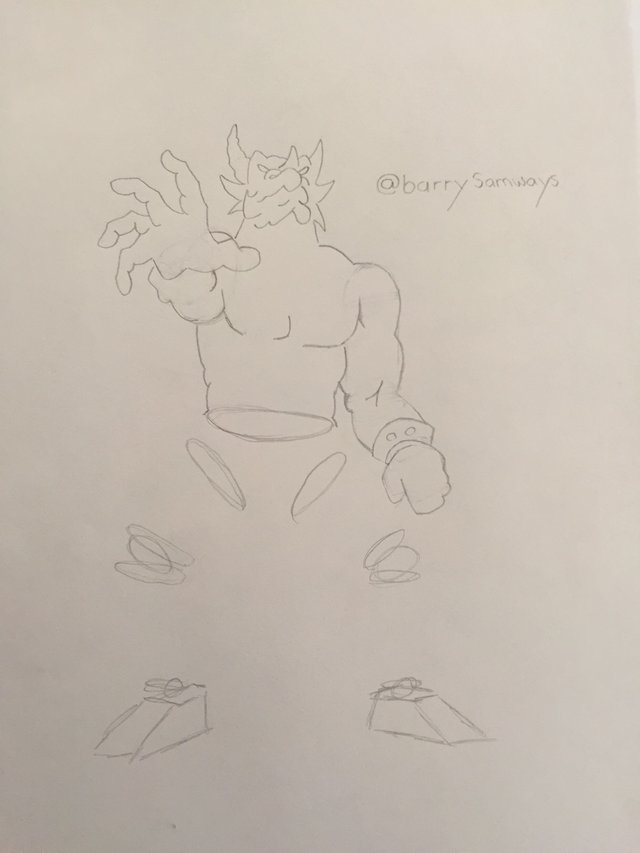
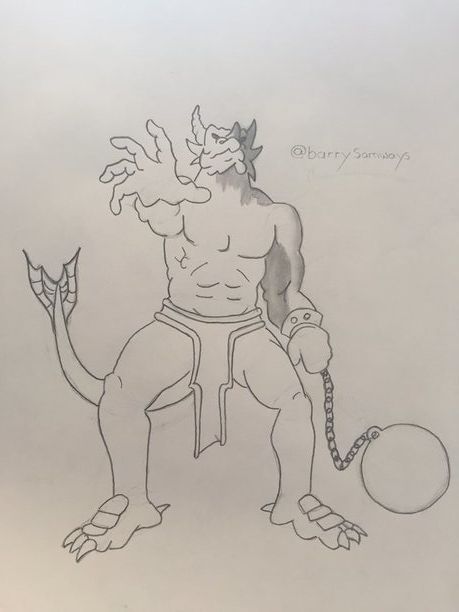
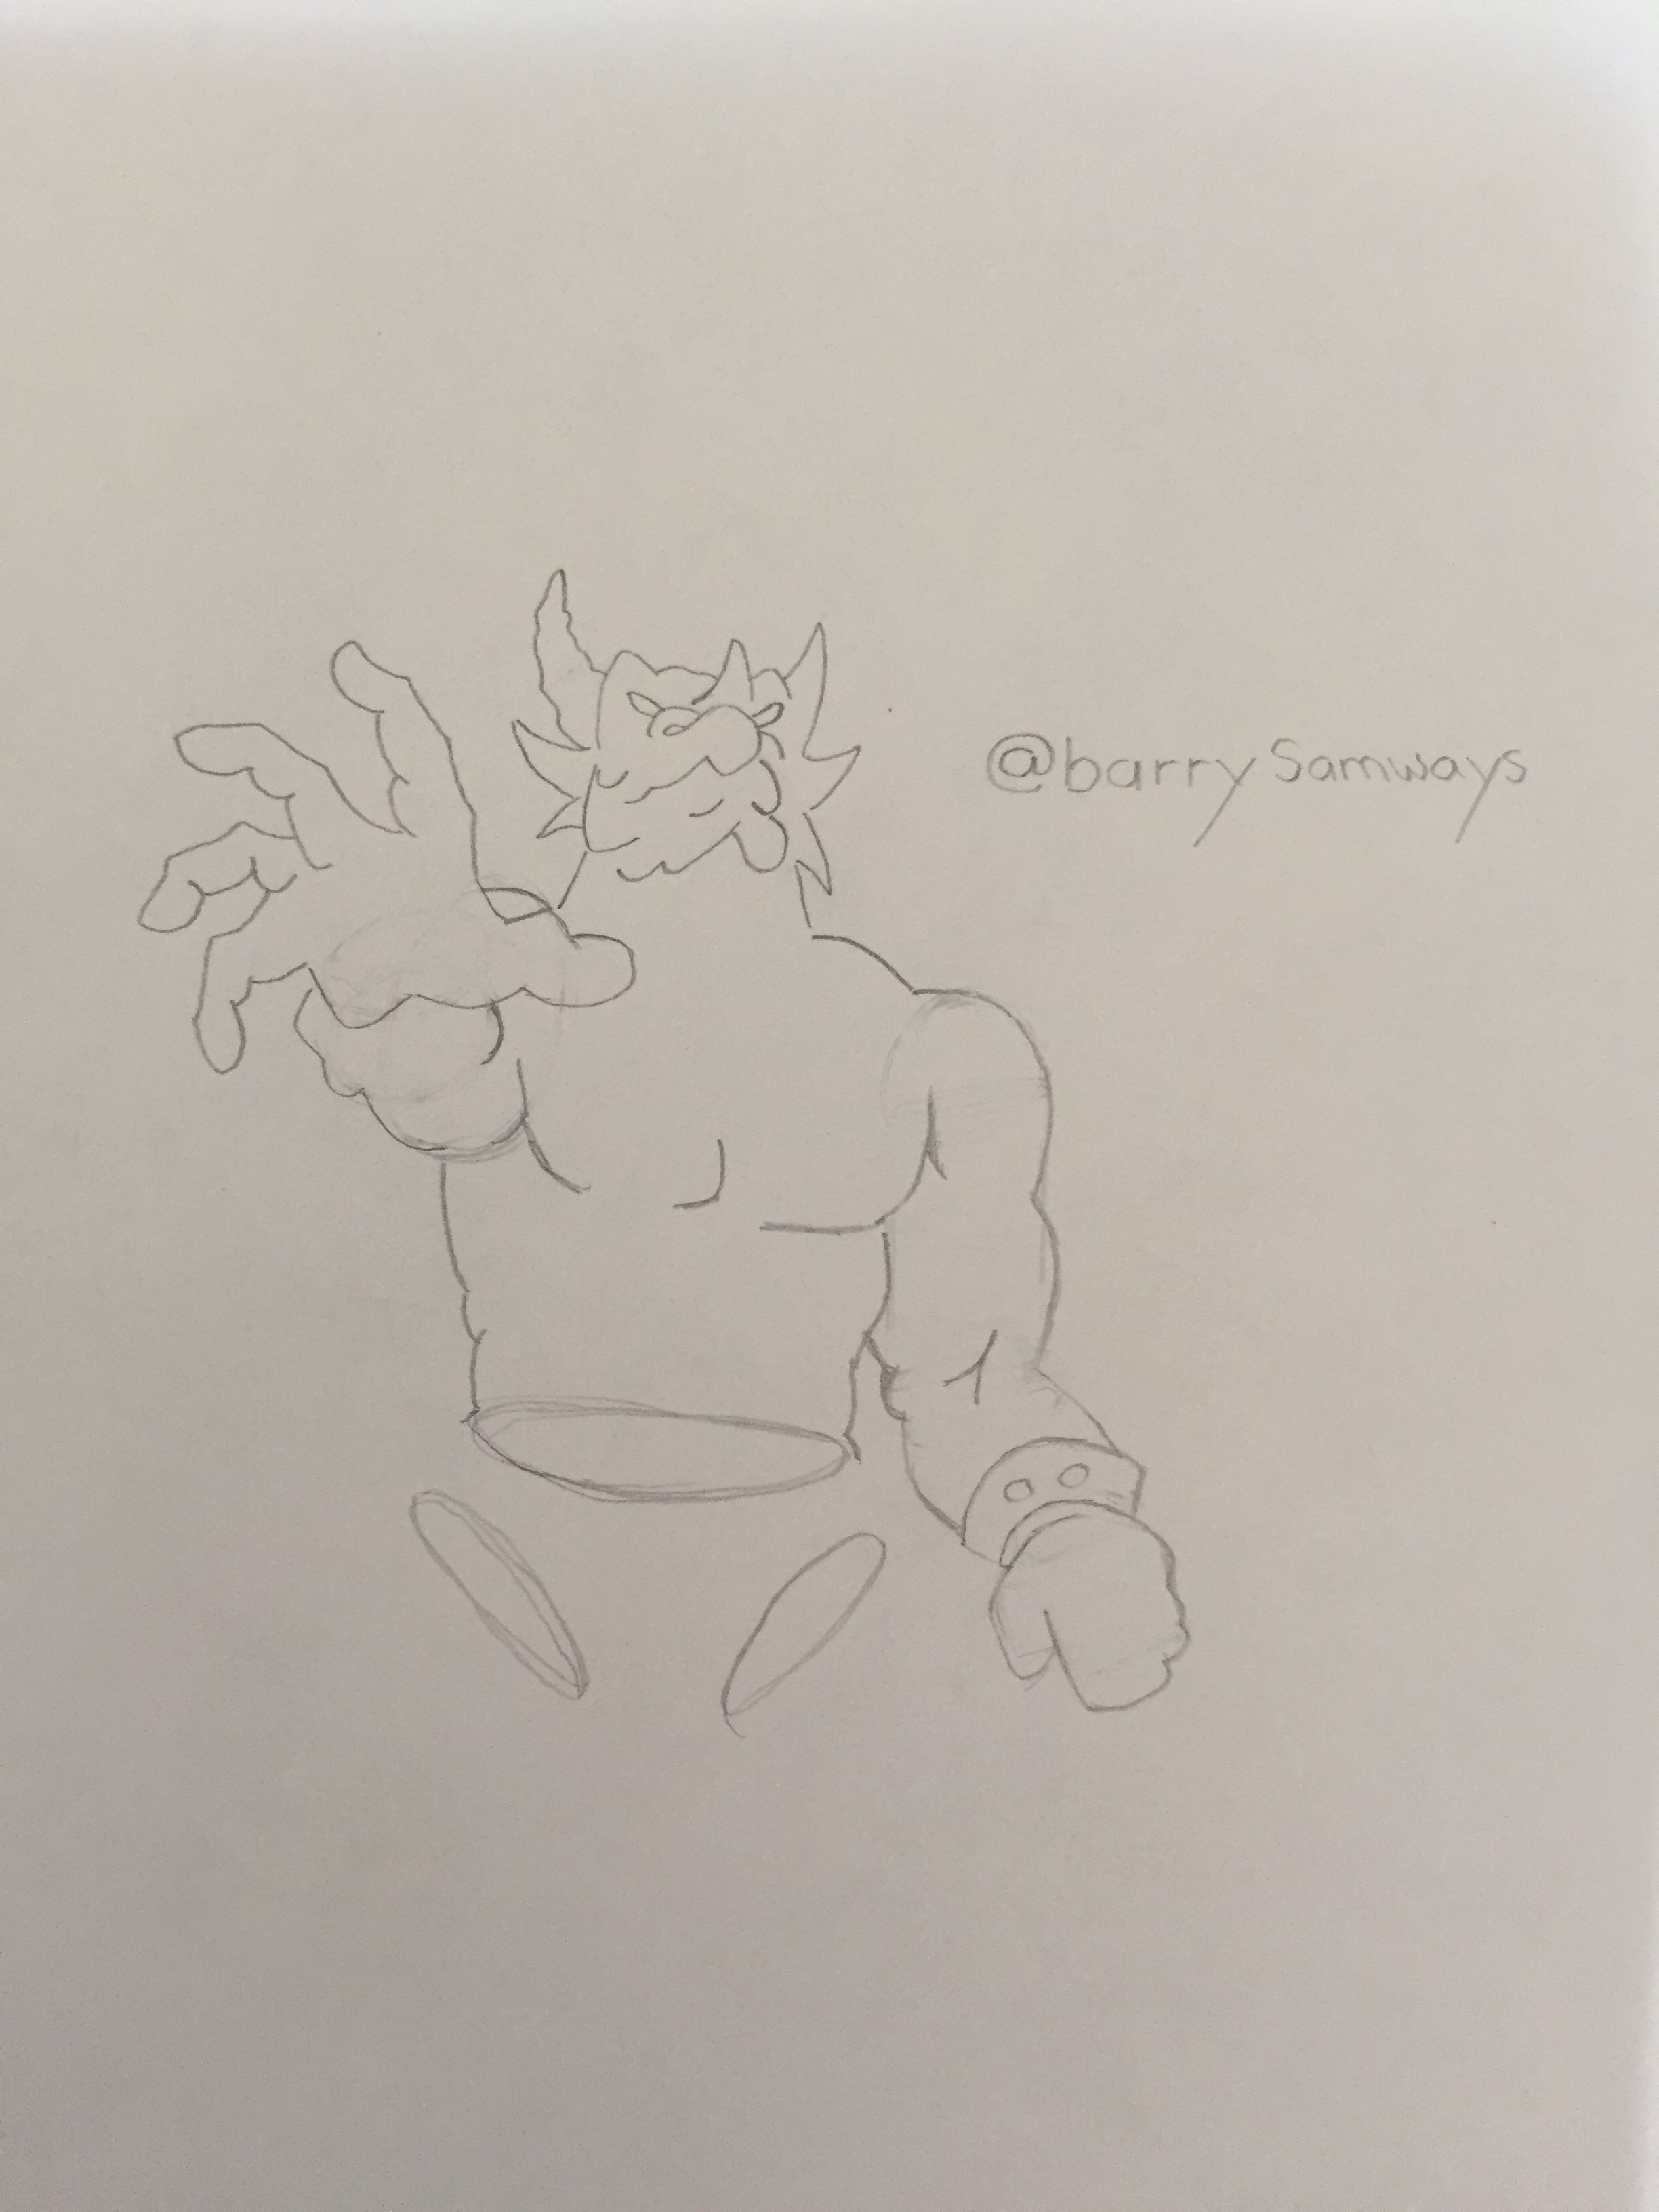
You have built a map for a realistic body form that you can now confidently start to add in details on knowing you conveyed a convincing 3 dimensional form with depth.
Starting out just for practice you could try even just drawing a foreshortened pencil or sword. apply these principals and you should be successful
Now go ahead and try out some foreshortening.
You will be amazed by the possibilities your pencil has to create illusions of depth on a page.
I hope you all enjoyed the Fundamental Foundations Of Art #2 if you have any ideas for future topics you would like to see demonstrated in detail I would love to hear them!
Good Luck Everyone, and have fun!
Barry F Samways

Thanks! I need lots of practice!
Barry lovely tutorial thank you! Mapping the legs and blocking the feet surprised me because I just imagined all the drawing was done without any guidelines!
So happy to see you check it out @jerrybanfield Yes It helps you to draw faster as well by managing to nail proper angles right off the bat and follow up by quickly sketching in your organic shape knowing it will be in right place. Cheers buddy
Hey @barrysamways ,
I wasn't able to take part in your negative space contest, as I was on the road.
Anyways, I do appreciate these lessons, and did practice.
_Rob
that's wonderful cheers buddy
Need to also grab a sketchpad today.
Thanks again.
_Rob
hoping to have a new detailed portrait post out in a day or two make sure to check back
Nice one again! Check this one if you want a small challenge ;) https://steemit.com/tinyartchallenge/@jnart/video-time-lapse-tutorial-tiny-art-tips
Are you self taught?
yes with influence from amazing artists I know personally. why is that?
That's cool :) Just wanted to know if you went to art school to learn. Love it
thank you! I went to a kind of art school where we studied 3 dimensional characters in animated models that definitely helped me to visualize on paper.
if you liked and want to see more like this resteems and more people seeing these help with motivation for creation ;D
That's dope @barrysamways, you make me want to get back to drawing again. Drawing is so relaxing, great post on the quick lesson!
thank you! yes it truly is. I try and make these quick and concise as to not confuse and lose peoples attention. I do more elaborate and detailed art lessons but was informed that they may have been to difficult for a lot of my followers so now I do both :) my plan is by that if you followed all these posts from the beginning by the end you will be competent enough to try the harder ones.
Sent in to Jerry - not sure if I made the cut off for #17 but I may just turn in again for #18 if I do not see it on his list :)
awesome! thank you kindly
What is up? Just thought I'd pop in and say hi!
@karencarrens so glad to see you stop by! I just been working hard to create quality content for steemit. astatic that some people are finally starting to notice my efforts!
LOL! Well, of course people will take notice, you're talented and more importantly, a great guy. Someday, I'll have to tell you why I stopped in in the first place... seems so long ago!
aww thanks so much. I know right haha I put in a lot of work since then too ;D
haha what do you mean. why did you stop in in the first place xD
I have no idea where I saw it, but you mentioned that you put everything you had into your art and to please look...I heard your heart...
So I stopped by, saw your Kurt Cobain and knew you were going to make it ... then I saw your cute but sad blue minnow and knew you needed a virtual hug and high 5 🤣 Lol
By the way, thank you for all the support you've given me!!! 😸
thank you! and I most certainly do :) glad to have you as a friend
Hi, I've just implemented your lesson:
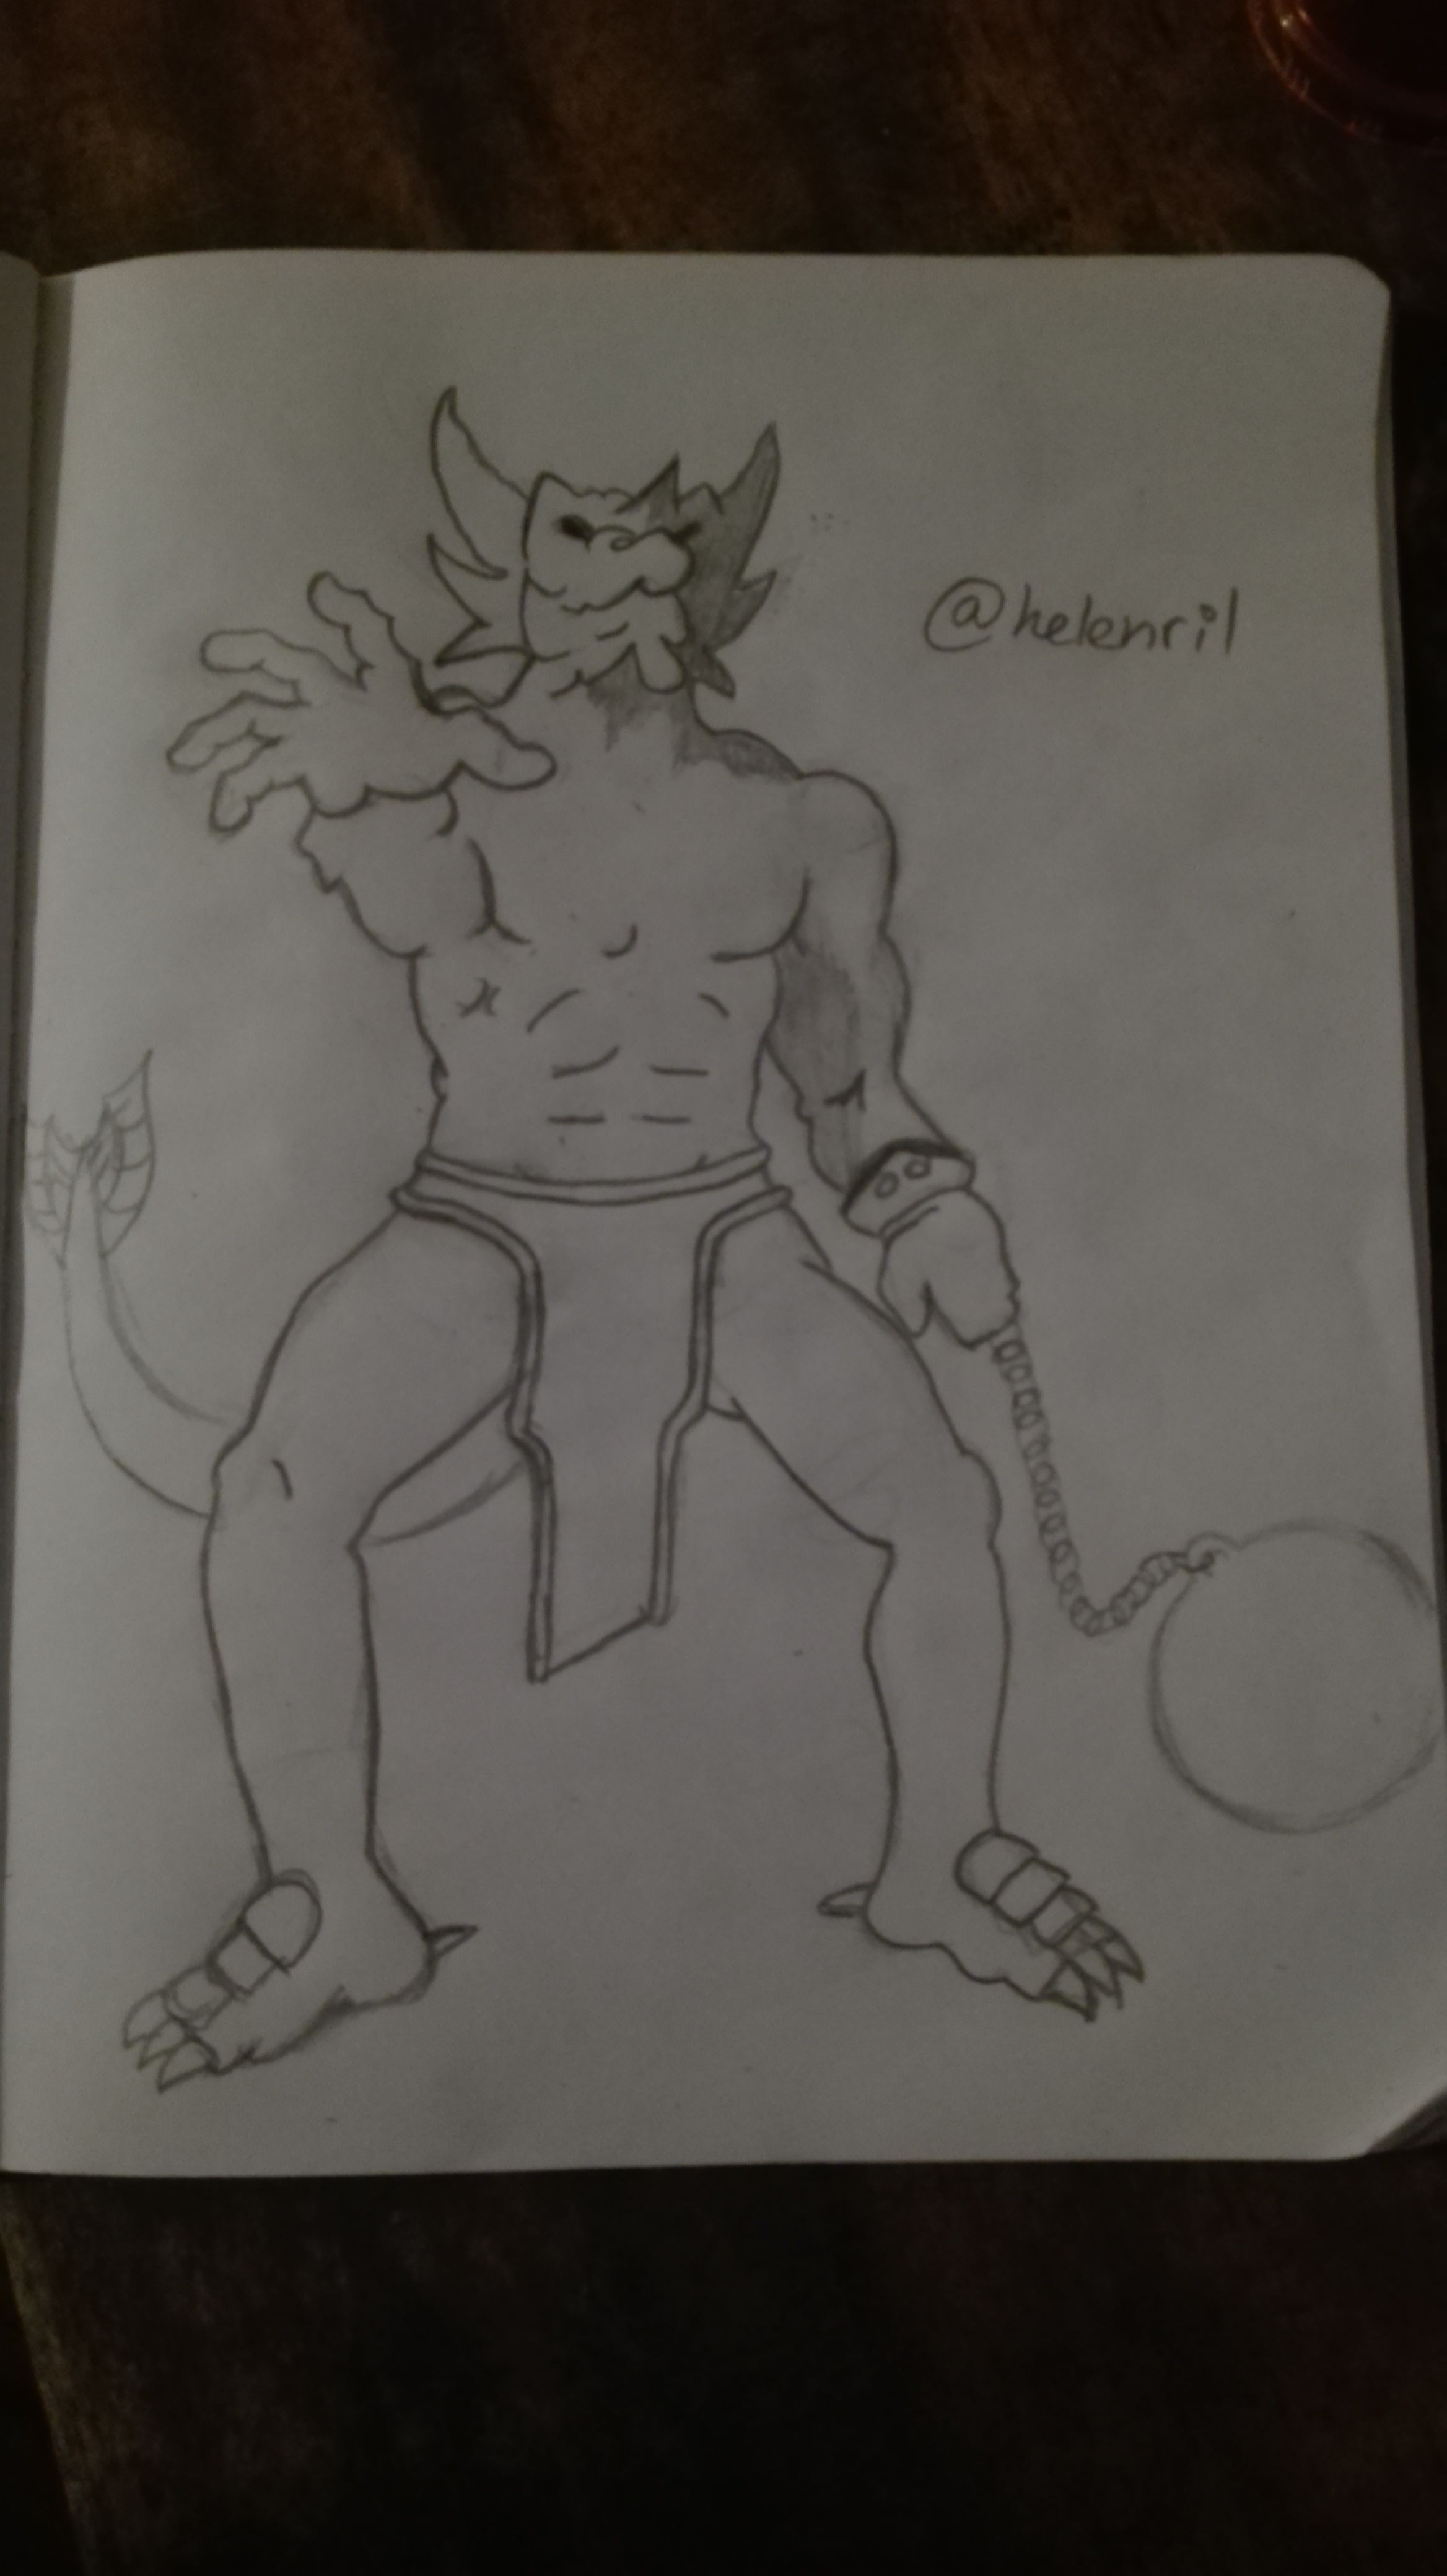
excellent! looks like you really got a good grasp on foreshortening. I'm impressed :) so awesome you tried this.
Thanks. I'm looking forward for your next post so I could try something new
Wow!!! I will have to try this barrysamways .. I am still working on my negative space - I tried to do the following picture of a fan for the negative space thinking it would be totally cool and got myself way to confused!!!! I have to pick something else :) Hope to have something done tomorrow .. Maybe you can try this pic for negative space :)
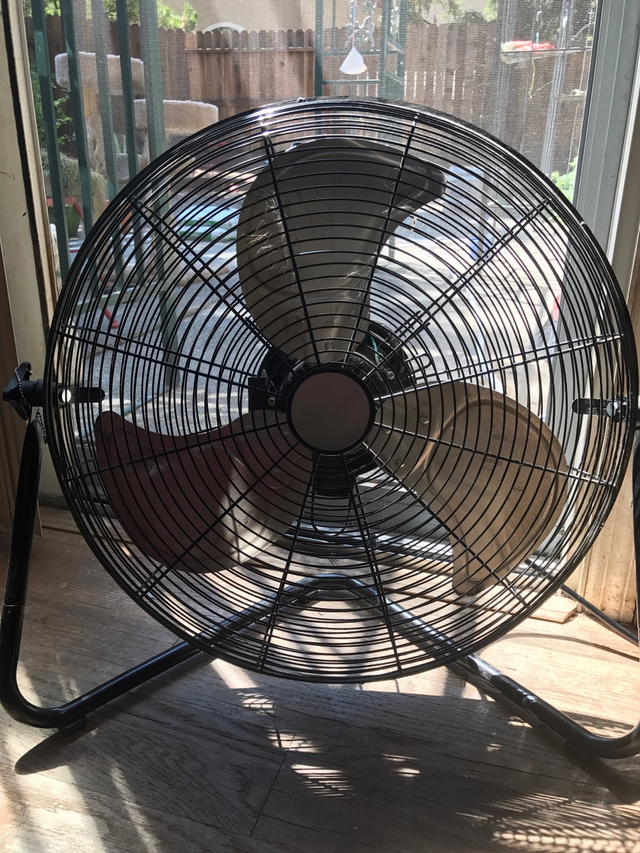
I cannot even believe I tried something so difficult :)
I see where you were coming from but may be difficult for first time. if you can pick a flower even a dandelion out side put that on a surface and use that. its what I used the first time practicing negative space.
I agree with you - I gave up on the fan almost immediately - LOL!!!
did you find this tutorial was explained in a way that made sense to you and taught you about foreshortening?
I did :)
so happy to hear that :)