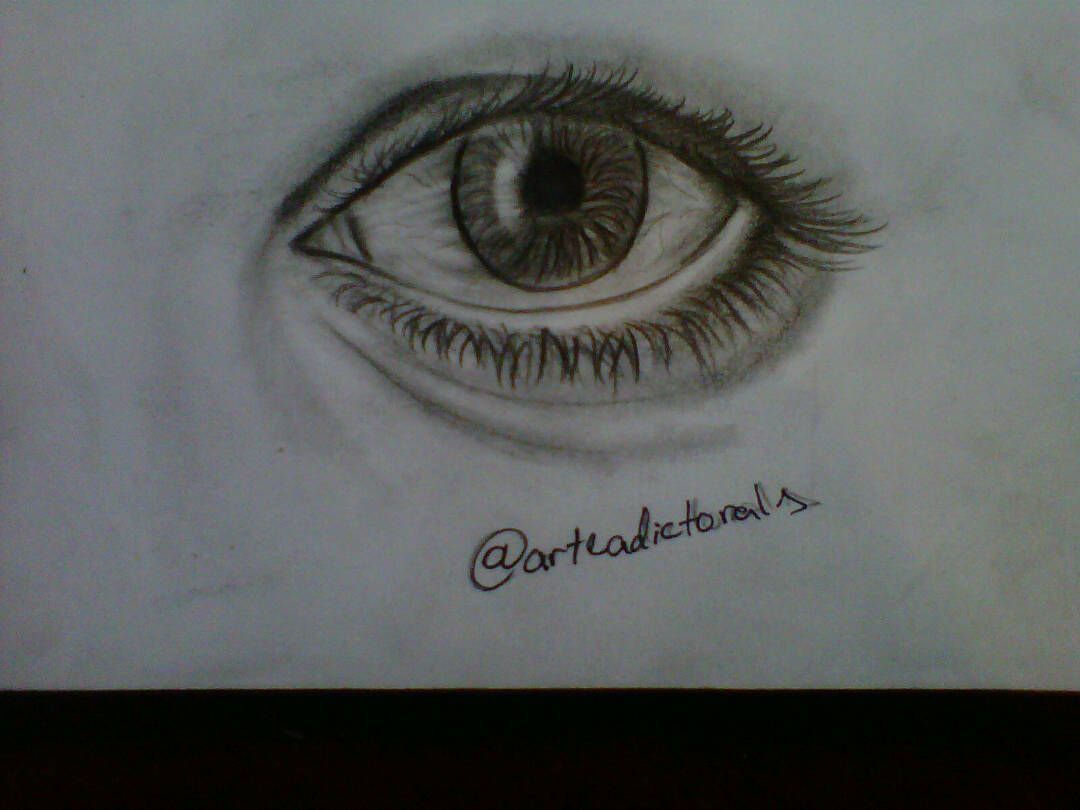
How to draw a realistic eye from the imagination Step by Step (2nd Edition)
Hello everyone today I bring you the second edition of how to draw a realistic eye from our imagination, without having to have a model or image of a person.
Materials To make a realistic eye:
1. Pencil HB, 2B and 8B (can be any but you need a pencil darker than the other to achieve the effect)
2. Eraser
3. Diffusers or cotton (I do not recommend using your finger to blend)
4. Paper sheet or poster board
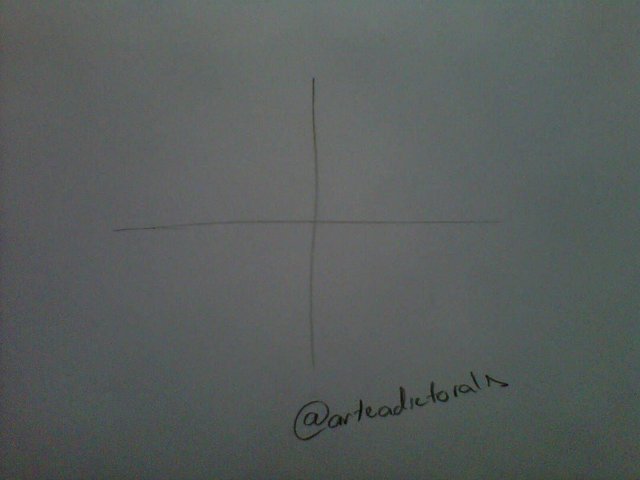
Step 1:
To start drawing the eye we must draw two lines, one vertical and one horizontal, forming a cross between them. I recommend using an HB pencil for the guide and the sketch.
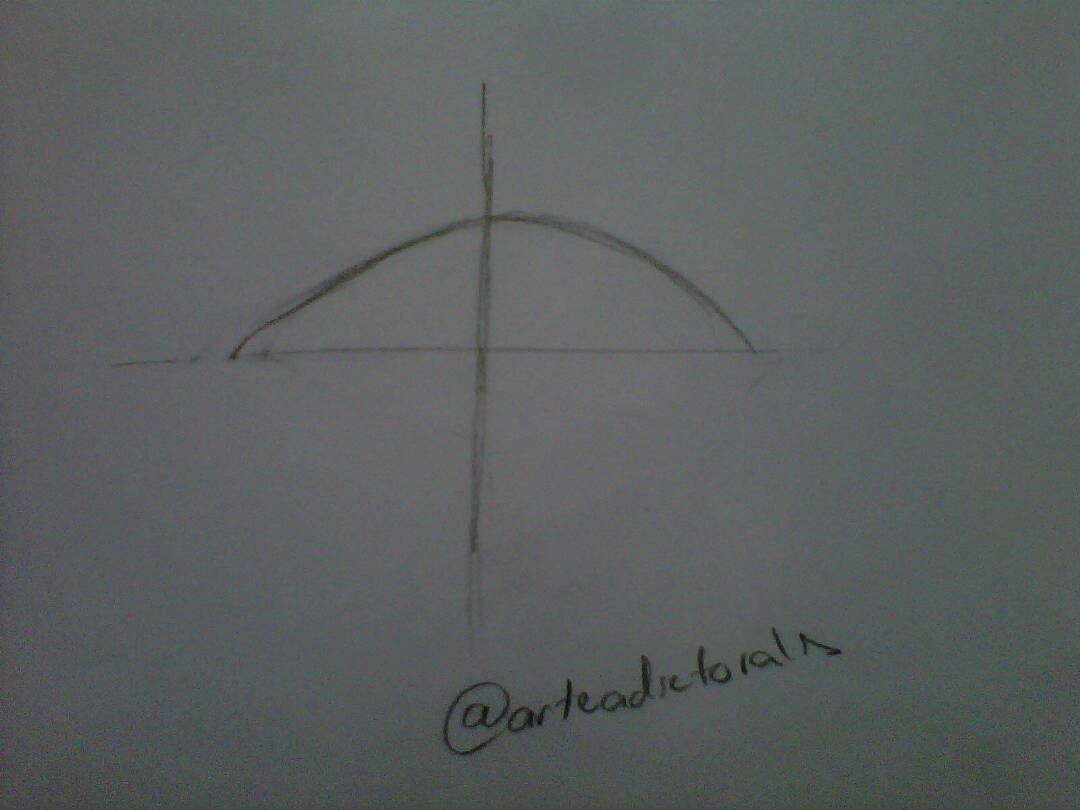
2nd step:
Therefore we draw the upper eyelid.
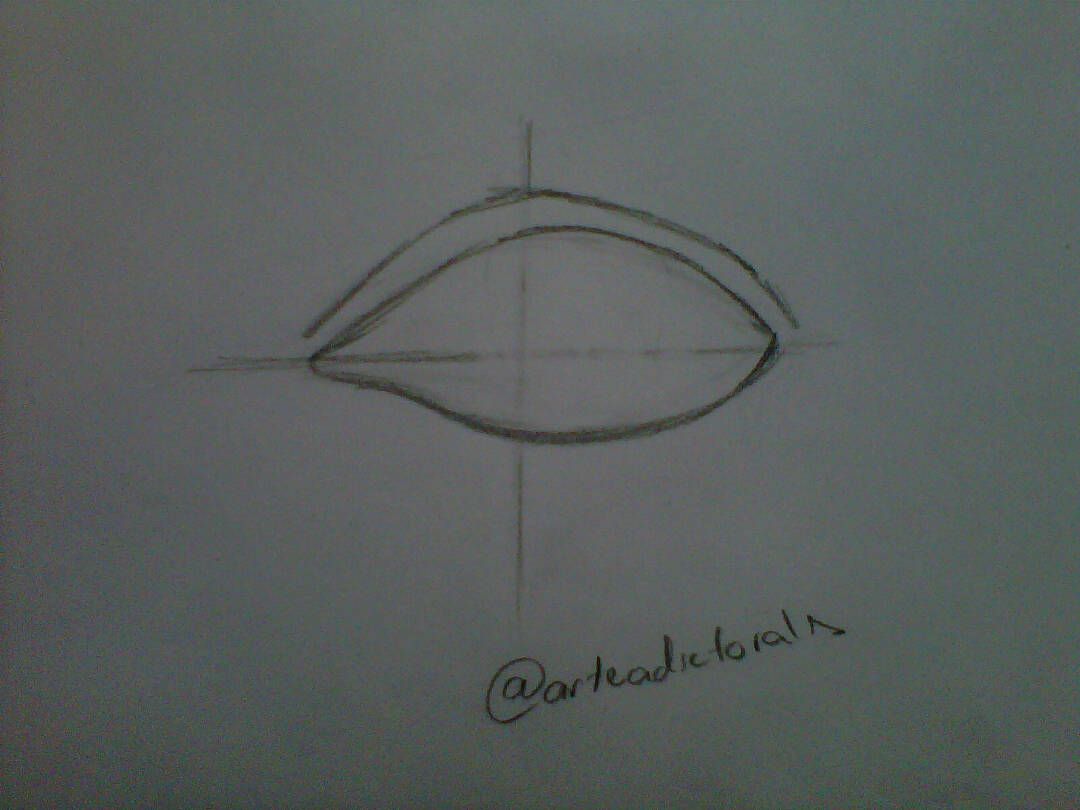
Step 3:
Then we draw the lower eyelid.

Step 4:
In this step we will draw a second lower line, line from where the lower eyelashes will come out. This line goes from the tear to the other end of the eye.
After this we will draw the outer part of the upper and lower eyelids.

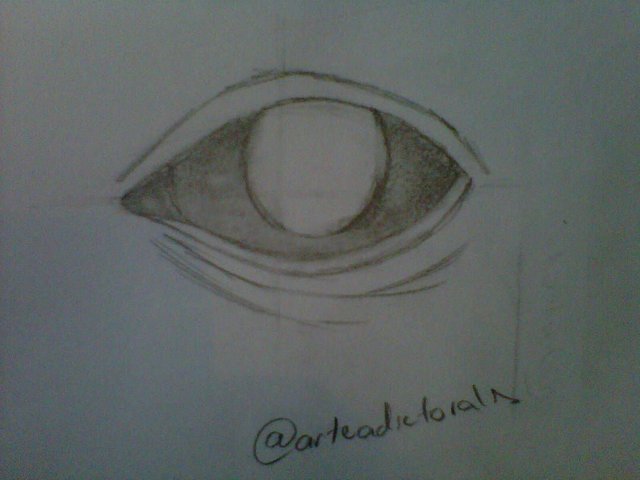
5th Step:
In this step we will draw the tear and what will be the eye.

Step 6:
Having the sketch of what the eye will be, we proceed to give it light and shadow. But first of all I want to explain to them how to blur and how not to.
The best way to blur is with the pencil lying down, with a slight inclination upwards, to work with the graphite side and not with the tip.

that way I recommend grabbing the pencil for when it is going to blur.
Here I leave a sample of how the graphite should be and how not
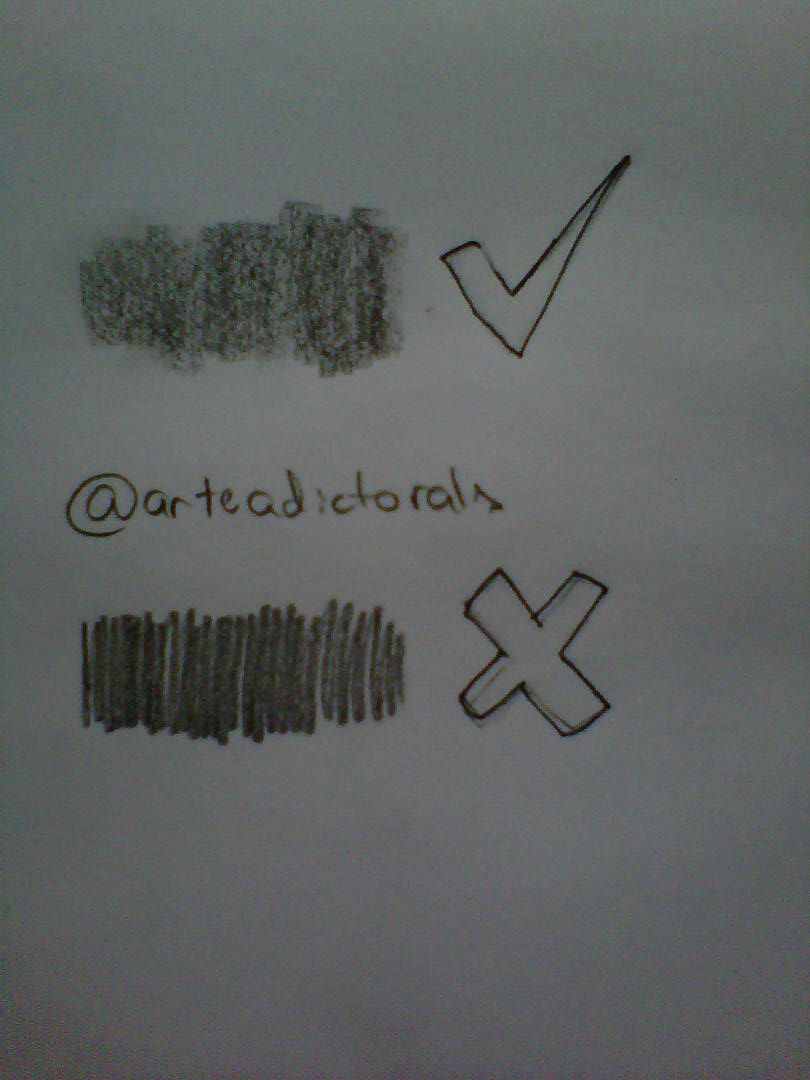
Already knowing this, we blur completely inside the eye, with a pencil 2B
8th Step:
Then in this step we proceed to give more darkness to the tear and the other end of the eye with a pencil 8B, then with a eraser erase where there will be light, so that it can be seen three-dimensional.
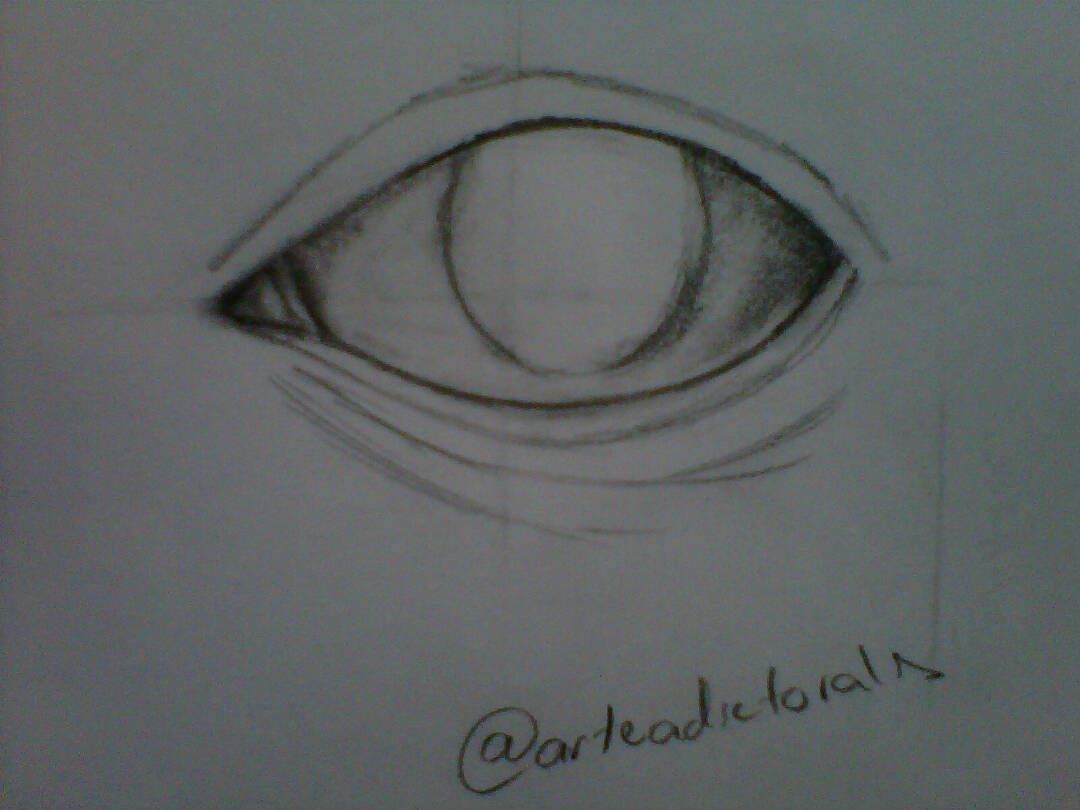
Step 9:
In this step we define what will be the iris and light in the eye.

Step 10:
Then in this step we blur the eye with a 2B pencil, as well as fill the iris and the eye contour with an 8B pencil.
After performing the base of the eye, draw curved lines inside the eye, with a 2B pencil.
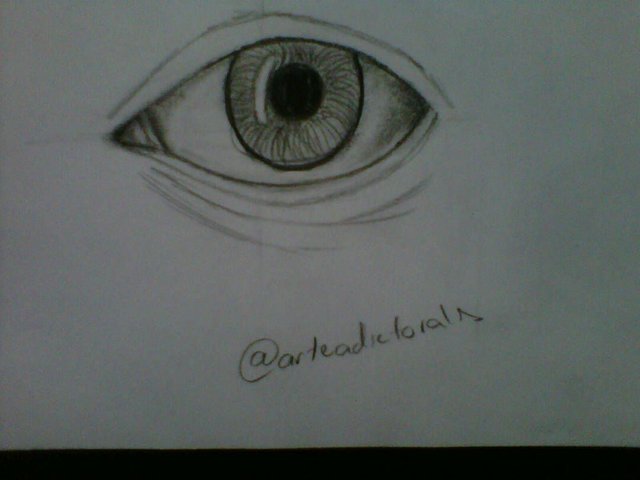
We repeat the same process above but with a pencil 8B, to give the dark clear effect.

Therefore we make the same curved lines but this time with one of the corners of a erase, so that they can be finite lines.
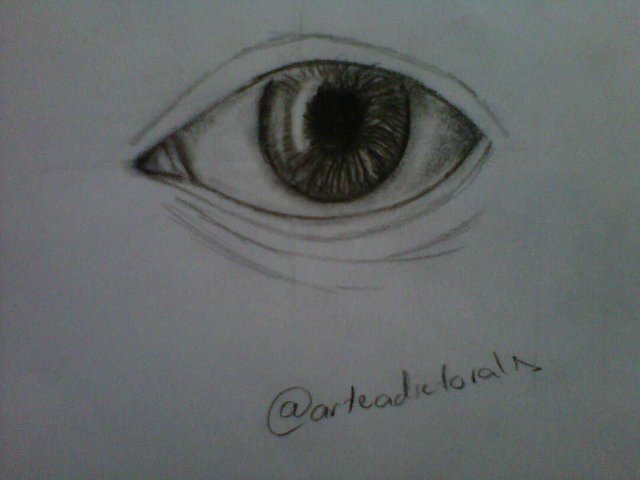
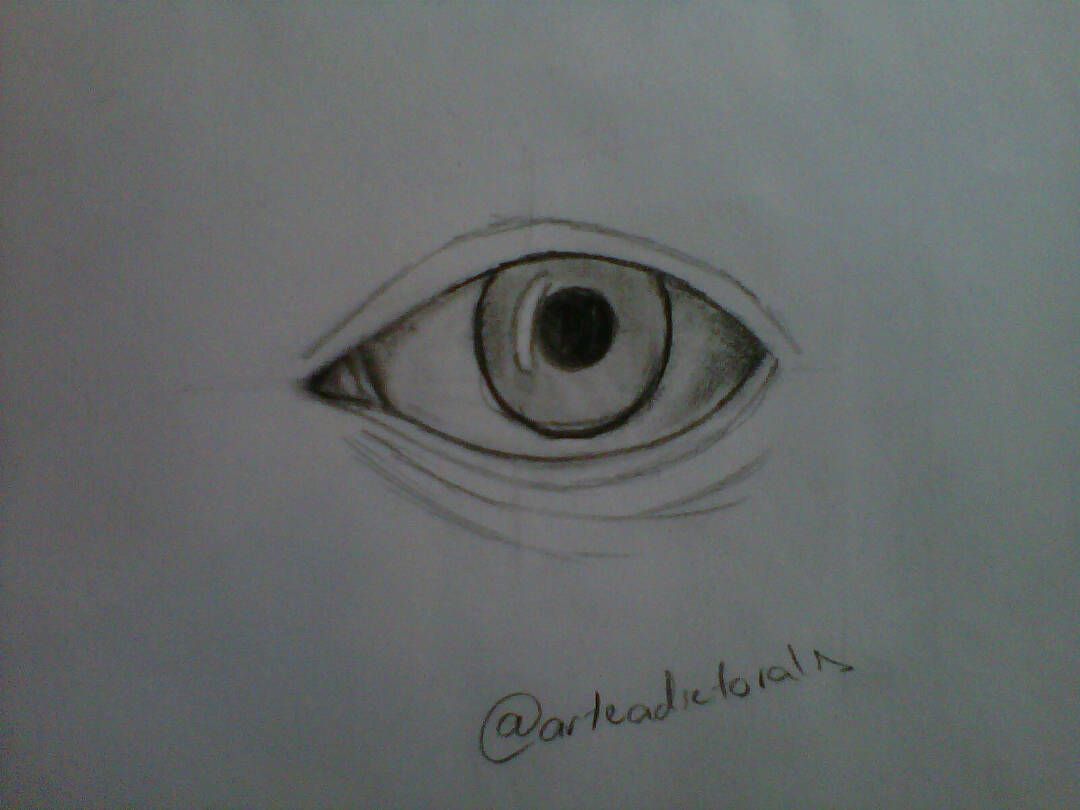
Step 11:
In this step we will blur the outside of the eye, ie the eyelids, with a 2B pencil for the base and 8B for the areas where there will be more darkness.

The outer part of the eyelids must always be darker than the rest of the eyelids, because in this way it is possible to give depth to the eye.
after giving the depth to the eye, we must with a eraser erase in the areas where there will be light.

Step 12:
In this last step, we will draw the eyelashes of the eye. but first you have to consider how to do them, in the image I show you how to draw the upper and lower lashes.
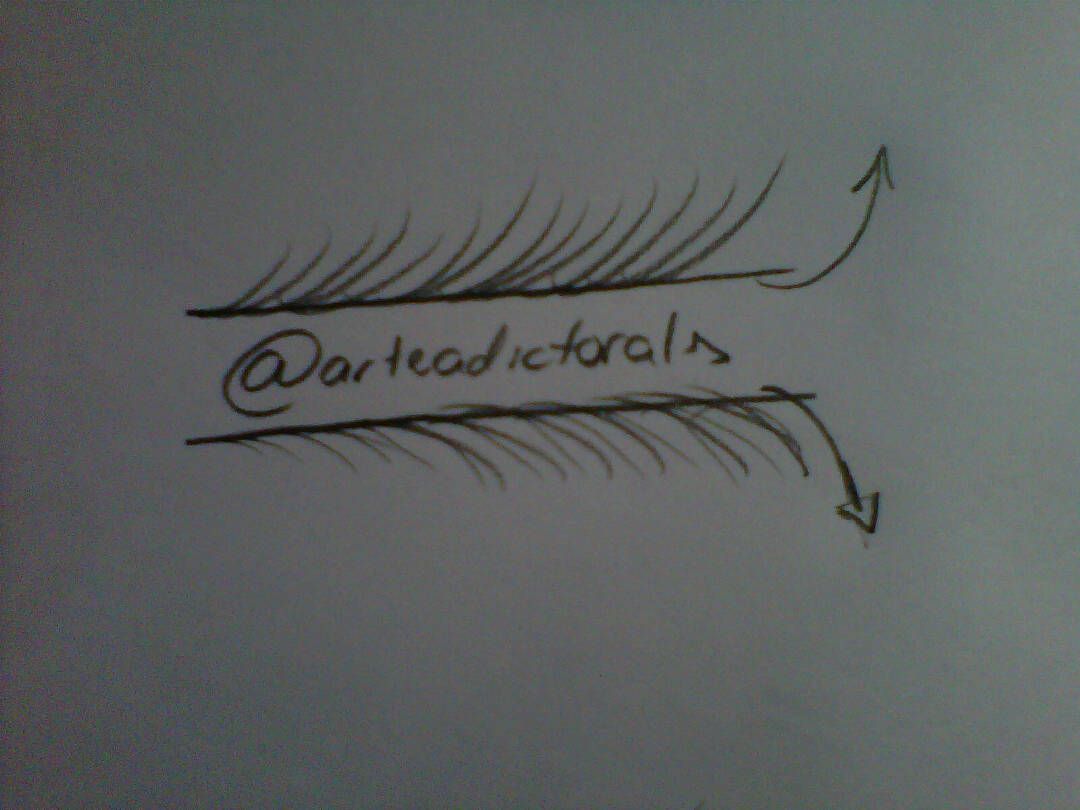
With this in mind, we draw the upper lashes and the lower lashes with a pencil 8B.
After drawing the eyelashes, we add a few details to the eye and reinforce the lights and shadows of the drawing.
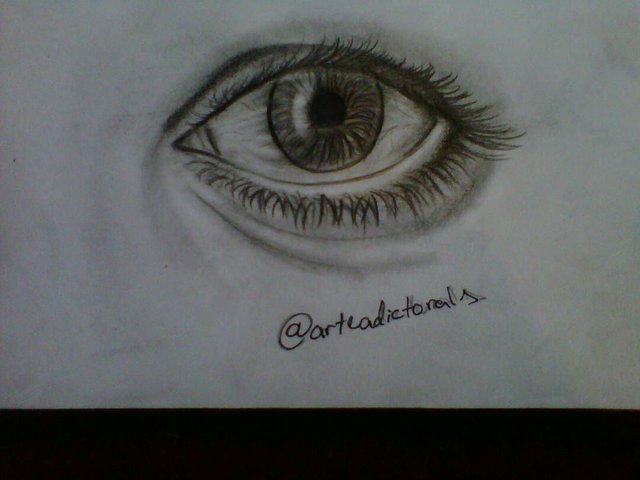
And this way we have our drawing of a realistic eye, without so many materials and in an original and fun way.
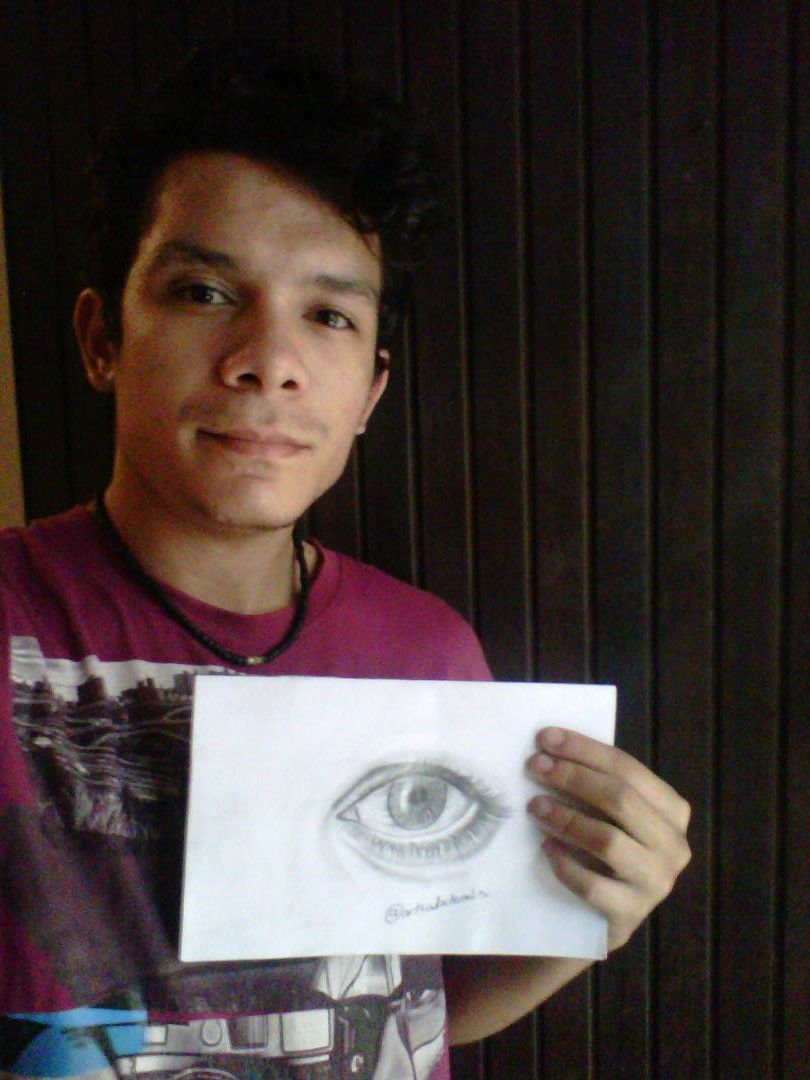
I invite you to be encouraged to try to make a realistic eye of your imagination, I know it will look beautiful!
I love seeing all of these tutorials. They really make it seem like someone unartistic like me might actually be able to draw something someday lol. Btw, I am a curator with @ocd and would love to nominate this post.
This gem of a post was discovered by the OCD Team!
Reply to this comment if you accept, and are willing to let us share your gem of a post! By accepting this, you have a chance to receive extra rewards and one of your photos in this article may be used in our compilation post!
You can follow @ocd – learn more about the project and see other Gems! We strive for transparency.
Let me know if you have any questions regarding the project or nomination. Hope to hear from you soon!
If you would like your posts to be resteemed by @ocd to reach a bigger audience, use the tag #ocd-resteem. You can read about it here.
thank you very much friend
and if I give you permission to promote my post @mrk40