Geometric figures in the sketch by markers. Part 1: Cube. [Full Process]
To draw any subject, you must follow certain rules. And whatever you draw: shell from the beach, a flower from the field or someone's portrait - the rules are the same. And all because any object can be broken into simple geometric figures.
Therefore, I suggest you to understand what the figures consist of and how to make them look like objects that represent themselves.
Cube
The simplest geometric figure is the cube. Let's build it! I do not use the ruler in my work, because the sketch is a sketch. A quick sketch, which, however, is not devoid of the correctness of the forms. To begin with, we draw a vertical line (the nearest edge to us) on the sheet, note the approximate line of the LH horizon. We put the point of the lower bound of the cube. We look at the slope of the side faces and draw the corresponding lines. On the horizon line (N), we obtain two focal points A and B.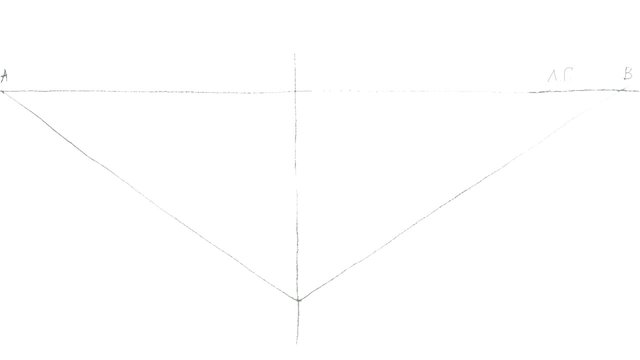
Almost half of the case is done. On the vertical line we select the height of our cube. Now we need to connect this point with the focus points. We have obtained two planes of lateral faces.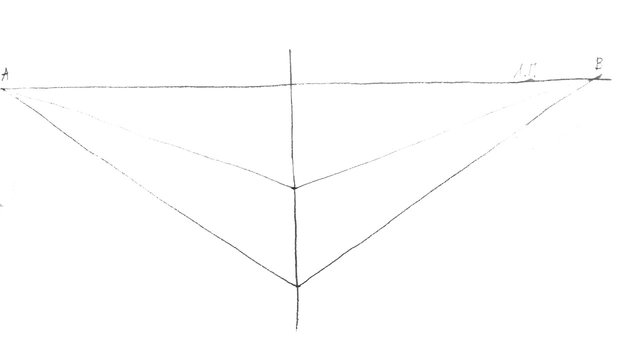
It remains for us to construct the upper bound. To do this, we set aside the width of our faces ("by eye") and draw vertical lines. In those places where vertical lines intersect with already existing lines, we put the dots. These are the corner points of the cube.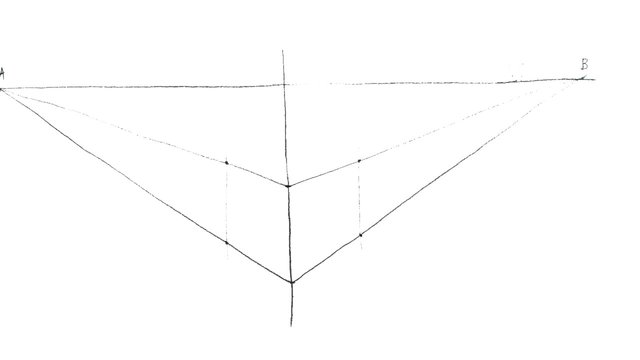
Now we connect the focal points with the obtained corner points, before us the cube.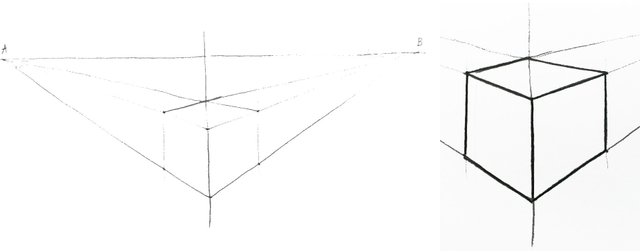
For sketching (and markers usually work this way), such a detailed construction of the cube can not be done. The main thing is to ensure that the lines of faces "converge".
Now let's move on to the shadows. I draw a similarly new cube with a liner (this is a capillary pen, which, as a rule, is not washed away by water and / or alcohol).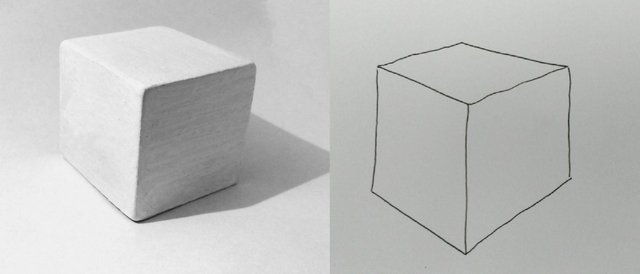
And now we need to give our cube volume. In the picture, we see that the light falls on the left. Therefore, the right side will be the darkest, and the left is the lightest.
First, tint the top face with a light gray color. And the far bottom corner of the left side will also go through the same shade.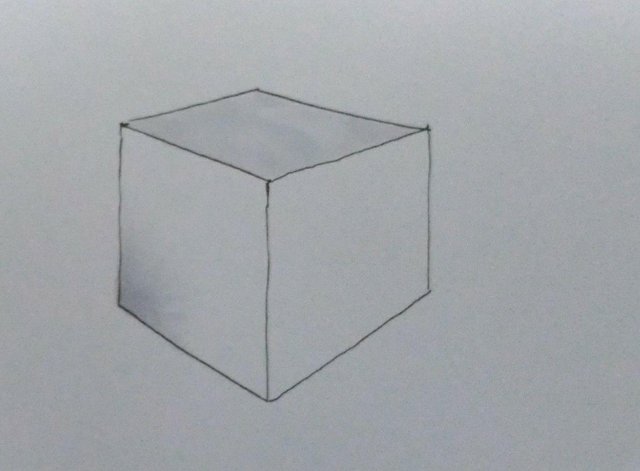
The right side is toned in a darker shade.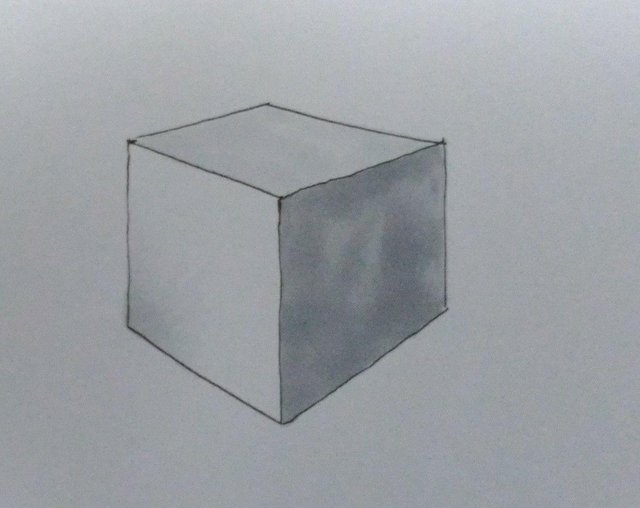
The cube has a hard scrap shape (angle), so this place will have a contrast. To achieve the desired effect, we must strengthen the boundary on the right side. Let's take gray still darker, make a gradient from the corner.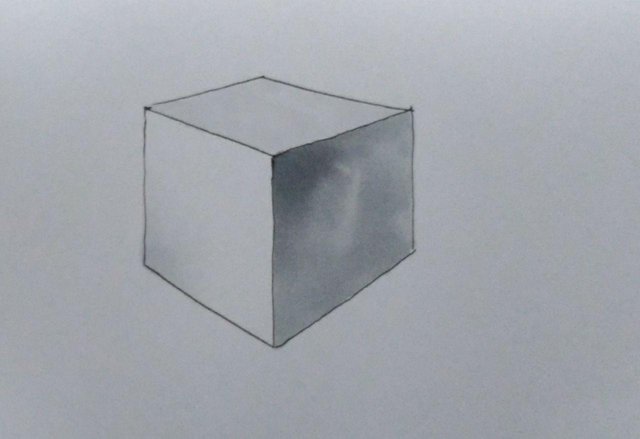
The same is done with the other corner of the cube (far). But here the contrast is not very strong, because the farther away from us - the tone is muffled.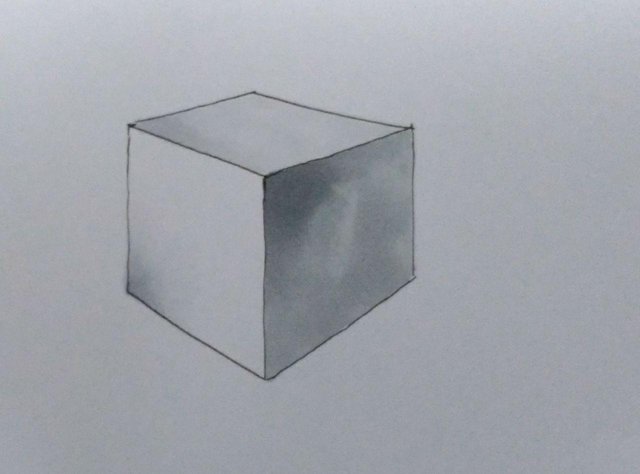
Now the falling shadow. In sketches, the shadow is not completely constructed, we only need to indicate in which direction it is and slightly "dissolve" the sheet.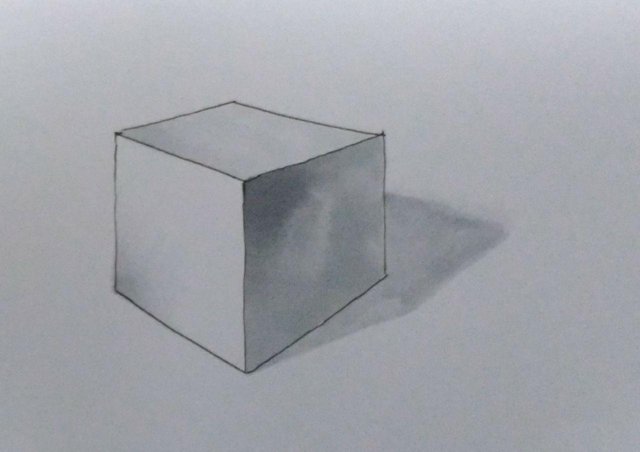
At the junction of the object with the plane, the shadow should be darker.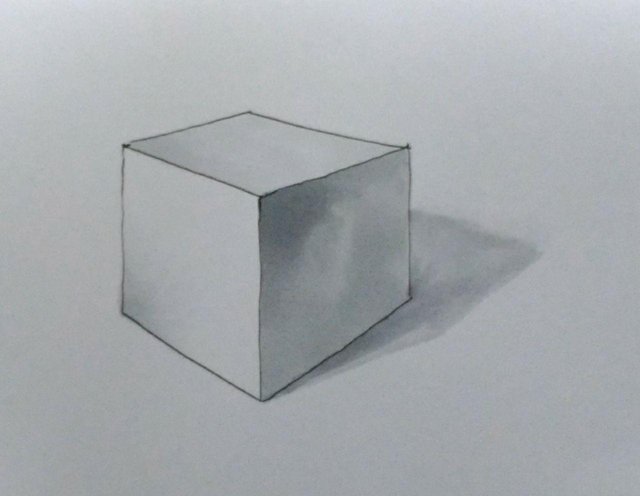
And it remains to dial the tone at the point of touching the cube and the plane. Our cube is ready.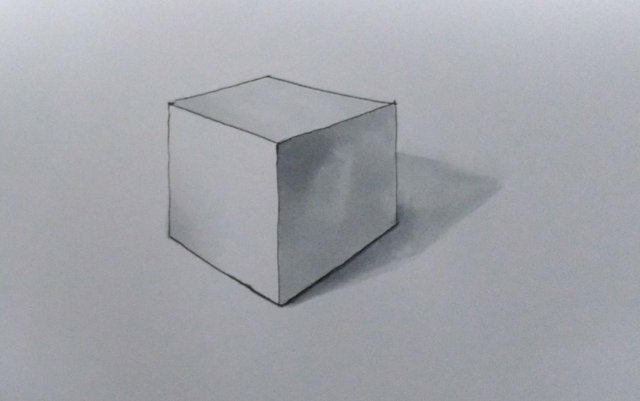
A video where I tint a cube.
P.S. It is hard to write in English, because my native language is Russian. But I'm learning. If you notice serious errors in the text that interfere with the correct perception, please let me know about them.
This was really good... help me some and tell we where I went wrong with all your instructions. please!!!
https://steemit.com/drawing/@flide/the-cube
Answered to the post. I still do not understand where to see notifications for comments.