Build the model Ferrari F12. Part one.
Hello! Today I'm a little distracted from the football theme. I will return to my hobby and begin the story of the assembly of the next model. A week ago I was already writing a post about the assembly of Aventador, which I assembled in the end of September. And now I want to tell a story, divided into several parts, so that it would not be tedious to read all this.
So, part one.
If to build the previous model of the car I was going for a long time with the spirit, now everything went much faster. The time of free now is a little more, so I think the assembly will be faster. In general, I decided to build such a vehicle.
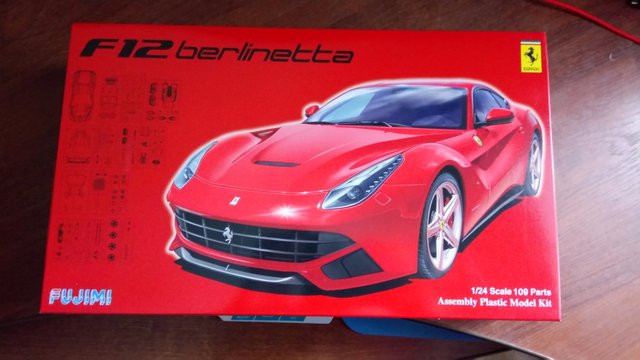
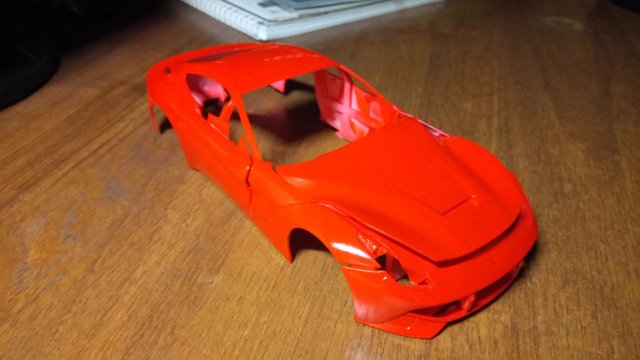
This is my favorite model of Ferrari, along with the 430th. For its construction, a set from Fujimi was purchased. Nobody except this company produces a similar model, so there is nothing to choose from. The firm is good, the casting quality is excellent. Before that, I collected two models of this company (one of which by the way was the Ferrari 430) and the assembly was - it's a pleasure.
A couple of words about the set. This kit as far as I know goes in two versions: with photo etching and without. I purchased the first option, and did not regret it. You just look at this beauty
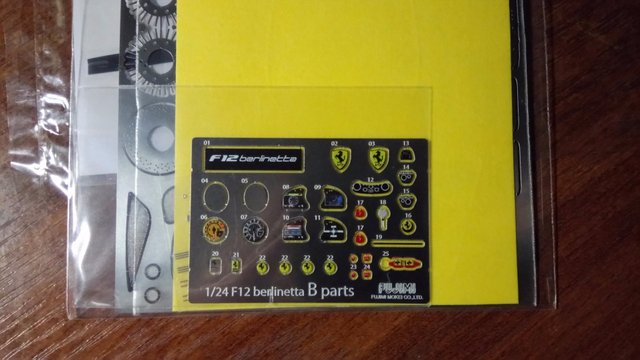

Compound brake discs, already cut out safety belts, already painted in the right color for the nameplate, but there is even a key! In general, with such additions you can create a virtually live car. Together with the set, a white primer was bought at the same time, as the last one dried up on Aventador.
The assembly was traditionally preceded by a journey through the vastness of the Internet in search of photographs of the original and all its details. With the body color this time there were no problems, for the Ferrari can only be red! All other colors are already pampering. The only issue was the coloring of the salon. I did not want to make the salon the same as the 430th built earlier, but I did not invent anything else either. Doing a salon for the color of the body - it will look like a toy and does not seem to be real. In general, this issue will remain open, maybe something will come to mind during the assembly process.
And now we pass directly to the process of assembling this

from this one.
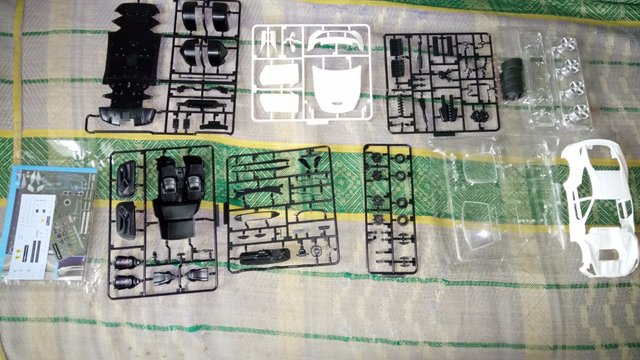
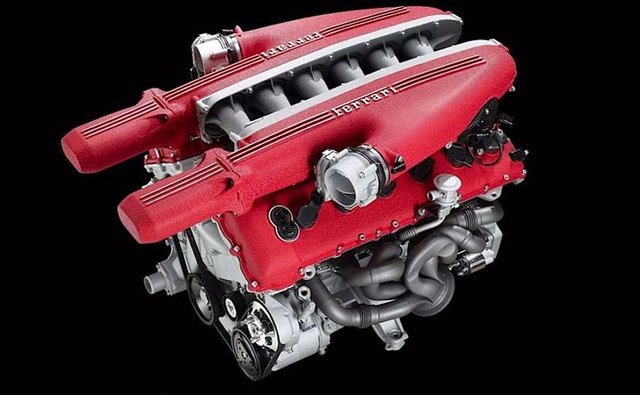
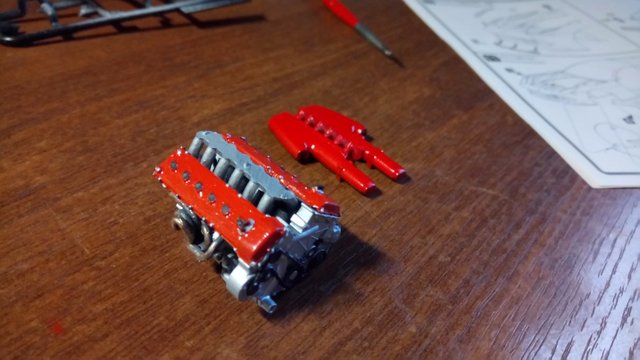
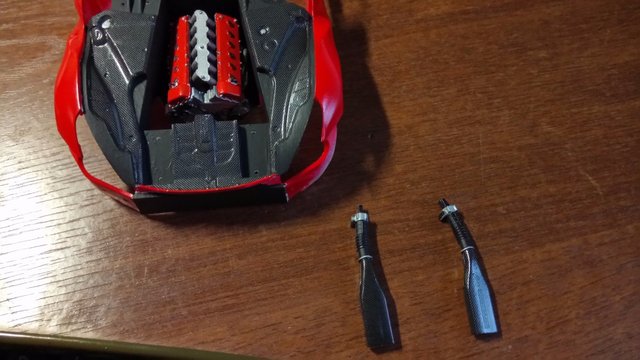
We begin by examining the appearance of the parts. Body parts are very well cast and this time too you can do without putty. In general, no problems with the assembly should arise. And I'll start assembling, perhaps, from the most important part of any car - the engine, and while the parts will dry, I will begin to fence the body. Let me say a few words about this engine. Atmospheric V12 in volume of 6.3 liters, giving out capacity in 740 horses, one of the most powerful engines of the company, and one of the most beautiful. And I could not help but thank the fact that the engine's detailing is very high and a whole gate of parts has been allocated to its assembly.

By tradition, every assembly I have under some kind of serial. At this time, at the time of the beginning of the assembly, I watched the TV series "Punisher". I'm not a big fan of "superhero" movies, but this show impressed me. Motivation, dialogue, logic in action, the disclosure of characters - all this is present. John Berntal is so much in the role of Frank Castle, how much can you get into it at all.
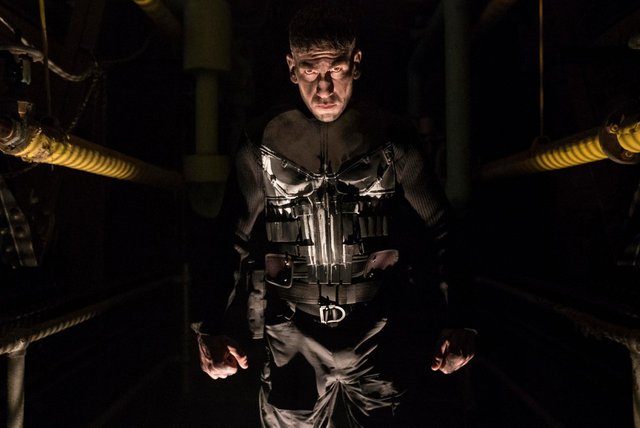
In general, a minimum of tolerance and a maximum of tin. This is exactly what a real Punisher should be. And this is clearly not the series under which it is worthwhile to collect something. But at my own risk and try.
I do not know whether this is due to the choice of the series or with crooked hands, but at the very start of the assembly I had a problem. A few days left for the assembly of the engine, the main problem I was brought here are these parts of the exhaust system of the car, which are attached to the engine.

I do not know who invented such an assembly of these details, but he was clearly angry at people. Painted everything seems to be simple: the three parts are attached in series to each other with the help of glue, and then on the die and the engine.
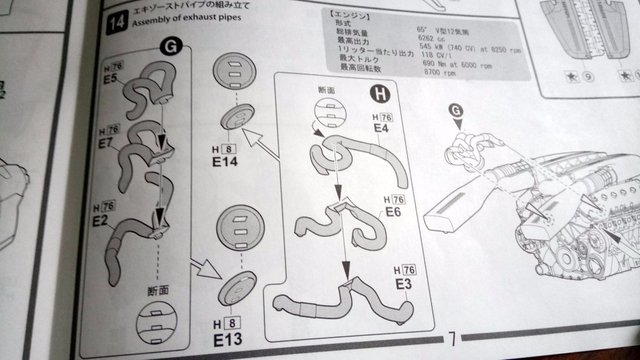
But no matter how it is, even following the instructions, I did not understand why I have nothing to do with the engine, not with each other. It's just some kind of nightmare, plus on some photos of the engine found on the Internet for some reason, only the left side is shown.

Why is there no right? There it was impossible to shoot? In general, I went through all the possible options for docking, the parts were permanently stuck, fell off, nothing connected with the engine, nothing docked with each other, no matter how I would not have smoked the details. There was even an attempt to make this detail myself, but in the end, with difficulty, but I still docked these details with the engine, podrrityuval paint zatertye details and went to prepare the body for painting.
First, I cleaned the body with P1200 and removed the joints of the molds. And now, when the body of the model has become smooth, no superfluous protrusions and jambs can begin to be primed with the first layer. After the first priming, I ran a couple of times with the sandpaper and put the second layer. And again, after drying, the sandpaper are used.
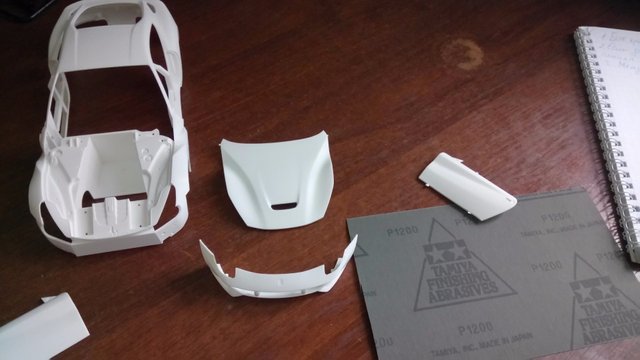
Everything took about two days. So, you can start painting. Here everything is the same as with the primer: first the first layer, not trying to fill in all the paint, but just to designate the color. After a couple of hours, the second layer goes, and here it is already necessary to cover the surface more abundantly.
Something like that.
Now you need to go over the P2000 sandpaper to remove all the jambs, then trim the other painted parts - the hood, bumper, doors and you can put another layer. In general, according to the results of the four-day painting, the body has acquired its color and now I will, perhaps, under the hood of space. Here it was possible to stupidly paint everything with a black matte color and it would turn out well. But we are not looking for easy ways, therefore, instead of painting, decals imitating the carbon will be used. This will look better and more realistic.
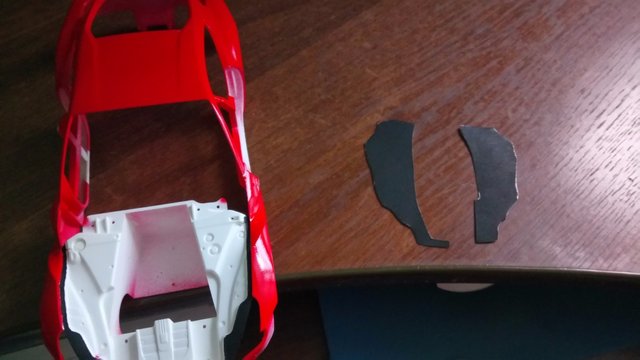
To implement this plan, with the help of paint tape were cut out sketches. I will say right away that I did not hit the size, and I did not quite think how I would stick them, so after the first unsuccessful attempt to paste the first "sketch" everything was redone. Carved on the new decal is not without difficulty, but fell into place with a special liquid and a hair dryer. All the rest, though it still had to be painted black, but with a brush.
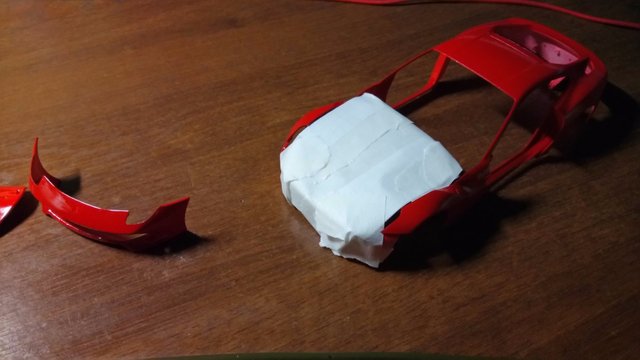
Now, you will need to think about how to cover the body with lacquer so as not to flood the engine compartment, as this paint does not react very well with the varnish.
After a little thought, a way to close the engine compartment was found. I just pasted everything nafig with paint tape, preloading a piece of paper under it, so that later I did not tear it off with carbon decals.
"The Punisher" is over, and it's sad. But one evening, accidentally visiting the Internet and reading about this series, I learned that the first appearance of the punisher was in another Marvel TV series - in the second season of Daredevil. And I immediately ran it to swing. I do not really like to start watching TV shows from the second season, but there's nothing to be done.
We continue.
In general, I prepared the body to cover the first layer of varnish. The body and some of its parts will have to be varnished separately. And while the varnish dries, the question again - how to paint the salon. And again we go to the Internet, and again nothing good. Options for decoration are very diverse, but there is not one that you look at, and you say - that's what you need. However, among a pile of photographs, there was one option that pleased my eye. Here he is.
All would be nothing, but there is one small problem - paint. I have a darker, lighter color, but this is not so, so we try to mix it. It turned out that we were right, not very. Therefore, the painting of the interior will have to be postponed until I buy the right shade. The body between the case was covered with a second layer of varnish and went to dry for a long time. It's time to start running. But this is in the next series.
To be continued...
Nice post and great work! Waiting for the second part))))
Thank you, my dear friend!
good job
Thanks!
@alessandarus payed 4.0 SBD to @minnowbooster to buy a stealth upvote.

transaction-id 270031dd661686baa0f703477a56c01d2171b18a
@stealthgoat
@alessandarus payed 4.0 SBD to @minnowbooster to buy a stealth upvote.
transaction-id 9a1d951ae122997c450ec9d48c101cccfc63bc02
@stealthgoat
@alessandarus payed 4.0 SBD to @minnowbooster to buy a stealth upvote.

transaction-id 8c23d24eeb60dddc3072d60c0e75ad37d2b7c041
@stealthgoat
This post has received a 2.20 % upvote from @buildawhale thanks to: @alessandarus. Send at least 1 SBD to @buildawhale with a post link in the memo field for a portion of the next vote.
To support our daily curation initiative, please vote on my owner, @themarkymark, as a Steem Witness
So many little parts.. Do most of these kits come with adhesives included?
No, only plastic parts are included. Paint, adhesives and all additional materials are bought separately.
Oh, ok.Asked cause I want to build in the near future a model skyline :D