3D max bouncing ball tutorial - week 2
3D max week 2 assignment – Bouncing ball
Build texture and animate a ball bouncing down the stairs. We learned a bit about applying textures last week. Let’s build something, animate it and timer permitting texture it with some cool textures. If we don’t get to the texture part in this tutorial just go back to last week’s tutorial and maybe you can figure it out.
Last week’s tutorial was:
https://steemit.com/animation/@altcoinnerd/into-to-3d-max-2017-week-one-download-and-install-3d-max-for-free-for-3-years-and-make-cool-stuff
- Create a ball about a foot (12 inches) across with a segment count of 10.
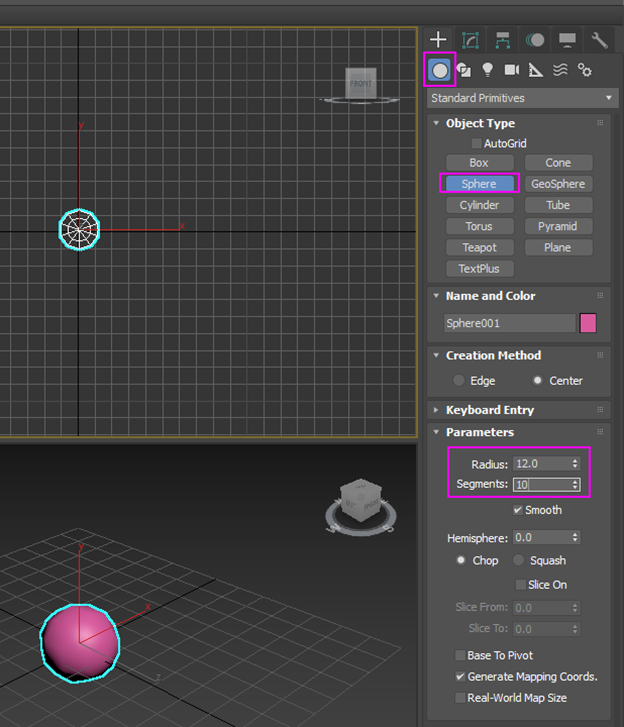
- Rename the sphere ‘ball 1’.
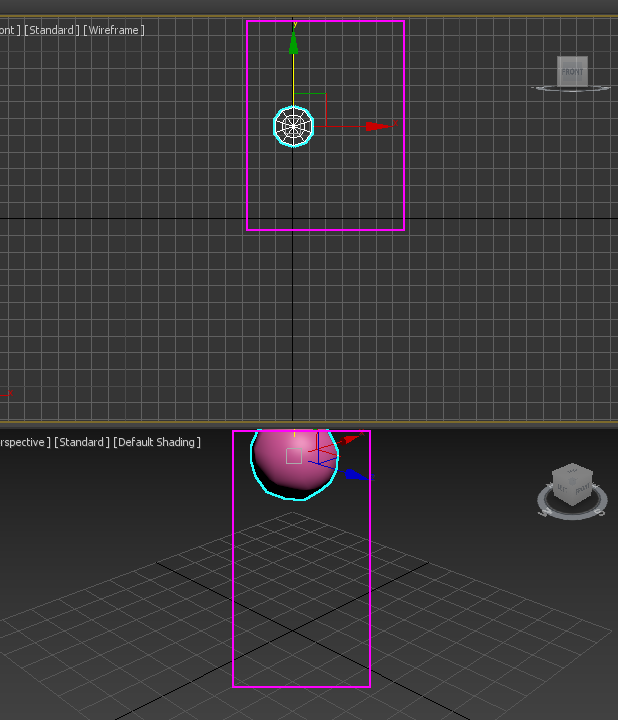
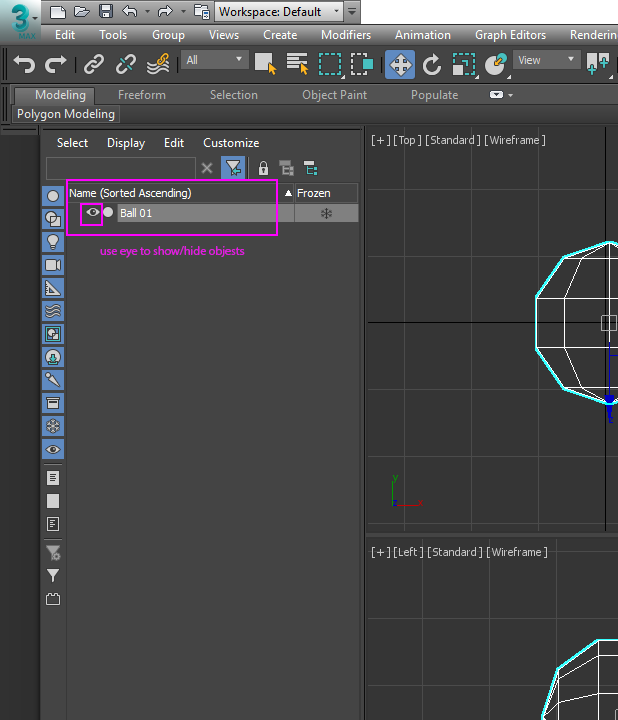
Move the ball up off the grid using the move tool. If it is in the way you can temporarily hide the ball.
4.
- In the top view click and drag out the length and width dimensions of the step. Then to create height drag the mouse up and bit and click again to finish the step. Now change the size of the step while it is still selected. Use the regular step size of 11 inches deep and 7 inches high. The step can be as wide as you like, I made mine 36 inches.
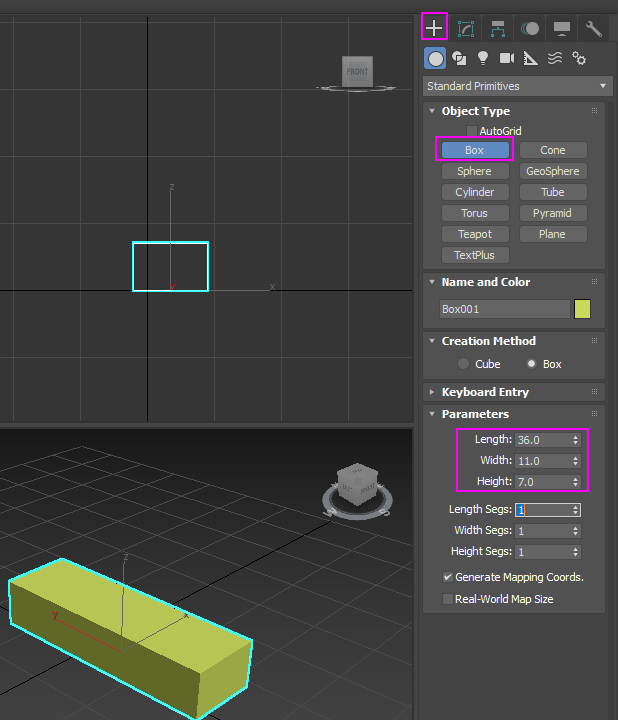
- If you ‘lost’ the selection don’t panic – just go to the modify panel and change the numbers there instead.

- Name the box you made ‘Step001’ – we need the extra zeros because we are going to make a few of them.
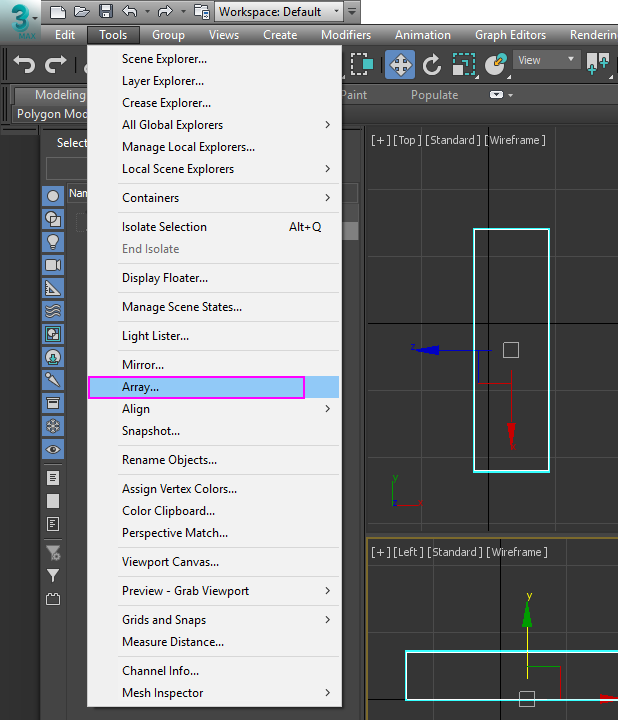
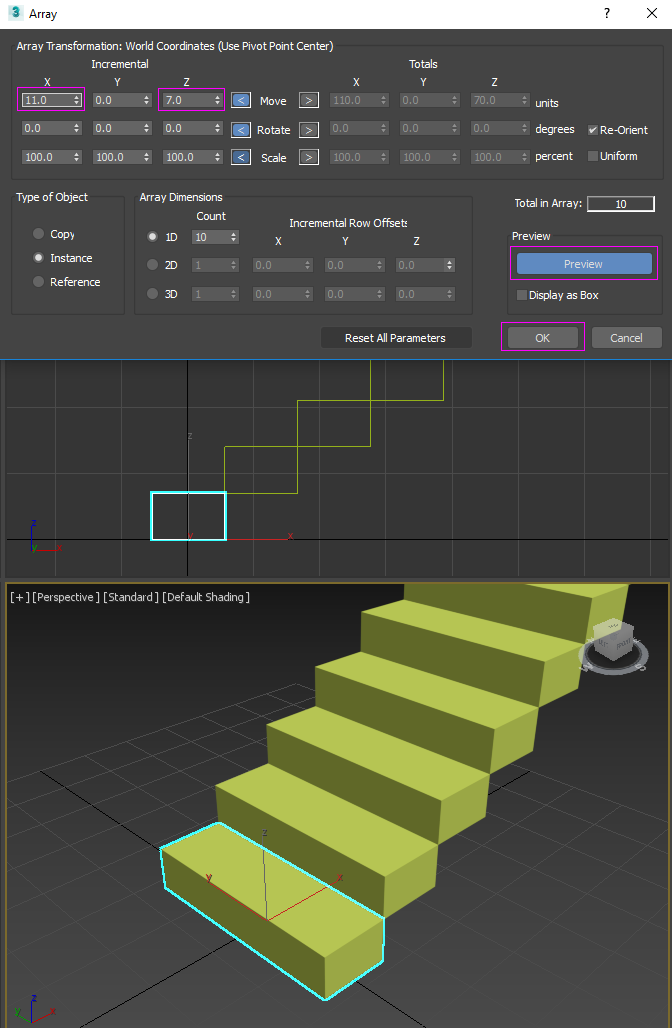
- Go to Tools-matrix in the top bar. Use the matrix copy to create a stair case to copy the stair 12 times.
- Creating the staircase
a. Since the step is 7 inches high and 11 inches deep we just need to cop the step up 7 inches and over 11 inches for it to match.
b. In the dialog box for the array you need to type in 7 for ‘Z’ and over11 for ‘X’. Before you set your decision in presently you can click ‘preview’ to see what it will look like.
c. When you are happy with the look of it, choose ‘ok’
d. if you are still having problems with the stairs going the wrong direction you may have created the step facing 90 degrees in the wrong direction – don’t worry - change the inputs from X and Z to Y and Z and see if it makes any difference.
Create a 1st floor landing. Go to create and plane and then drag out the plane in the top view of your screen. Click and drag the plane out so it is much larger than the stairs.
a. I had to zoom out a little in the top view to give myself some room.
b. Then I clicked at the top left hand corner of the screen and dragged diagonally across the stairs.
c. Then I keyed in the ‘length’ and ‘width’ to be 300x300. I left the ‘segments at 4 and 4. The segments are divisions the floor plane object. This should put the floor on the (0,0) of the ground plane below the stairs. If it is not use the move tool to move the ground plane so it is just below the floor.Time to animate the ball bouncing down the stairs.
a. Unhide the ball if you did by clicking the ‘eye’ icon next to the name ‘Ball01 on the list.
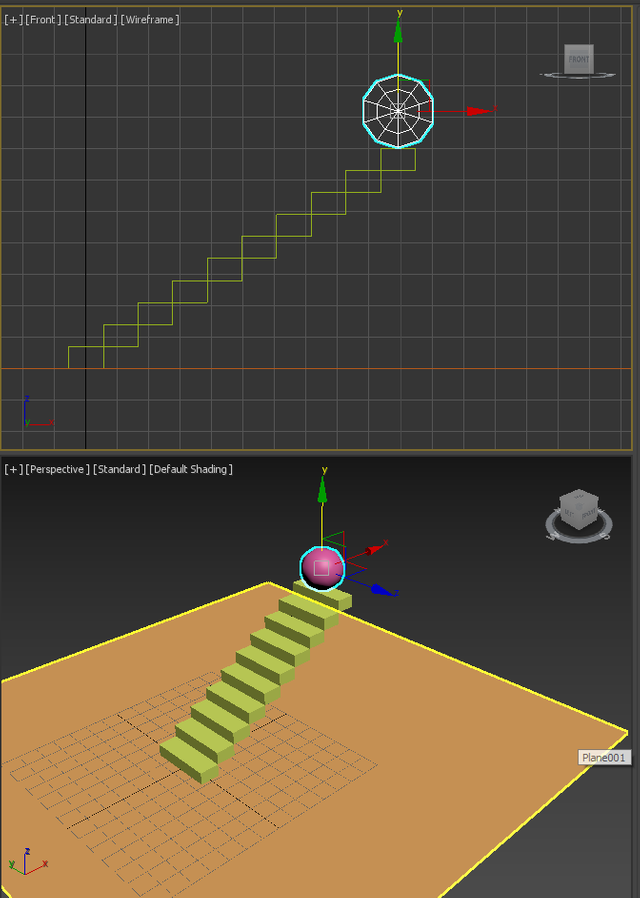
b. Move the ball to the top of the stairs using the move tool. Use a ‘side’ view of the stairs to make sure it sits properly on the top. My ‘side’ view turned out to be the ‘Front view port’ somehow
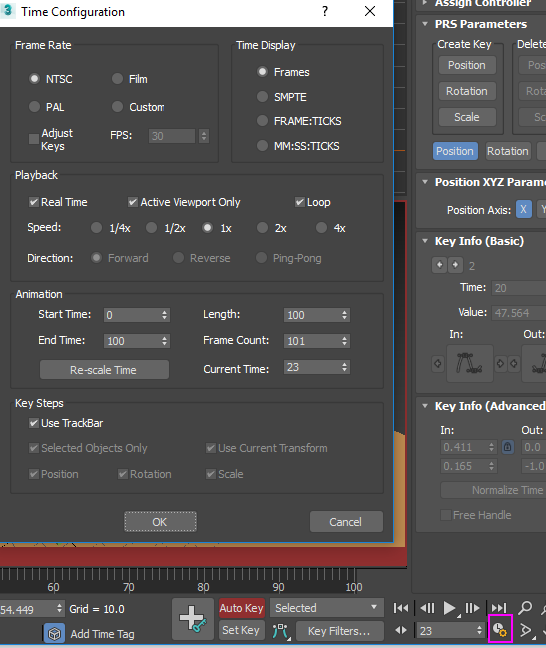
- To animate the ball first we must understand the ‘time line’ at the bottom of the screen.
I turned on auto key (in the red on the right) and moved my time slide up to the ‘5’ mark on the left.
a. I Clicked on the ball with the move tool and moved it up a bit off the top of the step like it was jumping up. Moving the ball with the auto key on sets what is called a ‘key frame’ which a saved position in space in 3D.
b. To check my work, I slid the time slider back and forth between 0-5 to see the ball jumping up and down.
c. Note: the ‘Auto key’ function can really make a mess if you are not carful. If you move something it is animated. It’s hard to ‘try things out’ because once you move them they are set. You can edit you keys you set.
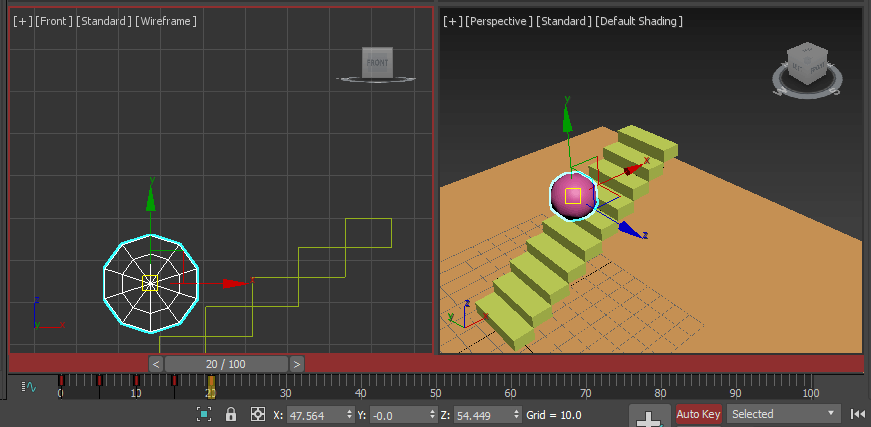
Now add more frames of animation.
a. Space out your ‘up’ and ‘down’ frames by about 5 frames
b. Have the ball bounce off every other step as it descends the stair case.
c. Have the ball bounce away off the floor once it gets to floor level.
d. Press the play button to watch the total animation
When you watch the animation, you will see it looks a little slow. Change the speed of the keyframes by editing them in one of two ways.
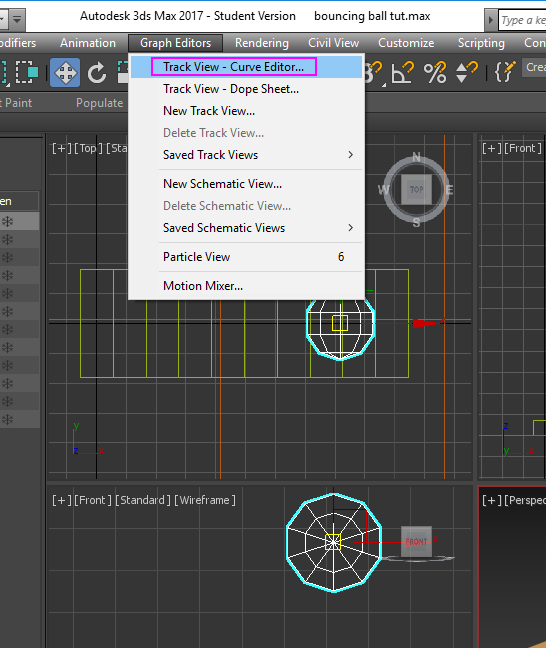
- Go to the top bar of the screen where it says edit, tools , group, modifiers, animation, graph editors, chose graph editors.
- Choose graph editors -> track view curve editor. This will allow you to change the speed and velocity of your animated key frames.
- Notice that you can isolate the different X and Z inputs graphs for the object. This is nice when things get messy later.
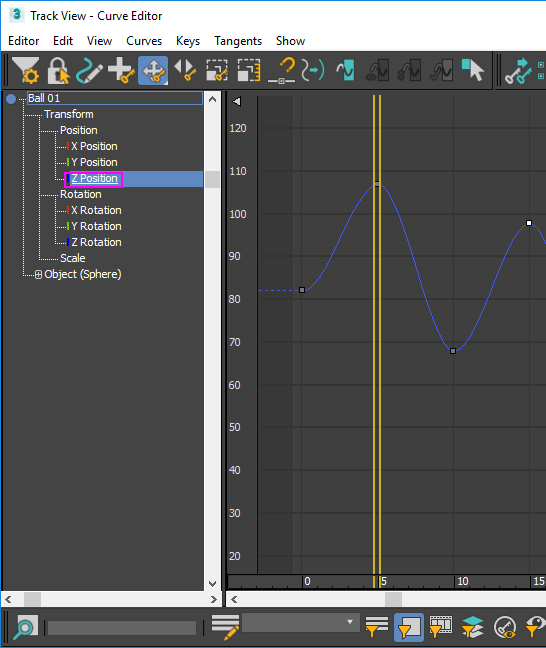
- You can zoom in on the curves you want to edit

- Select just the blue ‘Z’ Curve and look at the bottom of the bounce graph. This is the point at which the ball is bouncing off the ground. The ball is going much faster at this point in its path so make it look this way but choosing the ‘Set tangents to fast’ icon on the ‘Track View Curve editor’ on the tool bar.
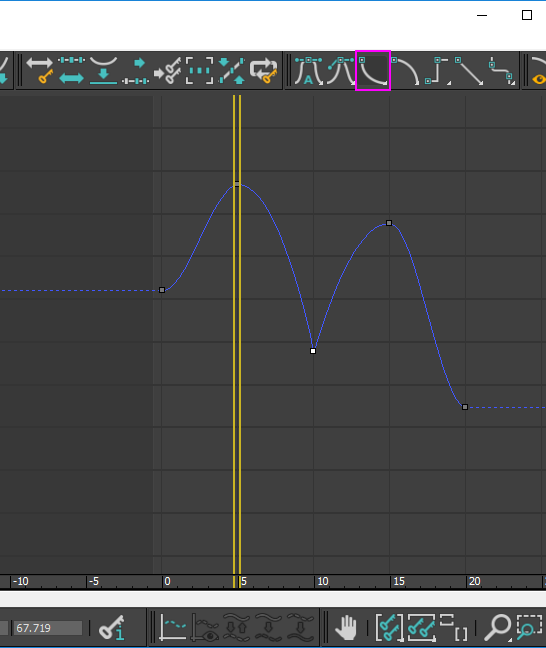
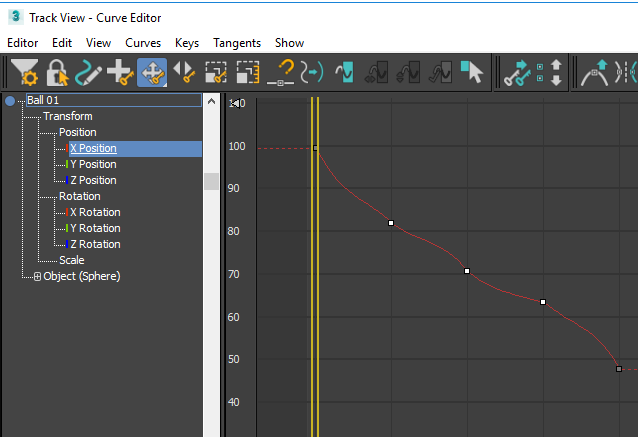
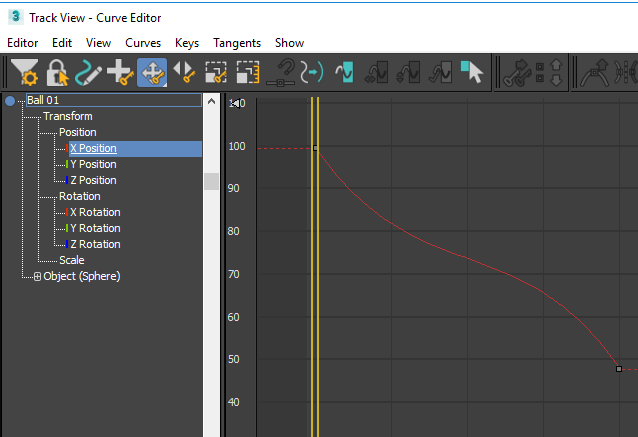
- Now that we are understanding how editing the in and out points of a key frame are important looks at the red ‘X’ keyframes. There are too many keyframes. All we need is a nice in and out point and that is it.
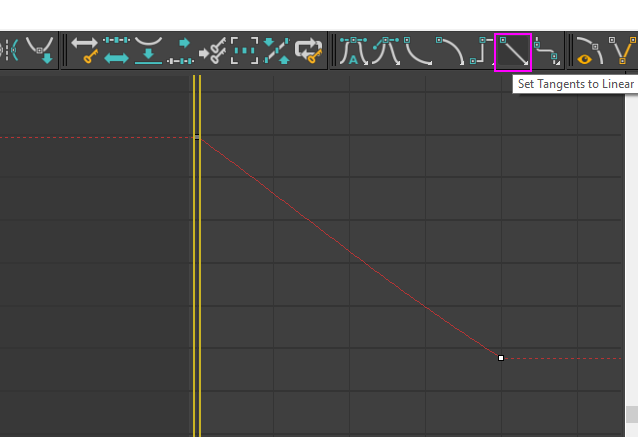
- Smooth the ‘in’ and ‘out’ points of the keyframes at the beginning and end of the animation so they are even and the line looks straighter. Use the set tangents to linier function.
Watch the animation again and see the difference – it should have a better ‘feel’ and ‘spring’ to it.
Now let’s make that stair case look more realistic. The stairs are just floating in the air. We will put a base underneath them.
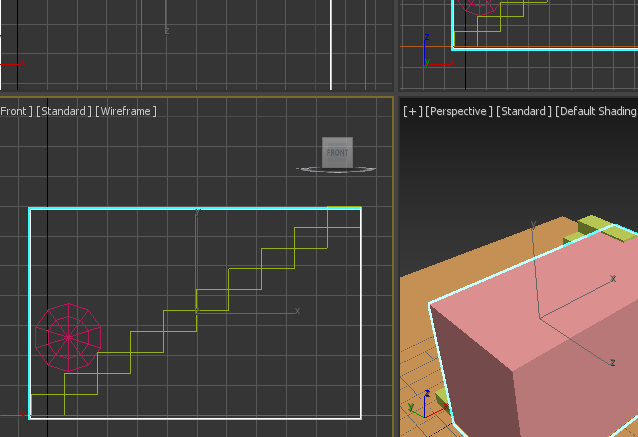
In the front view, click and drag the box from the bottom front edge of the bottom stair to the top back edge of the top stair.
In the top view use the scale tool in the ‘Y’ axis to widen the block so it is as wide as the stairs.
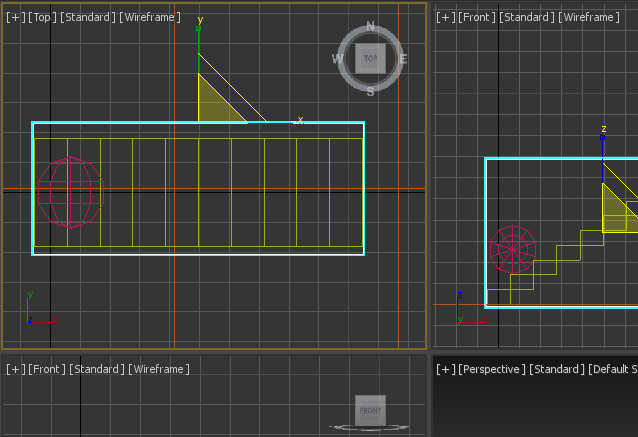
Use the move tool to more it into position and then the scale and move again to get it just right.
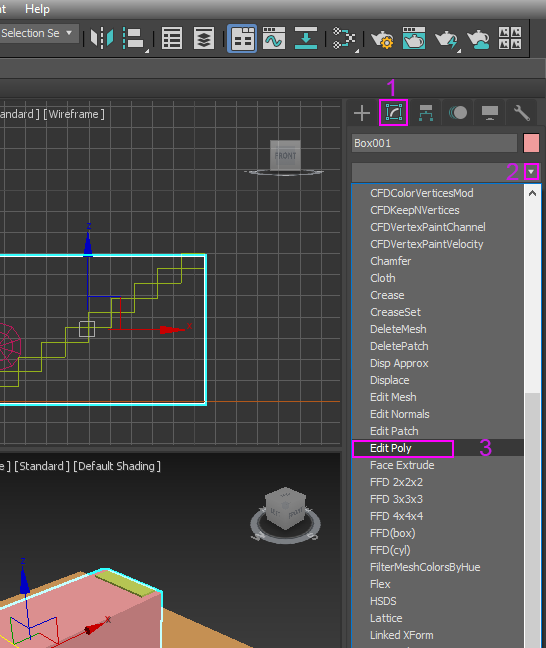
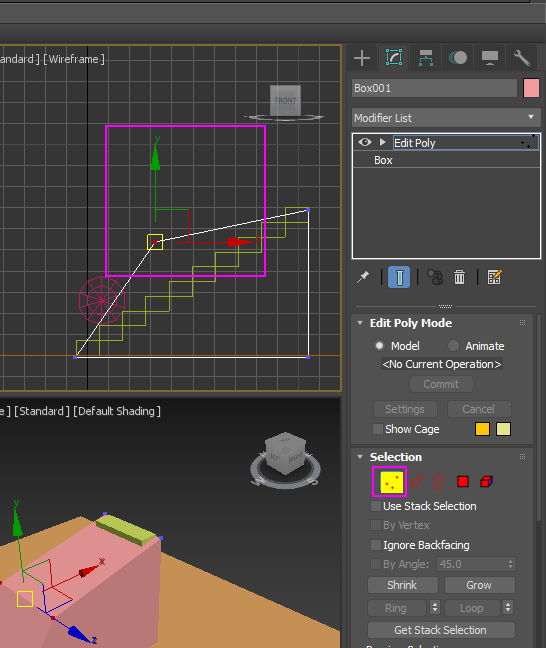
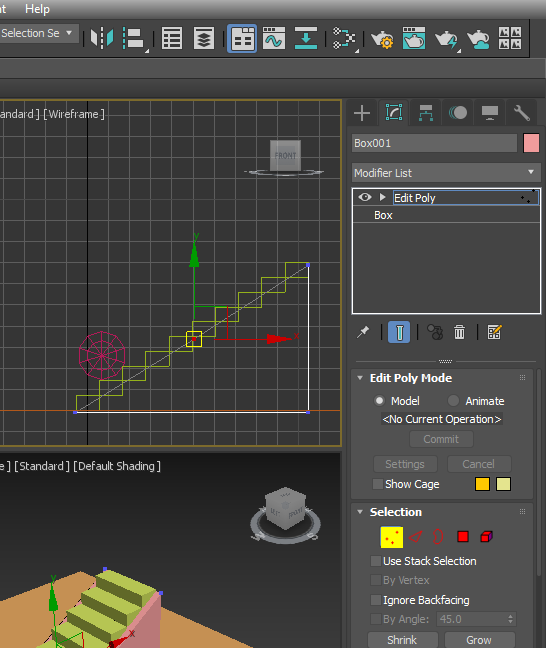
- Next to the create tab you have been using is the modify tab – this can edit elements in and object called vertexes.
- Choose edit poly icon and select the top left corner of the box and pull it down so the box become a triangle.
- Render out your animation of the bouncing ball and upload it to the internet.
a. Make sure your camera is set up in the perspective view so you can see the animation clearly.
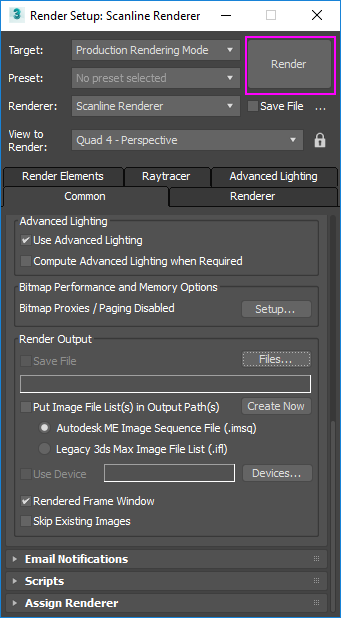
b. Click the render options

d. When the render options opens up Choose the scan line renderer and change the frame range to 0 to 100.
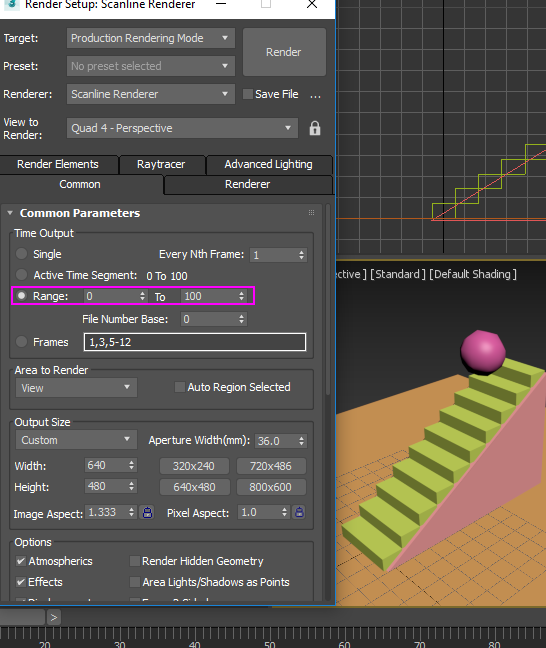
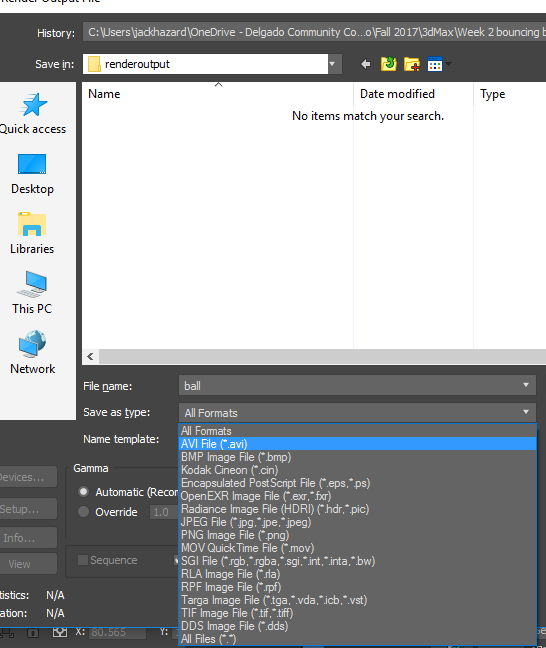
g. Scroll down to the render output and click on files and choose the ‘avi’ from the file type and type a name for the file
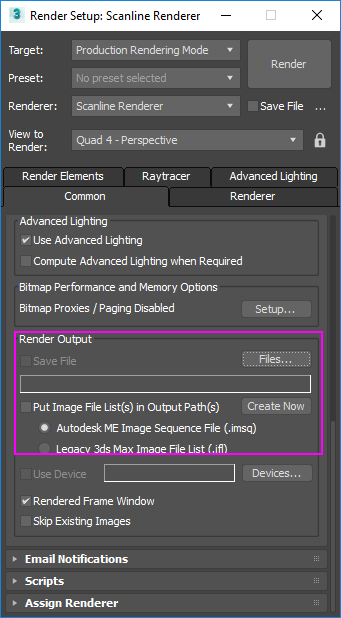
i. Name the file ‘yourname’ bouncing ball
k. Scroll up in the render dialog box and hit render once you have saved the file name
m. Find the file and watch it. Does it look the way you expected?
- Try to add textures to the ball, stairs and floor and render it again and compare the two files. Remember to save the new file under an new name.
- Upload the file to Youtube and share the link with your instructor and your friends


That's awesome...
Cool thinks..
Nice tutorial, man! Good job! I am working on a 3d animation project at the moment. If you would like any of your creations to be featured, let me know. Followed!
I like this a lot. Getting the right weight and physics on objects is really the key for a successful animation. I'm teaching my self the basics of Cinema4D because its integrated into Adobe After Effects. But 3D Max looks very similar. So it shouldn't be to hard to give this a go.
Thanks.
@animate
Your thinks are realy amazing,thanks for share.