How to Make Simple Pixelated Characters in Photoshop

Good Day guys! Today, I'm discussing how you can make simple characters pixelated using Photoshop - this isn't the best tutorial but it's a good way to do it and can be easily adapted by beginners.
We're gonna use characters from a series from Japan called Doraemon, you may know them from watching TV - I grew up in these kind of toons and I really like the characters. In fact, this is actually a very long series because it was so successful, people just can't get enough of it.
Reference images used:
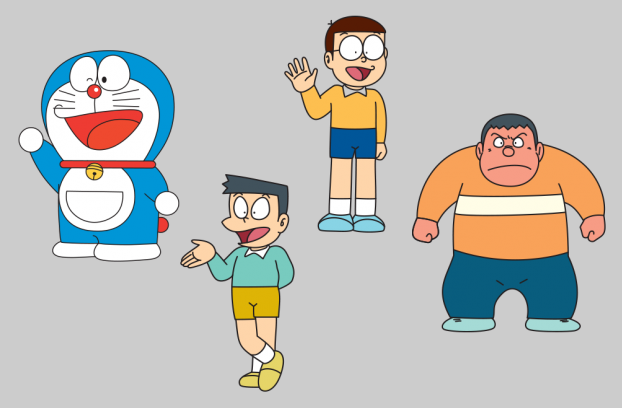
Image Sources: Wikia | Doraemon
Great! Now that you've met the characters, let's get to making them pixelated or something. Do follow as well if you have Photoshop - doing it is the best way to learn it! Enjoy!
Here are the Steps:
Open your image by pressing File > Open or Ctrl+O:
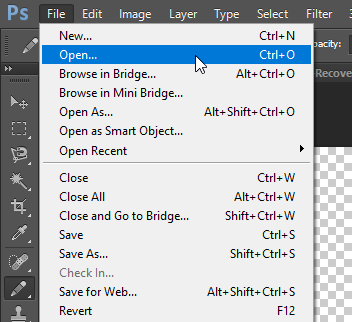
Select the image you want then press Open:

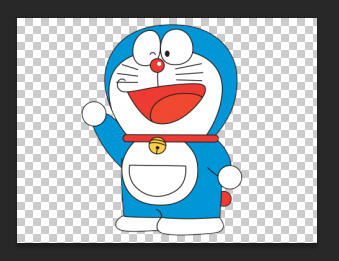
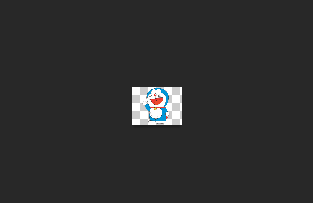
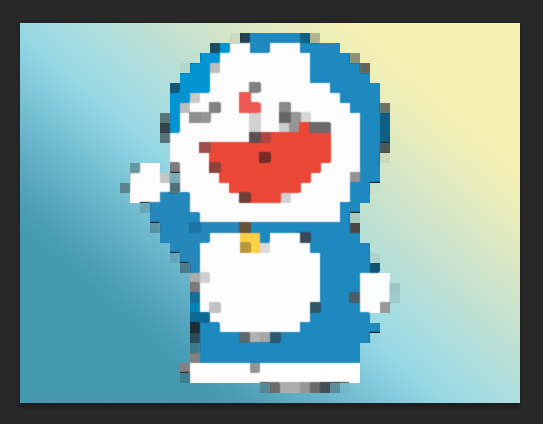
We've chosen Doraemon for this tutorial, he's saying 'Hi' to you now, look:
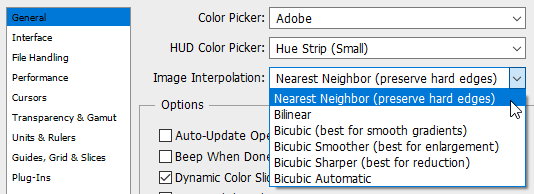
Next, we have to set-up some important settings. Go to Edit > Preferences > General or press Ctrl+K
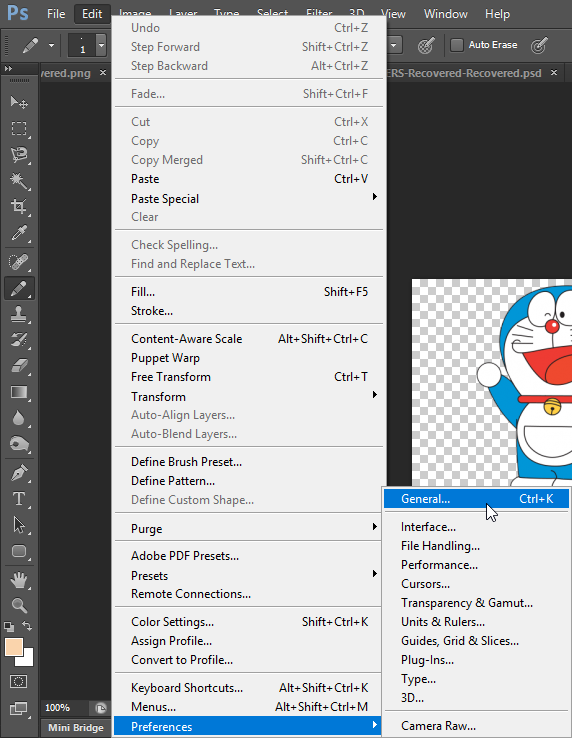
Under General, change Image Interpolation into "Nearest Neighbor (preserve hard edges)":
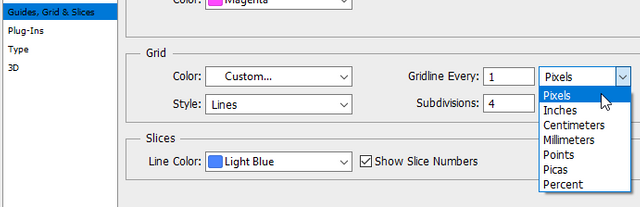
Now under Guides, grids, & slices, set the "Gridline Every" to a value of "1" and choose "Pixels" from the drop-down.
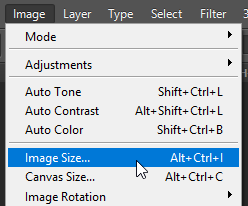
Then, go to Image > Image Size or press Alt+Ctlr+I:
Change the Width to a smaller value - for mine I will choose "50" (make sure the values are still linked) then press Ok:
This will give you a really small image:
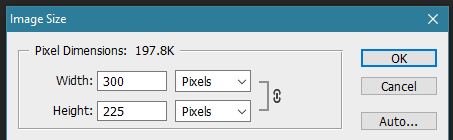
Now, again go to Image > Image Size or press Alt+Ctlr+I:

This time change the Width to a bigger value - for mine I will choose "500" (make sure the values are still linked) then press Ok:
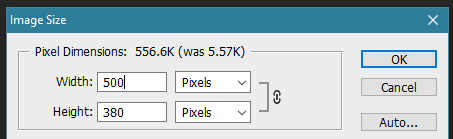
This will give you a larger - pixelated image:
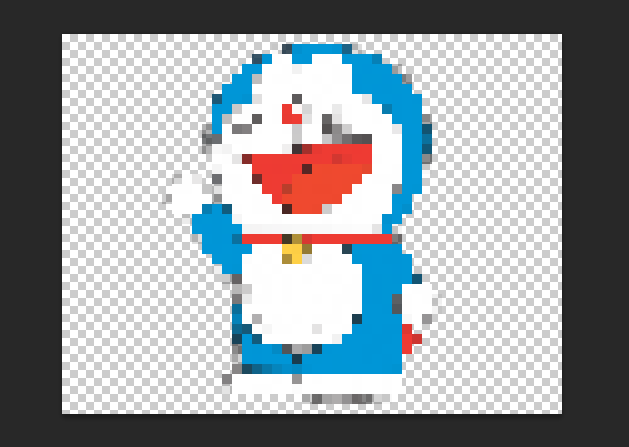
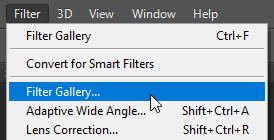
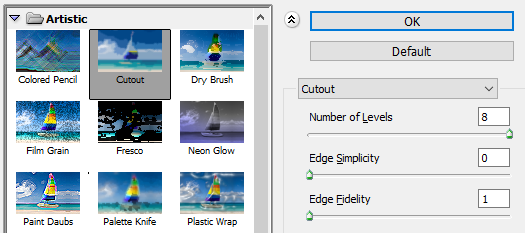
After that, go to Filter then choose Filter Gallery (the 2nd one):
Choose Cutout and follow these settings:
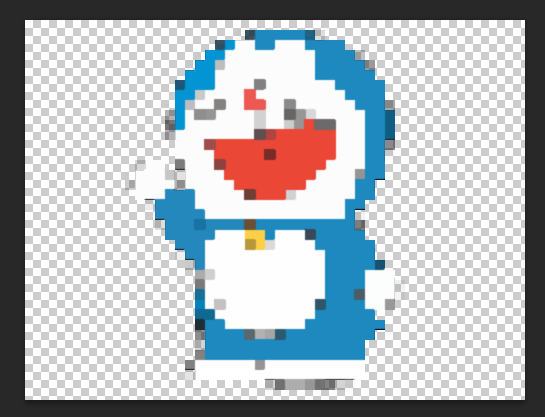
You will get an image like this:
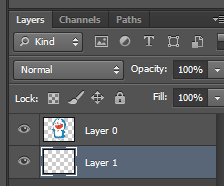
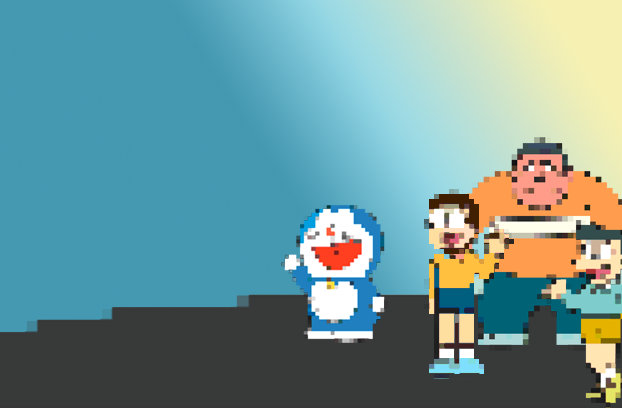
Add another layer and move it under your character's image so you can set up a background:
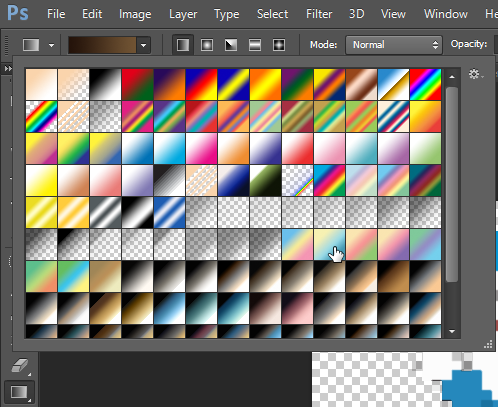
I'm gonna use the Gradient Tool for this:
This step gave me this image where I can see the subject better:
I did the same thing on 3 more characters and added them all into the same photo:
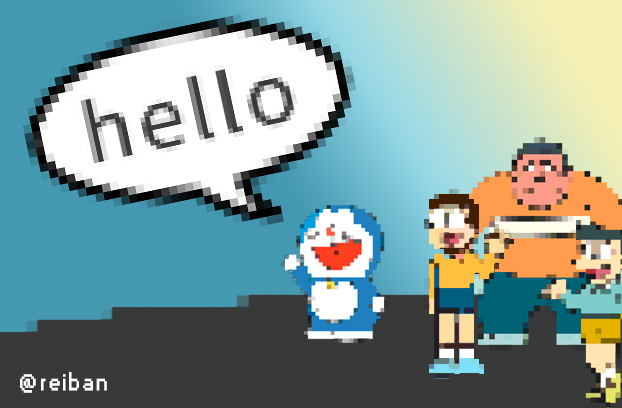
Also on a bubble for the text and a text layer that says 'hello'. I added those into the photo above along with a signature of my username here which gave me my final image.
Here's the Final Work!
The same thing was done for the Doraemon-Nobita pattern at the very first part of this post.
I appreciate you so much for viewing my post, thanks for the support as well! Glad you dropped by!
Thanks!

quality information, thanks for giving us guidance in making good edits in photoshop
Hehe, you're welcome and thanks!
Hi, reiban! I just resteemed your post!
I can also re-steem and upvote some of your other posts
Curious? Check out @resteembot's' introduction post
PS: If your reputation is lower than 30 re-blogging with @resteembot only costs 0.001 SBD
That's great! Thank you so much for that. Sadly - I don't have any money here. :(
Nice tutorial. :)
I appreciate the comment.
Nice post
Thanks!
interesting and great posts
Thanks!
hi @reiban, a new knowledge for me in deepening the way photo editing in photoshop, thank you for sharing
Thanks for the comment!
Whatever @resteembot resteems, I resteem too!
I am a new, simple to use and cheap resteeming bot
I will automatically resteem posts resteemed by @resteembot until 2017-10-15 00:00:01 +00:00
If you want to read more about me, read my introduction post.
Nice to know that little bot. Thanks!
Thanks @reiban, this is very useful information
:) You're welcome!
thank you for the information
You're welcome!
little kids will kill you if you really dont do that well lol ! they are die hard fans of doremon :D where is shizuka ? :D
I used google to search those images. I think I missed her so it became a boys day out.