GeekCash – Masternode Hot Wallet (Windows)
***NEVER GIVE OUT YOUR PRIVATE KEY TO NOBODY***
MASTERNODE PAYMENTS START AT BLOCK 180,000
CHECK explorer.geekcash.org FOR CURRENT BLOCK
Consider I write this tutorial trying to help people to setup their masternode and I do it as best as I can, sorry if I miss anything, if you have questions feel free to contact me at Discord or [email protected]
There are two ways to setup a Masternode, one is consider the secure way called a Cold Wallet where you setup remote machine to run only the Masternode process wyle you hold your coins on a local wallet in your computer, on this tutorial I will show you how to setup a Hot Wallet Masternode on Windows for the convinience that you dont need a remote (called VPS) machine.
When is this applicable or convinient:
You have a static ip with your internet provider
You dont have at the moment a way to pay for a VPS
You dont know Linux or want to mess with it
What you need:
Public Static IP from your Internet Provider
Router with portforward feature
Windows machine to run 24/7 your masternode
GeekCash Wallet – Windows
10,000 GeekCash Coins
Downside of running a Hot Wallet Masternode:
You need to manage the machine that will be On 24/7
Electricity Cost
Pros of running a Hot Wallet Masternode:
You dont need to rent a VPS
Learning expirience
Can do testing locally when required
Setp 1:
Download the GeekCash Wallet from Gibthub – Allways is better to download directly from Github to make sure we have the latest wallet, if possible confirm that the latest publication (release) works, ask on discord if possible.
GeekCash Discord: Click Here
GeekCash Github: Click Here
At the moment of this publication this is the latest release of the wallet for Windows 64bit, now days most computers run a 64bit version of Windows Click Here to Download
Get 10,000 GeekCash coins, you can do this by mining the coin or buying from someone on Discord channel #Exchange since currently there is no Exchange for this coin, read the chat, sellers are constantly posting.
For safety you can contact the admin or moderators to escrow the sell or you can contact me at discord ROMBTC and Ill explain you how escrow works, watch out for scammers, be as careful as you can
Step 2:
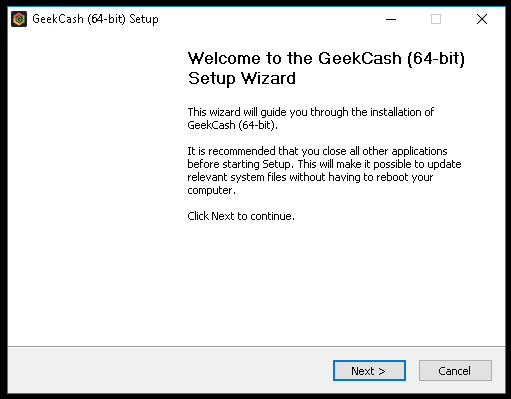
Install your wallet, double click on the file you downloaded previously, it will probably ask you for administrator rights to install, just say yes.
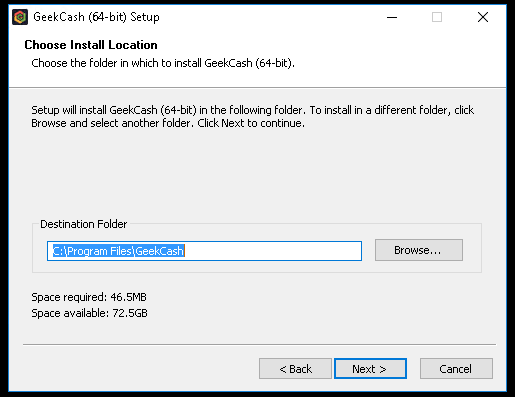
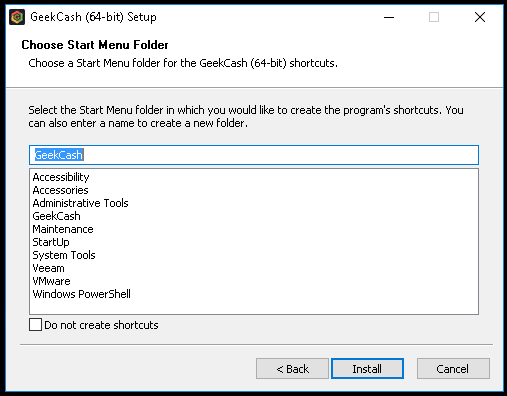
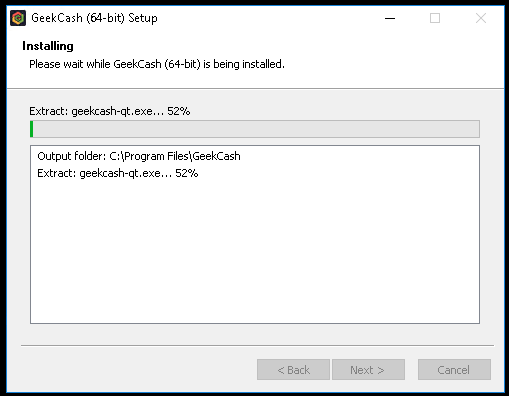
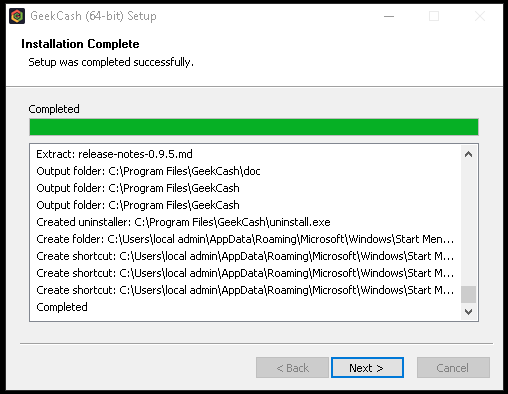
Then it will take you to the following screens, click next untill it finish installing.
Click Next
Click Next
Click Install
Let it run
Click Next
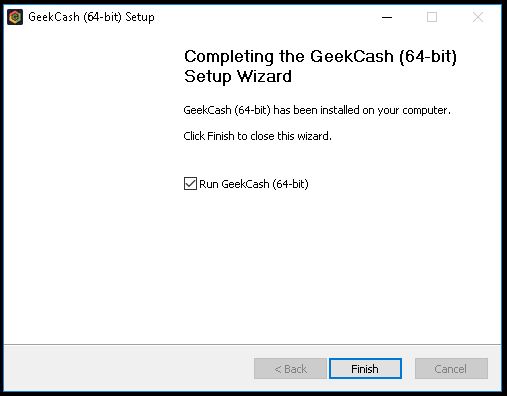
Click Finish and since there is a check on Run GeekCash (64 bit), it will now run the wallet after click Finish, after this the wallet will start to sync, depending on your internet connection this process may take some time, let it finish and follow the rest of the screens I post next
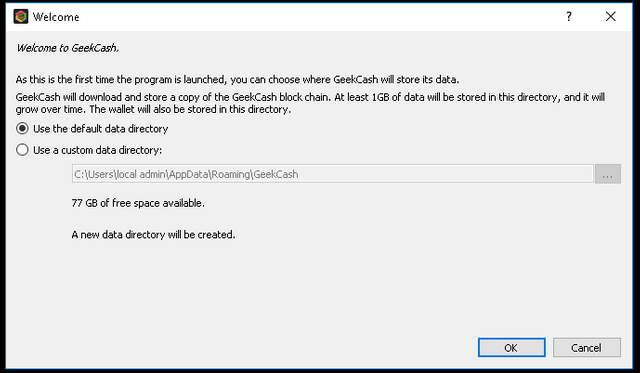
Click Ok, this screen will only appear after the installation
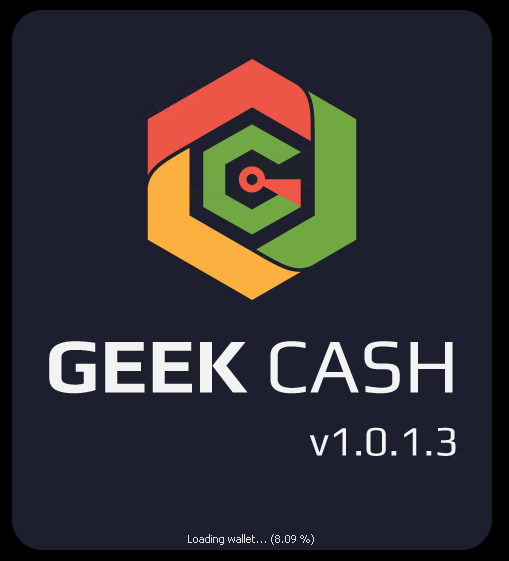
The GeekCash Logo comes up, it says the version of the wallet, at the moment Im running v1.0.1.3
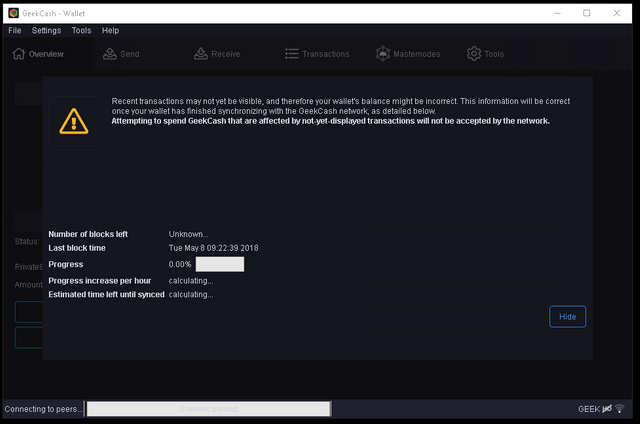
Now it will start to sync, you will see how the white bar at the bottom will partially become green
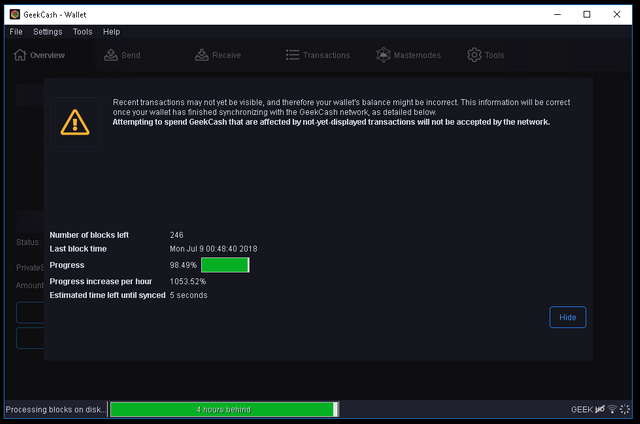
When its almost done it looks like this
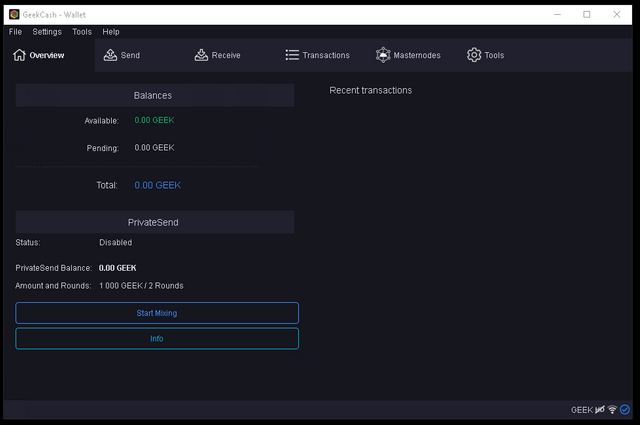
This is how a fully sync wallet looks
Step 3:
After we have install the wallet there a few things we need to enable
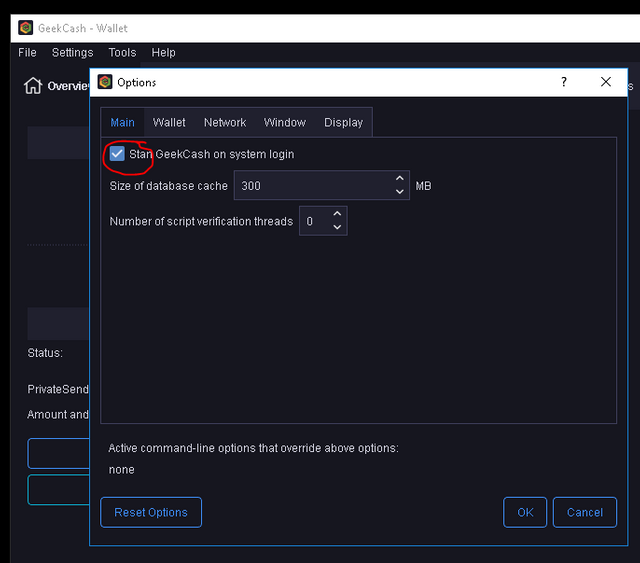
Start GeekCash on system login
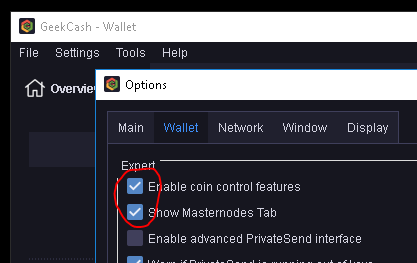
Enable coin control features
Show Masternode Tab
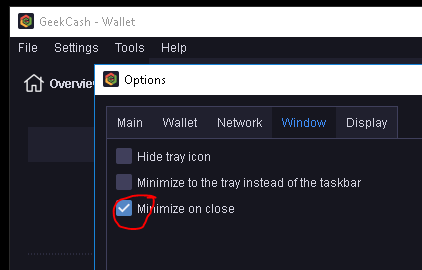
Minimize on close
The first and last options are not a MUST but its just a best practice to make sure in case your computer reboots the wallet starts after login and you dont accidentally close the wallet.
*You need to select this options since they are not enable by default*
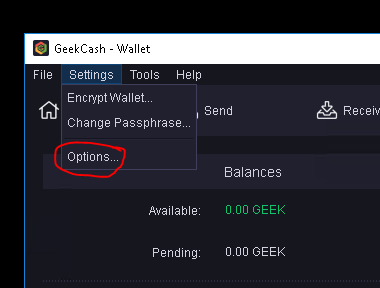
First click on Settings and then click Options as shown on the screenshot
After this the Options windows will open, then select the Tab Main and click on Start GeekCash on system login
Next click on the Tab Wallet and select:
Enable coin control features
Show Masternode Tab
Next click on the Tab Window and select Minimize on close
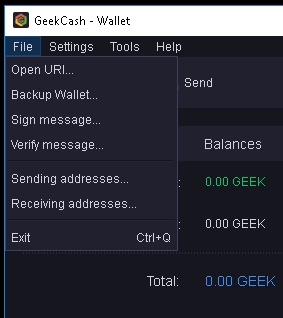
Next, click File and Exit to apply changes and open your wallet again.
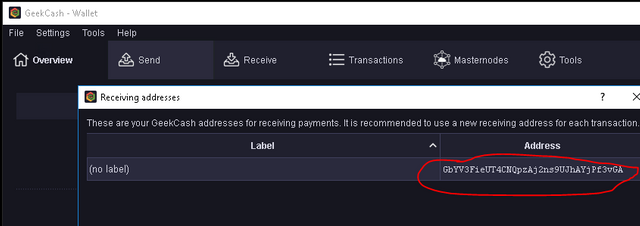
Now to know your wallet address click File as before but this time go to Receiving Address, that will open your wallet addresses, copy the address and this is where you want to send your GeekCash Coins as shown on the next screen, you need to send EXACTLY 10,000 coins no more than 10,000
When you buy your coins make sure you recieve 10,000 coins and not less or more than that.
You can also have multiple address but thats something we will talk about on another post.
Right click the address, select edit and input an alias, a name, in this case lets use mn01
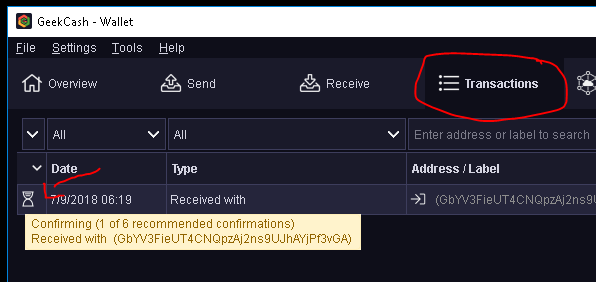
After you have recieve the GeekCash coins wait for 15 confirmations, as shown on the next screen, for this you need to go to Transactions Tab, put your cursor (mouse) where is the little Hourglass and wait untill it says 15 confirmations to proceed with next step
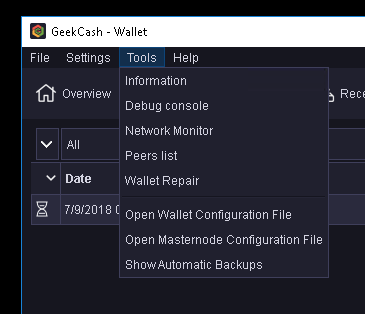
After you get 15 confirmations now we need to click on Tools and then Debug console
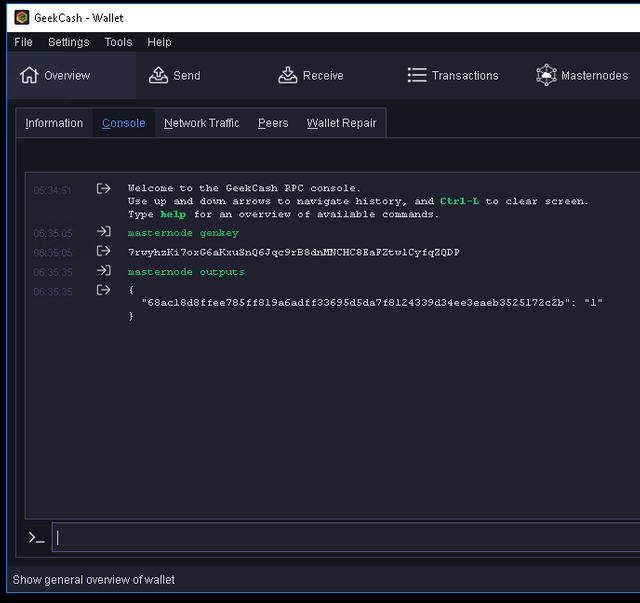
Next the Debug Console window will open and we will type the following commands, as shown on the next screen
masternode genkey (this is to generate your masternode private key)
masternode outputs (generate your transaction id and index)
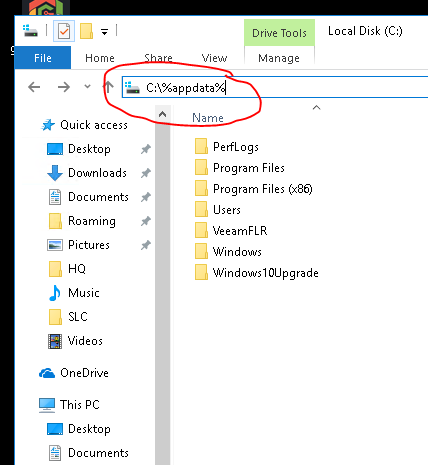
Next we need to open a any folder on windows and type in C:\%appdata% and hit enter as show on the next screen
Next open the GeekCash folder from the list of folder that will show up and look for the files geekcash and masternode, we will need to right click and open with notepad.
On the geencash (this is call the wallet configuration file) this will be the fileds required, replace what is in red
rpcuser=type in a user
rpcpassword=type in a password
rpcallowip=127.0.0.1
rpcport=6888
listen=1
daemon=1
maxconnections=50
port=6889
masternode=1
externalip=type in your static ip
masternodeprivkey=input the key generated after the command masternode genkey
On the masternode, replace what is on red, notice spaces between them
# Masternode config file
# Format: alias IP:port masternodeprivkey collateral_output_txid collateral_output_index
# Example: mn1 127.0.0.2:16889 93HaYBVUCYjEMeeH1Y4sBGLALQZE1Yc1K64xiqgX37tGBDQL8Xg 2bcd3c84c84f87eaa86e4e56834c92927a07f9e18718810b92e0d0324456a67c 0
mn01 type_in_your_static_ip:6889 type_in_your_masternode_key_type_in your_transaction_id type_in_your_index
Safe this files on the GeekCash Folder and Exit your wallet by going to File and then Exit
Before you open your wallet, you need to portforward on your router the port 6889 that is the port for the masternode
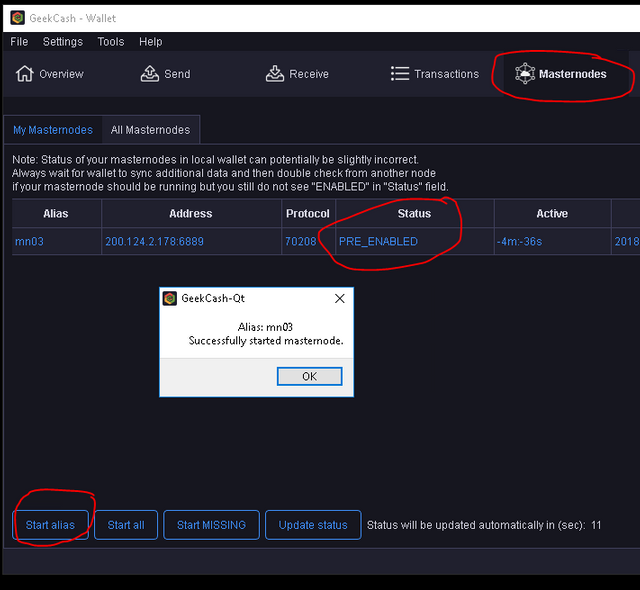
After you have configure the port on your router then you can open your wallet wait untill the bar at the bottom is loaded, it may change to PRE_ENABLED status if not go to the Masternodes Tab, click on the Status Missing and then click Start Alias, then it should ask you if you want to start the masternode, select Yes and then it should say Succesfully started masternode, see next screen
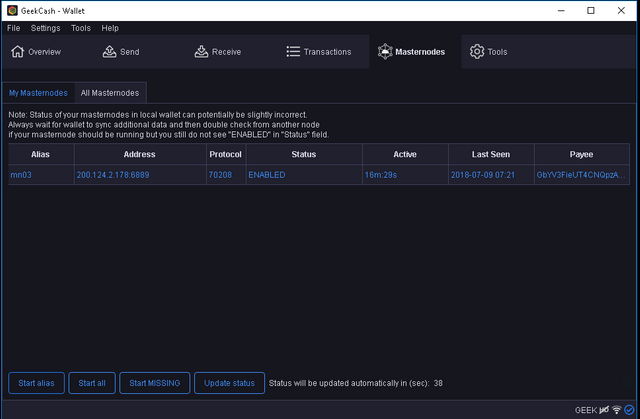
After this entire procedure the status will change to ENABLED after 30 minutes to 1 hour at most, if it changes to something else like Expire or New Start Required then we have network issues
You can verify if the port is open using the following link, input the public ip and port 6889,
https://www.yougetsignal.com/tools/open-ports/
If it says its close make sure that the wallet is open and check again, if the wallet is open but still says its not open then the portforward is not right or there is a network issue, sometimes base model routers or internet providers routers give me a hard time to apply network rules like a port forward.
Doing some research on google found this link that has a lot of guides on how to portforward a port on your router, you can look for your router model on the list
https://portforward.com/router.htm
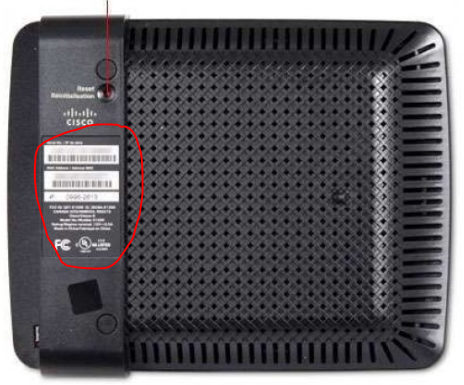
To know if your router is capable of doing this look for the model of the router at the bottom of it, for example lest take a Linksys E900, at the bottom of the router on the sticker says the Model E900
On the previous link provided I found the guide on how to portforward on the Linksys E900
https://portforward.com/linksys/e900/
If your router is not listed look on google “Model of Router port forwarding” in this case “Linksys E900 portforwarding” and many links will probably come up like the one provided before or another example is
http://setuprouter.com/router/cisco/linksys-e900/port-forwarding.htm
Portforward feature is very commong for gaming so Im almost sure you will find documentation available regarding how to do this on your router.
Feel free to contact me at discord or email [email protected]
Hope this helps

✅ @cryptoxicate, I gave you an upvote on your post! Please give me a follow and I will give you a follow in return and possible future votes!
Thank you in advance!
Congratulations @cryptoxicate! You have completed the following achievement on Steemit and have been rewarded with new badge(s) :
Click on the badge to view your Board of Honor.
If you no longer want to receive notifications, reply to this comment with the word
STOPDo not miss the last post from @steemitboard:
SteemitBoard World Cup Contest - Play-off for third result
Participate in the SteemitBoard World Cup Contest!
Collect World Cup badges and win free SBD
Support the Gold Sponsors of the contest: @good-karma and @lukestokes