How I Made My Bedside Lamp and Solved My Night Reading Issues.
The past two days have really changed a lot about the way I see myself now. I have always had some innovative ideas but I always end up not making any move to turn my ideas into reality. But this time, I did the opposite, I was determined to achieve this.
I have been having issues with reading at night, sometimes tears roll down my cheek. The way my hostel in school was built made this reading at night hard for me. The bulb hangs on the room ceiling together with the ceiling fan, and the bulb is just below the ceiling fan, so at night whenever i try to read, the rolling fan waves the light rays, altering the intensity of the rays reflecting on my book, thereby making me also dizzy and causing some pains in my eyes. I was already planing on buying a bedside lamp, was making plans to order for one from Jumia, most of them were quite expensive though.
About these past two days
Day 1
Wednesday morning i went for lectures, a normal daily routine, after we dismissed the afternoon lectures, while leaving the lecture hall, i saw some very old project files lying around just outside the hall, i think they were about burning them. Somehow the thought of "why not make the bedside lamp by myself" came running in my head. It just came like a flash and it felt so achievable. So i removed up to 7 covers, the blue transparent sheets, from seven different files.
HOW I MADE MY BEDSIDE LAMP

When i got home, i just drew out my plans on how to make make the lamp.
- first i needed my lamp cover to be shaped like a pyramid with the peak cut out. A pyramid has four sides so I joined four of the transparent blue sheets and cut out a truncated equilateral triangle.
to get a truncated triangle, you line of length, lets say 20cm, then draw another line some centimeters above it of length, lets say 12cm, so that an equal amount of length will be cut off from each side of the shorter line,(20-12= 8,,, 8÷2= 4) so here 4cm will be cut out of both sides to give the shorter line of 12cm. Then you join both ends of the two lines together at both sides, and you truncated triangle is formed, maintaining same angle and length for both sides.

Next i cut out a square, using the length of the shorter line(12cm).
Then i joined the four truncated triangles together using a paper tape to form me desired pyramid shape, then covered the top with the square piece i cut out.


- Next i brought a water pipe of about 25cm in length. I was going to use this as the stand and also, for the wire to pass through it. The pipe had under the staircase of the hostel i was living in, since it had been there useless for a while, i decided to put it into some use.

- Next i went to a carpenters shop a stone throw from my hostel, i picked a piece of plywood that was no longer useful and then cut it to a reasonable shape. I also picked for small chunks of wood and knocked them to the four edges of the plywood so that they would serve as stands.
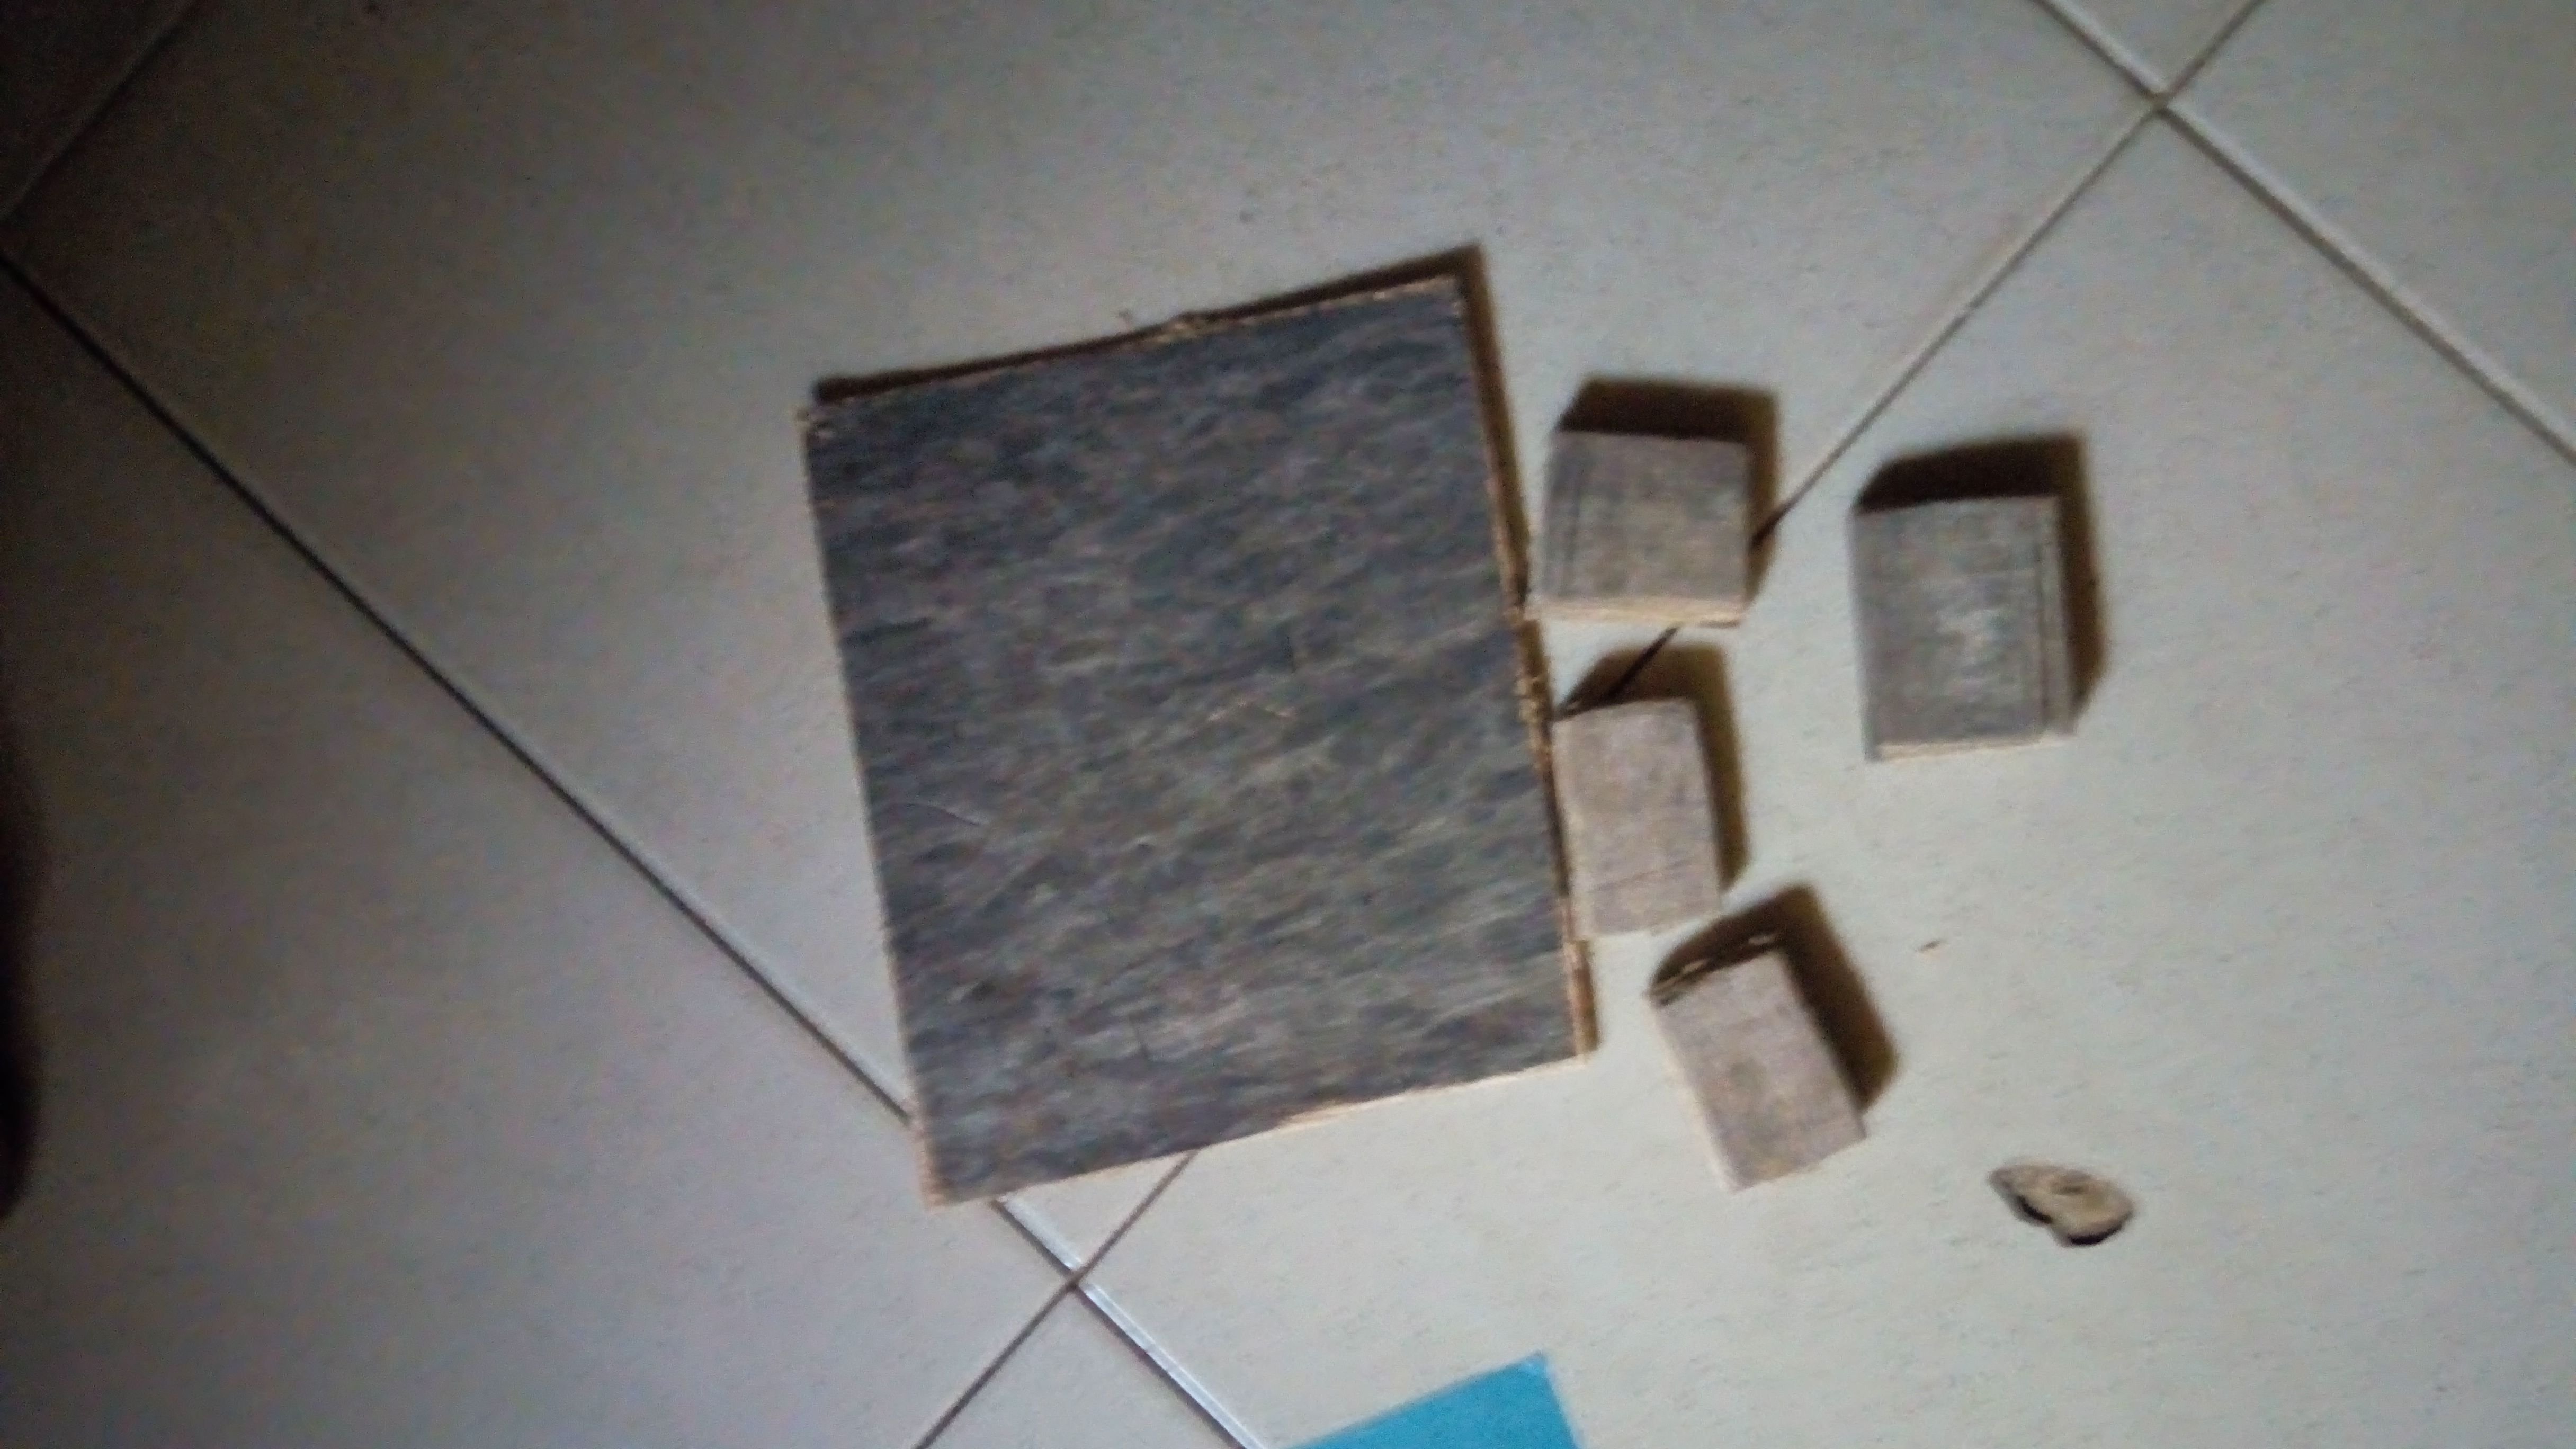

- Next i bore four holes at exactly the same distance apart round the circumference of the pipe, making each pair directly opposite each other. So you just choose any point of your choice on the pipe and bore the holes. Then i removed the coating from some copper wires i had and passed the two wires of equal length through the the bored holes.
this wires were going to serve to hold the lamp cover and keep it firm so that it would maintain its shape.
Bend the ends of the copper wires so that it will not tear the cover because it was made with paper.
- Next I made a hole at the center of the plywood so that i could place the pipe inside it.
make sure that the hole is tight enough so that it would hold the pipe firmly.

- Next I brought an AC wire, an electric lamp-holder and an electric bulb. I got the Ac wire from a friends abandoned Television, I asked him before cutting it out, since it was of no use to him again, he didn't decline. So i passed the Ac wire through the pipe and connected it to the electric lamp holder, next I fixed the bulb to the lamp holder and placed it to rest on the pipe.

- Now everything was set, i just had to fix the cover on top of it
This was my bedside lamp

I was proud of my efforts and shared it on my whatsapp status and asked my friends to grade it for me. The answers i got were far from what i ever expected. No one really appreciated my efforts,, someone even graded it 3/10. But i was determined to make it better, so that night i thought of how i could make it better, so i came up with some ideas.
Day 2
I discovered that what made the lamp not presentable was because it was too transparent and didn't really have any difference from when only a bulb was used. So to adjust for this, i needed a material that could reflect light but was would be barely transparent.
- So I got 4 A4 papers for the four sides and also cut out truncated triangles and a square for the top, reducing the areas by just 1mm^2.

- Next I drew flowers using a red marker on the four sheets to beautify them. Then drew a sun on the top square sheet.

- Next i fixed them one after the other to each side of the previous cover and held them firm using a paper tape. Applying this extra sheets and paper tapes also helped to increase the strength of the material, so now it was a triple advantage
a) i had solved the transparency issue
b) i had increased the strength of the material
c) i had beautified the lamp cover

So now i had a transformed lamp.
My Advanced Bedside Lamp
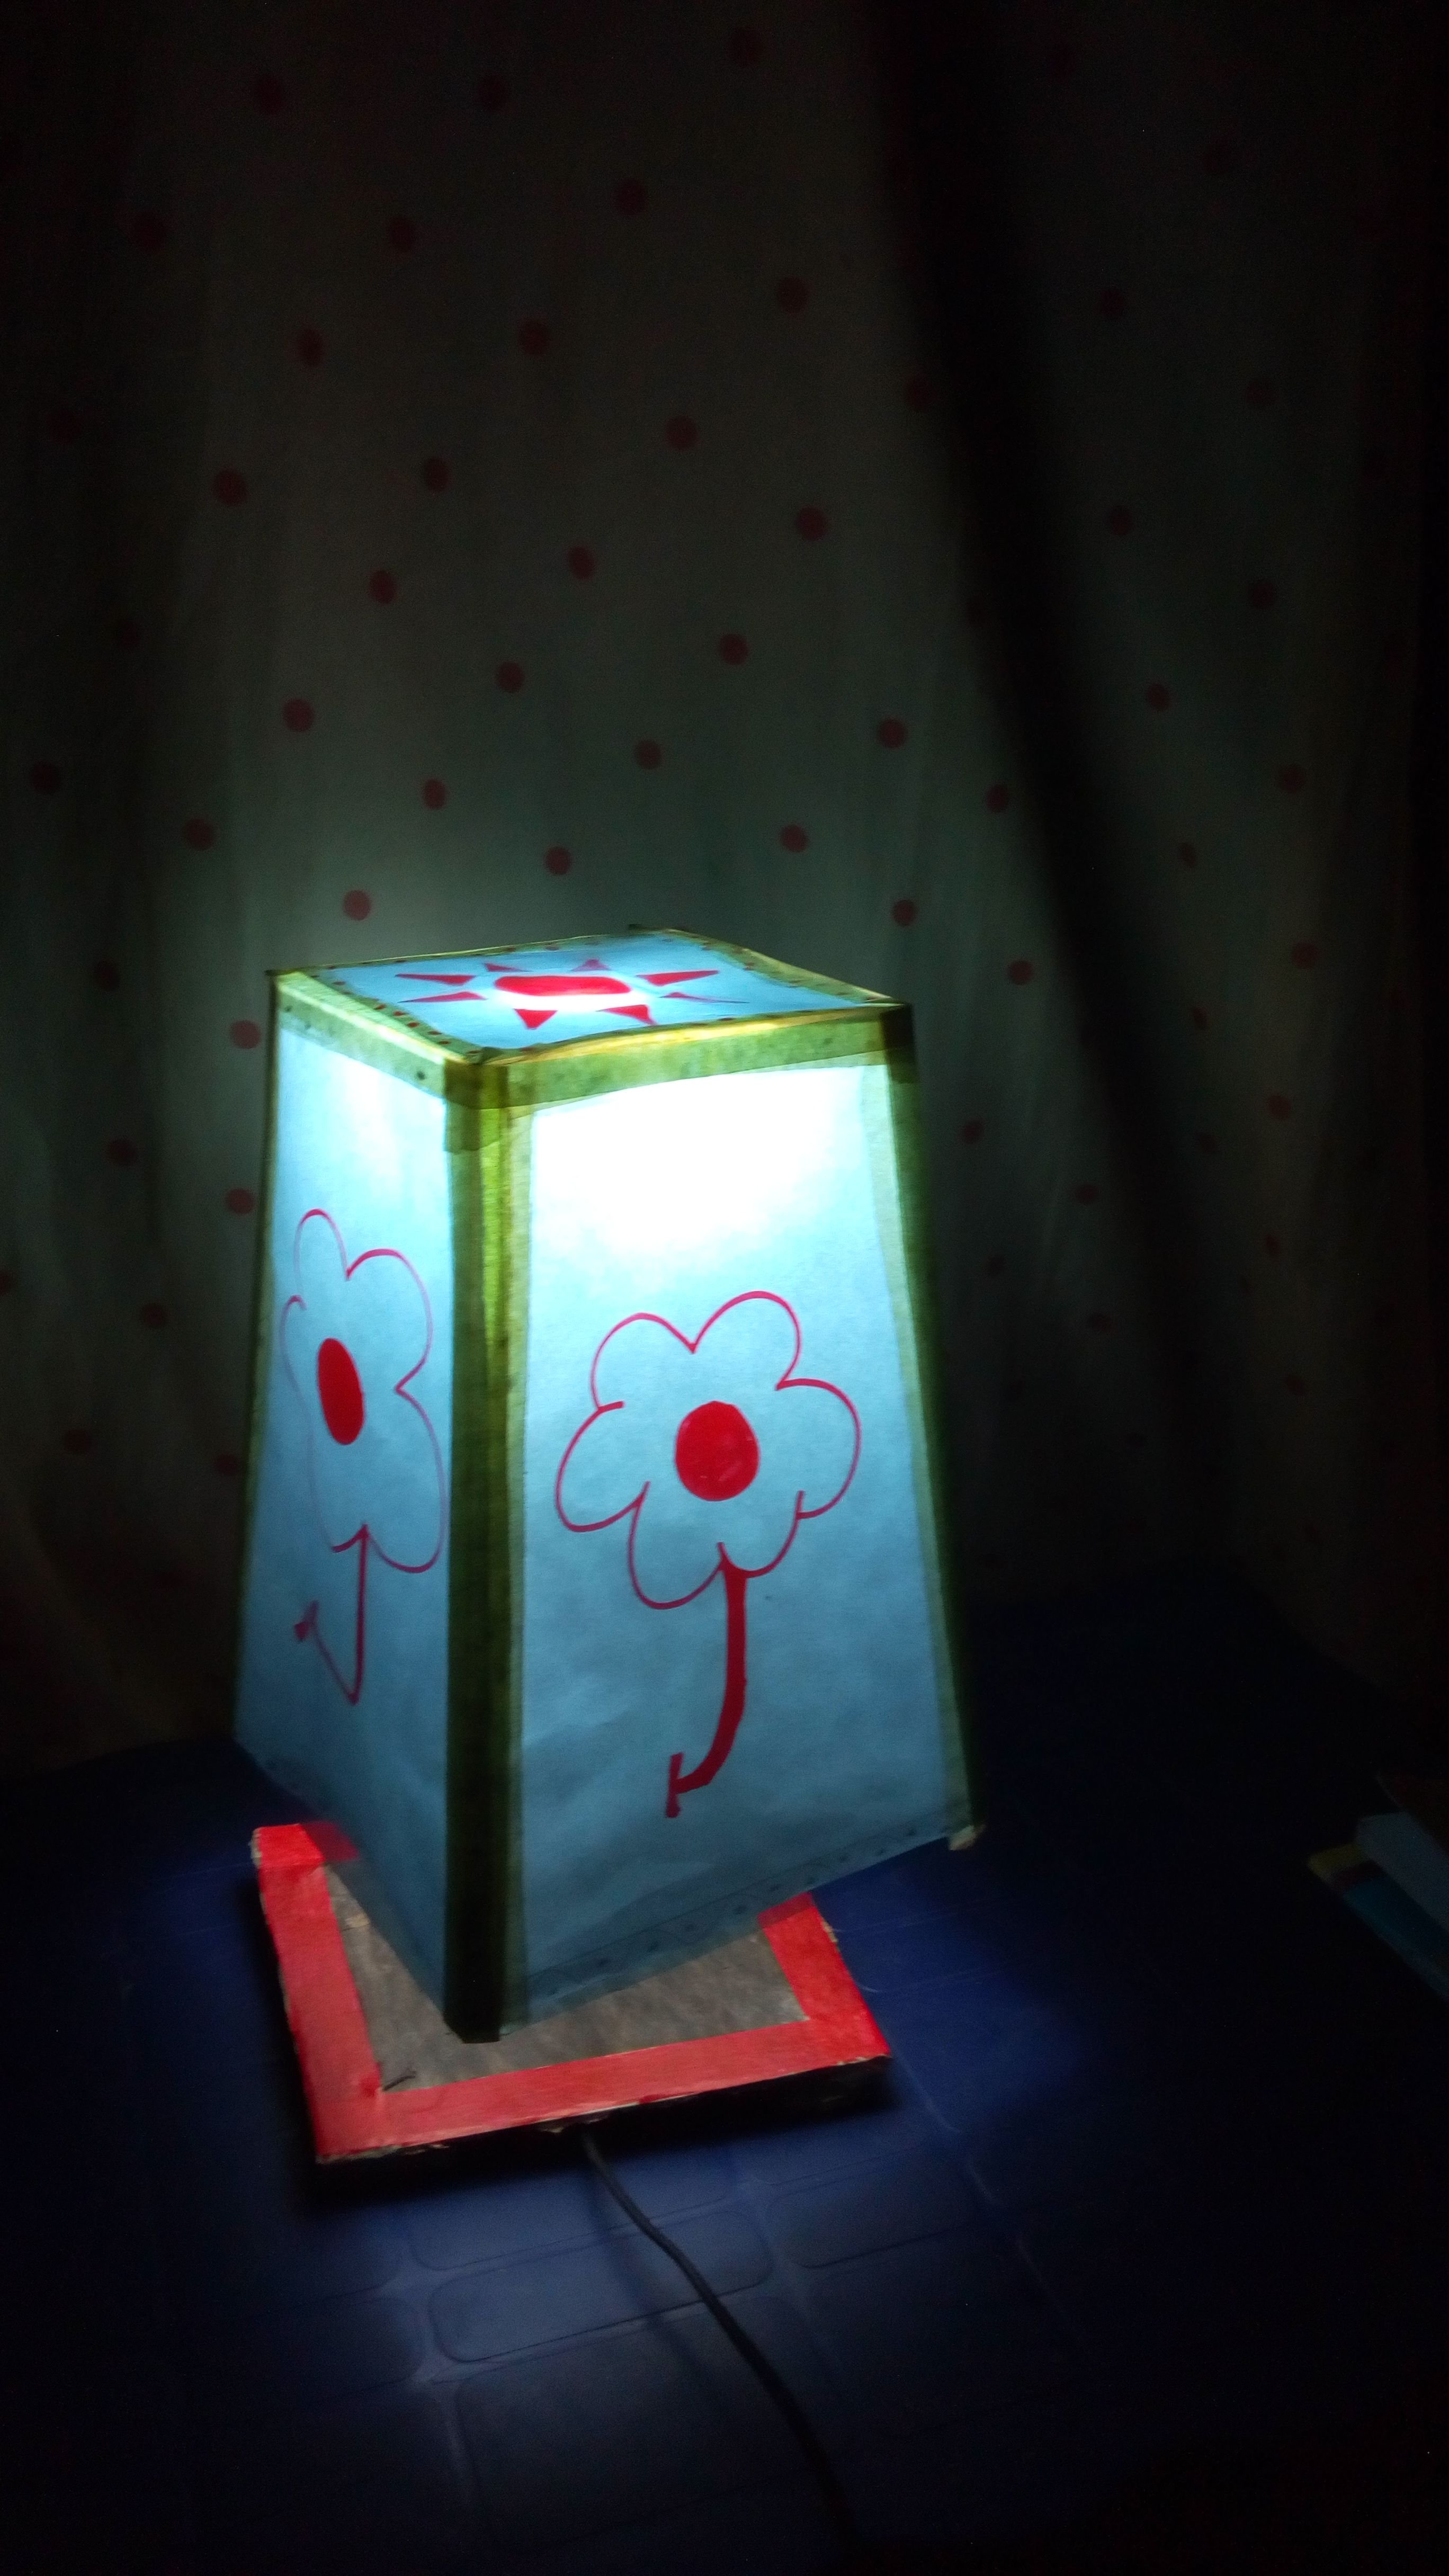

I then posted this advanced one again on my whatsapp status, even the person who had graded the previous one 3/10, graded this 10/10 now.
Moral lesson i also learnt from this previous two days is even in the presence of some criticism on any of your handy work, always channel that criticism into improving your skills or work, don't get absorbed or drowned by critics, just stay focused on getting better.
As you can see from my story, it was just a little piece that was left for me to take my work from 3/10 to 10/10.
Never you feel your hard work efforts in anything you do is a waste, you just have to find that missing piece and perfect your work.
So that's all about the past two days, and now i can read well at night without my eyes suffering. All i need to do now is switch off the room light and switch on my bedside lamp, so now the rolling ceiling fan won't affect the rays in anyway.
watch video here. I sped up the video so it affected the way my voice was sounding but i think its still understandable if you also read the post
Wow! what I really love about this is the fact that you were creative. You really did a good job. Ride on dear
Dude... you're brilliant... I'd turn to a woman n marry you if you could build be an electric lead guitar like you built the lamp... well done ..
Okay,,, that one will come,,,, but i will have to buy the strings,,, this lamp cost me almost nothing,, just my time though
I could send you the money oh
Its an engineering student dere.
WOW
Creativity at its peak!
Thank you bro,,,,
There are just two set of people in this world,
the engineers and others 😂😂😂
Iffa throw you slap ehn
Abeg when we fit start to order our own 😂
Lol,,,, just send 15k make i dash you this one 😉
Haha abeg keep am there o